Table of Contents
Advertisement
Advertisement
Table of Contents

Summary of Contents for Flo SmartDC
- Page 1 SmartDC Installation guide...
- Page 2 SmartDC Installation Guide...
-
Page 3: Table Of Contents
Care and maintenance of the station . . . . . . . . . . . . . . . . . . 18 SmartDC... -
Page 4: Safety
20 cm between itself and a person’s body and must not be colocated or operated with any other antenna in order to comply the conditions of the FCC Grants. Modifications not expressly approved by AddÉnergie Technologies inc. could void the user’s authority to operate the equipment. SmartDC Installation Guide... -
Page 5: Specifications
Specifications Model: SmartDC Version: V3 Company Info: AddÉnergie Technologies Inc Document revision number: US.11.2019.v1 ©2019 AddÉnergie Technologies Inc. All rights reserved. Such material is protected by copyright laws of multiple countries, and may not be modified, reproduced, or distributed without the prior written consent of AddÉnergie Technologies. -
Page 6: Specifications And Center Of Gravity
9.88 in 51.21 in 9.38 in 8.81 in 5.81 in 49.25 in 33.17 in 35.27 in CoG (approx) 25 mm (1 in) 940 mm (37 in) 58 mm (-2 in) * Shown with optional cable management system installed SmartDC Installation Guide... -
Page 7: Exterior View Of The Station
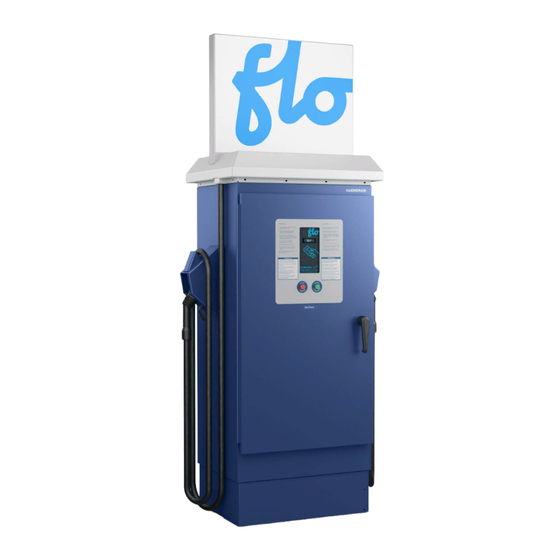
C : Stop button D : Display E : RFID card reader F : SAE J1772 Combo connector G : CHAdeMO connector H : Base I : Air intake J : Cable management system K : Heat exchange unit SmartDC Installation Guide... -
Page 8: Interior View Of The Station
Interior preview of the station A : Power cable access B : Three-phase and neutral terminals C : Door switch D : AC/DC conversion modules E : Grounding terminal SmartDC Installation Guide... -
Page 9: Typical Installation
A : Electrical equipment cabinet (metering, protection and distribution) B : Power cable (three-phase 480 Y/277 Volts @ 100 A or 200 A + NEUTRAL + GROUND) C : SmartDC Station D : Master disconnect switch (must be visible from the station) -
Page 10: Site Preparation
NOTE: Wiring conduit must be sealed to prevent moisture ingress IMPORTANT: A clearance of at least 16 inches must be maintained between the enclosure's back and a rear facing wall or any vertical obstacle. SmartDC Installation Guide... -
Page 11: Installing The Base Onto A Concrete Floor Slab
2 . Drill holes in the concrete slab of diameter and depth appropriate for the anchors, according to the base’s mounting holes, as illustrated. 3. Once the holes are drilled, place the base and screw in the anchors. SmartDC Installation Guide... -
Page 12: Lifting And Handling Of The Station
Lifting and handling of the station AS SHOWN ON PICTURE NOTE: SmartDC Installation Guide... -
Page 13: Installing The Station Onto The Base
3. Punch a hole in the access plate of an appropriate diameter for the cable connector. 4. Install the cable connector onto the access plate. 5. Insert the power cable into the cable connector. 6. Put the access plate back in place. SmartDC Installation Guide... -
Page 14: Installing The Counterweight
CAUTION: DO NOT put your hands or fingers between the rubber stoppers and the counterweight. 3. Place the cover over the counterweight system. IMPORTANT: DO NOT remove the rubber stoppers from the aluminum plate, since this may result in damage to the charging station. SmartDC Installation Guide... -
Page 15: Installing The Top Sign
1. Align the panel with the 4 holes on top of the charging station. 2. Screw the 4 bolts to secure the panel. NOTE: If there are any issues while installing the Top Sign, please contact AddEnergie support. SmartDC Installation Guide... -
Page 16: Electrical Connections To The Station
1. Connect the three phase-conductors and the neutral conductor into the power terminal with a torque of 500 Lb-In. 2. Connect the GROUND into the grounding terminal with a torque of 50 Lb-In. NOTE: Connectors are compatible with copper and aluminum wire. SmartDC Installation Guide... -
Page 17: Station Start-Up
2 . The station will then attempt to communicate with the AddÉnergie servers. 3. Once the station and gateway are powered on, please communicate with the technical support of AddÉnergie to complete the configuration: (877) 505-2674 ext. 203. SmartDC Installation Guide... -
Page 18: Care And Maintenance Of The Station
We recommend that you increase the frequency of station maintenance to 4 times a year in the following situations: • When the station is installed in a dusty area. • When the station’s average cumulative use exceeds 3 hours of charging per day. SmartDC Installation Guide... - Page 19 SmartDC Installation Guide...
- Page 20 Eastern Office: 2800 Louis-Lumière, Suite 100, Quebec (QC) G1P 0A4 CANADA Central Office: 7420 Airport Road, Mississauga (ON) L4T 4E5 CANADA United-States Office: 75 South Clinton Ave. Suite 510, Rochester (New-York), 14604, USA Contact Us T. 1 877 505-2674 F. 855 505-2674 flo.com info@flo.com flo.com...


Need help?
Do you have a question about the SmartDC and is the answer not in the manual?
Questions and answers