Advertisement
Quick Links
Advertisement

Related Manuals for TOORX MSX50


Summary of Contents for TOORX MSX50
- Page 1 INSTRUCTION...
-
Page 2: Safety Information
Safety Information Free area shall be not less than 0.6m greater than the training area in the directions from which • the equipment is accessed. The free area must also include the area for emergency dismount. Where equipment is positioned adjacent to each other the value of the free area may be shared. Keep unsupervised children away from the equipment. -
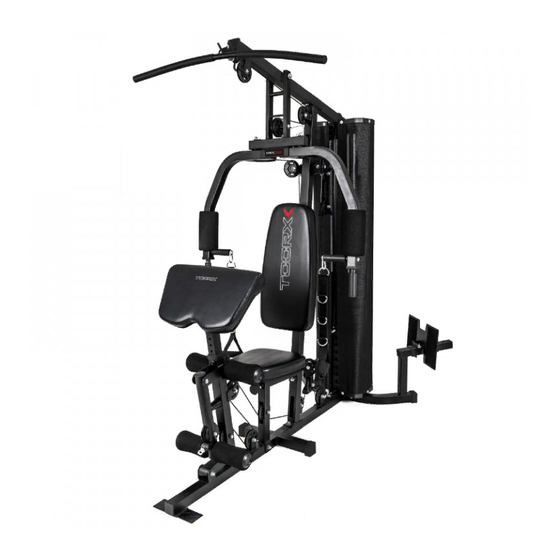
Page 3: Components - Parts
Components - Parts Please check you have all parts listed below Note: Some of the smaller components may be pre-fitted to larger components. Please check carefully before contacting us regarding any missing components. - Page 4 Components - Parts Please check you have all parts listed below Note: Some of the smaller components may be pre-fitted to larger components. Please check carefully before contacting us regarding any missing components.
-
Page 5: Components - Fixings
Components - Fixings Please check you have all fixings listed below Note: The quantities below are the correct amount to complete the assembly. In some cases more hardware may be supplied than is actually required. Some of the smaller components may be pre-fitted to the larger components. - Page 6 Assembly instructions Step 1 a. Insert the Guide rods (22#) into the holes of the Rear stabilizer (2#). Fix them using 2 pcs M10 x 25mm Allen bolts (37) and 2 pcs Ø10mm Washers (44#). b. Attach the Base frame (1#) to the Rear stabilizer (2#).
- Page 7 Assembly instructions Step 2 Attach the front vertical frame(3#) onto the base frame(1#). Carefully align the holes and secure them with 2 pc M10*70 carriage bolt(27#), 1 pc bracket(24#),2pcs φ10 washers(44#) and 2pcs M10 Aircraft nuts(46#) . Attach one end of the seat pad support(6#) to the front vertical frame(3#) and secure them with 2pcs M10*70 Carriage bolt(27#),1pc bracket(24#),2pcs φ10 washers(44#),2pcs...
- Page 8 Assembly instructions Step 3 Place 2pcs bottom weight stack cover bracket along the guide rod and secure them with 2pcs M10*25 Allen bolt (37#) and 2pcs φ10 washers(44#). Place 2pcs rubber bumper(82#) along the guide rod from the top to the bottom. Place 14pcs weight plate(100#) along the guide rods(22#) from the top to the bottom, Insert the Selector Rod(17#)
- Page 9 Assembly instructions Step 4 Place 2pcs upper weight stack cover bracket(91#) along the guide rods and then place the upper frame(12#) onto the front vertical frame(3#) and guide rods(22#). Secure the end of the upper frame with the guide rod and upper weight stack cover bracket together with the 2pcs M10*50 Allen bolt (34#),2pcs M10*25 Allen bolt (37#) and 4pcs φ10 washers(44#).
- Page 10 Assembly instructions Step 5 Attach the Front Press Frame(15#) to the Upper Frame(12#), Secure them with 1pcs axle(26#),2pcs φ 25×φ10.5×б1.5 washer(45#)and 2pcs M10 Aircraft nut (46#). Attach the swivel pulley bracket(19#) to the support as the diagram shows, and secure it with 1pc M10X65Allen Bolt (31#) ,2X φ10 washer (44#) and 1pc M10 Aircraft nut (46#).
- Page 11 Assembly instructions Step 6 Attach the Front support frame (5#) onto the base frame, Secure them with 1pcs M10*80 Allen bolt(30#),2pcs φ10 washers(44#),1 pc M10 Aircraft nuts(46#) . Insert the seat pad adjustment support(9#) into the hole of the seat pad support, Select the desired height with the lock knob(83#).
- Page 12 Assembly instructions Step 7 Attach the Right butterfly(8#) to the front press base,Secure them together with big Ø10 Washer (45#),1pc M10 Aircraft nut(46#) .Push 1pc butterfly foam roll(78#) as the diagram shows. Repeat the same way to install the left butterfly(7#). Attach the leg developer(13#) as the diagram shows and secure them with swivel axle(25#), 2pcs Ø10 washer (44#) and 2pcs M10*16 Allen bolt (38#).
- Page 13 Assembly instructions Step 8 Attach the 2pcs handle(4#) to the right and left butterfly frame as the diagram shows. Secure them with 2pcs M10*25 Allen bolt(37#) and 2pcs Ø10 washer (44#). Insert the leg press frame(10#) into the hole as the diagram shows and select the desired height with the lock knob(84#).
- Page 14 Assembly instructions...
- Page 15 Step 9 Step 8 A Attach one end of the 3150mm Upper cable (94#) through the opening of the upper frame , Make sure that the ball stopper should be in front of the U shape bracket. Place the 1 Pulley (79#) below the cable and secure the 1 pulley using 1PCM10 ×...
- Page 16 Assembly instructions Step 10 A. Attach the end of the 3020 MM butterfly cable(96#) to the hook and place 1X pulley below the cable , Secure the pulley to the swivel pulley bracket(19#) with 1X M10X45 Allen bolt (35#),2X φ10 washer (44#) and 1pcM10 Aircraft nut (46#).
- Page 17 Assembly instructions...
- Page 18 Step 11 A Attach the 4600 mm lower cable(95#) through the opening of the leg developer,place 1 pulley onto the cable and secure the pulley with 1PC M10X65 Allen bolt (31#),2pcs Bushing (47#)and 1pc M10 Aircraft nut (46#). B Draw the cable backwards and place the 2 pulley below it , Secure the pulley with the same way in C Draw the cable around the pulley and backwards again, place 3 pulley onto it , Secure the pulley...
- Page 19 Assembly instructions Step 12 Attach the foot plate(11#) to the leg press adjustment frame (105#) and secure them with 1pc M10*90 Allen bolt (29#), 2pcs φ10 washers(44#)and M10 aircraft nut(46#). Attach the plastic bracket(93#) into the upper and bottom hole of the weight stack cover(102#) as the diagram show .
- Page 20 Assembly instructions Step 13 Attach the seat pad (98#) onto the adjustment support (9#)and secure them with 4pcs M8*18 Allen bolt (39#) and 4pcs φ8 washer(43#). Attach the backrest pad (97#) to the backrest pad support(18#) and secure them with 2pcs M8*40 Allen bolt(40#) and 2pcs φ8 washer(43#).
- Page 21 Assembly instructions Assembly instructions Step 14 Attach the short bar(21#) to the end of the lower cable with the 1pc Chain (88#) and 2pcs Gourd hook (86#). Attach the Gourd hook (86#) to the end of the handle as the diagram shows and secure it with M10X28 Allen bolt (36#) and 2pcs φ10 washer(44#).
-
Page 22: Exploded Parts List
Exploded Parts List Part Description Qty. Part Description Qty. Main Base frame Guide rod Rear stabilizer Pulley bracket Front Vertical Frame Bracket Handle Φ16X57XM10 SWIVEL AXLE Front support frame Φ16X158 XM10 SWIVEL AXLE Seat pad support M10X70 Carriage bolt Left butterfly frame M10X140 Allen bolt Right butterfly frame M10X90 Allen bolt... - Page 23 Exploded Parts List Φ8 washer □50X□45 Sleeve Φ10 washer Φ □45X 26 Sleeve Big Φ10.5 washer □45X□ Sleeve M10 Aircraft nut Rubber bumper L-15 Bushing Rubber bumper L=13 Bushing Rubber bumper M6X16 Philips bolt Anti slip ST4.8X15 Philips Screw sticker L shape Pin Long rubber bumper bushing...
- Page 24 Weight plate select pin Ankle strap upper weight stack cover bracket bottom weight stack cover bracket Plastic bracket Upper cable Lower cable Butterfly cable Backrest pad Seat pad Arm curl pad 100# Weight plate 101# Weight stem 102# Weight stack cover 103# Foam roll tube 104#...
- Page 25 GARLANDO SPA Via Regione Piemonte, 32 - Zona Industriale D1 15068 - Pozzolo Formigaro (AL) - Italy www.toorx.it - info@toorx.it...
Need help?
Do you have a question about the MSX50 and is the answer not in the manual?
Questions and answers