Aplex ARCHMI-8 A Series User Manual
7”, 8”, 10.1”, 12.1”, 15”, 15.6”, 17”, 18.5”, 19” and 21.5” intel apollo lake n4200/n3350 fanless industrial compact size panel pc
Hide thumbs
Also See for ARCHMI-8 A Series:
- User manual (140 pages) ,
- User manual (141 pages) ,
- User manual (141 pages)
Table of Contents
Advertisement
ARCHMI-8XXA Series
7", 8", 10.1", 12.1", 15", 15.6", 17", 18.5", 19" and 21.5"
Intel Apollo Lake N4200/N3350 Fanless Industrial Compact Size Panel PC
User Manual
Release Date
Revision
Apr.2020
V1.0
®2020 Aplex Technology, Inc.
All Rights Reserved.
Published in Taiwan
Aplex Technology, Inc.
15F-1, No.186, Jian Yi Road, Zhonghe District, New Taipei City 235, Taiwan
Tel: 886-2-82262881 Fax: 886-2-82262883
URL:
http://www.aplextec.com/zh/home.php
Advertisement
Table of Contents

Subscribe to Our Youtube Channel
Related Manuals for Aplex ARCHMI-8 A Series


Summary of Contents for Aplex ARCHMI-8 A Series
- Page 1 Intel Apollo Lake N4200/N3350 Fanless Industrial Compact Size Panel PC User Manual Release Date Revision Apr.2020 V1.0 ®2020 Aplex Technology, Inc. All Rights Reserved. Published in Taiwan Aplex Technology, Inc. 15F-1, No.186, Jian Yi Road, Zhonghe District, New Taipei City 235, Taiwan Tel: 886-2-82262881 Fax: 886-2-82262883 URL: http://www.aplextec.com/zh/home.php...
- Page 2 Revision History Reversion Date Description 2020/04/16 Official Version ARCHMI-8XXA Series User Manual...
-
Page 3: Warning!/Caution/Disclaimer
Disclaimer This information in this document is subject to change without notice. In no event shall Aplex Technology Inc. be liable for damages of any kind, whether incidental or consequential, arising from either the use or misuse of information in this document or in any related materials. -
Page 4: Packing List
Packing List Accessories (as ticked) included in this package are: □ Adaptor □ Driver & manual CD disc □ Other.___________________(please specify) ARCHMI-8XXA Series User Manual... -
Page 5: Safety Precautions
Safety Precautions Follow the messages below to prevent your systems from damage: ◆ Avoid your system from static electricity on all occasions. ◆ Prevent electric shock. Don‘t touch any components of this machine when the machine is power-on. Always disconnect power when the system is not in use. ◆... -
Page 6: Table Of Contents
Table of Contents R e v i s i o n H i s t o r y … … … … … … … … … … … … … … … . . … … … … … … … … … … … … … … … … … … … … … … … … … … … … … … … … … . 1 Warning!/Caution/Disclaimer……………………............…………………………….……………………2 P a c k i n g L i s t …... - Page 7 Figures Figure 1.1: Dimensions of ARCHMI-807AP/AR/AG(H)……………………………………………..…….………………………….11 Figure 1.2: Dimensions of ARCHMI-808AP/AR/AG(H).………………………………………………..………………………….…11 Figure 1.3: Dimensions of ARCHMI-810AP/AR/AG(H)……………………………………………………….……..………….….…12 Figure 1.4: Dimensions of ARCHMI-812AP/AR/AG(H)………………..………………………………………………………………12 Figure 1.5: Dimensions of ARCHMI-815AP/AR/AG(H).…………………….…………………………………………………………13 Figure 1.6: Dimensions of ARCHMI-816AP/AR/AG(H)….…………….…………………………………………..…………………13 Figure 1.7: Dimensions of ARCHMI-817AP/AR/AG(H)….…………………….……………………………………..………………14 Figure 1.8: Dimensions of ARCHMI-818AP/AR/AG(H)……………………….………………………………………………………14 Figure 1.9: Dimensions of ARCHMI-819AP/AR/AG(H)……………………….…………………………………………….…………15 Figure 1.10: Dimensions of ARCHMI-821AP/AR/AG(H)……………………….………………………………………………………15 Figure 1.11: Front View of ARCHMI-807A….……………………….…………………..……………………….………………..………17...
-
Page 8: Getting Started
Chapter 1 Getting Started 1.1 Features Industrial Compact Size Panel PC Flat front panel touch screen Intel Apollo Lake N4200/N3350 Onboard 4G/8G DDR3L 1333MHz DC 9~36V wide-ranging power input IP66 compliant front panel High brightness LCD 1000 nits for option (DPTF Setting: 77~80 °C 1.2 Specifications... - Page 9 9. 1 x LAN+2 x USB2.0 (TB-528E1U2) 10. 1 x LAN+2 x USB2.0+45W POE (TB-528E1U2UPOE)-Not allowed for 10.1”/17”/18.5”/19”/21.5” UPS Battery 21W/10.8W/1.95Ah (3S1P) (7” and 8” models are not allowed for I/O board TB-528 series) (I/O board TB-528 series and UPS battery can only be either one choice in 10.1”/12.1” models) (I/O board TB-528 series can only be used in ARCHMI-812A and above models) (TB-528POE series and UPS Battery can only be either one choice in 15”...
- Page 10 Display(STD) ARCHMI-807 ARCHMI-808 ARCHMI-810 ARCHMI-812 ARCHMI-815 AP/AR/AG AP/AR/AG AP/AR/AG AP/AR/AG AP/AR/AG Display Type 7” TFT LCD 8” TFT LCD 10.1” TFT LCD 12.1” TFT LCD 15” TFT LCD Max Resolution 800 x 480 800 x 600 1280 x 800 800 x 600 1024 x 768 1024 x 768 262K...
- Page 11 Display(HB) ARCHMI-816 ARCHMI-817 ARCHMI-818 ARCHMI-819 ARCHMI-821 AP/AR/AG(H) AP/AR/AG(H) AP/AR/AG(H) AP/AR/AG(H) AP/AR/AG(H) Display Type 15.6” TFT LCD 17” TFT LCD 18.5” TFT LCD 19” TFT LCD 21.5” TFT LCD Max Resolution 1366 x 768 1280 x 1024 1366 x 768 1280 x 1024 1920 x 1080 16.7M 16.7M...
-
Page 12: Dimensions
1.3 Dimensions Figure 1.1: Dimensions of ARCHMI-807AP/AR/AG(H) Figure 1.2: Dimensions of ARCHMI-808AP/AR/AG(H) ARCHMI-8XXA Series User Manual... -
Page 13: Figure 1.3: Dimensions Of Archmi-810Ap/Ar/Ag(H)
Figure 1.3: Dimensions of ARCHMI-810AP/AR/AG(H) Figure 1.4: Dimensions of ARCHMI-812AP/AR/AG(H) ARCHMI-8XXA Series User Manual... -
Page 14: Figure 1.5: Dimensions Of Archmi-815Ap/Ar/Ag(H)
Figure 1.5: Dimensions of ARCHMI-815AP/AR/AG(H) Figure 1.6: Dimensions of ARCHMI-816AP/AR/AG(H) ARCHMI-8XXA Series User Manual... -
Page 15: Figure 1.7: Dimensions Of Archmi-817Ap/Ar/Ag(H)
Figure 1.7: Dimensions of ARCHMI-817AP/AR/AG (H) Figure 1.8: Dimensions of ARCHMI-818AP/AR/AG(H) ARCHMI-8XXA Series User Manual... -
Page 16: Figure 1.9: Dimensions Of Archmi-819Ap/Ar/Ag(H)
Figure 1.9: Dimensions of ARCHMI-819AP/AR/AG(H) Figure 1.10: Dimensions of ARCHMI-821AP/AR/AG(H) ARCHMI-8XXA Series User Manual... -
Page 17: Brief Description Of Archmi-8Xxa Series
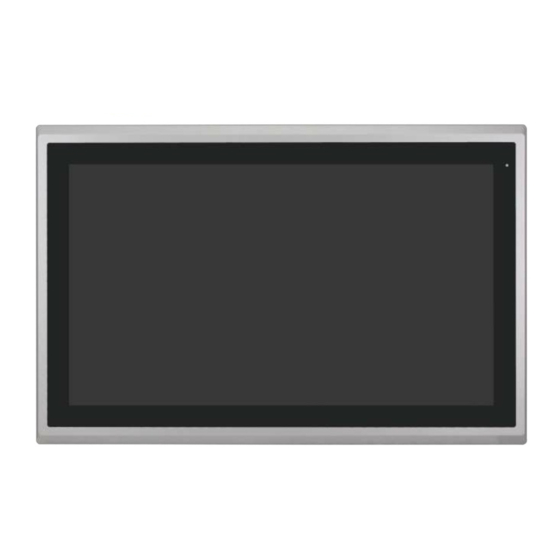
1.4 Brief Description of ARCHMI-8XXA Series There are 7” ~ 21.5” Industrial Compact Size Panel PC in ARCHMI-8XXA series, which comes with flat front panel touch screen and fanless design. It is powerful by Intel Apollo Lake N4200/N3350 CPU Processors with one SO-DIMM DDR3L slot, up to 8GB 1333 MHz. These systems support DC 9~36V wide-ranging power input and IP66 compliant front panel. -
Page 18: Figure 1.11: Front View Of Archmi-807A
Figure 1.11: Front View of ARCHMI-807A Figure 1.12: Rear View of ARCHMI-807A ARCHMI-8XXA Series User Manual... -
Page 19: Figure 1.13: Front View Of Archmi-808A
Figure 1.13: Front View of ARCHMI-808A Figure 1.14: Rear View of ARCHMI-808A ARCHMI-8XXA Series User Manual... -
Page 20: Figure 1.15: Front View Of Archmi-810A
Figure 1.15: Front View of ARCHMI-810A Figure 1.16: Rear View of ARCHMI-810A ARCHMI-8XXA Series User Manual... -
Page 21: Figure 1.17: Front View Of Archmi-812A
Figure 1.17: Front View of ARCHMI-812A Figure 1.18: Rear View of ARCHMI-812A ARCHMI-8XXA Series User Manual... -
Page 22: Figure 1.19: Front View Of Archmi-815A
Figure 1.19: Front View of ARCHMI-815A Figure 1.20: Rear View of ARCHMI-815A ARCHMI-8XXA Series User Manual... -
Page 23: Figure 1.21: Front View Of Archmi-816A
Figure 1.21: Front View of ARCHMI-816A Figure 1.22: Rear View of ARCHMI-816A ARCHMI-8XXA Series User Manual... -
Page 24: Figure 1.23: Front View Of Archmi-817A
Figure 1.23: Front View of ARCHMI-817A Figure 1.24: Rear View of ARCHMI-817A ARCHMI-8XXA Series User Manual... -
Page 25: Figure 1.25: Front View Of Archmi-818A
Figure 1.25: Front View of ARCHMI-818A Figure 1.26: Rear View of ARCHMI-818A ARCHMI-8XXA Series User Manual... -
Page 26: Figure 1.27: Front View Of Archmi-819A
Figure 1.27: Front View of ARCHMI-819A Figure 1.28: Rear View of ARCHMI-819A ARCHMI-8XXA Series User Manual... -
Page 27: Figure 1.29: Front View Of Archmi-821A
Figure 1.29: Front View of ARCHMI-821A Figure 1.30: Rear View of ARCHMI-821A ARCHMI-8XXA Series User Manual... -
Page 28: Installation Of Hdd
1.5 Installation of HDD Step 1 There are 2 screws to deal with when enclosing or removing the chassis. Gently remove 2 screws. Step 2 You can put or remove HDD into the machine by pulling the HDD bracket. Step 3 You can remove HDD by unscrewing 4 screws in the HDD bracket. -
Page 29: Vesa Mounting
1.6 VESA Mounting The ARCHMI-8XXA series is designed to be VESA mounted as shown in Picture. Just carefully place the unit through the hole and tighten the given screws from the rear to secure the mounting. Figure 1.31: ARCHMI-8XXA Series VESA Mounting 1.7 Panel Mounting There are four holes located along the four sides of the HMI. -
Page 30: Chapter 2 Hardware
Chapter 2 Hardware 2.1 Motherboard Introduction SBC-7118 is a 4" industrial motherboard developed on the basis of Intel Apollo Lake Processor, which provides abundant peripheral interfaces to meet the needs of different customers. Also, it features dual GbE ports, 6-COM ports and one mSATA configuration, one HDMI port, one LVDS interface. To satisfy the special needs of high-end customers, CN1 and CN2 and CN3 richer extension functions. - Page 31 Ethernet 2 x PCIe GbE LAN by Intel I210-AT 2 x USB 3.0 (type A) stack ports (USB3_1/USB3_2) 1 x USB 2.0 Pin header via CN1 (USB2) 2 x USB 2.0 Pin header via CN2 (USB6/USB7) 1 x USB 2.0 Pin header via CN3 (USB5) 1 x USB 2.0 for MPCIE1 (USB0) 1 x RS232/RS422/RS485 port, DB9 connector for external (COM1) Pin 9 w/5V/12V/Ring select...
-
Page 32: Figure 2.1: Motherboard Dimensions
1 x HDD LED status (CN3) 1 x Power LED status (CN1) 1 x Buzzer Operating: -20℃ to 70℃ Temperature Storage: -40℃ to 85℃ Humidity 10% - 90%, non-condensing, operating EMI/EMS Meet CE/FCC class A (units: mm) Figure 2.1: Motherboard Dimensions ARCHMI-8XXA Series User Manual... -
Page 33: Jumpers And Connectors Location
2.3 Jumpers and Connectors Location Figure 2.2: Jumpers and Connectors Location- Board Top Figure 2.3: Jumpers and Connectors Location- Board Bottom ARCHMI-8XXA Series User Manual... -
Page 34: Jumpers Setting And Connectors
2.4 Jumpers Setting and Connectors 1. U1: (FCBGA1090), onboard Pentium N4200/Celeron N3350 processors 1-1. H3/H4/H5/H6 (option): CPU1 Heat Sink Screw holes, four screw holes for Intel Apollo Lake N-series Processors. Heat Sink assembles. 2. U2/U3/U4/U5/U7/U8/U9/U10: (FBGA96) Onboard dual channel DDR3L memory Model Memory SBC-7118-N4200-4G... - Page 35 5. SATA_P1 : (2.5mm Pitch 1x2 box Pin Header), One onboard 5V output connector is reserved to provide power for SATA devices. Pin# Signal Name 5V_S0 (+DC5V output) Ground Note: Output current of the connector must not be above 1A. 6.
- Page 36 8. JP1: (2.0mm Pitch 2x2 Pin Header), TOUCH jumper setting JP3 Pin# TOUCH (TCH1) Close 3-4(default) Enable Close 3-4(option) Disable Close 1-2(default) 9. INVT1: (2.0mm Pitch 1x6 wafer Pin Header), Backlight control connector for LVDS. Pin# Signal Name 12V_S0 12V_S0 BKLT_EN_OUT BKLT_EN_CTRL 10.
- Page 37 Ground COM4_RI- COM4_DCD- COM4_TXD COM4_RXD- COM4 COM4 (UART) (UART) COM4_DTR- RICOM4_RTS- COM4_DSR- COM4_CTS- COM3_RI- COM3_DCD- COM3_TXD COM3_RXD COM3 COM3 (UART) (UART) COM3_DTR- COM3_RTS- COM3_DSR- COM3_CTS- GPIO16 SOC_5V_GPIO16 SOC_5V_GPIO17 GPIO17 GPIO18 SOC_5V_GPIO18 SOC_5V_GPIO19 GPIO19 Ground PCIe1x PE3_TX_N0 PE3_TX_P0 PCIe1x PE3_RX_N0 PE3_RX_P0 CLK_100M_PE3_N 48 CLK_100M_PE3_P PCIE_WAKE3-...
- Page 38 e) After the above operations, save changes and exit BIOS Setup. 13. CN1: (1.25mm Pitch 2x20 Connector, DF13-40P), For 18/24-bit LVDS output, contains LVDS output, USB2.0 and power LED. Function Signal Name Pin# Signal Name Function 12V_S0 12V_S0 BKLT_CTRL BKLT_EN_OUT Ground Ground LVDS_VDD5...
- Page 39 (50.95mm x 30mm Socket 52Pin), Mini PCI express socket. Support mini-PCIe (full size) devices with PCIex1, USB2.0, LPCbus, SMbus and SIM card via SD1. Share with mini SATA, select via S_1. Function Support ○(Option, S_1 setting) Mini SATA ●(Default, S_1 setting) Mini PCIe ●...
- Page 40 Pin1 DC_IN+(DC+9V~36V) Pin2 DC_IN-(Ground) Pin3 Model DC_IN1 SBC-7118-N4200-4G 180°Connector SBC-7118-N4200P-4G 45°Connector SBC-7118-N4200-8G 180°Connector SBC-7118-N4200P-8G 45°Connector SBC-7118-N3350-4G 180°Connector SBC-7118-N3350P-4G 45°Connector SBC-7118-N3350-8G 180°Connector SBC-7118-N3350P-8G 45°Connector Connector Power input DC_IN1 (Default) DC_IN1 BAT2 (option) BAT2 DC_IN1 + BAT2 (option) DC_IN1 19. VGA1: (CRT2.0mm Pitch 2x6 Pin Header) Video Graphic Array port. Signal Name Pin# Pin#...
- Page 41 21. P_SW1/BT1, BT2: Power on/off button: Use to connect external power switch button. The two pins are disconnected under normal condition. You may short them temporarily to realize system startup & shutdown or awaken the system from sleep state. P_SW1 or BT1 need to be selected before manufacturing. (2.0mm Pitch 1x2 Wafer Pin Header), Power on/off button, used to connect power switch button P_SW1 or BT1 Function...
- Page 42 25. BUZ1: Onboard buzzer. 26. SPK1: (2.0mm Pitch 1x4 Wafer Pin Header),support a stereo Class-D Speaker Amplifier with 2 watt per channel output power Pin# Signal Name SPK_OUTL_P SPK_OUTL_N SPK_OUTR_N SPK_OUTR_P 27. BAT_LED1: (2.0mm Pitch 1x4 Wafer Pin Header) The Charge status indicator for BAT2. Pin1-Pin3: Charge LED status.
- Page 43 serial devices. COM1 port is controlled by pins No.1~6 of JP1, select output Signal RI or 5V or 12V, for details, please refer to description of JP1 setting. RS232 (Default): Pin# Signal Name DCD# (Data Carrier Detect) RXD (Received Data) TXD (Transmit Data) DTR (Data Terminal Ready) Ground...
- Page 44 Pin# Signal Name 485- 485+ Ground BIOS Setup: Advanced/NCT6106D Super IO Configuration/F75111 COM1 Configuration【RS-485】 30. JP2: (2.0mm Pitch 2x3 Pin Header),COM2 jumper setting, pin 1~2 are used to communicate signal out of pin 9 of COM2 port. JP2 Pin# Function Close 1-2 COM2 RI (Ring Indicator) (default) COM2 Pin9:DC+5V...
- Page 45 JP2 select Setting (RI/5V/12V) 32. JP3: (2.0mm Pitch 2x3 Pin Header), COM2 jumper setting, pin1~6 are used to select signal out of pin9 of COM2 port. JP3 Pin# Function Close 1-2 COM2 RI (Ring Indicator) (Default) Close 3-4 COM2 Pin9: DC+5V (option) Close 5-6 COM2 Pin9: DC+12V (option) 33.
- Page 46 Pin# Signal Name GPIO Name Ground Ground GPA0_ONOFF EC_GPA0 GPA1_SPK- EC_GPA1 GPE6_BKLT- EC_GPE6 GPE0_BKLT+ EC_GPE0 GPH3_SPK+ EC_GPH3 BKLT_CTRL_PWR BKLT_CTRL_PWR ADC6_BKLT_CTRL EC_ADC6 ADC7_RSV EC_ADC7 3P3V_ALLS_EC 3.3V_ALLS_EC 36. U104: Infineon’s Trusted Platform Module (TPM2.0) SLB9665 is a fully standard compliant TPM based on the latest Trusted Computing Group (TCG) specification 2.0.
- Page 47 CN3: (1.27mm Pitch 2X30 Pin Header), connect to SBC-7118 CN2 pin Header. M-PCIE1: (Socket 52Pin),mini PCIe socket, it is located at the top, it supports mini PCIe devices with USB2.0(USB3), Smbus, SIM and PCIe signal. MPCIe card size is 30x30mm or 30x50.95mm. Signal Name Function support PCIe 1X...
- Page 48 (SIM Socket 6 Pin), Support SIM Card devices. SIM2 (Option): (1.25mm Pitch 1x6 Pin Wafer), For SIM card devices’ expansion GPIO1: (2.0mm Pitch 2x5 Pin Header),General-purpose input/output port, it provides a group of self-programming interfaces to customers for flexible use. Signal Name Pin# Pin#...
- Page 49 (2.0mm Pitch 2x3 Pin Header),COM5 setting jumper, pin 1~6 are used to select signal out of pin 9 of COM5 port. JP5 Pin# Function Close 1-2 RI (Ring Indicator) (default) Close 3-4 COM5 Pin9=+5V (option) Close 5-6 COM5 Pin9=+12V (option) COM5: (Type DB9), serial port, standard DB9 serial port is provided to make a direct connection to serial devices.
- Page 50 JP6: (2.0mm Pitch 2x3 Pin Header),COM6 setting jumper, pin 1~6 are used to select signal out of pin 9 of COM6 port. JP6 Pin# Function Close 1-2 RI (Ring Indicator) (default) Close 3-4 COM6 Pin9=+5V (option) Close 5-6 COM6 Pin9=+12V (option) COM6:...
- Page 51 PS_ON1: (2.0mm Pitch 1X2 Pin Wafer), ATX Power and Auto Power on jumper setting. PS_ON Mode Close 1-2 Auto Power on (Default) Open 1-2 ATX Power PS_ON2 (option): (2.0mm Pitch 1x2 Pin Wafer) PWR BT: POWER on/off BUTTON. It is used to connect power switch button. The two pins are disconnected under normal condition.
- Page 52 Signal Name Function support PCIe 1X USB2.0 (USB2) SMBus H1/H2: MPCIE1 SCREW HOLES, H2 for mini PCIE card (30 x 30mm) assemble. H1 for mini PCIE card (30 x 50.95mm) assemble. LED1: Mini PCIe devices LED status. SIM1 (option): (SIM Socket 6 Pin), Support SIM Card devices. PS2: (2.0mm Pitch 1x6 Pin Wafer), PS/2 keyboard and mouse port, the port can be connected to PS/2 keyboard or mouse via a dedicated cable for direct use.
- Page 53 JP_SET(option): (2.0mm Pitch 2x5 Pin Header) Signal Name Pin# Pin# Signal Name 3P3V_S5_USB 3P3V_S5 3P3V_S5_USB 3P3V_S5 3P3V_S5_USB 3P3V_S5 PSON_ATX Ground PSON_ATX Ground JP6: (2.0mm Pitch 2x3 Pin Header), COM6 setting jumper, pin 1~6 are used to select signal out of pin9 of COM6 port.
- Page 54 Signal Name Pin# Pin# Signal Name Ground SMB_DATA_R SMB_CLK_R PCH-GPIO56 PCH-GPIO57 PCH-GPIO59 PCH-GPIO58 JTAG: (2.0mm Pitch 2x5 Pin Header), Reserve. JP1: (2.0mm Pitch 1x2 Pin Header), Reserve. JP2: (2.0mm Pitch 1x2 Pin Header), Reserve. CAN1/CAN2: (3.5mm Pitch 1x10 Pin connector), it provides two CAN-bus interfaces. Pin# Channel Signal Name...
- Page 55 CN3: (1.27mm Pitch 2X30 Pin Header), connect to SBC-7118 CN2 pin Header. USB23(SBC-7118 USB3/USB4): (Double stack USB type A), Rear USB connector, it provides up to 2 USB2.0 ports, speed up to 480Mb/s. LAN1: (RJ45 Connector), Rear LAN port, one standard 10/100/1000M RJ-45 Ethernet port is provided. Use Intel I211-AT chipset, LINK LED (green) and ACTIVE LED (green) respectively located at the left-hand and right-hand side of the Ethernet port indicate the activity and transmission state of LAN.
- Page 56 12V_OUT1: (3.96mm Pitch 1x2 Pin Header), POE DC12V Output. Pin# Output Voltage 12V_POE Ground Model Maximum output Power SBC-7118 ● TB-528E1UPOE AG5510 12V_OUT3 (option): (2.0mm Pitch 1X6 Pin Header), Reserve. 12V_OUT1 (option): (3.96mm Pitch 1x2 Pin Header), Reserve. JP3 (option): (2.0mm Pitch 1X3 Pin Header), Reserve.
-
Page 57: Chapter 3 Bios Setup
Chapter 3 BIOS Setup 3.1 Operations after POST Screen After CMOS discharge or BIOS flashing operation, press [Delete] key to enter CMOS Setup. After optimizing and exiting CMOS Setup 3.2 BIOS Setup Utility Press [Delete] key to enter BIOS Setup utility during POST, and then a main menu containing system summary information will appear. - Page 58 BIOS Information Set the Time. Use Tab to BIOS Vendor American Megatrends Switch between Time Core Version 5.12 elements. Compliancy UEFI 2.4; PI 1.3 Project Version 7118v 0.16 x64 Build Date and Time 06/19/2017 13:51:32 Access Level Administrator Platform firmware Information BXT SOC MRC Version Intel®...
-
Page 59: Advanced Settings
3.4 Advanced Settings Aptio Setup Utility – Copyright (C) 2017 American Megatrends, Inc. Main Advanced Chipset Security Boot Save & Exit Trusted Computing Settings ►Trusted Computing ►ACPI Settings ►NCT6106D Super IO Configuration ►NCT6106D HW Monitor ►CPU Configuration ►Network Stack Configuration ►CSM Configuration →←: Select Screen ►Thermal... - Page 60 TPM 20 Interface type [TIS] Device Select [Auto] [TPM1.2] [TPM2.0] 3.4.2 ACPI Settings Enable ACPI Auto Configuration: [Disabled] [Enabled] Enable Hibernation: [Enabled] [Disabled] ACPI Sleep State: [S3 (Suspend to RAM) ] [Suspend Disabled] Lock Legacy Resources: [Disabled] [Enabled] S3 Video Repost: [Disabled] [Enabled] ACPI Low Power S0 Idle:...
- Page 61 [Disabled] Device Settings IO=2F8h; IRQ=3; Change Settings [Auto] Serial Port 3 Configuration Serial port [Enabled] [Disabled] Device Settings IO=3E8h; IRQ=7; Change Settings [Auto] Serial Port 4 Configuration Serial port [Enabled] [Disabled] Device Settings IO=2E8h; IRQ=7; Change Settings [Auto] Serial Port 5 Configuration Serial port [Enabled] [Disabled]...
- Page 62 :+380℃ System temperature6 :NA Fan1 speed :NA Fan2 speed :NA Fan3 speed :+0.760 V VCORE :+6.441V VIN0 :+6.864V VIN1 :+8.870V VIN2 :+3.456V AVCC :+3.440V VSB3 :+3.472V VCC3V :+3.376V VBAT 3.4.5 CPU Configuration CPU Configuration Socket 0 cpu Information Intel pentium® CPU N4200 @1.10GHz CPU Signature 506C9 Microcode Patch...
- Page 63 Turbo Mode [Enabled] Boot performance mode [Max Performance] Power Limit 1 Enable [Disabled] Active Processor Cores [Disabled] Intel Virtualization Technology [Enabled] VT-d [Disabled] Bi-directional PROCHOT [Enabled] Thermal Monitor [Enabled] Monitor Mwait [Disabled] P-STATE Coordination [HW_ALL] [SW_ALL] [SW_ANY] [Disabled] Network Stack Configuration Network Stack [Disabled] 3.4.6...
- Page 64 3.4.7 Thermal Automatic Thermal Reporting [Enabled] DPTF [Enabled] DPTF Configuration [ 0 ] DPTF Processor [Enabled] Active Thermal Trip Point Passive Thermal Trip point S3/CS Thermal Trip Point HOT Thermal Trip point Critical Thermal Trip Point Thermal Sampling Period Display participant [Enabled] FAN Device [Enabled]...
- Page 65 Thermal Sampling Period Generic Device 4 [Enabled] Active Thermal Trip Point Passive Thermal Trip point S3/CS Thermal Trip Point HOT Thermal Trip point Critical Thermal Trip Point Thermal Sampling Period Design Variable 0 Design Variable 1 Design Variable 2 Design Variable 3 Design Variable 4 Design Variable 5 Virtual Sensor participant 1...
-
Page 66: Chipset Settings
3.5 Chipset Settings Aptio Setup Utility – Copyright (C) 2017 American Megatrends, Inc. Main Advanced Chipset Security Boot Save & Exit ►North Bridge North Bridge Parameters ►South Bridge ►South Cluster Configuration →←: Select Screen ↑↓ : Select Item Enter: Select +/- : Charge Opt. - Page 67 South Bridge Serial IRQ Mode [Continuous] SMBus Support [Enabled] OS Selection [Windows] PCI CLOCK RUN [Enabled] State After G3 [S0 State] F75111 GPIO20 Config [Output] F75111 GPIO20 Output setting [Low] F75111 GPIO21 Config [Output] F75111 GPIO21 Output setting [Low] F75111 GPIO22 Config [Output] F75111 GPIO22 Output setting [Low]...
- Page 68 Peer Memory Write Enable [Disabled] Compliance Mode PCI Express Root Port 1 PCI Express Root Port 2 PCI Express Root Port 3 PCI Express Root Port 4 PCI Express Root Port 5 PCI Express Root Port 6 SATA Drives Chipset-SATA Controller Configuration Chipset SATA [Disabled] SATA Mode Selection...
- Page 69 DITO Configuration [Disabled] DITO Value DM Value SCC Configuration SCC SD Card Support (D27:F0) [Disabled] SCC eMMC Support (D28:F0) [Disabled] SCC UFS Support (D29:F0) [Disabled] SCC SDIO Support (D30:F0) [Disabled] USB Configuration XHCI Pre-Boot Driver [Disabled] XHCI Mode [Disabled] USB VBUS Support [ON] USB HSIC1...
-
Page 70: Security Settings
3.6 Security Settings Aptio Setup Utility – Copyright (C) 2017 American Megatrends, Inc. Main Advanced Chipset Security Boot Save & Exit Password Description Set Administrator Password If ONLY the Administrator’s password is set, Then this only limits access to Setup and is Only asked for when entering Setup. - Page 71 Type the password with up to 20 characters and then press Enter key. This will clear all previously typed CMOS passwords. You will be requested to confirm the password. Type the password again and press Enter key. You may press Esc key to abandon password entry operation.
-
Page 72: Boot Settings
3.7 Boot Settings Aptio Setup Utility – Copyright (C) 2017 American Megatrends, Inc. Main Advanced Chipset Security Boot Save & Exit Boot Configuration Controls the placement of newly Setup Prompt Timeout detected UEFI boot options Bootup Numlock State [On] Quiet Boot [Disabled] Boot Option Priorities Boot Option #1... -
Page 73: Save & Exit Settings
3.8 Save & Exit Settings Aptio Setup Utility – Copyright (C) 2017 American Megatrends, Inc. Main Advanced Chipset Boot Security Save & Exit Save Options Exit system setup after Save Changes and Exit Saving the changes. Discard Changes and Exit Save Changes and Reset Discard Changes and Reset Save Changes... - Page 74 [No] Save Changes Save Setup done so far to any of the setup options? [Yes] [No] Discard Changes Discard Changes done so far to any of the setup options? [Yes] [No] Restore Defaults Restore /Load Defaults values for all the setup options? [Yes] [No] Save as user Defaults...
-
Page 75: Chapter 4 Installation Of Drivers
Chapter 4 Installation of Drivers This chapter describes the installation procedures for software and drivers under Windows 10. The software and drivers are included with the motherboard. The contents include Intel® Apollo Lake SoC Chipset, Intel® VGA chipset, Intel® I210 LAN Driver, Realtek ALC 269Q HD Audio Driver, Intel ® TXE, Touch Panel Driver and DPTF Driver Installation instructions are given below. -
Page 76: Intel® Apollo Lake Soc Chipset
Intel® Apollo Lake SoC Chipset To install Intel® Apollo Lake SoC Chipset driver, please follow the steps below. Step 1. Select Intel® Apollo Lake SoC Chipset from the list Step 2. Here is welcome page. Please make sure you save and exit all programs before install. Click Next. ARCHMI-8XXA Series User Manual... - Page 77 Step 3. Read the license agreement. Click Accept to accept all of the terms of the license agreement. Step 4. Click Install to begin the installation. ARCHMI-8XXA Series User Manual...
- Page 78 Step 5. Select Restart Now to reboot your computer for the changes to take effect. ARCHMI-8XXA Series User Manual...
-
Page 79: Intel® Vga Chipset
Intel® VGA Chipset To install the Intel® VGA Chipset, please follow the steps below. Step 1. Select Intel® VGA Chipset from the list. Step 2. Choose automatically run function and Click Next to setup program. ARCHMI-8XXA Series User Manual... - Page 80 Step 3. Read the license agreement. Click Yes to accept all of the terms of the license agreement. Step 4. Click Next to continue. ARCHMI-8XXA Series User Manual...
- Page 81 Step 5. Click Next to continue. Step 6. Select Yes, I want to restart this computer now. Click Finish to complete installation. ARCHMI-8XXA Series User Manual...
-
Page 82: Intel® I210 Lan Driver
Intel® I210 LAN Driver To install Intel® I210 LAN Driver Driver, please follow the steps below. Step 1. Select Intel® I210 LAN Driver from the list Step 2. Intel® Network Connections appear. Click Install Drivers and Software. ARCHMI-8XXA Series User Manual... - Page 83 Step 3. Enter into Install Wizard welcome page. Click Next to continue. Step 4. Enter into Intel® Network Connections License Agreement welcome page. Click Next to continue. ARCHMI-8XXA Series User Manual...
- Page 84 Step 5. Enter into Intel® Network Connections Setup Options page and choose as example. Click Next to continue. Step 6. Enter into Intel® Network Connections Install Wizard page. Click Install to start installation. ARCHMI-8XXA Series User Manual...
- Page 85 Step 6. Click Finish to end your installation. ARCHMI-8XXA Series User Manual...
-
Page 86: Realtek Alc269Q Hd Audio Driver
4.4 Realtek ALC269Q HD Audio Driver To install Realtek ALC269Q HD Audio Driver, please follow the steps below. Step 1. Select Realtek ALC269Q HD Audio Driver from the list Step 2. Enter into Install Wizard page and wait for extracting files. ARCHMI-8XXA Series User Manual... - Page 87 Step 3. Enter into Audio Driver Setup page. Click Yes to continue the installation. ARCHMI-8XXA Series User Manual...
-
Page 88: Intel®Txe
4.5 Intel® TXE To install Intel® TXE, please follow the steps below. Step 1. Select Intel® TXE from the list Step 2. Enter into Intel® Trusted Execution Engine welcome page. Click Next to continue. ARCHMI-8XXA Series User Manual... - Page 89 Step 3. Enter into Intel® Trusted Execution Engine License Agreement page. Click Next to continue. Step 4. Click Next to continue. ARCHMI-8XXA Series User Manual...
- Page 90 Step 5. Choose Yes, I want to restart this computer now to finish the installation. ARCHMI-8XXA Series User Manual...
-
Page 91: Touch Panel Driver
4.6 Touch Panel Driver To install Touch Panel Driver, please follow the steps below. Step 1. Select Touch Panel Driver from the list Step 2. Enter into Penmount USB Windows Driver Setup Wizard page. Click Next to continue. ARCHMI-8XXA Series User Manual... - Page 92 Step 3. Read the License Agreement. Click I Agree to continue. Step 4. Choose the installation data location you preferred. Click Install to continue. ARCHMI-8XXA Series User Manual...
- Page 93 Step 5. Enter into Penmount USB Windows Driver Setup page. Click Yes to continue. Step 6. Enter into Penmount USB Windows Driver Setup page. Click Finish to finish installation. ARCHMI-8XXA Series User Manual...
-
Page 94: Dptf Driver
4.7 DPTF Driver To install DPTF Driver, please follow the steps below. Step 1. Select DPTF Driver from the list Step 2. Click Next to continue. ARCHMI-8XXA Series User Manual... - Page 95 Step 3. Read the license agreement. Choose Accept and click Next to accept all of the terms of the license agreement. Step 4. Select destination location by your option and click Next to continue. ARCHMI-8XXA Series User Manual...
- Page 96 Step 5. Click Install to continue the installing. Step 6. Click Finish to complete the installation and start install Intel DPTF driver for Windows. ARCHMI-8XXA Series User Manual...
- Page 97 Step 7. Click Next to start the installation. Step 8. Read the license agreement. Click Yes to accept all of the terms of the license agreement. ARCHMI-8XXA Series User Manual...
- Page 98 Step 9. Click Next to continues. Step 10. Click Finish to complete the installation. ARCHMI-8XXA Series User Manual...
Need help?
Do you have a question about the ARCHMI-8 A Series and is the answer not in the manual?
Questions and answers