Table of Contents
Advertisement
Quick Links
Advertisement
Table of Contents

Related Manuals for Aplex ARCHMI-932P


Summary of Contents for Aplex ARCHMI-932P
- Page 2 Gen. Core i5-6300U Fanless Industrial Compact Size Panel PC User Manual Release Date Revision Oct. 2016 V1.0 ®2016 Aplex Technology, Inc. All Rights Reserved. Published in Taiwan Aplex Technology, Inc. 15F-1, No.186, Jian Yi Road, Zhonghe District, New Taipei City 235, Taiwan Tel: 886-2-82262881 Fax: 886-2-82262883 URL: www.aplextec.com...
-
Page 3: Revision History
Revision History Reversion Date Description 2016/10/26 Official Version ARCHMI-932P User Manual... -
Page 4: Warning!/Caution/Disclaimer
This information in this document is subject to change without notice. In no event shall Aplex Technology Inc. be liable for damages of any kind, whether incidental or consequential, arising from either the use or misuse of information in this document or in any related materials. -
Page 5: Packing List
Packing List Accessories (as ticked) included in this package are: □ Adaptor □ Driver & manual CD disc □ Other.___________________(please specify) ARCHMI-932P User Manual... -
Page 6: Safety Precautions
Always disconnect power when the system is not in use. ◆ Disconnect power when you change any hardware devices. For instance, when you connect a jumper or install any cards, a surge of power may damage the electronic components or the whole system. ARCHMI-932P User Manual... -
Page 7: Table Of Contents
Warning!/Caution/Disclaimer......…………………………….……………………2 Packing List…………………………………….…………………………………………………....3 Safety Precautions…………………………………………………..…..……………………....4 Chapter 1 Getting Started 1.1 Features……..…………………..………………………...…………………………..7 1.2 Specifications…..………………...………………………………………………….7 1.3 Dimensions……..…………………..………………………………………...…...9 1.4 Brief Description of ARCHMI-932P...….…..……………………….……10 1.5 Installation of HDD………….…………..………..…...…………………..…..11 1.6 VESA Mounting……………….…………..………..…...…………………..…..12 1.7 Panel Mounting…..………….…………..………..…...…………………..…..12 Chapter 2 Hardware 2.1 Motherboard Specifications……..….…..…………………………..13 2.2 Features……………………………………...………….……………………………15 2.3 Hardware Installation…………………….……….…………………………...18 2.4 Jumper Settings……………………………..………..……………………..……23... - Page 8 5.1 Windows 8.1/10 Universal Driver Installation for PenMount 6000 Series………..…………………………………………………………….…106 5.2 Software Functions……………………..……………………………………..112 Figures Figure 1.1: Dimensions of ARCHMI-932P..……….……….………………………..….9 Figure 1.2: Front View of ARCHMI-932P……...………………………………………10 Figure 1.3: Rear View of ARCHMI-932P...………………………………………………10 Figure 1.4: ARCHMI-932P VESA Mounting.……………………….……………….…12 Figure 1.5: ARCHMI-932P Panel Mounting……………………...…………………..12 Figure 2.1: Motherboard SU173 Layout……..………………………………………..18...
-
Page 9: Getting Started
2 x 2.5” SATA HDD bay for SATA HDD (Easy accessible) Expansion Expansion Slot 2 x internal Mini-PCIe slot full size Display Display Type 32” color TFT LCD Max. Color 1920 x 1080 Contrast Ratio 3000: 1 Luminance (cd/m Viewing Angle 178(H) / 178(V) ARCHMI-932P User Manual... - Page 10 Net Weight 16.5 Kg Environmental Operating 0~50°C Temperature Storage Temperature -20~60°C Storage Humidity 10 to 90% @ 40°C, non-condensing Certification CE / FCC Class A Operating System Windows Embedded 8.1 Industry Pro, Support Windows 10 IoT Enterprise 2015LTSB ARCHMI-932P User Manual...
-
Page 11: Dimensions
1.3 Dimensions Figure 1.1: Dimensions of ARCHMI-932P ARCHMI-932P User Manual... -
Page 12: Brief Description Of Archmi-932P
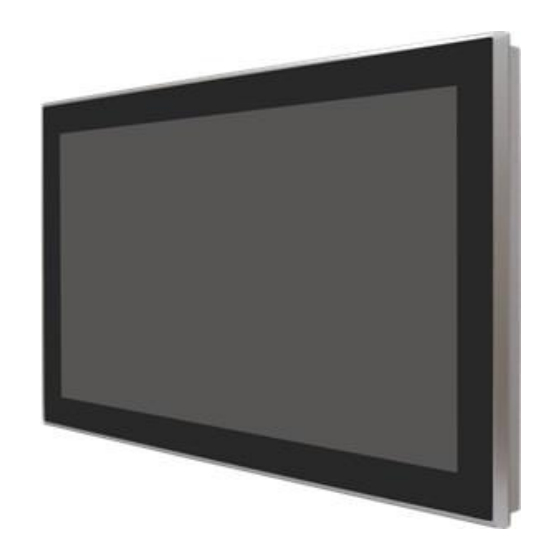
204-pin SODIMM DDR3L up to 16GB memory. The model supports 90~264VAC ~50/60Hz power input, and projected capacitive touch screen. Additionally, ARCHMI-932P comes with a 32” color TFT LCD with resolution 1920 x 1080, and can be VESA 200 x 200 mounted. The projected capacitive touch screen supports 7H anti-scratch surface is ideal for use as PC-based controller for industrial automation &... -
Page 13: Installation Of Hdd
Gently remove 6 screws. Step 2 Taka the chassis out as the picture show. Step 3 Unscrewing 4 screws in the HDD bracket, then you can replace HDD or SSD from here ARCHMI-932P User Manual... -
Page 14: Vesa Mounting
1.6 VESA Mounting The ARCHMI-932P is designed to be VESA mounted as shown in Picture. Just carefully place the unit through the hole and tighten the given screws from the rear to secure the mounting. Figure 1.4: ARCHMI-932P VESA Mounting 1.7 Panel Mounting... -
Page 15: Chapter 2 Hardware
1 x Full-size Mini PCIe (PCIe/USB) Audio Audio Codec Realtek ALC888S-VD2-GR Ethernet Controller 1 x Intel® I210AT PCIe (10/100/1000Mbps) 1 x Intel® I219LM PCIe with iAMT11.0 (10/100/1000Mbps) - (only Core i7/i5 supports iAMT) Rear I/O Ethernet 2 x GbE (RJ-45) ARCHMI-932P User Manual... - Page 16 /Linux Windows 8.1 (64-bit) Windows 10 IoT Enterprise 64-bit Debian 8 (with VESA graphic driver) CentOS 7 (with VESA graphic driver) Ubuntu 15.10 (Intel graphic driver available) Environment Temperature Operating: 0 to 60°C Storage: -40 to 85°C ARCHMI-932P User Manual...
-
Page 17: Features
Supports 1 LVDS/eDP, 1 HDMI/DP and 1 DP++ interface for triple display outputs. PCI Express PCI Express is a high bandwidth I/O infrastructure that possesses the ability to scale speeds by forming multiple lanes. ARCHMI-932P User Manual... - Page 18 ≥1.5A. For 3 or more USB ports, the 5V_standby power source of your power supply must support ≥2A. RTC Timer The RTC installed on the system board allows your system to automatically power-on on the set date and time. ACPI STR ARCHMI-932P User Manual...
- Page 19 Mbit/s, or 60 MB/s) and USB 1.1 (12Mb/s). USB 3.0 reduces the time required for data transmission, reduces power consumption, and is backward compatible with USB 2.0. It is a marked improvement in device transfer speeds between your computer and a wide range of simultaneously accessible external Plug and Play peripherals. ARCHMI-932P User Manual...
-
Page 20: Hardware Installation
Figure 2.1: Motherboard SU173 Layout • SU173: Wide Range 15~36V. • The eDP connector is optional. Please contact your sales representative for more information. • JP17, JP18 an JP19 will work when the eDP connector is populated on the system board. ARCHMI-932P User Manual... - Page 21 • Memory Features • Two 204-pin DDR3L SODIMM sockets • Supports 1600MHz DDR3L SDRAM • Supports up to 16GB system memory • Supports dual channel memory interface • The system board supports the following memory interface. ARCHMI-932P User Manual...
- Page 22 2. Disconnect all power cords and cables. 3. Locate the SODIMM socket on the system board. 4. Note the key on the socket. The key ensures the module can be plugged into the socket in only one direction. ARCHMI-932P User Manual...
- Page 23 30 degrees angle. Apply firm even pressure to each end of the module until it slips down into the socket. The contact fingers on the edge of the module will almost completely disappear inside the socket. ARCHMI-932P User Manual...
- Page 24 6. Push down the module until the clips at each end of the socket lock into position. You will hear a distinctive “click”, indicating the module is correctly locked into position. ARCHMI-932P User Manual...
-
Page 25: Jumper Settings
2. Set JP1 pins 2 and 3 to On. Wait for a few seconds and set JP1 back to its default setting, pins 1 and 2 On. 3. Now plug the power cord and power-on the system. ARCHMI-932P User Manual... - Page 26 1 and 2 to On. When using the JP16 “Power On” feature to power the system back on after a power failure occurs, the system may not power on if the power lost is resumed within 5 seconds (power flicker). ARCHMI-932P User Manual...
- Page 27 JP13 is used to select the power supplied with the LVDS LCD panel. Important: Before powering-on the system, make sure that the power settings of JP13 match the LCD panel’s specification. Selecting the incorrect voltage will seriously damage the LCD panel. ARCHMI-932P User Manual...
- Page 28 LCD/Inverter Power Select JP14 is used to select the power level of the LCD/Inverter power connector. ARCHMI-932P User Manual...
- Page 29 JP12 is used to select the power level of backlight control: +3.3V (default) or +5V. Important: Before powering-on the system, make sure that the power settings of JP12 match the power specification of backlight control. Selecting the incorrect voltage will seriously damage the backlight. ARCHMI-932P User Manual...
- Page 30 JP19 is used to select the power supplied with the eDP panel. Important: Before powering-on the system, make sure that the power settings of JP19 match the eDP panel’s specification. Selecting the incorrect voltage will seriously damage the Edp panel. ARCHMI-932P User Manual...
- Page 31 Inverter Power Select (optional) JP18 is used to select the power level of the eDP Inverter power supply. ARCHMI-932P User Manual...
- Page 32 JP17 is used to select the power level of backlight control: +3.3V (default) or +5V. Important: Before powering-on the system, make sure that the power settings of JP17 match the power specification of backlight control. Selecting the incorrect voltage will seriously damage the backlight. ARCHMI-932P User Manual...
- Page 33 COM 1/COM 2 RS232/Power Select JP4 (for COM1) and JP5 (for COM 2) are designed to configure Serial COM ports to pure RS232 or RS232 with power. ARCHMI-932P User Manual...
- Page 34 Mini PCIe/mSATA Signal Select JP7 is used to select the Mini PCIe signal: Mini PCIe or mSATA (default). ARCHMI-932P User Manual...
-
Page 35: Rear Panel I/O Ports
This jack is considered a low power solution. Connect a DC power cord to this jack. Using a voltage more than the recommended range may fail to boot the system or cause damage to the system board. ARCHMI-932P User Manual... - Page 36 The HDMI port which carries both digital audio and video signals is used to connect a LCD monitor or digital TV that has the HDMI port. Driver Installation Install the graphics driver. Refer to chapter 4 for more information. ARCHMI-932P User Manual...
- Page 37 Intel® I219LM PCIe with iAMT11.0 (10/100/1000Mbps) (only Core i7/i5 supports iAMT) The LAN ports allow the system board to connect to a local area network by means of a network hub. Driver Installation Install the LAN drivers. Refer to chapter 4 for more information. ARCHMI-932P User Manual...
-
Page 38: Usb Ports
10-pin connectors allow you to connect 4 additional USB 2.0 ports (USB 7-8/9-10). The additional USB ports may be mounted on a card-edge bracket. Install the card-edge bracket to an available slot at the rear of the system chassis and then insert the USB port cables to a connector. ARCHMI-932P User Manual... - Page 39 If you are using the Wake-On-USB Keyboard/Mouse function for 2 USB ports, the +5V_standby power source of your power supply must support ≥1.5A. For 3 or more USB ports, the +5V_standby power source of your power supply must support ≥2A. ARCHMI-932P User Manual...
- Page 40 BIOS Setting Configure the onboard USB in the Advanced menu (“Audio Configuration” submenu) of the BIOS. Refer to chapter 3 for more information. Driver Installation Install the audio driver. Refer to the chapter 4 for more information. ARCHMI-932P User Manual...
-
Page 41: I/O Connectors
Digital I/O Connector Digital I/O Power Connector The 8-bit Digital I/O connector provides powering-on function to external devices that are connected to the connector. Digital I/O Connector Pins Function DIO7 DIO6 DIO5 DIO4 DIO3 DIO2 DIO1 DIO0 ARCHMI-932P User Manual... - Page 42 SATA (Serial ATA) Connectors Features Serial ATA 3.0 ports with data transfer rate up to 6Gb/s Integrated Advanced Host Controller Interface (AHCI) controller Supports RAID 0/1/5 (Core i only) ARCHMI-932P User Manual...
- Page 43 SATA (Serial ATA) Power Connectors These SATA power connectors supply power to the SATA drive. Connect one end of the provided power cable to the SATA power connector and the other end to your storage device. ARCHMI-932P User Manual...
- Page 44 COM connector. Make sure the colored stripe on the ribbon cable is aligned with pin 1 of the COM connector. ARCHMI-932P User Manual...
- Page 45 This LED will light when the hard drive is being accessed. RESET-SW - Reset Switch This switch allows you to reboot without having to power off the system. PWR-BTN - Power Switch This switch is used to power on or off the system. ARCHMI-932P User Manual...
- Page 46 CPU and system board components. BIOS Setting The Advanced menu (“SIO NUVOTON6106D” submenu) of the BIOS will display the current speed of the cooling fans. Refer to chapter 3 for more information. ARCHMI-932P User Manual...
- Page 47 LCD Display Panel. Refer to the right side for the pin functions of these connectors. BIOS Setting Configure the LCD panel in the Advanced Features submenu of the BIOS. Refer to chapter 3 for more information. ARCHMI-932P User Manual...
- Page 48 LVDS_CLK2+ LVDS_CLK1- LVDS_CLK2- LVDS_DDCCLK N.C. LVDS_DDCDTA +3.3V Panel Power Panel Power Panel Power Panel Power LCD/Inverter Power Connector Pins Function Panel Inverter Brightness Voltage Control Panel Power +3.3V Panel Backlight On/Off Control LCD/Inverter Power LCD/Inverter Power ARCHMI-932P User Manual...
- Page 49 Install the card-edge bracket to an available slot at the rear of the system chassis then connect the audio cable to the S/PDIF connector. Make sure pin 1 of the audio cable is aligned with pin 1 of the S/PDIF connector ARCHMI-932P User Manual...
- Page 50 The SMBus (System Management Bus) connector is used to connect SMBus devices. It is a multiple device bus that allows multiple chips to connect to the same bus and enable each one to act as a master by initiating data transfer. ARCHMI-932P User Manual...
- Page 51 Install PCI Express cards such as network cards or other cards that comply to the PCI Express specifications into the PCI Express x4 slot. SIM Slot The SIM slot on the system board is used to insert a SIM card. ARCHMI-932P User Manual...
- Page 52 When the system’s power is on and a chassis intrusion occurred, an alarm will sound. When the system’s power is off and a chassis intrusion occurred, the alarm will sound only when the system restarts. ARCHMI-932P User Manual...
- Page 53 ML_Lane 0+ ML_Lane 3+ ML_Lane 1- ML_Lane 1+ AUX- AUX+ ML_Lane 2- ML_Lane 2+ Got Plug +V_LCD +V_LCD Panel Backlight On/Off Control Panel Inverter Brightness Voltage Control Inverter GND Inverter GND Inverter PWR Inverter PWR Inverter PWR ARCHMI-932P User Manual...
- Page 54 33MHz LPC bus clock. For more information about LPC bus refer to the Intel® Low Pin Count Interface Specification Revision 1.1’. The table below indicates the pin fuctions of the LPC connector. Pins Pin Assignment Pins Pin Assignment CLK_24M LAD1 RST# LAD0 FRAME# VCC3 LAD3 LAD2 SERIRQ 5VSB ARCHMI-932P User Manual...
- Page 55 The system board used in the following illustrations may not resemble the actual one. These illustrations are for reference only. The EXT-RS232/RS485 card is connected to SU173 via the LPC connector. The photo below guides you how to connect the extension module to the motherboard. ARCHMI-932P User Manual...
- Page 56 This LED will lit red when the system is in the standby mode. It indicates that there is power on the system board. Power-off the PC and then unplug the power cord prior to installing any devices. Failure to do so will cause severe damage to the motherboard and components. ARCHMI-932P User Manual...
- Page 57 Safety Measures Danger of explosion if battery incorrectly replaced. Replace only with the same or equivalent type recommend by the manufacturer. Dispose of used batteries according to local ordinance. ARCHMI-932P User Manual...
-
Page 58: Chapter 3 Bios Setup
After the memory test, the message “Press DEL to run setup” will appear on the screen. If the message disappears before you respond, restart the system or press the “Reset” button. You may also restart the system by pressing the <Ctrl> <Alt> and <Del> keys simultaneously ARCHMI-932P User Manual... - Page 59 When “ “ appears on the left of a particular field, it indicates that a submenu which contains additional options are available for that field. To display the submenu, move the highlight to that field and press <Enter>. ARCHMI-932P User Manual...
-
Page 60: Insyde Bios Setup Utility
The date format is <day>, <month>, <date>, <year>. Day displays a day, from Sunday to Saturday. Month displays the month, from January to December. Date displays the date, from 1 to 31. Year displays the year, from 1980 to 2099. ARCHMI-932P User Manual... -
Page 61: Acpi Settings
Important: Setting incorrect field values may cause the system to malfunction. ACPI Settings This section is used to configure the system ACPI parameters. ARCHMI-932P User Manual... -
Page 62: Cpu Configuration
This section is used to configure the CPU Intel(R) SpeedStep(tm) This field is used to enable or disable the Intel Enhanced SpeedStep Technology. Turbo Mode Enable or disable the turbo mode. Video Configuration This section configures the video settings ARCHMI-932P User Manual... - Page 63 Internal Graphics Keep IGFX enabled or disabled based on the setup options. Always Enabled PEG Enable or disable the PEG function. ARCHMI-932P User Manual...
- Page 64 Boot Type : UEFI Boot Type -> Show Primary Display & Hide Boot Display Boot Type : Dual Boot Type -> Show Primary Display & Show Boot Display LCD Panel Type Select the LCD panel type. ARCHMI-932P User Manual...
- Page 65 This section is used to configure the audio settings. HD Audio Control the detection of the HD-Audio device. Disabled HDA will be unconditionally disabled. Enabled HDA will be unconditionally enabled. Auto HDA will be enabled if present, disabled otherwise. ARCHMI-932P User Manual...
-
Page 66: Sata Configuration
This option allows you to create RAID or Intel Matrix Storage configuration on Serial ATA devices. Serial ATA Port 0, 1 and 2 This field is used to enable or disable the serial ATA port. USB Configuration This section is used to configure the parameters of the USB device. ARCHMI-932P User Manual... - Page 67 USB BIOS Support Disabled Disable USB keyboard/mouse/storage support. Enabled Enable USB keyboard/mouse/storage support under UEFI and DOS environment. PCI Express Configuration This section configures settings relevant to PCI Express root ports. ARCHMI-932P User Manual...
- Page 68 PCI Express Root Port This field is used to enable or disable the PCI Express Root Port. PCIe Speed Select the speed of the PCI Express Root Port: Auto, Gen1, Gen2 or Gen3. ARCHMI-932P User Manual...
- Page 69 This field is used to enable or disable the flash ME region. Active Management Technology Support The section allows users to enable or disable the Intel® Active Management Technology (Intel® AMT) BIOS extension. Refer to chapter 6 for more information. ARCHMI-932P User Manual...
- Page 70 Enable or disable the system/CPU/AUX smart fan. Boundary 1 to Boundary 4 Set the boundary temperature. The range is from 0-127oC. Fan Speed Count 1 to Fan Speed Count 4 Set the fan speed. The range is from 0-100%. ARCHMI-932P User Manual...
- Page 71 Serial Port 1 to Serial Port 4 Configure the settings to use the serial port. Disable No configuration Enable User configuration ARCHMI-932P User Manual...
- Page 72 Enable or disable the watchdog function. Case Open Enable or disable the case open. AC Power Loss Set the AC power loss always off/on. ARCHMI-932P User Manual...
- Page 73 Note: SYS Smart Fan, Fan2 and CPU Smart Fan Control can be switched to <Disable>. When they are disabled, it will enable "Fix Fan Speed Count". PC Health Status This field only displays the PC health status. ARCHMI-932P User Manual...
-
Page 74: Security
This item can be displayed when any security mode of HDD is not Lock. Set All Master Hdd Password Set all master HDD password and suggest the length of password greater than one character. This item can be displayed when any security mode of HDD is not Lock. ARCHMI-932P User Manual... - Page 75 Storage Password Setup Page Storage Password Setup Page This option allows you to set up storage password. ST3160318AS (Device Name) This option allows you to go to Storage Password List Help. ARCHMI-932P User Manual...
- Page 76 When secutiry mode is Lock, input master HDD password to unlock HDD. Master HDD password is valid when HDD password is set. Only pressing “Enter” would clear HDD password and make HDD secutiry disable when set new master HDD password. ARCHMI-932P User Manual...
-
Page 77: Boot
If you select “Legacy Boot”, “PXE Boot to LAN” and “USB Boot” will show up. PXE Boot Capability Disabled : Suppoort Network Stack UEFI PXE : IPv4/IPv6 Legacy : Legacy PXE OPROM only USB Boot Enable or disable the booting for USB boot devices. ARCHMI-932P User Manual... - Page 78 Based on the boot normal priority, it determines the EFI device first or the legacy device first. Advance All boot devices follow the user’s selection sequence. Boot Type Order Select the priority of boot type: Normal Boot or Advance Boot. ARCHMI-932P User Manual...
- Page 79 Based on the boot normal priority, it determines the EFI device first or the legacy device first. Advance All boot devices follow the user’s selection sequence. Use + and - keys to arrange the priority of the listed boot devices. ARCHMI-932P User Manual...
-
Page 80: Exit
The first device in the order list has the first boot priority. For example, to boot from a floppy drive instead of a hard drive, place the floppy drive ahead of the hard drive in priority. 3.5 Exit ARCHMI-932P User Manual... -
Page 81: Updating The Bios
2. The BIOS (SPI ROM) on this system board must be the original equipment from the factory and cannot be used to replace one which has been utilized on other system board. ARCHMI-932P User Manual... - Page 82 When the BIOS IC needs to be replaced, you have to populate it properly onto the system board after the EEPROM programmer has been burned and follow the technical person's instructions to confirm that the MAC address should be burned or not. For Windows 10 ARCHMI-932P User Manual...
- Page 83 For Windows 8.1 ARCHMI-932P User Manual...
- Page 84 ARCHMI-932P User Manual...
-
Page 85: Chapter 4 Installation Of Drivers
Framework driver, Intel Management Engine driver, and IO driver Installation instructions are given below. Important Note: After installing your Windows operating system, you must install first the Intel Chipset Software Installation Utility before proceeding with the installation of drivers. ARCHMI-932P User Manual... -
Page 86: Intel(R) Atomtm Soc Chipset
4.1 Intel(R) AtomTM SoC Chipset To install the Intel chipset driver, please follow the steps below. Step 1. Select Intel(R) AtomTM SoC Chipset from the list Step 2. Click Next to setup program. ARCHMI-932P User Manual... - Page 87 Step 3. Read the license agreement. Click Yes to continue. Step 4. Click Next to continue. ARCHMI-932P User Manual...
-
Page 88: Intel(R) Vga Chipset
Step 5. Click Finish to complete the setup process. 4.2 Intel(R) VGA Chipset To install the VGA drivers, follow the steps below to proceed with the installation. Step 1.Select Intel(R) VGA Chipset from the list. ARCHMI-932P User Manual... - Page 89 Step 2. Click Automatically run WinSAT and enable the Windows Aero desktop theme(if supported). Click Next. Step 3. Read license agreement. Click Yes to continue. ARCHMI-932P User Manual...
- Page 90 Step 4. Click Next to continue. Step 5. Click Next to continue. ARCHMI-932P User Manual...
-
Page 91: Intel(R) Lan Driver
Step 6. Select Yes, I want to restart this computer now. Then click Finish to complete the installation. 4.3 Intel(R) LAN Driver To install the Intel(R) I210AT&I219LM LAN driver, please follow the steps below. Step 1. Select Intel(R) I210AT&I219LM LAN Driver from the list. ARCHMI-932P User Manual... - Page 92 Step 2. . Click Next. Step 3. Select I accept the terms in the license agreement. Then Click Next. ARCHMI-932P User Manual...
- Page 93 Step 4. Click Next to continue. Step 5. Click Install to begin the installation. ARCHMI-932P User Manual...
-
Page 94: Realtek Audio Driver
Step 6. Click Finish to complete the installation. 4.4 Realtek Audio Driver To install the Realtek ALC888S HD Audio Driver, please follow the steps below. Step 1. Select Realtek ALC888S HD Audio Driver from the list ARCHMI-932P User Manual... - Page 95 Step 2. Click Next to continue. Step 3. Select Yes, I want to restart my computer now. Click Finish to complete the installation. ARCHMI-932P User Manual...
-
Page 96: Usb 3.0 Driver
4.5 USB 3.0 Driver To install the USB 3.0 Driver, please follow the steps below. Step 1. Select USB 3.0 Driver from the list Step 2. Click Next to continue. ARCHMI-932P User Manual... - Page 97 Step 3. Read the license agreement. Then click Yes to continue. Step 4. Click Next to continue. ARCHMI-932P User Manual...
- Page 98 Step 5. Click Next to continue. Step 6. Select Yes, I want to restart this computer now. Then click Finish to complete the installation. ARCHMI-932P User Manual...
-
Page 99: Framework 4.5.2
4.6 Framework 4.5.2 Step 1. Select Framework_4.5.2 from the list Step 2. Setup is now extracting files. ARCHMI-932P User Manual... - Page 100 Step 3. Read the License Agreement. Select I have read and accept the license terms and then click Install to begin the installation. Step 4. Setup is now installing the driver. ARCHMI-932P User Manual...
-
Page 101: Intel Management Engine Driver
Step 5. Click Finish to complete the installation. 4.7 Intel Management Engine Driver To install the Intel Management Engine Driver, please follow the steps below. Step 1. Select Intel Management Engine Drivers from the list ARCHMI-932P User Manual... - Page 102 Step 2. Setup is ready to install the driver. Click Next to continue. Step 3. Read the license agreement then select I accept the terms in the License Agreement. Click Next to continue. ARCHMI-932P User Manual...
- Page 103 Step 4. Click Next to continue. Step 5. Please wait while the product is being installed. ARCHMI-932P User Manual...
-
Page 104: Io Driver (For Windows 8 And Windows 10)
Step 6. Click Finish to complete the installation. 4.8 IO Driver (For Windows 8 and Windows 10) To install the IO Driver, please follow the steps below. Step 1. Select IO Driver (For Windows 8&10) from the list ARCHMI-932P User Manual... - Page 105 Step 2. Setup is ready to install the driver. Click Next to continue. Step 3. Read the license agreement carefully. Select I accept the terms in the License Agreement then click Next to continue. ARCHMI-932P User Manual...
- Page 106 Step 4. Read the file information then click Next to continue. Step 5. Setup is ready to install the driver. Click Next to continue. ARCHMI-932P User Manual...
- Page 107 Step 6. Setup is now installing the driver. Step 7. Click Finish to complete the installation. ARCHMI-932P User Manual...
-
Page 108: Chapter 5 Touch Screen Installation
8.1/10 system installed and running on your computer. You must also have one of the following PenMount 6000 series controller or control boards installed: PM6500, PM6300. 5.1.1 Installing Software Step 1. Insert the product CD, the screen below would appear. Select Touch Panel Driver from the list. ARCHMI-932P User Manual... - Page 109 Step 2. Click Next to continue. Step 3. Select I accept the terms of the license agreement. Click Next to continue. ARCHMI-932P User Manual...
- Page 110 Step.4. Click Next to continue. Step 5. Click Install RS232 interface driver. Then click Next to continue. ARCHMI-932P User Manual...
- Page 111 Step 6. Select None. Click Next. Step 7. Click OK to continue. Step 8. Select Support Muti-Monitor System. Click Next. ARCHMI-932P User Manual...
- Page 112 Step 9. Go to C:\Program Files\eGalaxTouch. Click Next to continue. Step 10. Click Next to continue. ARCHMI-932P User Manual...
- Page 113 Step 11. Select Create a eGalaxTouch Utility shortcut on desktop. Click Next. Step 12. Wait for installation. Step 13. Click Yes to do 4 point calibration. ARCHMI-932P User Manual...
-
Page 114: Software Functions
5.2 Software Functions General In this window, you can see there is USB Controller. Click OK to continue. Monitor Mapping to adjust touch panel to search for device ARCHMI-932P User Manual... - Page 115 Beep Beep On Touch Beep On Release Beep From System Beep Beep From Sound Card Linearization Style 9 points 25 points Double Click Time Shorter Longer Double Click Area Smaller Bigger Normal mode Simulate the mouse mode ARCHMI-932P User Manual...
- Page 116 Option Function Enable Constant Touch Enable Auto Right Click Enable Touch Enable Cursor Stabilization Constant Touch Area Auto Right Click Time ARCHMI-932P User Manual...
- Page 117 Do 4 points alignment to match display. Clear and Calibrate Clear linearization parameter and do 4 points alignment. Linearization Do 9 points linearization for better touchscreen linearity. Draw Test Do draw test to verify the touch accuracy. ARCHMI-932P User Manual...
- Page 118 Display In this window, it shows the mode of display. Enable Multiple Monitors. Map to main display if system has only one display monitor Full Screen Lower Screen Left Screen Upper Screen Right Screen ARCHMI-932P User Manual...
- Page 119 Other Other mode of display. Quarter1~4 and Customized area. Active Area Drag active area to enable Active Area Function. ARCHMI-932P User Manual...
- Page 120 Hardware Saturn Hardware Configuration ARCHMI-932P User Manual...
- Page 121 About To display information about eGalaxTouch and its version. ARCHMI-932P User Manual...
Need help?
Do you have a question about the ARCHMI-932P and is the answer not in the manual?
Questions and answers