
Subscribe to Our Youtube Channel
Related Manuals for ProSoft Technology MVI69E-GSC


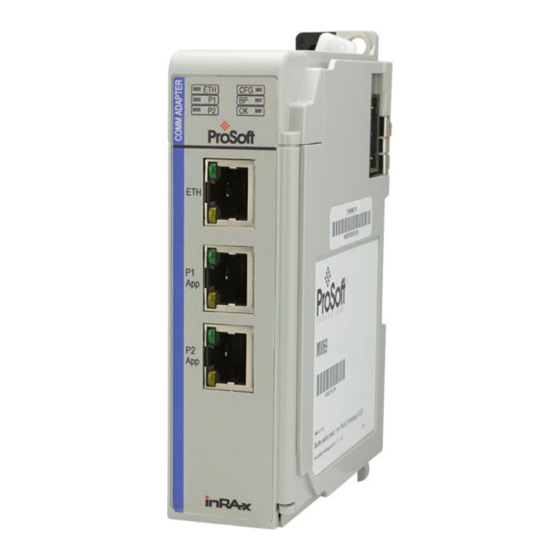
Summary of Contents for ProSoft Technology MVI69E-GSC
- Page 1 MVI69E-GSC CompactLogix™ or MicroLogix™ Platform Generic ASCII Serial Communication Module June 16, 2020 USER MANUAL...
-
Page 2: Your Feedback Please
Neither ProSoft Technology nor any of its affiliates or subsidiaries shall be responsible or liable for misuse of the information contained herein. Information in this document including illustrations, specifications and dimensions may contain technical inaccuracies or typographical errors. -
Page 3: Important Safety Information
MVI69E-GSC ♦ CompactLogix™ or MicroLogix™ Platform Contents Generic ASCII Serial Communication Module User Manual Important Safety Information North America Warnings This Equipment is Suitable For Use in Class I, Division 2, Groups A, B, C, D or Non-Hazardous Locations Only. -
Page 4: Table Of Contents
Importing the Optional AOI ..................28 Setting up the Optional AOI ................... 30 Synchronizing the IP Settings from the MVI69E-GSC to the Processor ....32 Synchronizing the IP Settings from the Processor to the MVI69E-GSC ....33 Reading the Date/Time from the MVI69E-GSC to the Processor ......34 Writing the Date/Time from the Processor to the MVI69E-GSC ...... - Page 5 MVI69E-GSC ♦ CompactLogix™ or MicroLogix™ Platform Contents Generic ASCII Serial Communication Module User Manual 5.3.1 GSC.DATA ......................51 5.3.2 GSC.STATUS ......................52 5.3.3 GSC.CONTROL ..................... 52 Transmitting ASCII Data Sending ASCII Strings from the Processor to a Serial Device....... 53 Receiving ASCII Strings from a Serial Device to the Processor ......
-
Page 6: Start Here
10 or higher), with compatible power supply and one free slot in the rack, for the MVI69E-GSC module. Important: The MVI69E-GSC module has a power supply distance rating of 4 (L43 and L45 installations on first 2 slots of 1769 bus). It consumes 500 mA at 5 VDC. -
Page 7: Package Contents
MVI69E-GSC ♦ CompactLogix™ or MicroLogix™ Platform User Manual Package Contents The following components are included with your MVI69E-GSC module, and are all required for installation and configuration. Important: Before beginning the installation, please verify that all of the following items are present. - Page 8 The module is shipped with the Setup jumper OFF. If an update of the firmware is needed, apply the Setup jumper to both pins. The following illustration shows the MVI69E-GSC jumper configuration, with the Setup Jumper OFF. Page 8 of 87...
-
Page 9: Install The Module In The Rack
Refer to the documentation for each device to be connected to verify that suitable safety procedures are in place before installing or servicing the device. After you verify the jumper placements, insert the MVI69E-GSC into the rack. Use the same technique recommended by Rockwell Automation to remove and install CompactLogix or MicroLogix 1500-LRP modules. - Page 10 MVI69E-GSC ♦ CompactLogix™ or MicroLogix™ Platform User Manual Push the module’s bus lever back slightly to clear the positioning tab and move it firmly to the left until it clicks. Ensure that it is locked firmly in place. Close all DIN-rail latches.
- Page 11 MVI69E-GSC ♦ CompactLogix™ or MicroLogix™ Platform User Manual Press the DIN-rail mounting area of the controller against the DIN-rail. The latches will momentarily open and lock into place. ProSoft Technology, Inc. Page 11 of 87...
-
Page 12: Configuring The Module In Rslogix
Create a new project in Studio 5000. Add the module to the Studio 5000 project. There are two ways to do this: You can use the Add-On Profile from ProSoft Technology. This is the preferred way, but requires RSLogix version 15 or later. -
Page 13: Creating A Module In The Project Using An Add-On Profile
MVI69E-GSC ♦ CompactLogix™ or MicroLogix™ Platform User Manual 2.1.1 Creating a Module in the Project Using an Add-On Profile Installing an Add-On Profile Download the AOP file (MVI69x_RevX.X_AOP.zip) from the product webpage (www.prosoft- technology.com) onto your local hard drive and then extract the files from the zip archive. - Page 14 MVI69E-GSC ♦ CompactLogix™ or MicroLogix™ Platform User Manual Click F when complete. The AOP is now installed in Studio 5000. You do not need INISH to reboot the PC. Using an Add-On Profile In Studio 5000, expand the I/O C folder in the Project tree.
- Page 15 MVI69E-GSC ♦ CompactLogix™ or MicroLogix™ Platform User Manual This opens the Select Module Type dialog box. In the Module Type Vendor Filters area, uncheck all boxes except the P box. Then select the MVI69 option ECHNOLOGY and click the C button.
- Page 16 This value should not be set to less than 1 millisecond. Values between 1 and 10 milliseconds should work with most applications. Click OK. The MVI69E-GSC is now visible in the I/O Configuration section. Page 16 of 87...
-
Page 17: Creating A Module In The Project Using A Generic 1769 Module Profile
MVI69E-GSC ♦ CompactLogix™ or MicroLogix™ Platform User Manual 2.1.2 Creating a Module in the Project Using a Generic 1769 Module Profile This procedure is not required if you installed the ProSoft Technology Add-On Profile for this module. Expand the I/O C folder in the Project tree. - Page 18 MVI69E-GSC ♦ CompactLogix™ or MicroLogix™ Platform User Manual Set the Module Properties values as follows: Value Parameter Enter a module identification string. Example: MVI69EGSC Name Enter a description for the module. Example: ProSoft Description communication module for Serial Modbus communications.
-
Page 19: Importing The Add-On Instruction
Note: This section only applies if you are using Studio 5000 version 16 or higher. If you are configuring the MVI69E-GSC module with an earlier version of Studio 5000, please refer to Adding the Module to an Existing CompactLogix Project (page 27). - Page 20 MVI69E-GSC ♦ CompactLogix™ or MicroLogix™ Platform User Manual Select the MVI69EGSC_AddOn_Rung_v1_x.L5X file. The Add-On Instruction file is located at www.prosoft-technology.com. Click on the I button. MPORT The following window displays the controller tags to be created during the import procedure. Make sure the slot number reference (Local:x) is correct.
- Page 21 MVI69E-GSC ♦ CompactLogix™ or MicroLogix™ Platform User Manual When the import is complete, the new rung with the Add-On instruction is visible as shown in the following illustration. The procedure imports new user defined data types, data objects and the Add-On instruction.
-
Page 22: Adding Multiple Modules In The Rack (Optional)
User Manual 2.2.2 Adding Multiple Modules in the Rack (Optional) Important: If your application requires more than one MVI69E-GSC module in the same project, follow the steps below. In the I/O Configuration folder, right-click the mouse button to open a shortcut menu, and... - Page 23 MVI69E-GSC ♦ CompactLogix™ or MicroLogix™ Platform User Manual In the New Module dialog, enter the Name, Description, and Slot options for your application, then click on the Connection tab. Select the Request Packet Interval value for scanning the I/O on the module. This value represents the minimum frequency the module will handle scheduled events.
- Page 24 MVI69E-GSC ♦ CompactLogix™ or MicroLogix™ Platform User Manual Click OK to confirm. The new module is now visible in the I/O Configuration: Expand the Tasks folder, and then expand the MainTask folder. On the MainProgram folder, right-click the mouse button to open a shortcut menu. On...
- Page 25 MVI69E-GSC ♦ CompactLogix™ or MicroLogix™ Platform User Manual 10 Select the MVI69EGSC_AddOn_Rung.L5X file, and click I MPORT 11 This opens the I dialog box. Click the T tab to show the MPORT ONFIGURATION controller tags in the AOI. You must edit the F...
- Page 26 MVI69E-GSC ♦ CompactLogix™ or MicroLogix™ Platform User Manual 13 Click OK to confirm. 14 The setup procedure is now complete. Save and download the project to the processor. Page 26 of 87 ProSoft Technology, Inc.
-
Page 27: Downloading The Sample Program To The Processor
MVI69E-GSC ♦ CompactLogix™ or MicroLogix™ Platform User Manual Downloading the Sample Program to the Processor Note: The key switch on the front of the CompactLogix processor must be in the REM or PROG position. If you are not already online to the processor, open the C... -
Page 28: Optional Aoi
MVI69E-GSC ♦ CompactLogix™ or MicroLogix™ Platform User Manual Optional AOI The Optional AOI supports the following optional features: Read/Write IP Address Read/Write Date Time Using controller tags, the Optional AOI allows you to request and set the module’s IP address, date, and time. - Page 29 MVI69E-GSC ♦ CompactLogix™ or MicroLogix™ Platform User Manual At the Import Configuration window, select the Operation parameter to C . Then REATE click OK. The imported AOI rung is now in place. ProSoft Technology, Inc. Page 29 of 87...
-
Page 30: Setting Up The Optional Aoi
In the Message Configuration dialog, under the Communication tab, select the B ROWSE button. Select the MVI69E-GSC module configured at the 1769 Bus and click at OK. Page 30 of 87 ProSoft Technology, Inc. - Page 31 MVI69E-GSC ♦ CompactLogix™ or MicroLogix™ Platform User Manual The module name is displayed at the path field. Select OK to confirm the route configuration. Repeat the same procedure to set the route for the remaining messages: WriteEthernetMSG ReadClockMSG ...
-
Page 32: Synchronizing The Ip Settings From The Mvi69E-Gsc To The Processor
User Manual Synchronizing the IP Settings from the MVI69E-GSC to the Processor This section covers the process to read the IP settings from the MVI69E-GSC, and implement them in the processor. To trigger the IP settings read operation, set the MVI69EGSCEthernet.Read bit to ‘1’. -
Page 33: Synchronizing The Ip Settings From The Processor To The Mvi69E-Gsc
MVI69E-GSC ♦ CompactLogix™ or MicroLogix™ Platform User Manual Synchronizing the IP Settings from the Processor to the MVI69E-GSC This section covers the process to send the IP settings from the processor to the MVI69E- GSC. Populate the IP settings in the MVI69EGSCEthernet.Config tag: Set the MVI69EGSCEthernet.Write bit to ‘1’... -
Page 34: Reading The Date/Time From The Mvi69E-Gsc To The Processor
Toggle the MVI69EGSCClock.Read bit to ‘1’ to toggle the date/time read operation. The MVI69EGSCClock.Read bit will be automatically reset once the operation is concluded. The date and time read from the MVI69E-GSC is stored at the MVI69EGSCClock.Config tag. Page 34 of 87... -
Page 35: Writing The Date/Time From The Processor To The Mvi69E-Gsc
MVI69E-GSC ♦ CompactLogix™ or MicroLogix™ Platform User Manual Writing the Date/Time from the Processor to the MVI69E-GSC Populate date and time values in the MVI69EGSCClock.Config tag. Toggle the MVI69EGSCClock.Write bit to ‘1’ to trigger the write date/time operation. The MVI69EGSCClock.Write tag will be automatically reset once the write date/time operation is concluded. -
Page 36: Using Prosoft Configuration Builder
MVI69E-GSC ♦ CompactLogix™ or MicroLogix™ Platform User Manual Using ProSoft Configuration Builder ProSoft Configuration Builder (PCB) provides a quick and easy way to manage module configuration files customized to meet your application needs. PCB is not only a powerful solution for new configuration files, but also allows you to import information from previously installed (known working) configurations to new projects. -
Page 37: Adding The Mvi69E-Gsc Module To The Project
MVI69E-GSC ♦ CompactLogix™ or MicroLogix™ Platform User Manual 4.2.1 Adding the MVI69E-GSC module to the project. Right click D (which you can rename) and choose A EFAULT OCATION ODULE Right-click N and choose C ODULE HOOSE ODULE In the Choose Module Type dialog box, select MVI69E in the P... -
Page 38: Renaming Pcb Objects
MVI69E-GSC ♦ CompactLogix™ or MicroLogix™ Platform User Manual Renaming PCB Objects Notice that the contents of the information pane and the configuration pane changed when you added the module to the project. At this time, you may wish to rename the Default Project and Default Location folders in the tree view. -
Page 39: Module Configuration Parameters
MVI69E-GSC ♦ CompactLogix™ or MicroLogix™ Platform User Manual Module Configuration Parameters This section describes the MVI69E-GSC parameters configured in ProSoft Configuration Builder. 4.4.1 Module Parameters Range Description [Section]/Item Module section header [MODULE] 0 to 65535 This parameter specifies the number of successive transfer... -
Page 40: Gsc Port X Parameters
MVI69E-GSC ♦ CompactLogix™ or MicroLogix™ Platform User Manual 4.4.2 GSC Port x Parameters The GSC Port 1 and 2, respectively, have identical port parameters. Description Range Parameter MVI69E-GSC port definition header [GSC Port 1 or 2] This parameter defines if this port will be utilized. - Page 41 MVI69E-GSC ♦ CompactLogix™ or MicroLogix™ Platform User Manual Description Range Parameter None, Even, This is the Parity code to be used for the port. Parity Odd, Mark or Space 5 to 8 This parameter sets the number of data bits for each Data Bits word used by the protocol.
-
Page 42: Mvi69E-Gsc Ip Address Configuration
MVI69E-GSC ♦ CompactLogix™ or MicroLogix™ Platform User Manual 4.4.3 MVI69E-GSC IP Address Configuration This section defines the permanent IP address, Subnet Mask, and Gateway of the module. In the ProSoft Configuration Builder tree view, double-click the E 1 icon. THERNET... -
Page 43: Downloading The Configuration File To The Module
MVI69E-GSC ♦ CompactLogix™ or MicroLogix™ Platform User Manual Downloading the Configuration File to the Module In the ProSoft Configuration Builder tree view, right-click the module icon and choose OWNLOAD FROM EVICE In the Download Files from PC to Module dialog box, select B... - Page 44 MVI69E-GSC ♦ CompactLogix™ or MicroLogix™ Platform User Manual In the ProSoft Discovery Service dialog box, select the MVI69E-GSC module: The IP address field is populated with the module’s IP address. Click DOWNLOAD to confirm the operation: Once concluded, the status field shows ‘Module Running’. Click OK.
-
Page 45: Uploading The Configuration File From The Module
MVI69E-GSC ♦ CompactLogix™ or MicroLogix™ Platform User Manual Uploading the Configuration File from the Module In the ProSoft Configuration Builder tree view, right-click the MVI69E-GSC icon and choose U PLOAD FROM EVICE TO Click the B ) button. ROWSE EVICE ProSoft Technology, Inc. - Page 46 MVI69E-GSC ♦ CompactLogix™ or MicroLogix™ Platform User Manual In the ProSoft Discovery Service dialog box, select the MVI69E-GSC module. The Ethernet field will be automatically populated with the module’s IP address. Once the file is uploaded, the following message is displayed: PCB now displays the uploaded configuration file.
-
Page 47: Converting A Legacy Mvi69-Gsc To An Mvi69E-Gsc
In PCB, right-click on the module and select C MVI69E-GSC. HANGE ODULE YPE TO The legacy project will be converted to the MVI69E-GSC project with the same module settings: The new configuration file can now be downloaded to the MVI69E-GSC. ProSoft Technology, Inc. Page 47 of 87... -
Page 48: Using Controller Tags
MVI69E-GSC ♦ CompactLogix™ or MicroLogix™ Platform User Manual Using Controller Tags The MVI69E-GSC data is stored in controller tags in the ladder logic. Controller tags are used to manage the communications between the MVI69E-GSC module and the CompactLogix or MicroLogix 1500-LRP processor: ... -
Page 49: Mvi69E-Gsc Controller Tags
MVI69E-GSC ♦ CompactLogix™ or MicroLogix™ Platform User Manual MVI69E-GSC Controller Tags The main controller tag structure, GSC, is broken down into four lower-level controller tag structures. The four lower-level controller tag structures contain other controller tags and controller tag structures. Click the [+] sign next to any controller tag structure to expand it and view the next level in the structure. -
Page 50: User-Defined Data Types (Udts)
Another advantage of defining a UDT is that you may reuse it in other controller tag structures that use the same data types. The Add-On Instruction for the MVI69E-GSC module has pre-defined UDTs. You can find them in the User-Defined subfolder, located in the Data Types folder in the Controller Organizer pane of the main RSLogix window. -
Page 51: Gsc Controller Tag Overview
MVI69E-GSC ♦ CompactLogix™ or MicroLogix™ Platform User Manual GSC Controller Tag Overview This section details the GSC controller tags. Description Tag Name Port 1 and Port 2 tags for data transfer GSC.DATA Status information GSC.STATUS Tasks that the processor may request from the module. -
Page 52: Gsc.status
The GSC.CONTROL tag contains all control tasks that may be requested by the processor to the module. The MVI69E-GSC supports two control operations: Warmboot and Coldboot. To perform a module reboot (Warmboot or Coldboot), toggle the associated controller tag to ‘1’. -
Page 53: Transmitting Ascii Data
MVI69E-GSC ♦ CompactLogix™ or MicroLogix™ Platform User Manual Transmitting ASCII Data Sending ASCII Strings from the Processor to a Serial Device In order to send data from the processor to a remote serial device, you must first copy the source data to the GSC.DATA.PortX.WriteString array tag: In the GSC.DATA.PortX.WriteLength tag, enter the number of characters to send. -
Page 54: Receiving Ascii Strings From A Serial Device To The Processor
User Manual Receiving ASCII Strings from a Serial Device to the Processor The MVI69E-GSC continuously buffers the data received from remote serial devices until the criteria to flush the data to the processor is met. The criteria to interrupt data buffering... -
Page 55: Diagnostics And Troubleshooting
10 seconds, the program has probably halted. If the BP ACT and OK LEDs blink at a rate of every one-second, this indicates a serious problem with the module. Call ProSoft Technology support to arrange for repairs. ProSoft Technology, Inc. -
Page 56: Ethernet Led Indicators
Verify correct configuration data is being transferred to the module from the CompactLogix or MicroLogix controller. If the module's OK LED does not turn green, verify that the module is inserted completely into the rack. If this does not resolve the problem, contact ProSoft Technology Technical Support. Page 56 of 87... -
Page 57: Troubleshooting
MVI69E-GSC ♦ CompactLogix™ or MicroLogix™ Platform User Manual Troubleshooting Use the following troubleshooting steps if you encounter problems when the module is powered up. If these steps do not resolve your problem, please contact ProSoft Technology Technical Support. Processor Errors Steps to take... -
Page 58: Configuring A Temporary Ip Address
To use PCB, arrange the Ethernet connection so that there is no router/ layer 3 switch between the computer and the module, OR reconfigure the router/ layer 3 switch to allow routing of the UDP broadcast messages. In the tree view in ProSoft Configuration Builder (PCB), select the MVI69E-GSC module. - Page 59 MVI69E-GSC ♦ CompactLogix™ or MicroLogix™ Platform User Manual In the Connection Setup dialog box, click B ) to start ProSoft Discovery ROWSE EVICE Service. Right-click the module and choose A SSIGN EMPORARY The module’s default IP address is usually 192.168.0.250. Choose an unused IP within your subnet, and then click OK.
-
Page 60: Diagnostics Menu
MVI69E-GSC ♦ CompactLogix™ or MicroLogix™ Platform User Manual Diagnostics Menu In the tree view in ProSoft Configuration Builder, right-click the MVI69E-GSC module and then choose D IAGNOSTICS After the Diagnostics window opens, click the S button to browse for ET UP ONNECTION the module’s IP address. - Page 61 MVI69E-GSC ♦ CompactLogix™ or MicroLogix™ Platform User Manual In the Ethernet field of the Connection Setup dialog box, enter the current IP address, whether it is temporary or permanent. Click T to verify that the module ONNECTION is accessible with the current settings.
-
Page 62: Diagnostics Menu Navigation
MVI69E-GSC ♦ CompactLogix™ or MicroLogix™ Platform User Manual 7.6.1 Diagnostics Menu Navigation In the Diagnostics window in ProSoft Configuration Builder, the Diagnostics menu is available through the Ethernet configuration port. The menu is arranged as a tree structure. 7.6.2 Monitoring Network Configuration Information In the Diagnostics window in Prosoft Configuration Builder, click NETWORK and then click to view the Ethernet network configuration information. -
Page 63: Monitoring Backplane Information
MVI69E-GSC ♦ CompactLogix™ or MicroLogix™ Platform User Manual 7.6.3 Monitoring Backplane Information In the Diagnostics window in ProSoft Configuration Builder, click BACKPLANE to view the backplane information. This menu has two submenus: ONFIGURATION TATUS ProSoft Technology, Inc. Page 63 of 87... -
Page 64: Port X Module Information
MVI69E-GSC ♦ CompactLogix™ or MicroLogix™ Platform User Manual 7.6.4 Port x Module Information The GSC Port 1 and GSC Port 2 menus include the following submenus: Configuration Status (General status for the port) Page 64 of 87 ProSoft Technology, Inc. -
Page 65: Data Analyzer
MVI69E-GSC ♦ CompactLogix™ or MicroLogix™ Platform User Manual 7.6.5 Data Analyzer The Data Analyzer feature allows you to view the serial communications traffic as it is received and sent from the selected MVI69E-GSC communications port. Click on the S icon. ETUP NALYZER Select the Time Tick setting, the port number, and the data format. - Page 66 MVI69E-GSC ♦ CompactLogix™ or MicroLogix™ Platform User Manual Each byte will be enclosed with < > for data transferred out of the port, and [ ] for data received on the port. Click on the same D button to stop the data analyzer operation: NALYZER You may also log the data analyzer capture to a text file.
- Page 67 MVI69E-GSC ♦ CompactLogix™ or MicroLogix™ Platform User Manual Click on the same L button to stop the data capture logging: Click on the V button to view the log file: 10 The log file opens in Notepad 11 To clear the log file before a new logging session starts, click the C LEAR button.
-
Page 68: Connecting To The Module's Webpage
MVI69E-GSC ♦ CompactLogix™ or MicroLogix™ Platform User Manual Connecting to the Module’s Webpage The module’s internal web server provides access to module version and status information, as well as the ability to set the date and time, reboot the module, and download firmware upgrade to the module. -
Page 69: Reference
MVI69E-GSC ♦ CompactLogix™ or MicroLogix™ Platform User Manual Reference Product Specifications ® ® The MVI69E-GSC allows Rockwell Automation CompactLogix or MicroLogix 1500-LRP I/O compatible processors to interface easily with other ASCII protocol compatible devices. The module acts as an input/output communications module between the ASCII network and the CompactLogix or MicroLogix 1500-LRP backplane. -
Page 70: Functional Specifications
MVI69E-GSC ♦ CompactLogix™ or MicroLogix™ Platform User Manual 8.1.2 Functional Specifications ASCII Communication ports 1 & 2 (PRT1, PRT2) Both ports are capable of transmitting and/or receiving ASCII character strings. Each port is individually configurable: Termination types Stream mode... -
Page 71: Functional Overview
The following topics describe several concepts that are important for understanding the operation of the MVI69E-GSC module. This is the order of operations on power-up: The module begins the following logical functions:... - Page 72 User Manual The following illustration shows the data transfer method used to move data between the CompactLogix processor, the MVI69E-GSC module, and the network. Normal Data Transfer Normal data transfer includes the paging of the user data to and from the module’s ports and bringing in status data.
- Page 73 MVI69E-GSC ♦ CompactLogix™ or MicroLogix™ Platform User Manual The Block Sequence Number is that received on the last read block transfer through the input image on the module. The ladder logic should copy this value from byte 0 of the input image to byte 0 of output image in the ladder logic.
- Page 74 MVI69E-GSC ♦ CompactLogix™ or MicroLogix™ Platform User Manual Word Offset Description Block Sequence Number (Bumped each scan by module) (0 to 127) Number of characters (0 to 50) in Port 1 receive block (3 to 27). If the Port 1 string received on the port is larger than 50 characters, multiple blocks will be transferred.
-
Page 75: Special Function Blocks
MVI69E-GSC ♦ CompactLogix™ or MicroLogix™ Platform User Manual The two byte values at bytes 1 (port 1 transmit count) and 29 (port 2 transmit count) inform the processor of the number of ASCII characters transferred in the last write block to the respective port transmit buffers. -
Page 76: Ethernet Port Connection
MVI69E-GSC ♦ CompactLogix™ or MicroLogix™ Platform User Manual Ethernet Port Connection 8.3.1 Ethernet Cable Specifications The recommended cable is Category 5 or better. A Category 5 cable has four twisted pairs of wires, which are color-coded and cannot be swapped. The module uses only two of the four pairs. -
Page 77: Application Port Cable Connection
MVI69E-GSC ♦ CompactLogix™ or MicroLogix™ Platform User Manual Ethernet Performance Ethernet performance in the MVI69E-GSC module can be affected in the following way: Accessing the web interface (refreshing the page, downloading files, and so on) may affect performance ... - Page 78 MVI69E-GSC ♦ CompactLogix™ or MicroLogix™ Platform User Manual RS-232: Modem Connection (Hardware Handshaking Required) This type of connection is required between the module and a modem or other communication device. The "Use CTS Line" parameter for the port configuration should be set to 'Y' for most modem applications.
- Page 79 MVI69E-GSC ♦ CompactLogix™ or MicroLogix™ Platform User Manual RS-232: Null Modem Connection (No Hardware Handshaking) This type of connection can be used to connect the module to a computer or field device communication port. Note: For most null modem connections where hardware handshaking is not required, the Use CTS Line parameter should be set to N and no jumper is required between Pins 7 (RTS) and 8 (CTS) on the connector.
-
Page 80: Rs-422 Wiring
MVI69E-GSC ♦ CompactLogix™ or MicroLogix™ Platform User Manual 8.4.2 RS-422 Wiring The RS-422 interface requires a single four or five wire cable. The Common connection is optional, depending on the RS-422 network devices used. The cable required for this interface is shown below: 8.4.3 RS-485 Wiring... -
Page 81: Db9 To Rj45 Adaptor (Cable 14)
MVI69E-GSC ♦ CompactLogix™ or MicroLogix™ Platform User Manual 8.4.4 DB9 to RJ45 Adaptor (Cable 14) ProSoft Technology, Inc. Page 81 of 87... -
Page 82: Status Data Definition
MVI69E-GSC ♦ CompactLogix™ or MicroLogix™ Platform User Manual Status Data Definition This section contains a description of the members present in the GSCStatus object. This data is transferred from the module to the processor as part of each read block. - Page 83 MVI69E-GSC ♦ CompactLogix™ or MicroLogix™ Platform User Manual Block Description Object in GSCInStat Offset Port 2 transmit state: Port2.TxState 0 = Waiting for Data to Send 1 = RTS On 2 = RTS Timeout 3 = Sending data 4 = Waiting for RTS Off...
- Page 84 MVI69E-GSC ♦ CompactLogix™ or MicroLogix™ Platform User Manual GSCErrorWord Definition Bit in Word Description Member Name Bit 0 The termination type configured for the port is not valid. Values Cfg_type between 0 and 15 are the only ones valid. The module will use type 0 (stream mode) for the port.
-
Page 85: Support, Service & Warranty
User Manual Support, Service & Warranty Contacting Technical Support ProSoft Technology, Inc. is committed to providing the most efficient and effective support possible. Before calling, please gather the following information to assist in expediting this process: Product Version Number System architecture... -
Page 86: Index
MVI69E-GSC ♦ CompactLogix™ or MicroLogix™ Platform Index Generic ASCII Serial Communication Module User Manual Hardware Specifications • 69 Index Important Safety Information • 3 Install the Module in the Rack • 9 Installing an Add-On Profile • 13 Installing ProSoft Configuration Builder Software • 36 Adding Multiple Modules (Optional) •... - Page 87 MVI69E-GSC ♦ CompactLogix™ or MicroLogix™ Platform Index Generic ASCII Serial Communication Module User Manual Troubleshooting • 57 Uploading the Configuration File from the Processor • User-Defined Data Types (UDTs) • 50 Using an Add-On Profile • 14 Using ProSoft Configuration Builder • 36 Using the Diagnostic Window in ProSoft Configuration Builder •...
Need help?
Do you have a question about the MVI69E-GSC and is the answer not in the manual?
Questions and answers