
Related Manuals for WIKA Wally Box III


Summary of Contents for WIKA Wally Box III
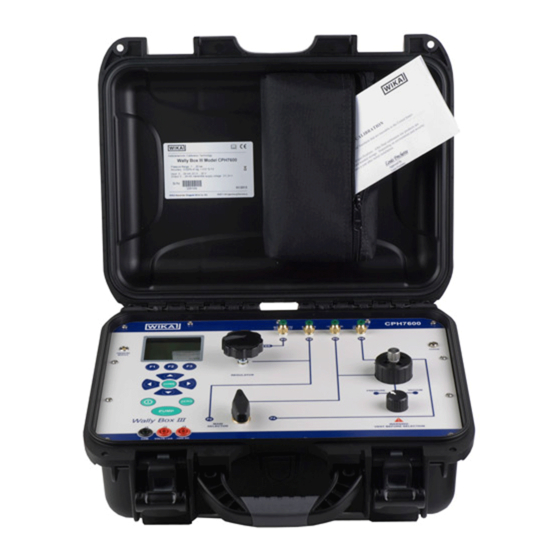
- Page 1 Operating instructions Betriebsanleitung Wally Box III model CPH7600 Wally Box III Typ CPH7600 Hand-Held pressure calibrator, Wally Box III, model CPH7600...
- Page 2 1 - 36 Betriebsanleitung Typ CPH7600 Seite 37 - 72 © 2012 WIKA Alexander Wiegand SE & Co. KG All rights reserved. / Alle Rechte vorbehalten. WIKA® is a registered trademark in various countries. WIKA® ist eine geschützte Marke in verschiedenen Ländern.
-
Page 3: Table Of Contents
6.10.2 Calibrating a pressure-to-current transmitter ..............31 6.10.3 %-Error function ......................... 32 6.11 MIN/MAX value capture ..................... 35 Maintenance, cleaning and recalibration ................36 Maintenance ........................36 Cleaning ..........................36 Recalibration ........................36 Faults ..........................37 WIKA Operating Instruction, Model CPH7600... - Page 4 Contents Dismounting, return and disposal ..................37 Dismounting ........................37 Return ..........................37 Disposal ..........................38 Accessories ........................38 Declarations of conformity can be found online at www.wika.com. WIKA Operating Instruction, Model CPH7600...
-
Page 5: General Information
Factory calibrations/NIST/optional17025 (A2LA accredited) calibrations are carried out in accordance with int ■ standards. Further information: ■ Internet address: www.wika.de / www.wika.com Relevant Data Sheet: CT 17.01 Application consultant: Tel.: (+49) 9372/132-9986 Fax: (+49) 9372/132-8767 E-Mail: testequip@wika.de WIKA Operating Instruction, Model CPH7600... -
Page 6: Safety
Non-observance can result in serious injury and/or damage to equipment. Further important safety instructions can be found in the individual chapters of these operating instructions. WIKA Operating Instruction, Model CPH7600... -
Page 7: Intended Use
Should the hand-held pressure calibrator be improperly handled or operated outside of its technical specifications, it has to be taken out of service immediately and inspected by an authorised WIKA service engineer. Handle electronic precision measuring instruments with the required care (protect from humidity, impacts, strong magnetic fields, static electricity and extreme temperatures, do not insert any objects into the instrument or its openings). -
Page 8: Special Hazards
In order to avoid any possible damage to the pressure calibrator or the test ■ equipment, use the correct leads, the correct function and the correct range for the measuring application. WIKA Operating Instruction, Model CPH7600... -
Page 9: Labelling / Safety Marks
Charging using a defective power supply unit (e.g. short circuit from the mains ■ voltage to the output voltage) can result in life-threatening voltages at the ProcessCalibrator! Only use the mains connector permitted by WIKA for the Process-Calibrator. ■ Only use a charger that is fully-functional or undamaged. ■... -
Page 10: Specifications
3 Specifications 3 Specifications WIKA Operating Instruction, Model CPH7600... - Page 11 3 Specifications WIKA Operating Instruction, Model CPH7600...
- Page 12 3 Specifications For further specifications see WIKA data sheet CT 17.01 and the order documentation. WIKA Operating Instruction, Model CPH7600...
-
Page 13: Design And Function
With the Model CPH7600, Wally Box III, WIKA offers a further development of the well-known Wally Box I and Wally Box II. The Wally Box III is a compact, portable pressure calibrator, which has been designed for mobile use as well as for stationary workshop and laboratory testing. A special feature of this test instrument is that it is fitted with two independently- operating pressure systems. -
Page 14: Cph7600 Hand-Held Pressure Calibrator, Pressure Connections
4 Design and Functions CPH7600 hand-held pressure calibrator, pressure connections (Figure: external pressure supply) (Figure: Pressure supply with integrated pump) (Figure: Measuring) WIKA Operating Instruction, Model CPH7600... -
Page 15: Cph7600 Hand-Held Pressure Calibrator, Keypad
Control of the current source/current simulation and adjustment of the pump limit and the %-error limit ZERO key Zeroing of the pressure measurement PUMP key Start-up of the pump operation ON/OFF key Turning the calibrator on and off WIKA Operating Instruction, Model CPH7600... -
Page 16: Menu-Structure
4 Design and Functions Menu-Structure see page 17 WIKA Operating Instruction, Model CPH7600... - Page 17 4 Design and Functions WIKA Operating Instruction, Model CPH7600...
-
Page 18: Transport, Packaging And Storage
2. Place the hand-held pressure calibrator, along with shock-absorbent material, in the packaging. 3. If stored for a prolonged period of time (more than 30 days), place a bag, containing a desiccant, inside the packaging. WIKA Operating Instruction, Model CPH7600... -
Page 19: Commissioning, Operation
The {active display} is displayed via the middle option in the menu in the main display. It is used to select which display on the screen, for example, the ZERO button will be used for. 6.1.1.3 Using the "LIGHT" option The backlight can be toggled on and off using this key. WIKA Operating Instruction, Model CPH7600... -
Page 20: Main Menu Functionality
P[1] [EXT] P[1] ST [EXT] ST mA-loop Volt WIKA Operating Instruction, Model CPH7600... -
Page 21: Using The Backlighting
If a 'sub-menu' has further subdivisions, from now on it will be referred to as {function} main menu. The "CONTRAST" sub-menu for example will be referred to as the "CONTRAST" main menu. Otherwise it will be referred to as the {function} menu. WIKA Operating Instruction, Model CPH7600... -
Page 22: Setting The Contrast
If "SAVE" or "RECALL" is selected, use the arrow keys to select the setting location. Then use the "SAVE" option to store the current setting into the selected location or the "RECALL" option to recall the setting stored in the selected location. The display menu will automatically return home. WIKA Operating Instruction, Model CPH7600... -
Page 23: Setting Auto Shut-Off Parameters
The calibrator makes approximately three readings per second. 6.4.7 Pump limit To prevent overpressuring of sensitive devices, a maximum pressure (pump limit) can be set. In this mode, use the arrow keys to set the maximum pressure. WIKA Operating Instruction, Model CPH7600... -
Page 24: Hart Tm -Resistor
"OL" is displayed if the pressure exceeds the nominal range by 110 %. Use the ZERO key to zero the pressure sensor once it is vented to atmospheric pressure. WIKA Operating Instruction, Model CPH7600... -
Page 25: Media Compatibility
Simply plug them into the interface and select [EXT] (external sensor). Since the interface between the calibrator and the module is digital, the accuracy and display resolution is dependent on the module. Figure 2: Pressure measurement with external pressure module WIKA Operating Instruction, Model CPH7600... -
Page 26: Measuring And Sourcing Current (4
% steps (4, 8, 12, 16, 20 mA) or 0 % (4 mA) and 100 % (20 mA). 5. While in the mA output mode, if the loop is broken or the value is exceeded, the calibrator will flash "OL". WIKA Operating Instruction, Model CPH7600... -
Page 27: Measuring Voltage
For voltage measurement, use the connections on the front of the calibrator. Select the VOLTS function on one of the displays. The calibrator can measure up to DC 30 V. The display will indicate "OL" when the measured voltage exceeds the nominal range of voltage measurement (30 V). WIKA Operating Instruction, Model CPH7600... -
Page 28: Performing A Pressure Switch Test
Then connect the pump to the calibrator and the pressure switch. 3. Open the vent button on the pump and zero the calibrator. Then close the vent after resetting the calibrator. WIKA Operating Instruction, Model CPH7600... - Page 29 6. Once the switch is open, "OPEN" will be displayed; bleed the pump slowly until the pressure switch closes. 7. In the top display it will now read "SW OPENED AT" and give you the pressure at which the switch opened. WIKA Operating Instruction, Model CPH7600...
-
Page 30: Calibrating Transmitters
2. Actively – the calibrator supplies a loop power of DC 24 V to the device under test to 3. power the device while reading the resulting 4 ... 20 mA signal. Passive Active WIKA Operating Instruction, Model CPH7600... -
Page 31: Calibrating A Pressure-To-Current Transmitter
2. Apply pressure with the pump. 3. Measure the current output of the transmitter. 4. Ensure that the read value is correct. If it isn't, the transmitter must be adjusted. Figure 5: CPH7600 with a pressure transmitter WIKA Operating Instruction, Model CPH7600... -
Page 32: Error Function
4 ... 20 mA output signal. The user can programme in a 0 ... 2 bar pressure span into the calibrator and the calibrator will then calculate and display the deviation or %-Error value from the 4 ... 20 mA output. This then eliminates manual calculations. WIKA Operating Instruction, Model CPH7600... - Page 33 (pressure connections). Once this is completed, select the "NEXT" option. 4. "LOOP POWER" can be toggled on or off; select "NEXT" when done. 5. Use "SELECT" to scroll through the "UNIT" options, and select "NEXT" to move on. WIKA Operating Instruction, Model CPH7600...
- Page 34 The "%-ERROR" mode will be ready to use. The lower and upper limit of the measuring range will be saved in non-volatile memory until they are changed again by the user for the internal sensors and the external pressure modules. WIKA Operating Instruction, Model CPH7600...
-
Page 35: Min/Max Value Capture
"MIN/MAX" registers. These readings are live so new MIN/MAX values will be recorded while in this mode. To clear the "MIN/MAX" registers, simply press the "CLEAR" key. These registers are also cleared on power-up or when the configuration is changed. WIKA Operating Instruction, Model CPH7600... -
Page 36: Maintenance, Cleaning And Recalibration
Repairs must only be carried out by the manufacturer. CAUTION! To avoid personal injury or damage to the calibrator, only use accessories supplied by WIKA and ensure that no water finds its way into the case. Cleaning CAUTION! Before cleaning, vent and switch off the hand-held pressure calibrator. -
Page 37: Faults
Only disconnect test- and calibration installations once the system has been depressurised! Return WARNING! Strictly observe when shipping the instrument: All instruments delivered to WIKA must be free from any kind of hazardous substances (acids, bases, solutions, etc.). When returning the instrument, use the original packaging or a suitable transport package. - Page 38 9 Dismounting, return and disposal / 10 Accessories Enclose the completed return form with the Hand-Held Pressure Indicator model CPH6300. The return form is available on the internet: www.wika.de / Service / Return Disposal Incorrect disposal can put the environment at risk.
- Page 39 6.10.1 Verwendung der mA-Messfunktion ..................67 6.10.2 Kalibrierung eines Druck/Strom-Transmitters ..............68 6.10.3 %-Fehler-Funktion ......................69 6.11 MIN-/MAX-Wert Speicherung .................... 72 Wartung und Reinigung ..................... 73 Wartung ..........................73 Reinigung .......................... 73 Rekalibrierung ........................73 Störungen .......................... 74 WIKA Betriebsanleitung, Typ CPH7600...
- Page 40 Inhalt Demontage, Rücksendung und Entsorgung ..............74 Demontage ........................74 Rücksendung ........................75 Entsorgung ........................75 Zubehör ..........................75 Konformitätserklärungen finden Sie online unter www.wika.de. WIKA Betriebsanleitung, Typ CPH6300...
-
Page 41: Allgemeines
Es gelten die allgemeinen Geschäftsbedingungen in den Verkaufsunterlagen. ■ Technische Änderungen vorbehalten. ■ Werkskalibrierungen/DKD/DAkkS-Kalibrierungen erfolgen nach internationalen Normen. ■ Weitere Informationen: ■ - Internet-Adresse: www.wika.de / www.wika.com - zugehöriges Datenblatt: CT 17.01 - Anwendungsberater: Tel.: (+49) 9372/132-9986 Fax: (+49) 9372/132-8767 E-Mail: testequip@wika.de WIKA Betriebsanleitung, Typ CPH7600... -
Page 42: Sicherheit
Vor Montage, Inbetriebnahme und Betrieb sicherstellen, dass der richtige Referenz- Drucksensor hinsichtlich Messbereichs, Ausführung und spezifischen Messbedingungen ausgewählt wurde. Bei Nichtbeachten können schwere Körperverletzungen und/oder Sachschäden auftreten. Weitere wichtige Sicherheitshinweise befinden sich in den einzelnen Kapiteln dieser Betriebsanleitung. WIKA Betriebsanleitung, Typ CPH7600... -
Page 43: Bestimmungsgemäße Verwendung
Handhabung oder ein Betreiben des Hand-Held Druckkalibrators außerhalb der technischen Spezifikationen macht die sofortige Stilllegung und Überprüfung durch einen autorisierten WIKA-Servicemitarbeiter erforderlich. Elektronische Präzisionsmessgeräte mit erforderlicher Sorgfalt behandeln (vor Nässe, Stößen, starken Magnetfeldern, statische Elektrizität und extremen Temperaturen schützen, keine Gegenstände in das Gerät bzw. -
Page 44: Besondere Gefahren
■ Verletzungen führen können, den Akku laden, sobald die Batterieanzeige erscheint. Um eine mögliche Schädigung des Hand-Held Druckkalibrators oder der ■ Testeinrichtung zu vermeiden richtige Leitungen, richtige Funktion und den richtigen Bereich für die Messanwendung verwenden. WIKA Betriebsanleitung, Typ CPH7600... -
Page 45: Beschilderung / Sicherheitskennzeichnungen
Beim Ladevorgang mit einem defekten Netzgerät (z. B. Kurzschluss von ■ Netzspannung zur Ausgangsspannung) können am Hand-Held Druckkalibrator lebensgefährliche Spannungen auftreten. Nur das von WIKA für den Hand-Held Druckkalibrator zugelassene Netzgerät ■ verwenden. Nur einwandfrei funktionierendes oder unbeschädigtes Ladegerät verwenden. -
Page 46: Technische Daten
3 Technische Daten 3 Technische Daten WIKA Betriebsanleitung, Typ CPH7600... - Page 47 3 Technische Daten (Sensor und Kabel) WIKA Betriebsanleitung, Typ CPH7600...
- Page 48 3 Technische Daten Weitere technische Daten siehe WIKA Datenblatt CT 17.01 und Bestellunterlagen. WIKA Betriebsanleitung, Typ CPH7600...
-
Page 49: Aufbau Und Funktion
WIKA bietet mit der Wally Box III Typ CPH7600 eine Weiterentwicklung der weit bekannten Wally Box I und Wally Box II. Die Wally Box III ist ein kompakter, tragbarer Druckkalibrator, der sowohl für den mobilen Einsatz als auch für stationäre Werkstatt- und Laborprüfungen entwickelt wurde. -
Page 50: Druckanschlüsse Des Hand-Held Druckkalibrator Cph7600
4 Aufbau und Funktion Druckanschlüsse des Hand-Held Druckkalibrator CPH7600 0…8 bar Druckluft- versorgung (Abbildung: Druckversorgung über externe Druckluft) (Abbildung: Druckversorgung über integrierte Pumpe) -1…+20 bar (Abbildung: Druckmessung) WIKA Betriebsanleitung, Typ CPH7600... -
Page 51: Tastenfeld Des Hand-Held Druckkalibrator Cph7600
Konfigurieren des Kalibrators über diese Softkeys Home-Taste Zurück zum Hauptmenü Pfeiltasten Steuerung der Stromquelle/-simulation und Einstellen des Pumpenlimits sowie der %- Fehlergrenze ZERO-Taste Nullung der Druckmessung PUMP-Taste Start des Pumpenbetriebs EIN/AUS-Taste Ein- und Ausschalten des Kalibrators WIKA Betriebsanleitung, Typ CPH7600... -
Page 52: Menü-Struktur
4 Aufbau und Funktion Menü-Struktur siehe Seite 51 WIKA Betriebsanleitung, Typ CPH7600... - Page 53 4 Aufbau und Funktion WIKA Betriebsanleitung, Typ CPH7600...
-
Page 54: Transport, Verpackung Und Lagerung
3. Bei längerer Einlagerung (mehr als 30 Tage) einen Beutel mit Trocknungsmittel der Verpackung beilegen. WARNUNG! Vor der Einlagerung des Gerätes (nach Betrieb) alle anhaftenden Messstoffreste entfernen. Dies ist besonders wichtig, wenn der Messstoff gesundheitsgefährdend ist, wie z. B. ätzend, giftig, krebserregend, radioaktiv, usw. WIKA Betriebsanleitung, Typ CPH7600... -
Page 55: Inbetriebnahme, Betrieb
6.1.1.2 Verwendung der Option {ausgewählter Bereich} Der {ausgewählte Bereich} wird über die mittlere Option im Menü im Hauptdisplay angezeigt. Er wird verwendet, um die Anzeige im Display auszuwählen, für die z. B. die ZERO-Taste angewendet werden kann. WIKA Betriebsanleitung, Typ CPH7600... -
Page 56: Funktionen Hauptmenü
Die folgende Tabelle zeigt, welche Funktionen gleichzeitig verfügbar sind. Ein "--" in einer Spalte bedeutet, dass der Modus im aktiven Display nicht angewählt werden kann, wenn der Modus in dieser Reihe in einem anderen Displaybereich verwendet wird. WIKA Betriebsanleitung, Typ CPH7600... -
Page 57: Verwendung Der Hintergrundbeleuchtung
Wenn ein externes Absolutdruckmodul im aktiven Display angewählt und die ZEROTaste gedrückt wurde, weist der Kalibrator den Benutzer an, den Referenzdruck einzugeben. Dafür können die Pfeiltasten verwendet werden. Der Sensoranschluss sollte bei diesem Vorgang zur Umgebung hin offen (belüftet) sein. WIKA Betriebsanleitung, Typ CPH7600... -
Page 58: Andere Menügesteuerte Funktionen
"CONFIG" im Hauptmenü zeigt an, dass sie gesperrt ist. Auch alle anderen Menüs sind gesperrt mit Ausnahme der Menüs "MIN/MAX", Kontrasteinstellung und das Menü zum Sperren der Konfiguration. Wurde die Option "UNLOCK CFG" gewählt, ist die Konfiguration entriegelt und die Menüanzeige geht weiter zum nächsten Untermenü. WIKA Betriebsanleitung, Typ CPH7600... -
Page 59: Einstellungen Speichern Und Aufrufen
Die Tasten F2 und F3 verwenden, um die Zeit einzustellen, nach der der Kalibrator abgeschaltet wird oder die Selbstabschaltefunktion deaktivieren, indem auf "0" gescrollt wird. Die Option "AUTO OFF DONE" wählen, um die Parameter zu übernehmen und ins Hauptdisplay zurückzukehren. Die automatische Abschaltzeit wird zurückgesetzt, sobald eine Taste gedrückt wird. WIKA Betriebsanleitung, Typ CPH7600... -
Page 60: Anzeige Aktivieren Und Deaktivieren
-Widerstand von 250 Ω kann aktiviert werden, wenn der CPH7600 im Modus "mA-Messung-24V" verwendet wird. Damit kann ein HART-Kommunikator über die Stromklemmen angeschlossen werden und das Hinzufügen eines externen Widerstands ist nicht mehr nötig. Wenn der HART -Widerstand aktiviert ist, beträgt die maximaler Last 750 Ω. WIKA Betriebsanleitung, Typ CPH7600... -
Page 61: Grundeinstellung Und Erste Druckerzeugung
ZERO-Taste verwenden, um den Drucksensor auf Null zurückzusetzen sobald der atmosphärische Druck wieder hergestellt wurde. 6.6.1 Medien-Kompatibilität VORSICHT! Den Kalibrator nur mit sauberer, trockener Luft betreiben! Um eine Verunreinigung durch Prüflinge zu vermeiden wird die Verwendung eines Schmutzabscheiders (siehe "10. Zubehör") empfohlen! WIKA Betriebsanleitung, Typ CPH7600... -
Page 62: Druckmessung Mit Externen Druckmodulen
[EXT] (externer Sensor) wählen. Da die Schnittstelle zwischen dem Kalibrator und dem Modul digital ist, hängt die Genauigkeit und die Anzeigeauflösung vom Modul ab. Ventil Druckmodul- adapter Druckmodul Abbildung 2: Druckmessung mir externen Druckmodulen WIKA Betriebsanleitung, Typ CPH7600... -
Page 63: Strom Messen Und Geben (4
Ausgabe entweder in 25 %-Schritten (4, 8, 12, 16 20 mA) oder in 0 % (4 mA) und 100 % (20 mA) anzuzeigen. 5. Im mA-Ausgabemodus zeigt der Kalibrator "OL" an, falls die Schleife geöffnet oder die maximale Last überschritten wird. Prüfling Prüfling WIKA Betriebsanleitung, Typ CPH7600... -
Page 64: Spannungsmessung
Das Display zeigt "OL" an, wenn die gemessene Spannung den Nennbereich der Stromspannung (30 V) übersteigt. Prüfling bis DC 30V Signal Ausgang Prüfling +24V Spannung Anschlüsse für Drucktransmitter mit 24V Spannungsversorgung und 0 bis 1, 0 bis 5 oder 0 bis 10V Ausgangssignal. WIKA Betriebsanleitung, Typ CPH7600... -
Page 65: Druckschaltertest Durchführen
2. Den Kalibrator mit dem Druckschalter über den Schalteranschluss verbinden. Die Polarität der Klemmen spielt keine Rolle. Danach die Pumpe mit dem Kalibrator und dem Druckschalter verbinden. 3. Den Belüftungsknopf an der Pumpe öffnen und den Kalibrator nullen. Danach den Belüftungsknopf nach dem Rücksetzen des Kalibrators schließen. WIKA Betriebsanleitung, Typ CPH7600... - Page 66 6. Sobald der Schalter geöffnet ist und "OPEN" angezeigt wird, Pumpe langsam entlüften bis der Druckschalter schließt. 7. In der oberen Anzeige ist nun "SW OPENED AT" zu lesen und der Druck, bei dem der Schalter geöffnet hat, wird angezeigt. WIKA Betriebsanleitung, Typ CPH7600...
-
Page 67: Messumformer Kalibrieren
Passiv – das zu prüfende Gerät erzeugt 4 ... 20 mA direkt. Diese werden vom Kalibrator gelesen. 2. Aktiv – der Kalibrator liefert an das zu prüfende Gerät eine Versorgungsspannung von DC 24 V und liest dabei das entstehende 4 ... 20 mA Signal. Passiv Aktiv WIKA Betriebsanleitung, Typ CPH7600... -
Page 68: Kalibrierung Eines Druck/Strom-Transmitters
1. Den Kalibrator und die Pumpe mit dem Transmitter verbinden. 2. Mit der Pumpe Druck erzeugen. 3. Stromausgang des Transmitters messen. 4. Sicherstellen, dass der Ablesewert korrekt ist. Falls nicht, muss der Transmitter kleinvolumige Schlauchleitungen verwenden Abbildung 5: CPH7600 mit einem Drucktransmitter WIKA Betriebsanleitung, Typ CPH7600... -
Page 69: Fehler-Funktion
4 ... 20 mA-Signal aus. Der Benutzer kann den Kalibrator mit einer Druckspanne von 0 ... 2 bar programmieren, woraufhin der Kalibrator die Abweichung oder den %-Fehlerwert aus dem 4 ... 20 mA-Ausgang berechnet und anzeigt. Hierdurch werden manuelle Berechnungen vermieden. WIKA Betriebsanleitung, Typ CPH7600... - Page 70 Auswahl des Ports (Druckanschluss) zu blättern. Nach Beendigung die Option "NEXT" wählen. 4. "LOOP POWER" (Versorgungsspannung) kann aus- oder eingeschaltet werden; nach Beendigung die Option "NEXT" wählen. 5. "SELECT" wählen, um durch die Optionen "UNIT" (Einheit) zu blättern und "NEXT", um weiterzukommen. WIKA Betriebsanleitung, Typ CPH7600...
- Page 71 7. Die Pfeiltasten verwenden, um den Messbereichsanfang einzustellen und nach Beendigung "DONE SET" wählen; der Modus "%-ERROR" ist funktionsfähig. Der Messbereichsanfang und das Messbereichsende werden in einem permanenten Speicher hinterlegt, bis sie vom Benutzer für die internen Sensoren und die externen Druckmodulen geändert werden. WIKA Betriebsanleitung, Typ CPH7600...
-
Page 72: Min-/Max-Wert Speicherung
Werte gespeichert werden, auch wenn man sich in diesem Modus befindet. Um die "MIN/MAX"-Register zu löschen, drücken Sie die Schaltfläche "CLEAR". Diese Register werden auch beim Starten des Kalibrators gelöscht oder wenn die Konfiguration geändert wird. WIKA Betriebsanleitung, Typ CPH7600... -
Page 73: Wartung Und Reinigung
Wartung Reparaturen sind ausschließlich vom Hersteller durchzuführen. VORSICHT! Um Personenschaden oder Schäden am Kalibrator zu vermeiden, nur das von WIKA bereitgestellte Zubehör verwenden und darauf achten, dass kein Wasser in das Gehäuse gelangt. Reinigung VORSICHT! Vor der Reinigung den Hand-Held-Druckkalibrator entlüften und ausschalten. -
Page 74: Störungen
Bei notwendiger Rücksendung die Hinweise unter Kapitel „9.2 Rücksendung“ beachten. 9 Demontage, Rücksendung und Entsorgung WARNUNG! Messstoffreste in ausgebauten Geräten können zur Gefährdung von Personen, Umwelt und Einrichtung führen. Ausreichende Vorsichtsmaßnahmen ergreifen. Demontage Hand-Held-Druckkalibrator nur im drucklosen Zustand demontieren! WIKA Betriebsanleitung, Typ CPH7600... - Page 75 9 Demontage, Rücksendung und Entsorgung / 10 Zubehör Rücksendung WARNUNG! Beim Versand des Gerätes unbedingt beachten: Alle an WIKA gelieferten Geräte müssen frei von Gefahrstoffen (Säuren, Laugen, Lösungen, etc.) sein. Zur Rücksendung des Gerätes die Originalverpackung oder eine geeignete Transportverpackung verwenden.
- Page 76 Tel. (+64) 9 8479020 France E-Mail: info@wika.com.tr Brazil Malaysia Fax: (+64) 9 8465964 WIKA Instruments s.a.r.l. www.wika.com.tr WIKA do Brasil Ind. e Com. Ltda. WIKA Instrumentation (M) E-Mail: info@wika.co.nz 95610 Eragny-sur-Oise CEP 18560-000 Iperó - SP Sdn.Bhd www.wika.co.nz Tel. (+33) 1 343084-84 Ukraine Tel.
Need help?
Do you have a question about the Wally Box III and is the answer not in the manual?
Questions and answers