
Subscribe to Our Youtube Channel
Related Manuals for Bartec Tech1000


Summary of Contents for Bartec Tech1000
- Page 1 User Guide P a g e Technical Support (866) 407-TPMS or help@bartecusa.com V1.0...
-
Page 2: Table Of Contents
Tool Updating ............................14 Service Center ............................. 15 On Tool/Job Management: ........................15 Website: ..............................15 Using your Tech1000 ..........................16 Tool Navigation ............................16 Home Menu: ............................16 Tool Display and Icons ..........................17 Tool Positioning/Reading a Sensor ......................21 Snap-in Sensors: .......................... - Page 3 User Guide Possible Reading Scenarios ........................25 Step 1c: Tire Condition ..........................27 Step2: Repair ............................27 Step 3: Verify ............................30 Step 4: Relearn ............................31 OBD Relearn: ............................31 Drive Relearn: ............................31 Stationary Relearn: ..........................31 Sensor Programming:..........................32 Placard Change: ............................
- Page 4 User Guide Appendix D: FAQ & Troubleshooting ...................... 44 Appendix E: COMMS (OBD) Error Troubleshooting ................46 Technical Specifications (Tool) ........................46 LIMITED WARRANTY and REPAIR ........................ 47 Limitation of Liability: ..........................47 Exclusions: ............................... 47 Repair Terms: ............................47 Freight: ..............................
-
Page 5: Important Notices
Bartec USA reserves the right to make changes at any time without obligation to notify any person or organization. Bartec USA will do its best to keep you, the customer, informed of any changes that might affect the tools performance. Important items will be called out by using “NOTE.”... -
Page 6: Account And Registration
Account and Registration The Tech1000 allows for existing Bartec users with a tool management account to add this tool to their account, or New Users to set-up a new account right from the tool. -
Page 7: Kit Contents
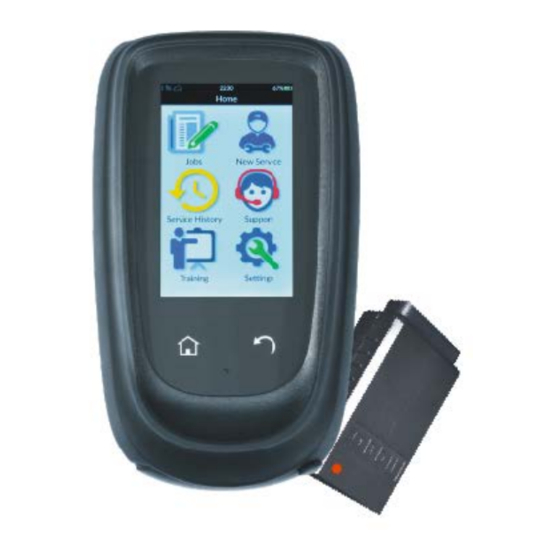
Inductive Charging Pad with Cable and Power Supply Quick Start Guide *Other kit configurations may vary. Getting Started A Wi-Fi connection is required to register and update the Tech1000. Please make sure you have your router name and password before starting. Tool Layout Home Button... -
Page 8: Powering Tool
User Guide Powering Tool To power the Tech1000 on, simply press the power button on the right side of the tool until the LED on the front of the tool illuminates. The tool will quickly boot to the HOME screen. - Page 9 User Guide Note: Only use the supplied charger & cable to prevent any damage to your device. See Warranty more Details. Battery Level examples as shown on main tool screen. Battery Level examples with estimated services shown on drop down screen. *Number of services is estimated.
-
Page 10: Tool Set-Up
User Guide Tool Set-Up The Tech1000 MUST be set-up before use. If at any time the tool is powered off during the Set-up process, the set-up process will automatically start over. While the Tech1000 ships with a charged battery, before starting it is recommended you charge your tool at least 50% to ensure your tool power level is high enough to complete the set-up process. -
Page 11: Wireless Connections
User Guide Wireless Connections Wi-fi The Tech1000 requires a Wi-Fi connection in order to register, update the device, and connect to Service Center. The Tech1000 is designed to work with 2.4GHz Wi-Fi networks. With the standard production software, the tools have the ability to support the following connection security types: •... -
Page 12: Bluetooth
User Guide Bluetooth The Tech1000 is equipped with Bluetooth to interact with the Bartec Wireless VCI (Vehicle Communication Interface) and Tread Depth Tools (TPG200 and Tech200PRO). The Bartec Tech1000 comes with a Wireless VCI that needs to be paired to tool. The VCI does not have its own power source, and... -
Page 13: Vci Color Indicator
User Guide VCI Color Indicator Wireless VCI Pairing Process P a g e | 13 Technical Support (866) 407-TPMS or help@bartecusa.com V1.0... -
Page 14: Tool Updating
User Guide Tool Updating Once the Tech1000 is connected to the Wi-Fi it will automatically download the updates and notify you when its ready to install. Note: the tool will need to reboot to complete the update process. If you would like to manually update the tool it can be found in Settings, Software Update. -
Page 15: Service Center
Coming soon! Website: Service Center is a cloud-based site that works directly with the Tech1000, and the basic version is included with the annual tool software license. On-line storage for inspection data, on-tool registration, and tool updating via a Wi-Fi connection are all functions of Service Center. -
Page 16: Using Your Tech1000
Using your Tech1000 Tool Navigation The Tech1000 is a touch screen device (like a smart phone or tablet) that by touching the on-tool icons and text (usually located at the bottom of the screen) will guide the user through using the tool. -
Page 17: Tool Display And Icons
Tool Display and Icons Since the Tech1000 is a touch screen device, the tool uses icons to assist the user in navigating through the tool. Please take a moment and get acquainted with the icons used on the tool and what they mean. - Page 18 User Guide This icon takes you to your Service Center account where you can log in Service Center for data to be uploaded to your service center desktop account. Rotated tires icon will display when the IDs are deemed rotated per OBD Tires Rotated data in the ECM versus what was read at the wheels.
- Page 19 User Guide Access to A SUB-MENU OF Action Overflow TASKS/FUNCTIONS. Icon is shown when there is no Service Center logged in service center account yet. Icons show the different types of Connections connections that can be made with tool (WIFI, Bluetooth, TPG200) Drive (Auto) Relearn Shown if drive relearn is required.
- Page 20 User Guide A sensor with a duplicate ID has been Duplicate Sensor IDs read. The tool will direct to re-read those sensors. Icon is show in the battery when the Battery Charging tool is in a charging state. This icon is accessible in the drop Brightness down menu to adjust the brightness of the display.
-
Page 21: Tool Positioning/Reading A Sensor
TPMS sensor location (near the valve stem) as shown below. Banded Sensors (e.g. Ford): Place the Tech1000 on the tire, held 180° opposite of the valve stem as shown below. Magnet Activated Sensors: Magnet icon is shown when it is required/recommended to use a magnet when activating the sensor. -
Page 22: New Service
User Guide New Service The Tech1000 uses a Guided Process (step by step) approach to TPMS Service. To start a new vehicle, click on New Service. The tool has the ability to capture the vehicle info one of these ways: Select from the following VINDicate®... -
Page 23: Guided Diagnostics And Repair Process
User Guide Guided Diagnostics and Repair Process For ensuring that the TPMS process is executed correctly, the TECH1000 guides the user through the workflow. Subsequently, the default workflow process will be described in the following image: 1. Diagnose (OBD) 2. Read TPMS 3. - Page 24 User Guide Tool Positioning Do NOT touch the metal rim. The tool needs to be pointed at the sensor through the tire. 1. LF activated sensors To test a sensor the tool should be placed alongside the valve stem and the red Test symbol needs to be pressed.
-
Page 25: Possible Reading Scenarios
User Guide Possible Reading Scenarios Note that if a faulty TPMS sensor has been replaced, some methods of relearn procedures will need to be followed, as explained later in this manual. To receive further Sensor Information, tap on one of the symbols next to the wheel position. - Page 26 User Guide Rotated tire Rotated tires icon will display when the IDs are deemed rotated per OBD data in the ECM versus what was read at the wheels. Incorrect sensor mode Further diagnostic related to the sensor is required when icon displays. New Sensor ID Icon is shown when a new sensor with a new ID has been found in the TPMS service.
-
Page 27: Step 1C: Tire Condition
User Guide Step 1c: Tire Condition By default, this step is removed from the process since a separate Tire service step has been provided. If this step is however enabled (optional or mandatory) via the tool settings, it will be displayed with an appropriate label and icon. - Page 28 In order to fix the issue, please select the displayed issue and select a sensor. For this example a Bartec RITE-SENSOR® has been used. After selecting a replacement sensor please place the sensor in front of the tool. Then please select Program which will initialize the Programming process.
- Page 29 However, it is recommended to Reprogram for saving time. If the Bartec TECH1000 supports the sensor, the tool has a valid program for the MMY selection and if the sensor is of the correct type, then the option Reprogram sensor will be shown. To perform a Reprogram, please simply select the Repair job that is being worked on and press Reprogram in the bottom right corner.
-
Page 30: Step 3: Verify
User Guide Repair suggestion Diagnosis Icon Must be Replacement Service kit Reprogram Relearn repaired sensor sensor vehicle for relearn only Rotated No (fixed in Relearn process) Incorrect Yes further mode diagnostics required If one of the above-mentioned faults is displayed, you do not have to perform a Repair since those issues can be fixed during the Relearn. -
Page 31: Step 4: Relearn
Note: If there are no TPMS faults found then the tool will inform you that this step can be skipped. With your TECH1000 you have the possibility of performing different types of relearns. A relearn is needed in order to learn the sensor IDs to the car. The relearn type can be selected for each MMY, depending on the vehicle. -
Page 32: Sensor Programming
Sensor Programming: Sensor programming at this time can only be done in the repair step of the guided relearn process. Coming soon will be a standalone sensor programming function. At this time the Tech1000 can program the following sensors: •... -
Page 33: Passive Entry / Keyless Ignition Testing - Diagnose
User Guide PASSIVE ENTRY / KEYLESS IGNITION TESTING - DIAGNOSE OBD System: At this first step the OBD Engine is used to retrieve crucial OBD information, including: • DTCs - Retrieved from the TPMS ECU Keys: Once a new key is added, the Key check will identify if there are any faults with the key. Faults could include issues such as a damaged key, a low battery, an un-programmed or incorrect key and other issues. -
Page 34: Passive Entry / Keyless Ignition Testing - Verify
User Guide PASSIVE ENTRY / KEYLESS IGNITION TESTING - VERIFY Keys: The Verify step is used to verify that any work which has been performed previously on keys has been performed correctly. No new keys can be added in Verify. Keys that were not faulty also cannot be updated. -
Page 35: Support (On Tool)
User Guide Support (On Tool) The Tech1000, using Service Center via your Wi-Fi connection, supports on-tool requests for Technical Support. The user can request this support by swiping down (or click the power button once) to pull up the screen shown here. -
Page 36: Tool Kit
User Guide Tool Kit: This is where you can find additional testing features. RKE: Since certain relearn procedures require using a key fob, the RKE Test function can be used to ensure that a fob is transmitting properly. UHF: The UHF Monitor feature tests for nearby UHF signals. If you suspect your tool is not scanning properly due to signal interference (e.g. -
Page 37: Dtc
User Guide The Tech1000 will allow the user to Read generic Diagnostic Trouble Codes (Check Engine Light). Example: P0113 is an OBDII trouble code that occurs when the Dodge Ram's engine management computer detects that there is an issue with the Intake Air Temperature (IAT) Sensor, specifically that there is a High Input Problem with it. -
Page 38: On Tool Training
User Guide On Tool Training The Tech1000 has on-tool videos (with and without sound). These training videos allow the user to watch topics on how to use their Tech1000. P a g e | 38 Technical Support (866) 407-TPMS or help@bartecusa.com... -
Page 39: Device Settings
User Guide Device Settings Access the tool’s settings by tapping SETTINGS on the HOME screen. Make all the appropriate changes and views under Connections, Service Center, Software Update (check for updates), Services, Measurements, Display, General, Users, Device Maintenance and About Device. Connections- This is where you can find the Wi-Fi network, connected/connecting a VCI (OBD), connected/connecting TPG200 Service Center- Can view the logged in Service Center account. -
Page 40: Tool Service
User Guide Tool Service The Tech1000 is not field serviceable. If damage occurs, or the tool does not power on, follow these steps to get you back up and running again: 1. Contact our Technical Support team with your concerns. Please have the serial number ready. -
Page 41: Technical Support
User Guide Technical Support To speak with our Technical Support team, please call our toll-free number: (866) 407-8767 Hours of operation: 8am-9pm EST, Monday-Friday. 8am-4pm EST Saturday. Or contact us by email: help@bartecusa.com Visit our website at www.bartecusa.com for a complete directory. For efficient and accurate service, please have the following information ready when contacting us: •... -
Page 42: Appendices
User Guide Appendices: Glossary: Audit Data is all the sensor and OBD data stored on the tool. Bar units are commonly used in many Western European countries as a metric unit of pressure. 1 bar equals 100 kPa, or approximately 14.5038 psi. Bluetooth is a wireless technology standard for exchanging data over short distances from fixed and mobile devices. -
Page 43: Appendix C: Vin
Ethernet protocol. Appendix C: VIN When using the Tech1000, it is important to verify the Model Year you are working on to ensure that you are looking for the proper sensor and are using the proper vehicle COMs when necessary. -
Page 44: Appendix D: Faq & Troubleshooting
A: In some cases, you won’t know since the battery might be too low to even transmit. If the sensor spec allows, when the sensor battery gets low, it will transmit a status and the Bartec tool will prompt with a Low Battery icon. - Page 45 Q: Does the Tech1000 get hot when placed on the QI charger? A: The Tech1000 will feel warm/hot to the touch but not to worry it is normal for this type of charging. Q: Can you use the vehicle battery management system reset?
-
Page 46: Appendix E: Comms (Obd) Error Troubleshooting
User Guide Appendix E: COMMS (OBD) Error Troubleshooting If a problem or error occurs during the COMMS process, follow the steps below before calling technical support. Check vehicle ignition Vehicle ignition must be in the RUN position in order for vehicle COMMS process to complete. Check VCI to Vehicle connection Ensure the VCI is connected to the vehicle securely. -
Page 47: Limited Warranty And Repair
It is expressly agreed that the liability of Bartec is limited, and we do not function as an insurer. The remedies set forth in this warranty shall continue the exclusive remedies available to the purchaser or user and are in lieu of all other remedies expressed or implied. The liability of Bartec, whether in contract, or in tort, under any warranty or otherwise, shall not exceed the selling price by Bartec or the manufacture of the particular product made, sold, or supplied by Bartec. -
Page 48: Freight
Bartec will warranty the tool to be free from defects in material and workmanship. The Warranty applies ONLY to the ORIGINAL OWNER and is not transferable. In the unlikely event of a defect, Bartec will at its discretion repair or replace the tool with a product of like kind or quality which may be new or reconditioned.
Need help?
Do you have a question about the Tech1000 and is the answer not in the manual?
Questions and answers