Advertisement
Quick Links
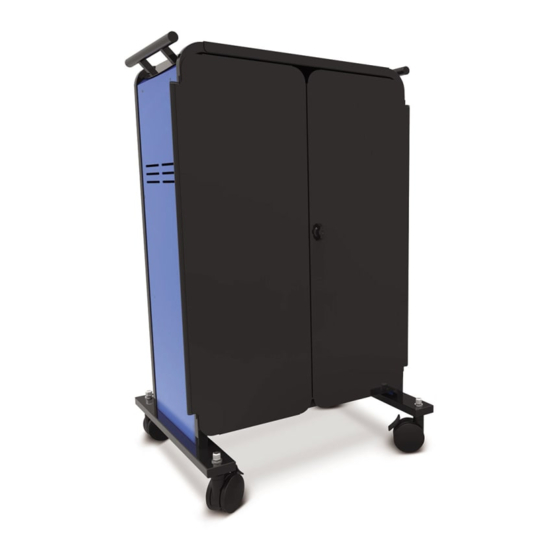
VRC300
WARNING
Please Recycle
VR Storage Cart for 30 Devices
Assembly Guide
VRC300_2020_A
Check out our other products online at
www.copernicused.com
This product is meant to be assembled by an adult.
Ÿ
In its unassembled state, small parts present a hazard.
Ÿ
To be used under direct supervision of an adult.
Ÿ
Version A - Released January 31, 2020 - Copernicus Educational Products Inc.
For assistance, please contact us:
1-800-267-8494
Email info@copernicused.com
Have your packing slip ready for reference
1
Advertisement

Subscribe to Our Youtube Channel
Related Manuals for Copernicus VRC300


Summary of Contents for Copernicus VRC300
- Page 1 This product is meant to be assembled by an adult. Ÿ WARNING In its unassembled state, small parts present a hazard. Ÿ To be used under direct supervision of an adult. Ÿ Please Recycle Version A - Released January 31, 2020 - Copernicus Educational Products Inc.
- Page 2 Validate Your Warranty Time To validate your warranty, submit the ON-LINE form at www.copernicused.com Enter a draw to win a Copernicus Product for your classroom at the same time! Warranty Frame Version A - Released January 31, 2020 - Copernicus Educational Products Inc.
- Page 3 72 consecutive hours. Turn off power strip before unplugging. Specifications Read the electrical specifications of any electronic equipment you are using with your Copernicus products. Failure to read these specifications and follow their instructions could result in damage to your equipment or personal injury.
-
Page 4: Additional Tools Required
1/4” Lock Nut Rivet, Ratcheting 1/4” Star Washer (432773) (4301022) (430101) (420134) M6 x 15mm Thumb Screw M5 Thumb Nut 1/4-20 x 0.5” (43216) (432140) (4302041) #10 Lock Nut (430165) Version A - Released January 31, 2020 - Copernicus Educational Products Inc. - Page 5 Power Timer Cover Power Timer Mounting Bracket (32238) (32237) (32101) (321012) USB Cover Cable Housing Power Adapter 10 Port USB Hub (255146) (255144) Foam Tablet Holder USB “B” Cable (23241) Version A - Released January 31, 2020 - Copernicus Educational Products Inc.
- Page 6 For missing parts and other issues regarding this product: other great products! Please call Copernicus Customer Service, where we will be happy to help. 1-800-267-8494. Monday - Friday 8:30am - 4:30 pm EST. Email our Tech Support Service at info@copernicused.com www.copernicused.com...
- Page 7 You will need: (Not to Scale) Front Doors 1/4-20 x 1.5” 1/4” Star Washer 7/16” Hex Wrench Assemble Front Doors to Stretchers Finger tighten hardware only. 1/4” Star Washer Repeat 6X Version A - Released January 31, 2020 - Copernicus Educational Products Inc.
-
Page 8: Left Side
Flip over cart. Make sure side frame stretchers are loose to allow for feet to be attached. First thread each bolt 3 full turns. Once all bolts are in place, fully tighten hardware. 1/4” Star Washer Version A - Released January 31, 2020 - Copernicus Educational Products Inc. - Page 9 Make sure the holes on the Tub shelves line up with the holes on the stretcher. Actual Size: You will need: (Not to Scale) 1/2” Flat 1/2” M12 Cap Nut 4” Caster Caster Wrench Washer Lock Washer With Brake Attach Casters to Frame Version A - Released January 31, 2020 - Copernicus Educational Products Inc.
- Page 10 1/4-20 x 0.5” Cable Hook 7/16” Hex Wrench 1/4” Nut 2-Person Task Flip cart right side up. Attach Cable Hooks to Back Frame Fully tighten hardware. 1/4” Star Washer Version A - Released January 31, 2020 - Copernicus Educational Products Inc.
- Page 11 Left Right 1/4” Nut 1/4” Star Washer Attach Side Panels to Frame Repeat on both sides 1/4” Star Washer Note Orientation of Side Panels. Repeat on both sides Version A - Released January 31, 2020 - Copernicus Educational Products Inc.
- Page 12 You will need: (Not to Scale) 1/4” Nut 1/4” Star Washer Top Shelf 7/16” Hex Wrench Attach Top Shelf to Frame 1/4” Star Washer Note Orientation of Top Shelf. Version A - Released January 31, 2020 - Copernicus Educational Products Inc.
- Page 13 1/4” Star Washer Repeat on both sides Actual Size: You will need: (Not to Scale) Power Timer (25526) Install Power Timer onto Power Timer Bracket 1/4” Star Washer Version A - Released January 31, 2020 - Copernicus Educational Products Inc.
- Page 14 You will need: (Not to Scale) Screwdriver Tub Rack 3/8” wrench (x1) Adjustable wrench x1 Install Tub Rack Slide tub rack in channels Insert safety hardware into channels Version A - Released January 31, 2020 - Copernicus Educational Products Inc.
- Page 15 (Not to Scale) Bent Divider Headset Tub Pliers Attach Headset Divider Middle to tub 3x Use pliers to help push the ratchet snaps together. Repeat 2x for all tubs Version A - Released January 31, 2020 - Copernicus Educational Products Inc.
- Page 16 Ensure cables are securely plugged into Power Adapter. Feed Cable through holes on end of USB Cover. Place Device Foam into Tub The foam will fit snugly into tub Version A - Released January 31, 2020 - Copernicus Educational Products Inc.
- Page 17 Hook & Loop found on the metal USB Cover. Plug in USB Hubs to Adapters Once USB hubs have been plugged in, ensure the USB hubs are turned on. Version A - Released January 31, 2020 - Copernicus Educational Products Inc.
- Page 18 USB Cover. the slot. Actual Size: You will need: (Not to Scale) Screwdriver Attach Cable Housing to USB Cover 1/4” Star Washer Version A - Released January 31, 2020 - Copernicus Educational Products Inc.
- Page 19 Each slot is 2 devices deep by 3 wide. Gently pull on cord from housing if more is needed to plug device in. Each slot holds 6 devices. Version A - Released January 31, 2020 - Copernicus Educational Products Inc.
- Page 20 Wrap each of the USB power cables around the blue Feed cables through grommet and plug into outlets cable hook on the inside of the VR Storage Cart. on bottom of Power Timer. Version A - Released January 31, 2020 - Copernicus Educational Products Inc.
- Page 21 Check entire assembly for loose parts; tighten all casters, bolts, screws and nuts Tighten all casters using supplied Caster Wrench. Keep wrench with unit. Casters must be tightened every 6 months for proper maintenance. Version A - Released January 31, 2020 - Copernicus Educational Products Inc.
Need help?
Do you have a question about the VRC300 and is the answer not in the manual?
Questions and answers