Advertisement
Quick Links
TEC510
TEC510B
WARNING
Please Recycle
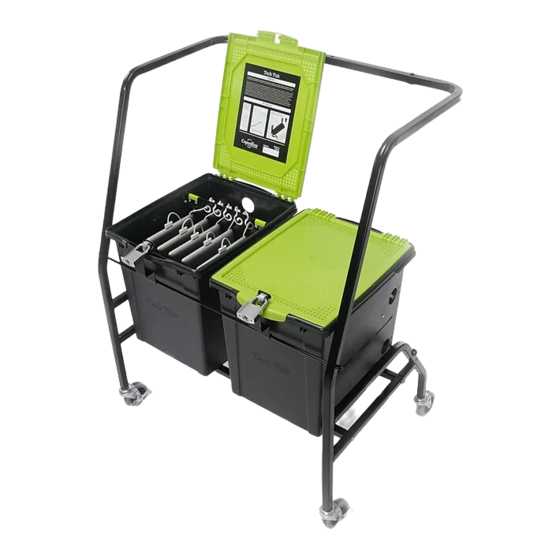
Tech Tub™ Cart - 2 Tubs
Assembly Guide
TEC510_TEC510B_2014_A
Check out our other products online at
www.copernicused.com
This product is meant to be assembled by an adult.
In its unassembled state, small parts present a hazard.
To be used under direct supervision of an adult.
TEC510_TEC510B - Version A - Released April 14, 2014 - Copernicus Educational Products Inc.
For assistance, please contact us:
1-800-267-8494
Email info@copernicused.com
Have your packing slip ready for reference
Have a Question?
Need Support?
Email our Customer Support
1
Advertisement

Related Manuals for Copernicus Tech Tub TEC510


Summary of Contents for Copernicus Tech Tub TEC510
- Page 1 In its unassembled state, small parts present a hazard. To be used under direct supervision of an adult. Need Support? Have a Question? Email our Customer Support Please Recycle TEC510_TEC510B - Version A - Released April 14, 2014 - Copernicus Educational Products Inc.
-
Page 2: Assembly Guide
Email our Tech Support Service Validate Your Warranty Year Year Year To validate your warranty, submit the ON-LINE form at www.copernicused.com Enter a drawing to win a Copernicus Product for your classroom at the same time! Frame Tub and Lid Component Warranty Warranty... - Page 3 Unplug when not in use. Powerbar Specifications Read the electrical specifications of any electronic equipment you are using with your Copernicus products. Failure to read these specifications and follow their instructions could result in damage to your equipment or personal injury.
- Page 4 Powerbar Tray (1) (Base TEC510B Option) Rod (2) Locking System (2) Main Frame (2) 3" Caster With Brake (2) Stretcher (2) 3" Caster Without Brake (2) TEC510_TEC510B - Version A - Released April 14, 2014 - Copernicus Educational Products Inc.
- Page 5 Powerbar Tray 1/4” x 1-3/4” Bolt (43007) Hardware Actual Size 1/4” x 1-1/4” Bolt (43005) 1/4” Lock Washer 1/4” Lock Nut (43010) (430101) 1/4” Lock Nut (430101) TEC510_TEC510B - Version A - Released April 14, 2014 - Copernicus Educational Products Inc.
-
Page 6: Before You Begin
The Premium Tech Tub models include a power strip for charging various electronic devices. This warning applies to this component and any other electronic equipment used with this product. TEC510_TEC510B - Version A - Released April 14, 2014 - Copernicus Educational Products Inc. - Page 7 10-24” x 7/8” Machine Screw You will need: (Not to Scale) Main Frame - Connector Install the Main Frame - Connetor Threaded insert should be facing down TEC510_TEC510B - Version A - Released April 14, 2014 - Copernicus Educational Products Inc.
- Page 8 (Not to Scale) OPTIONAL - FOR BASE Powerbar Tray VERSION CART TEC510B Install Powerbar Tray Make sure the Powerbar Tray hooks tab is hooked around the back stretcher TEC510_TEC510B - Version A - Released April 14, 2014 - Copernicus Educational Products Inc.
- Page 9 Slide the one end of the Rod through, then slide the locking system parts onto the Rod. Note the orientation of both Locking System & Rods. TEC510_TEC510B - Version A - Released April 14, 2014 - Copernicus Educational Products Inc.
- Page 10 Positioning Tech Tub™ on Base Version (TEC510B) Make sure the Tubs fit between the Rods. Positioning Tech Tub™ on Premium Version (TEC510) Make sure the Tubs fit between the Rods. TEC510_TEC510B - Version A - Released April 14, 2014 - Copernicus Educational Products Inc.
-
Page 11: Tips For Use
TEC510 - Cable Management Use the cable hooks on the Tech Tub™ to manage the Power Strip cords. ALWAYS Wrap Cords when not in use & when transporting. TEC510_TEC510B - Version A - Released April 14, 2014 - Copernicus Educational Products Inc. - Page 12 Use the cable hooks on the Tech Tub™ Cart Powerbar Tray to manage the Power Strip cords. ALWAYS Wrap Cords when not in use & when transporting. TEC510_TEC510B - Version A - Released April 14, 2014 - Copernicus Educational Products Inc.
- Page 13 Powerbar Tray. Make sure the cables are not touching the floor. When placing the Tub back into the Cart, make sure the Tub is not sitting on the cables. TEC510_TEC510B - Version A - Released April 14, 2014 - Copernicus Educational Products Inc.
- Page 14 Tech Tub™ Cart is an ideal solution for transporting devices from one location to another. The cart is also a secure central resource for storing tech devices. TEC510_TEC510B - Version A - Released April 14, 2014 - Copernicus Educational Products Inc.
Need help?
Do you have a question about the Tech Tub TEC510 and is the answer not in the manual?
Questions and answers