
Subscribe to Our Youtube Channel
Related Manuals for H3C SecPath L1000-A


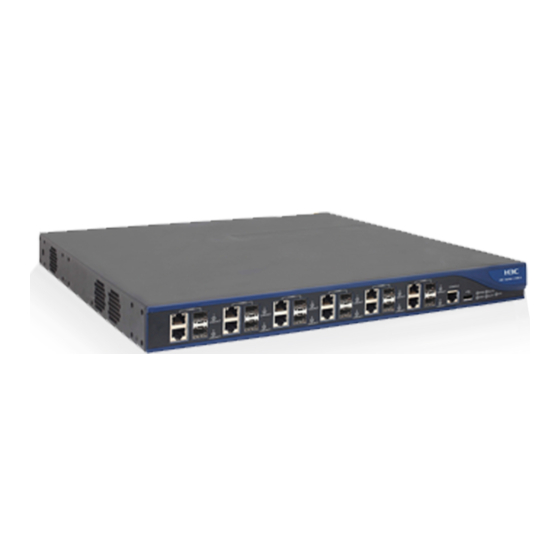
Summary of Contents for H3C SecPath L1000-A
- Page 1 H3C SecPath L1000-A Load Balancing Device Installation Guide Hangzhou H3C Technologies Co., Ltd. http://www.h3c.com Document version: 5PW102-20130815...
- Page 2 Copyright © 2012-2013, Hangzhou H3C Technologies Co., Ltd. and its licensors All rights reserved No part of this manual may be reproduced or transmitted in any form or by any means without prior written consent of Hangzhou H3C Technologies Co., Ltd.
- Page 3 Preface The H3C SecPath L1000-A Load Balancing Device Installation Guide includes seven chapters, which describe the preparing for installation, installing the L1000-A, installing FRUs, accessing the L1000-A for the first time, replacement procedures, hardware management and maintenance, and troubleshooting. This preface includes: Audience •...
- Page 4 Layer 2 forwarding and other Layer 2 features. Port numbering in examples The port numbers in this document are for illustration only and might be unavailable on your L1000-A. About the H3C L1000-A documentation set The H3C L1000-A documentation set includes: Category...
- Page 5 Command references commands. Obtaining documentation You can access the most up-to-date H3C product documentation on the World Wide Web at http://www.h3c.com. Click the links on the top navigation bar to obtain different categories of product documentation: [Technical Support & Documents > Technical Documents]—Provides hardware installation, software...
-
Page 6: Table Of Contents
Contents Preparing for installation ············································································································································· 1 Safety recommendations ·················································································································································· 1 Safety symbols ·························································································································································· 1 General safety recommendations ··························································································································· 1 Electricity safety ························································································································································ 1 Laser safety ································································································································································ 1 Handling safety ························································································································································ 2 Examining the installation site ········································································································································· 2 ... - Page 7 Performing basic configurations ··································································································································· 28 Performing basic configurations at the CLI ········································································································· 29 Performing basic configurations in the Web interface ······················································································ 29 Replacement procedures ··········································································································································· 37 Precautions ······································································································································································ 37 Replacing an interface module ····································································································································· 37 ...
- Page 8 Appendix C Numbering interfaces ··························································································································· 62 Numbering interfaces ···················································································································································· 62 Examples ········································································································································································· 62 Appendix D Cables ··················································································································································· 63 Ethernet twisted pair cable ············································································································································ 63 Introduction ···························································································································································· 63 Making an Ethernet twisted pair cable ··············································································································· 66 ...
-
Page 9: Preparing For Installation
Preparing for installation Safety recommendations To avoid possible bodily injury and equipment damage, read all safety recommendations carefully before installation. Note that the recommendations do not cover every possible hazardous condition. Safety symbols When reading this document, note the following symbols: WARNING means an alert that calls attention to important information that if not understood or followed can result in personal injury. -
Page 10: Handling Safety
WARNING! Do not stare into any fiber port when the L1000-A has power. The laser light emitted from the optical • fiber may hurt your eyes. Use fiber test equipment, rather than a microscope or magnifier to observe an operating fiber •... -
Page 11: Cleanness
High temperature can accelerate the aging of insulation materials and significantly lower the • reliability and lifespan of the L1000-A. For the temperature and humidity requirements of the L1000-A, see Table Table 1 Temperature and humidity requirements Ambient temperature Ambient relative humidity •... -
Page 12: Esd Prevention
Figure 1 Airflow through the chassis ESD prevention CAUTION: • Check the resistance of the ESD wrist strap for safety. The resistance reading should be in the range of 1 to 10 megohm (Mohm) between human body and the ground. The L1000-A does not provide any ESD wrist strap. -
Page 13: Emi
Figure 2 Attaching an ESD wrist strap (1) ESD wrist strap (2) Lock (3) Alligator clip The EMI might be coupled from the source to the L1000-A through the following coupling mechanisms: Capacitive coupling • • Inductive coupling Radiative coupling •... -
Page 14: Rack Installation
Rack installation Reserve at least 1 m (3.28 ft) of clearance between the rack and walls or other devices. • • The equipment room is at least 3 m (9.84 ft) high and an air conditioner is installed. Power supply Make sure the power source of the installation site is steady and can satisfy the input requirements of the power modules and parameters such as rated voltage. -
Page 15: Checklist Before Installation
Ring terminal Insulation sheath ESD gloves Cage nuts (user-supplied) (user-supplied) (user-supplied) (user-supplied) Checklist before installation Table 4 Checklist before installation Item Requirements Result The floor can support the total weight of the chassis Weight support and all other components. Operating ambient 0°C to 45°C (32°F to 113°F) temperature... - Page 16 Item Requirements Result • The grounding cable of the chassis is well grounded. Lightning • The grounding terminal of the AC power protection receptacle is well grounded. • A power lightning arrester is installed. (Optional) • Equip an uninterrupted power supply (UPS). Electricity safety •...
-
Page 17: Installing The L1000-A
Installing the L1000-A IMPORTANT: Keep the packages of the L1000-A and the components for future use. Figure 3 L1000-A installation flow Confirming installation preparations Before you install the L1000-A, verify that: You have read "Preparing for installation" carefully and the installation site meets all the •... -
Page 18: Unpacking The L1000-A
The L1000-A is ready for installation and has been carried to a place near the installation site and • convenient for moving. Unpacking the L1000-A Figure 4 Unpacking the L1000-A Mounting the L1000-A on a workbench IMPORTANT: Ensure good ventilation and 10 cm (3.94 in) of clearance around the chassis for heat dissipation. •... - Page 19 Figure 5 Marking the positions of the cage nuts As shown in Figure 6, insert one edge of a cage nut into the hole, and compress the other edge of the cage nut to push the cage nut fully into the hole. Figure 6 Installing cage nuts Align the screw holes in one mounting bracket with the screw holes in the side panel of the chassis, and use screws to attach the mounting bracket to the L1000-A, as shown in...
- Page 20 Figure 8 Sliding the L1000-A into the rack Attach the L1000-A horizontally by fastening the mounting brackets to the rack with appropriate pan head screws. The specifications of pan head screws must satisfy the installation requirements, and rustproof treatment has been made to their surfaces. Figure 9 Mounting the L1000-A to the rack...
-
Page 21: Grounding The L1000-A
Grounding the L1000-A WARNING! Correctly connecting the L1000-A grounding cable is crucial to lightning protection and EMI protection. The power input end of the L1000-A has a noise filter, whose central ground is directly connected to the chassis to form the chassis ground (commonly known as PGND). You must securely connect this chassis ground to the earth so the faradism and leakage electricity can be safely released to the earth to minimize EMI susceptibility of the L1000-A. -
Page 22: Installing A Power Module
Figure 11 Connecting the grounding cable to the grounding hole of L1000-A NOTE: The resistance reading should be smaller than 5 ohms between L1000-A chassis and the ground. • To guarantee the grounding effect, use the grounding cable provided with the L1000-A to connect to •... -
Page 23: Connecting Interface Cables
Figure 12 Installing the power module Fasten the captive screws on the power module with a Phillips screwdriver. NOTE: • For more information about power module LEDs, see "Appendix B LEDs." An AC power module and a DC power module cannot be installed on the same L1000-A. •... -
Page 24: Connecting A Power Cord
The L1000-A has SFP fiber ports, which only support LC connectors. The procedures for connecting SFP fiber ports are similar. The following uses the SFP port as an example. To connect a fiber port to a peer device through optical fibers: Remove the dust plug from the fiber port. -
Page 25: Connecting A Dc Power Cord
Figure 14 Connecting an AC power cord to the L1000-A Connecting a DC power cord Identify the plug for connecting to the L1000-A, correctly orient the plug with the RPS receptacle on the L1000-A chassis, and insert the plug into the receptacle. Use a flat-blade screwdriver to fasten the screws on the plug. -
Page 26: Installing Frus
Installing FRUs Installing an interface module The methods for installing NSQ1GT2UA0, NSQ1GP4U0, and NSQ1XS2U0 are similar. The following example installs the NSQ1XS2U0 to the F1000-A-EI. IMPORTANT: NSQ1XS2U0 can be installed to only slot 1. NSQ1GT2UA0 and NSQ1GP4U0 can be installed to either slot 1 or slot 2. -
Page 27: Installing A Lightning Protector For A Network Port
Figure 17 Pushing the interface module into the slot Fasten the captive screws on the interface module with a Phillips screwdriver. Installing a lightning protector for a network port The lightning protector for a network port is only applicable to a copper Ethernet port. If part of the network cable of a copper Ethernet port must be routed outdoors, connect a lightning protector to the cable before you plug the cable into the port. -
Page 28: Connecting The Ac Power Supply To A Power Strip With Lightning Protection
Figure 18 Installing a lightning protector (1) Grounding wire (2) Lightning protector for a network port (3) Outdoor network cable (4) Cable connected to the L1000-A Installation precautions The performance of the port lightning protector may be affected in the following cases: The port lightning protector is installed in reverse direction. - Page 29 After you connect the AC power cord from the L1000-A to a socket on the power strip, verify that the green RUN LED on the strip is on and the red LED is off. If the red LED is on, use a multimeter to check the polarity of the wires in the power socket for wrong connections.
-
Page 30: Logging In And Performing Basic Configurations
Logging in and performing basic configurations The first time you access the L1000-A, you can log in to the CLI through the console port or log in to the Web interface by using a Web browser. After login, you can configure Telnet for remote access. Logging in to the CLI through the console port To log in to the CLI through the console port, you must have a console cable and a terminal (for example, a PC). -
Page 31: Configuring Communication Parameters On The Terminal
IMPORTANT: Identify the mark on the console port and make sure you are connecting to the correct port. • The serial ports on PCs do not support hot swapping. If the L1000-A has been powered on, always • connect the console cable to the PC before connecting it to the L1000-A, and when you disconnect the cable, first disconnect it from the L1000-A. - Page 32 Configure serial port properties as described in Table Figure 23 Configuring serial port properties Table 5 Serial port properties Property Value Bits per second 9600 bps (the default) Data bits Parity None Stop bits Flow control None To restore the default settings, click Restore Defaults. Click OK.
- Page 33 Figure 24 HyperTerminal window Select File > Properties and then click the Settings tab. Figure 25 Selecting the emulation type Select VT100 or Auto detect for Emulation and click OK.
-
Page 34: Powering On The L1000-A
Booting Normal Extend BootWare..The Extend BootWare is self-decompressing.........Done! **************************************************************************** H3C SecPath BootWare, Version 1.06 **************************************************************************** Copyright (c) 2004-2013 Hangzhou H3C Technologies Co., Ltd. Compiled Date : Feb 27 2013 CPU Type : XXXX CPU L1 Cache : 32KB... -
Page 35: Logging In To The Cli By Using Telnet
System application is starting... User interface con0 is available. Press ENTER to get started. Press Enter at the prompt. When the prompt <H3C> appears, you can configure and manage the L1000-A. NOTE: To access the extended Boot menu (also called the "main BootWare menu"), press Ctrl+B •... -
Page 36: Performing Basic Configurations
Enter the correct username, password, and verify code, select English as the language, and click Login. NOTE: The default account is used at the first login. To ensure security, you must delete the default account and H3C LB Products System Management create an administrator account. For more information, see Configuration Guide Performing basic configurations This section describes the steps for performing basic configurations on the L1000-A. -
Page 37: Performing Basic Configurations At The Cli
Step Command Remarks Enter system view. system-view By default, the system name is Set the system name. sysname sysname H3C. By default, the Telnet server is Enable the Telnet server. telnet server enable disabled. Enter Ethernet interface interface interface-type view. - Page 38 Enter the system name for the L1000-A. Click Apply. Configuring the username and password Select System > User from the navigation tree. Figure 28 Local user Click Add. Figure 29 Adding a local user Configure the local user, as described in Table Click Apply.
- Page 39 Item Description Set the user privilege level of a user. User privilege levels are visitor, monitor, configure, and management in ascending order. A user with a higher level has all the operating rights of a user with a lower level. •...
- Page 40 Figure 30 Interface management Click the icon for an interface to enter the page for modifying the information of the interface.
- Page 41 Figure 31 Modifying interface information Modify the interface as described in Table Click Apply. Table 7 Configuration items Item Description Set the name for the interface or its subinterface. • If you select a logical interface type from the list, such as LoopBack, Vlan-interface, and Virtual-Template, set the interface number in the box Interface Name behind to create the logical interface.
- Page 42 Item Description button is not available. Interface Type Set the interface type, which can be Electrical Port, Optical Port, or None. Set the VLAN ID associated with the subinterface. This parameter is available on a subinterface of a Layer 3 Ethernet subinterface in the previous step.
- Page 43 Figure 32 Static NAT In the Static Address Mapping area, click Add to enter the Add Static Address Mapping page. Figure 33 Adding static address mapping Configure a static address mapping as described in Table Click Apply. Table 8 Configuration items Item Description Specify a name of the VPN instance to which the internal IP addresses belong.
- Page 44 Saving the configuration Select System > Maintenance from the navigation tree. The Save page appears, as shown Figure Figure 34 Saving the configuration To encrypt the configuration file, select Encrypt the configuration file. Click Apply.
-
Page 45: Replacement Procedures
Replacement procedures Precautions Always wear an ESD wrist strap or ESD gloves when servicing the L1000-A. • • When removing FRUs (such as interface modules and power modules): Ensure good alignment with the slot and use uniform force to avoid damage to the FRUs. Completely loosen each captive screw before removing FRUs to keep their panels in good condition. -
Page 46: Replacing A Transceiver Module
Replacing a transceiver module WARNING! When you remove a transceiver module, do not touch the golden finger on the module. • Do not stare at the fibers to avoid hurting your eyes. • Make sure the transceiver modules at the two ends of a fiber are the same type. •... - Page 47 Figure 37 Pulling out the power module Place the removed power module in an antistatic bag or on the workbench. Install a new power module. For the installation procedures, see "Installing a power module." If no new power module is to be installed to the slot, install a filler panel to prevent dust from entering the chassis.
-
Page 48: Hardware Management And Maintenance
L1000-A. NOTE: The output depends on your software version. Displaying detailed information about the L1000-A Use the display device verbose command to display detailed information about the L1000-A and interface modules. <H3C> display device verbose Status Type :RPU Hardware Driver :1.0... -
Page 49: Displaying Running Status Data
Comware Software, Version 5.20, Feature 3722 Copyright (c) 2004-2013 Hangzhou H3C Tech. Co., Ltd. All rights reserved. H3C SecPath L1000-A uptime is 0 week, 0 day, 0 hour, 1 minute CPU type: XXXX 4096M bytes DDR2 SDRAM Memory 4M bytes Flash Memory Version:Ver.B... - Page 50 <H3C> # Execute the tftp put command in user view to put the file aa.diag to the TFTP server. <H3C> tftp 192.168.0.2 put aa.diag File will be transferred in binary mode Sending file to remote TFTP server. Please wait... | TFTP: 223242 bytes sent in 0 second(s).
-
Page 51: Displaying The Electrical Label Data
Displaying the electrical label data Use the display device manuinfo command to display the electronic label data for the L1000-A and interface modules. <H3C> display device manuinfo slot 0 DEVICE_NAME:SecPath L1000-A DEVICE_SERIAL_NUMBER:210235A0XBB10C000010 MAC_ADDRESS:3CE5-A6CC-8D21 MANUFACTURING_DATE:2013-11-06 VENDOR_NAME:H3C Displaying CPU usage statistics Use the display cpu-usage command to display CPU usage statistics. -
Page 52: Displaying The Operating States Of Fans
Percentage of the memory used to the total memory Displaying the operating states of fans Use the display fan command to display the operating states of fans. <H3C> display fan 1 State: Normal 2 State: Normal Table 11 Command output... -
Page 53: Verifying And Diagnosing Transceiver Modules
<H3C> display environment System Temperature information (degree centigrade): -------------------------------------------------------------------------------- --------- Sensor Temperature LowerLimit Warning-UpperLimit Alarm-UpperLimit Shutdown-U pperLimit hotspot 1 hotspot 2 Table 13 Command output Field Description Temperature sensor. Sensor Hotspot indicates a hot-spot temperature sensor. Temperature Current temperature LowerLlimit... -
Page 54: Troubleshooting System Exceptions
Displaying the exception handling method Use the display system-failure command to display the exception handling method. <H3C> display system-failure System failure handling method: reboot Rebooting your L1000-A You can reboot the L1000-A in one of the following ways to recover from an error condition: Reboot the L1000-A immediately at the command line interface (CLI). - Page 55 To reboot the L1000-A immediately: Task Command Remarks Required. Reboot a card or the whole reboot system immediately. Available in user view. To configure the scheduled reboot function: Task Command Remarks Enable the scheduled reboot Required. function and specify a specific schedule reboot at hh:mm [ date ] Use either approach.
-
Page 56: Troubleshooting
Keep the tamper-proof seal on one of the chassis cover's mounting screws intact. If you want to open • the chassis, contact the local sales agent of H3C for permission. Otherwise, H3C shall not be liable for any consequence caused thereby. -
Page 57: No Display On The Configuration Terminal
Verify that the serial port cable is in good condition and the serial port properties are correct. For how to set the properties of the serial port, see "Configuring communication parameters on the terminal." Password loss For troubleshooting console login password loss and user privilege level password loss, see H3C LB Products System Management Configuration Guide. -
Page 58: Cooling System Failures
If the temperature inside the L1000-A exceeds 50°C (122°F), the following information appears on • the configuration terminal: %Feb 27 11:34:39:949 2012 H3C DRVMSG/3/Temp2High:Temperature Point 0/0 Too High. %Feb 27 11:34:42:557 2012 H3C DEV/4/BOARD TEMP TOOHIGH: Board temperature is too high on Chassis 0 Slot 0, type is RPU. -
Page 59: Appendix A Chassis Views And Technical Specifications
Appendix A Chassis views and technical specifications Chassis views Figure 38 L1000-A front view (1) Combo interfaces (2) Console port (CONSOLE) (3) USB port (reserved for future use) Each combo interface comprises one 10/100/1000 Mbps copper port and one 1000 Mbps fiber port. The L1000-A comes with each combo fiber port covered by a dust cap. -
Page 60: Technical Specifications
Technical specifications Dimensions and weights Table 14 Dimensions and weights Item Description Dimensions without feet and rack-mounting brackets 44.2 × 442 × 442.6 mm (1.74 × 17.40 × 17.43 in) (H × W × D) Weight 5.5 kg (12.13 lb) Power consumption Table 15 Power consumption range of the entire system Item... -
Page 61: Storages
Item Description Maximum input current Maximum output power 150 W DC power module The L1000-A supports the DC power module PSR150-D. Its maximum output power is 150 W. Figure 41 DC power module PSR150-D 3 4 5 (1) Captive screw (2) Power module handle (3) Screw hole for securing the power cord (4) DC-input power receptacle... -
Page 62: Ports And Slots
Ports and slots Table 19 Ports and slots Item Description Console port 9600 bps (default) to 115200 bps USB port 1 (Host mode, reserved without software support) • Twelve 10/100/1000 Mbps copper ports: GE0 through GE11 Combo interfaces (fiber/copper ports) •... -
Page 63: Interface Modules
NOTE: The media dependent interface (MDI) standard is typically used on the Ethernet port of network adapters. The media dependent interface crossover (MDI-X) standard is typically used on hubs or LAN switches. Fiber Ethernet ports • Table 22 Technical specifications for 1000 Mbps fiber Ethernet ports Item Specification Connector... - Page 64 Figure 42 NSQ1GT2UA0 panel view (1) Captive screw (2) GE port 0 (3) GE port 1 The interface module comes with each GE port covered by a dust cap. For simplicity, this figure does not show the dust caps. Table 23 NSQ1GT2UA0 interface specifications Item Description Connector type...
- Page 65 The interface module comes with each SFP port covered by a dust cap. For simplicity, this figure does not show the dust caps. Table 24 NSQ1GP4U0 interface specifications Item Description Connector type Transceiver module type Number of interfaces Compliant standards 802.3, 802.3u, and 802.3ab Ethernet_II Frame format...
-
Page 66: Lightning Protector For A Network Port (Optional)
Item Description Transceiver module type SFP+ Number of interfaces Compliant standard 802.3ae Physical layer 10GBASE-R/W Interface speed LAN PHY mode: 10.3125 Gbps Lightning protector for a network port (optional) If part of the network cable of a network port must be routed outdoors, connect a lightning protector to the cable before you plug the cable into the port. -
Page 67: Appendix B Leds
Appendix B LEDs Panel LEDs Figure 45 F1000-A-EI LEDs Table 26 LED description Status Description No link is present on the corresponding port. Steady green A 1000 Mbps link is present on the port. (yellow/green) Steady yellow A 10/100 Mbps link is present on the port. No link is present. -
Page 68: Interface Module Leds
Interface module LEDs NSQ1GT2UA0 Figure 46 NSQ1GT2UA0 LEDs Table 27 LED description Status Description No link is present. (green) A link is present. No data is being transmitted or received. (yellow) Flashing Data is being transmitted or received. NSQ1GP4U0 Figure 47 NSQ1GP4U0 LEDs Table 28 LED description Status Description... -
Page 69: Nsq1Xs2U0
NSQ1XS2U0 Figure 48 NSQ1XS2U0 LEDs Table 29 LED description Status Description No link is present on the port. A 10 Gbps link is present on the port. (green) Flashing Data is being transmitted or received at 10 Gbps. -
Page 70: Appendix C Numbering Interfaces
Appendix C Numbering interfaces Numbering interfaces Interfaces on the L1000-A are numbered in the form of interface-type X/Y, where, • interface-type represents the type of the interface such as GigabitEthernet. X represents the number of the slot where the interface module resides. •... -
Page 71: Appendix D Cables
Appendix D Cables This chapter describes cables used for connecting network ports. Table 30 Cable description Cable Port type Application Ethernet twisted pair cable RJ-45 Ethernet ports Connects RJ-45 Ethernet ports to transmit data. Optical fiber SFP/SFP+ ports Connects the fiber ports to transmit data. Ethernet twisted pair cable Introduction An Ethernet twisted pair cable consists of four pairs of insulated copper wires twisted together. - Page 72 Figure 49 RJ-45 connector pinout diagram NOTE: The RJ-45 Ethernet interfaces use category 5 or higher Ethernet twisted pair cables for connection. EIA/TIA cabling specifications define two standards, 568A and 568B, for cable pinouts. • Standard 568A—pin 1: white/green stripe, pin 2: green solid, pin 3: white/orange stripe, pin 4: blue solid, pin 5: white/blue stripe, pin 6: orange solid, pin 7: white/brown stripe, pin 8: brown solid.
- Page 73 Figure 51 Crossover cable Select an Ethernet twisted pair cable according to the RJ-45 Ethernet port type on your device. An RJ-45 Ethernet interface can be MDI (for routers and PCs) or MDIX (for switches). For the pinouts of RJ-45 Ethernet interfaces, see Table 32 Table...
-
Page 74: Making An Ethernet Twisted Pair Cable
10Base-T/100Base-TX 1000Base-T Signal Function Signal Function Reserved BIDD- Bi-directional data cable D- Send data BIDA- Bi-directional data cable A- Reserved BIDC+ Bi-directional data cable C+ Reserved BIDC- Bi-directional data cable C- To ensure normal communication, the pins for sending data on one port should correspond to the pins for receiving data on the peer port. -
Page 75: Transceiver Modules
Table 34 Allowed maximum tensile force and crush load Period of force Tensile load (N) Crush load (N/mm) Short period Long term Transceiver modules GE SFP transceiver module The GE SFP transceiver module provides a transmission speed of 1000 Mbps and adopts the LC connector. - Page 76 Figure 53 SFP+ transceiver module Table 36 SFP+ transceiver module specifications Specification (dBm) Central Fiber Receivi Optic Fiber Bandwidth Optical Model wavele diameter transmission mode (MHz*km) transmit ngth (μm) distance sensitiv satur power ation 300 m 2000 (984.25 ft) 82 m 50/125 (269.03 ft) SFP-XG-S...
-
Page 77: Lc Connector
Specification (dBm) Central Fiber Receivi Optic Fiber Bandwidth Optical Model wavele diameter transmission mode (MHz*km) transmit ngth (μm) distance sensitiv satur power ation SFP-XG-L 1310 10 km (6.21 –8.2 to + X-SM131 9/125 ≤–10.3 +0.5 miles) SFP-XG-L 1550 40 km (24.86 –4.7 to + H40-SM 9/125... - Page 78 metallic board hole or bending along the acute side of mechanical parts, the fiber must wear jackets or cushions. Insert and remove a plug with care. Never exert a fierce force to the fiber or plug; otherwise the • plug may be damaged or the fiber may be broken. Never pull, press or extrude the fiber fiercely. For the allowed maximum tensile load and crush load, see Table...
-
Page 79: Appendix E Cabling Recommendations
Appendix E Cabling recommendations When the L1000-A is mounted in a 19-inch standard rack, the interface cables are routed through the cable management brackets, bound at cabling racks on chassis sides, and then routed up or down to pass through the chassis top or the raised floor, depending on the available equipment room condition. The power cables run along the two sides of the chassis and out of the chassis either from the chassis top or the raised floor depending on the equipment room conditions (power distribution cabinet, lightning protection box, connector strip, and so on) of the exchange office. - Page 80 Figure 55 Correct and incorrect cable binding Route different types of cables (for example, power cables and signal cables) separately. If they • are close to one another, cross them over one another. If you route them in parallel, make sure the space between a power cable bundle and a signal cable bundle is at least 30 mm (1.18 in).
- Page 81 Figure 57 Binding cables where they must be bent Route, bind, and attach excess cables for easy, safe maintenance activities and correct operations. • Do not tie power cables to slide rails. • • When you connect a cable to an articulated part, for example, when you connect a grounding cable to a cabinet door, leave enough slack in cables and make sure they are not stressed from any movement of the part.
-
Page 82: Cabling Examples
Cable bundle diameter (mm) Space between bundles (mm) 200 to 300 Do not tie cables or bundles in a knot. • The metal parts of the crimped cold-pressed terminal blocks (such as air switch) cannot protrude • beyond the blocks. Cabling examples Figure 59 Fiber cabling example... -
Page 83: Index
Index A C D E F G I L M N O P R S T U V Accessories,6 Installation tools,6 Installing a lightning protector for a network port,19 Installing a power module,14 Cable management requirements,71 Installing an interface module,18 Cabling examples,74 Installing the L1000-A in a 19-inch... - Page 84 Unpacking the L1000-A,10 Technical specifications,52 Troubleshooting system exceptions,46 Verifying and diagnosing transceiver modules,45 Verifying the installation,17...
Need help?
Do you have a question about the SecPath L1000-A and is the answer not in the manual?
Questions and answers