Advertisement
Quick Links
Power On and Test
1.
Turn on accessory power to the vehicle.
2.
Put the vehicle in reverse gear.
During normal operation, the monitor only turns on
when the vehicle is shifted into reverse.
If the monitor fails to turn on when power is applied,
confirm power connections. Disconnect and firmly
reconnect the LCD Monitor cables.
3.
For installations with video recorder integration,
configure the recorder as shown in the RVS Recorder
Configuration Guide (700-1103).
4.
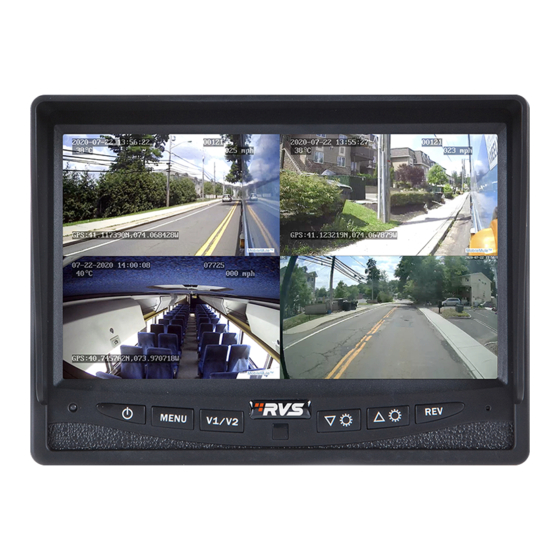
Adjust the camera view so that the bumper of the vehicle
is just visible across the bottom edge of the monitor, as
shown.
5.
Refer to the camera installation guide for details on
closing and fastening the camera once it has been aimed.
6.
Turn off accessory power to the vehicle.
LCD Monitor Configuration
For information on custom monitor settings, see the Rear
Vision Monitor Quick Install Guide (700-1107)
Related Documents
For full product details, and access to our Document Library,
please visit the Seon Community Web site:
https://community.seon.com
If you do not have access credentials, please contact
Customer Service.
© 2018 Safe Fleet | All rights reserved. www.seon.com. Part Number: 700-1110 R4
Customer Service
Service: 1.844.899.7366
General Enquiries: 1.877.630.7366
Email:
service@seon.com
If your RVS device is to be returned, please contact
Customer Service, and provide the model and/or serial
number of your unit. Ask for a Return Merchandise
Authorization (RMA) number. An RMA number allows the
Service Technicians to better track your product when it
comes in for service. Please show the RMA number on the
outside of the package. ANY RETURNED PRODUCT
WITHOUT AN RMA NUMBER MAY BE REFUSED.
Warranty
For full warranty information, please visit:
http://www.seon.com/documents/Seon-Warranty.pdf
Rear Vision System Installation Guide
for Standalone and Video Recorder Integration
Introduction
The Rear Vision System (RVS) for vehicles enables the driver to see the camera output on a dash-mount monitor
whenever the reverse signal is triggered. The video feed can be mirrored with monitor settings.
This document covers physical installation of RVS hardware components. The RVS can be installed in two ways:
Standalone: the RVS is powered from the vehicle, and displays on the dashboard monitor without passing
through the recorder; RVS video is NOT recorded.
Recorder Integration: Using a recorder camera socket, RVS camera video runs through the video recorder
before appearing on the monitor. RVS video, events, and alarms are recorded. For details on setting up a
recorder for RVS integration, see the RVS Recorder Configuration Guide (700-1103).
Note: High definition camera views cannot be displayed on the monitor.
When installed, RVS typically operates as follows:
The monitor is usually OFF (dark)
The monitor only turns ON when the vehicle is put into reverse gear (REVERSE signal is applied)
Important: When the vehicle ignition is turned on, the recorder may require approximately one minute to boot
up before video from the rear view camera appears on the dashboard monitor.
System Installation Components
CA or RVC400 camera - including bracket (660-1072) and
hardware kit (020-1043)
7" Monitor (080-1059), including sunshade (665-1020),
bracket (660-1073), and hardware kit (020-1042)
Rear Vision Monitor Quick Install Guide (700-1107)
*
Expansion harness for TH4/TH6/HX/NX (060-1059)
*
Expansion harness for TL-HD (060-1014)
*
Components not required for standalone installations
© 2018 Safe Fleet | All rights reserved. www.seon.com. Part Number: 700-1110 R4
75' Camera extension cable (060-1094)
Camera cable adaptor for retrofit (060-1095)
20' Video extension cable (HE1HD)
*
Monitor power and connector harness (060-1096)
RCA cable adaptor (060-1102)
Monitor diode kit (020-1045)
Advertisement

Related Manuals for Safe Fleet RVS


Summary of Contents for Safe Fleet RVS
- Page 1 Introduction http://www.seon.com/documents/Seon-Warranty.pdf The Rear Vision System (RVS) for vehicles enables the driver to see the camera output on a dash-mount monitor whenever the reverse signal is triggered. The video feed can be mirrored with monitor settings. This document covers physical installation of RVS hardware components. The RVS can be installed in two ways: ...
- Page 2 Once the camera is installed according to its installation documentation: Take note of the camera port number RVS Recorder Configuration Guide (700-1103). for TL-HD recorders, note the channel number Connect the 2x3 Microfit connector on cable A to the BACK AV3 Microfit socket on cable B.
Need help?
Do you have a question about the RVS and is the answer not in the manual?
Questions and answers