
Subscribe to Our Youtube Channel
Related Manuals for True Envision 9


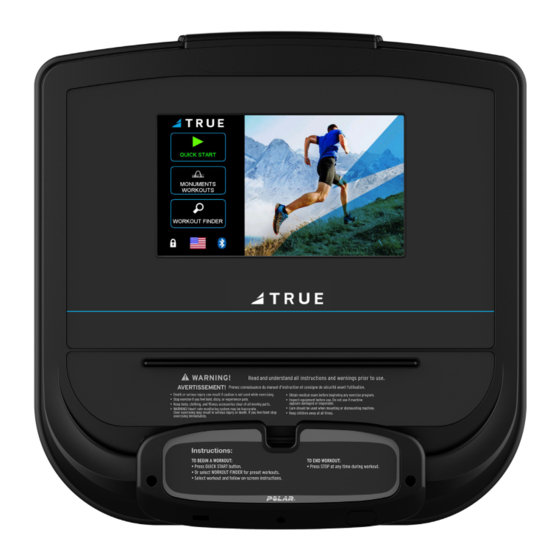
Summary of Contents for True Envision 9
- Page 1 ENVISION CONSOLE OWNER’S MANUAL Console Manual SKU #: MAN-CUI9 Model #: Envision Revision 022720...
- Page 2 ENVISION CONSOLE IMPORTANT: All products shown are prototype. Actual product delivered may vary. Product specifications, features & software are subject to change without notice. For the most up-to-date owner’s manual please visit www.truefitness.com. For documents in additional languages please visit www.truefitness.com/resources/document-library/ IMPORTANTE: Todos los productos mostrados son prototipos.
- Page 3 The proud manufacturing tradition of quality and the culture of innovation at TRUE have given rise to a full line of extraordinary cardio and strength equipment. As a result, people all over the world are benefiting from the TRUE experience.
-
Page 4: Table Of Contents
ENVISION CONSOLE TABLE OF CONTENTS: Chapter 1: Safety Instructions Safety Instructions ..................................5 Chapter 2: Product Overview Envision Overview ................................9 Touchscreen Introduction ..............................10 Touchscreen Navigation ..............................10 Chapter 3: Programming & Operation Heart Rate Monitoring ................................11 Heart Rate Control ................................12 Workout Program Descriptions ............................13 Chapter 4: Envision Operation Touchscreen Navigation ..............................16... -
Page 5: Chapter 1: Safety Instructions
45, smokes, has high cholesterol, is obese, or has not exercised regularly in the past year. Additionally, TRUE recommends consulting a fitness professional on the correct use of this product. - Page 6 To disconnect, turn power OFF at the ON/OFF switch if applicable, then remove plug from electrical outlet. • Never operate a TRUE product if it has a damaged power cord or electrical plug, or if it has been dropped, damaged, or even partially immersed in water. Contact TRUE Customer Service for a replacement.
- Page 7 Never insert objects into any openings in this product. If an object should drop inside, turn off the power, unplug the power cord from the outlet and carefully retrieve it. If the item cannot be reached, contact TRUE Customer Service.
- Page 8 Important Electrical Requirements – 120V: Your TRUE equipment requires a dedicated 120 volt, alternating current (AC), 20 amp grounded outlet circuit. This means nothing else can be plugged into the same circuit. Most power circuits are rated for this 120V AC 20 amp requirement, but you must ensure the equipment does not share the circuit with anything else.
-
Page 9: Chapter 2: Product Overview Envision 9 Overview
CHAPTER 2: PRODUCT OVERVIEW ENVISION OVERVIEW: Touch Screen Display USB Jack Headphone Jack Warning Decal Reading Rack Truefitness.com / 800.426.6570 / 636.272.7100 9 of 42... -
Page 10: Touchscreen Introduction
Due to this, capacitive touch screens are highly responsive and do not require pressure to register a touch. TOUCH SCREEN NAVIGATION: TRUE recommends that users familiarize themselves with the different screens to ensure they are safely taking advantage of all of the features this equipment has to offer. Icon Character Map: This console uses several icons to provide users with a simplified and visually appealing workout experience. -
Page 11: Chapter 3: Programming & Operation
CHAPTER 3: PROGRAMMING & OPERATION caution: The safety key must be in place on the machine, and should be attached to the user’s clothing. HEART RATE MONITORING: The machine can monitor a user’s heart rate using either a Polar® compatible chest strap or the metal grips on the hand rails (called contact heart rate or CHR pads). -
Page 12: Heart Rate Control
The TRUE HRC system is unique because users must enter the key parameters of the workout; target heart rate, maximum speed, maximum incline, and time, prior to starting the HRC workout. As users approach their target heart rate, the machine’s computer automatically takes over and changes the speed and/or incline automatically to keep them near their... -
Page 13: Workout Program Descriptions
CHAPTER 3: PROGRAMMING & OPERATION WORKOUT PROGRAM DESCRIPTIONS: Quick Start: A workout in which the user controls all settings. The workout continues until it is ended by the user. Cardio 360™ Quick Start: (Only Available on the XS1000, XC400, & XC900) Get right into a pre-set 20-minute workout designed to shape and tone every major muscle group. - Page 14 CHAPTER 3: PROGRAMMING & OPERATION WORKOUT PROGRAM DESCRIPTIONS: Leg Shaper: (Only Available on the XS1000, XC400/900, RC400/900, and UC400/900) A workout that suggests PACE changes to work the leg muscles with added intensity. Reverse stride occasionally for an added challenge. Distance Workouts: Choose any one of our four common distance workouts: 5k****, 10k****, 2 mile***, or 4 mile***.
- Page 15 CHAPTER 3: PROGRAMMING & OPERATION WORKOUT PROGRAM DESCRIPTIONS: Custom HRC Intervals: Set up a custom heart rate interval. Specify WORK and REST targets and let the machine make all the adjustments. The workout begins in MANUAL control - users should gradually increase the workout intensity until the heart rate is within 10 bpm of the user’s target heart rate.
-
Page 16: Chapter 4: Envision Operation Touchscreen Navigation
CHAPTER 3: PROGRAMMING & OPERATION TOUCH SCREEN NAVIGATION: Home Screen: The Home Screen is displayed on the console when there is no workout in progress. From this screen, the user is able to select from various options to begin a workout. A) Quick Start Starts a workout in which the user controls all settings. - Page 17 CHAPTER 4: ENVISION OPERATION TOUCH SCREEN NAVIGATION: Selecting a Preset Workout: Preset workouts are accessed by selecting the Workout Finder button on the home screen. All available workouts are listed as a default on the right side of the screen, but the user may select from specific workout categories listed on the left side of the screen to view a subset of all available workouts such as HRC workouts.
- Page 18 CHAPTER 4: ENVISION OPERATION TOUCH SCREEN NAVIGATION: Workout Views Screen: During any workout a Workout View Screen will be displayed to give the user a comprehensive visual overview of their current workout data. A) Workout Views Toolbar Cycle: Cycle through three preset toolbar menus of workout data also shown in the Workout Data Menu. B) METS: Displays the current METS expenditure based on current speed and incline workout settings.
- Page 19 CHAPTER 4: ENVISION OPERATION TOUCH SCREEN NAVIGATION: Workout Views Screen: During any workout a Workout View Screen will be displayed to give the user a comprehensive visual overview of their current workout data. A) Volume Up: Increase the volume one level at a time. B) Volume Down: Decrease the volume one level at a time.
- Page 20 CHAPTER 4: ENVISION OPERATION TOUCH SCREEN NAVIGATION: Options Menu: The Options menu contains controls that allow users to adjust settings during their workout. A) Options Menu: The Options menu enables users to customize their workout experience such as enabling a Heart Rate Control (HRC) Cruise Control workout, and pairing Bluetooth wireless technology enabled devices with the console.
- Page 21 CHAPTER 4: ENVISION OPERATION TOUCH SCREEN NAVIGATION: Bluetooth Connectivity: The Bluetooth connectivity screen (A) displays the Bluetooth wireless technology enabled devices available for pairing with the Envision console. Follow the on-screen prompts on the Envision console and the Bluetooth device to complete the pairing process.
-
Page 22: Walk/Run Track
CHAPTER 4: ENVISION OPERATION WALK/RUN TRACK: The Walk/Run Track screen (A) displays a virtual track with a progress dot representing the user walking and/or running around the track. A) Lap Count: Displays a counter for the number of laps the user has completed around the virtual track. TIME SCREEN: The Time screen (A) displays the elapsed time for the current workout. -
Page 23: Incline/Speed Graph
CHAPTER 4: ENVISION OPERATION INCLINE/SPEED GRAPH: The Incline/Speed screen (A) provides a real-time graphical display of the user’s current workout incline or speed data based on the type of workout selected. A horizontal progress bar driven by preset time increments tracks the progress through the current graph bar. -
Page 24: Idle Screen
CHAPTER 4: ENVISION OPERATION IDLE SCREEN: During a workout when the user becomes idle or presses the Stop button on the bottom toolbar, the Idle screen shown below will appear, prompting the user to resume their workout (A), start a two minute, low intensity cooldown (B) with the workout ending after that time, reset the Idle Screen Timer (C) to 30 seconds while the user makes their selection, or end the current workout (D) and proceed to the Workout Summary screen. -
Page 25: Broadcastvision Tv Preset Programming
Entering Service Screen: To enter the Service screen, press and hold the TRUE logo (A) in the upper left corner of the home screen until the TRUE logo begins to flash. Next, press and hold the bottom, right corner of the screen until the Service screen appears. - Page 26 CHAPTER 4: ENVISION OPERATION SERVICE MODE: Summary Screen: The Summary Screen will be the first screen displayed. This screen will give a general overview of the unit’s setup. A) Home Screen: Navigates the user to the Home screen. B) Product Model: The model number that the console is currently configured to.
- Page 27 B) Software Update: TRUE may periodically release software updates to enhance the workout experience. Due to the complex nature of this procedure, it is recommended that a TRUE certified service professional performs any software updates. C) Change Equipment Type: Enables the user to change the equipment type if switching the console from a different base unit. Follow the on-screen prompts to complete the process.
- Page 28 CHAPTER 4: ENVISION OPERATION SERVICE MODE: Options Menu: The Options menu is accessed by selecting the Options button on the Main menu. The Options menu provides various customization options. H, I, J A) Units: Displays the selected unit of measrement whether U.S. or metric. B) Save Workouts: Enables the user to pre-configured save workouts.
- Page 29 Toggles on or off indicating if the optional decline foot is installed on the base unit. F) Display Images M.E.: Enable or disable modesty mode. G) Factory Defaults: Restore the Envision 9 console to factory defaults. Truefitness.com / 800.426.6570 / 636.272.7100 29 of 42...
- Page 30 CHAPTER 4: ENVISION OPERATION SERVICE MODE: Language: The Language menu enables the selection of a language for the Envision 9 console from the 12 available languages. Diagnostics Menu: The Diagnostics menu provides advanced functions for the Envision 9 console. A) Calibration/Test: Enables the user to calibrate and test the console.
- Page 31 CHAPTER 4: ENVISION OPERATION SERVICE MODE: Statistics Menu: The Statistics Menu provides statistical data about the console and base unit with the ability to clear all statistics in addition to enabling the user to export all statistics via the USB Export button. Truefitness.com / 800.426.6570 / 636.272.7100 31 of 42...
- Page 32 CHAPTER 4: ENVISION OPERATION SERVICE MODE: Transferring Envision to same type base unit: console to a same base unit type (e.g. treadmill to treadmill), the Envision When transferring the Envision console must be configured to the correct base unit model(e.g. TI1000, TC900, TC400, etc.). Within Service Mode, navigate to Utilities >...
-
Page 33: Gymtrakr Application
CHAPTER 4: ENVISION OPERATION GYM TRAKR APPLICATION: Home Screen: The Gym Trakr© application Home screen displays all available machines for pairing with the application via Bluetooth. Note: The Gym Trakr application offers two color combinations themes as shown below. Settings Screen: The Settings screen enables the user to adjust the unit of measurement, toggle between color combination themes, contact the application developer, and view acknowledgements. - Page 34 CHAPTER 4: ENVISION OPERATION GYM TRAKR APPLICATION: Workout History Screen: The Workout History screen displays all previously saved workout data. Note: The user must select “Yes” in the “Save Workout to History” pop-up screen when prompted at the end of a workout for the workout data to be saved and viewable in the Workout History screen.
- Page 35 CHAPTER 4: ENVISION OPERATION GYM TRAKR APPLICATION: Workout Paused, End Workout, and Save Workout to History Pop-Up Windows: At the conclusion of a workout, the user is presented with three pop-up windows. The Workout Paused pop-up window notifies the user the workout has been paused on the equipment with the option to end data tracking of the current workout.
-
Page 36: Zwift Application
CHAPTER 4: ENVISION OPERATION ZWIFT APPLICATION: Login Menu: The Zwift© application Login menu enables the user to select a profile in addition to selecting a language. Note: Confirm your smartphone or tablet is paired with the Envision with Compass touchscreen console via Bluetooth to ensure all workout data is synced with the Zwift application. - Page 37 CHAPTER 4: ENVISION OPERATION ZWIFT APPLICATION: Home Menu: The Home menu displays special in-app events (A), available workouts (B), device pairing options (C), the ability to join other users in their current workout (D), the guest world schedule (E), current challenges selected by the user (F), and the option to begin a workout based on selected parameters (G).
- Page 38 CHAPTER 4: ENVISION OPERATION ZWIFT APPLICATION: Workout Screen: After configuring workout parameters and selecting the Ride button on the Home menu, the workout will begin. The appearance of the workout user interface will display either the Workouts or Plans screen based on the user selecting from the Workouts or Plans tabs in the Training menu.
- Page 39 CHAPTER 4: ENVISION OPERATION ZWIFT APPLICATION: Ride Report Screen: The Ride Report screen displays post-workout data such as route traveled and distance traveled. Save Your Ride: The Save Your Ride screen enables the user to save the workout data to the list of fitness applications listed below with the option to navigate back to the Workout Pause screen or discard current workout data.
-
Page 40: Envision 9 Console Assembly
CHAPTER 4: ENVISION OPERATION ENVISION CONSOLE ASSEMBLY: Console Wire Connections: Connect the Auxillary Power Supply (A), USB Data cable (B), and Ground Wire Ring Terminal (C) as shown below. Tuck the CSAFE cable (D), Coaxial cable (E), Console Fan (F), Ethernet Communication cable (G), and any excess cord length inside the pedestal. -
Page 41: Chapter 5: Customer Service
HOURS OF OPERATION: 8:30 A.M. - 5:00 P.M. CST E-MAIL: service@truefitness.com CONTACTING SALES: Interested in TRUE Products? Please contact us with any sales or product inquires so that we may direct you to the appropriate sales representative to answer your questions. TRUE FITNESS HOME OFFICE 865 HOFF ROAD ST. -
Page 42: Reporting Freight Or Parts Damage
Please make sure the photos include the damaged product as well as the damaged box the product arrived in. Contact the TRUE Fitness customer support team by calling 800.883.8783 or sales support team by calling 800.426.6570 Monday-Friday during normal business hours.
Need help?
Do you have a question about the Envision 9 and is the answer not in the manual?
Questions and answers