Cascade TEK TFO-1 Installation And Operation Manual
Forced air ovens
Hide thumbs
Also See for TFO-1:
- Instruction manual (16 pages) ,
- Installation and operational manual (30 pages)
Table of Contents
Advertisement
Advertisement
Table of Contents

Related Manuals for Cascade TEK TFO-1


Summary of Contents for Cascade TEK TFO-1
- Page 1 FORCED AIR OVENS TFO-1 TFO-3 TFO-5 Installation and Operation Manual...
- Page 2 Depicted on front cover, left to right: TFO-1, TFO-3, TFO-5 Warning: This product contains chemicals, including triglycidyl isocyanurate, known to the State of California to cause cancer as well as birth defects or other reproductive harm. For more information, go to www.P65Warnings.ca.gov.
- Page 3 CTF322 CTF522 Part ID designates the specific build type of the model. This oven is manufactured for Cascade TEK by Sheldon Manufacturing, INC, an ISO-certified manufacturer. Safety Certifications These units are CUE listed by TÜV SÜD as forced air ovens for professional, industrial, or educational use where the preparation or testing of materials is done at an ambient air pressure range of 22.14 –...
-
Page 4: Table Of Contents
TABLE OF CONTENTS INTRODUCTION ..............................5 Read this Manual ..................................5 Safety Considerations and Requirements ........................5 Contacting Assistance ................................6 Manufacturing Warranty ..............................6 Engineering Improvements..............................6 RECEIVING YOUR UNIT............................. 7 Inspect the Shipment ................................7 Orientation Images ................................8 Recording Data Plate Information ........................... -
Page 5: Introduction
INTRODUCTION Thank you for purchasing a Cascade TEK oven. We know you have many choices in today’s competitive marketplace when it comes to constant temperature equipment. We appreciate you choosing ours. We stand behind our products and will be here if you need us. -
Page 6: Contacting Assistance
Therefore, some changes, modifications, and improvements may not be covered in this manual. If your unit’s operating characteristics or appearance differs from those described in this manual, please contact your Cascade TEK dealer or customer service representative for assistance. -
Page 7: Receiving Your Unit
Carefully check all packaging for accessory items before discarding. Model Shelves Shelf Clips Leveling Feet Power Cord TFO-1 TFO-3 TFO-5 Shelves TFO-1 TFO-3 TFO-5 A high-temperature access port stopper ships installed in the port located on the back of the oven. -
Page 8: Orientation Images
RECEIVING RIENTATION MAGES Figure 1: TFO-5 Exhaust Port with Sliding Dampener Main Temperature and High Limit Sensor Probes Chamber Gasket Door Latch Access Port Control Panel Oven Chamber P a g e... - Page 9 RECEIVING Figure 2: TFO-3 Chamber Gasket Exhaust Port with Sliding Main Temperature and High Limit Sensor Probes Dampener Door Latch Access Port Control Panel Oven Chamber P a g e...
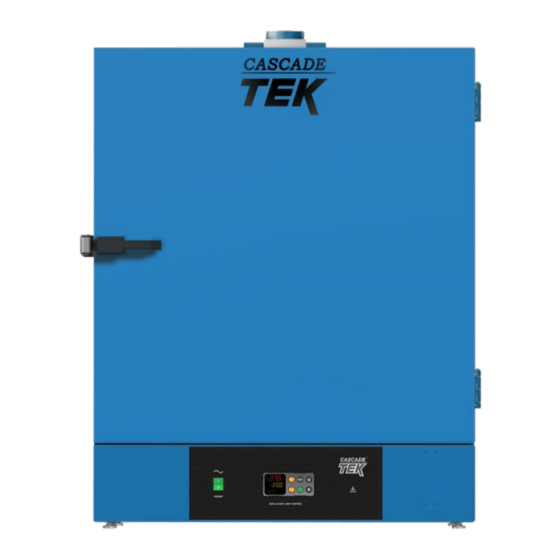
- Page 10 RECEIVING Figure 3: TFO-1 Exhaust Port with Sliding Dampener Chamber Gasket Main Temperature and High Limit Sensor Probes (Under Shelf) Door Latch Access Port Control Panel Oven Chamber 10 | P a g e...
- Page 11 RECEIVING Figure 4: Unit Back Access Port (Stopper Installed) Data Plate Analog Data Jack Port RS485 Data Port, 25 pins Power Cord Inlet with Fuse 11 | P a g e...
-
Page 12: Recording Data Plate Information
RECEIVING ECORDING LATE NFORMATION The data plate contains the unit model number and serial number. Customer Support will need this information during any support call. Record it below for future reference. The data plate is located on the back of the oven above the power inlet. •... -
Page 13: Installation
INSTALLATION NSTALLATION ROCEDURE HECKLIST For installing the unit in a new workspace location. Pre-Installation Check that the required workspace ambient conditions for the oven are met, page 14. Unit dimensions may be found on page 43 • Check that the required ventilation and spacing requirements are met, page 14. ... -
Page 14: Required Ambient Conditions
Ducting is attached 6” (152 mm 6” (152 mm) Door Swing TFO-1: 23” (585mm) TFO-3: 27” (686mm TFO-5: 32” (813mm) This spacing is required for the oven to operate safely and meet its stated temperature specifications: 24 inches (610 mm) of headspace clearance is required between the exhaust vent and any •... -
Page 15: Power Source Requirements
When selecting a location for the unit, verify that each of the following requirements is satisfied: Power Source: The wall power outlet must meet the power requirements listed on the unit data plate. These units are intended for 110 – 120 VAC 50/60 Hz applications at the following amperages: TFO-1 TFO-3 TFO-5 12.0 Amps 14.0 Amps... -
Page 16: Lifting And Handling
INSTALLATION IFTING AND ANDLING The oven is heavy. Use appropriate lifting devices that are sufficiently rated for these loads. Follow these guidelines when lifting the oven: Lift the oven only from its bottom surface. • Doors, handles, and knobs are not adequate for lifting or stabilization. •... -
Page 17: Shelving Installation
INSTALLATION HELVING NSTALLATION Figure 5: Place the Shelf Figure 6: Install Clips Install 4 clips for each shelf in the slots located on the sides of the chamber interior. a. Squeeze each clip. b. Insert the top tabs first, then the bottom tabs using a rocking motion. 2. - Page 18 INSTALLATION 18 | P a g e...
-
Page 19: Graphic Symbols
GRAPHIC SYMBOLS The oven is provided with multiple graphic symbols on its external and internal surfaces. The symbols identify hazards and the functions of the adjustable components as well as important notes found in the user manual. Symbol Definition Consult the user manual. Consulter le manuel d'utilisation Indicates adjustable temperature Indique température réglable... - Page 20 GRAPHIC SYMBOLS 20 | P a g e...
-
Page 21: Control Panel Overview
CONTROL PANEL OVERVIEW Figure 8: Control Panel and Controller Power Switch The self-illuminating main power switch controls all power to the oven and its systems. The switch must be in the ( I ) on position for the unit to function. Temperature Controller - Display on Homepage Top Line (Red): Present chamber air temperature... - Page 22 CONTROL PANEL 22 | P a g e...
-
Page 23: Operation
OPERATION Safe operation of the oven is dependent on the actions and behavior of the oven operators. Operating personnel must read and understand the Operating Precautions in this section prior to operating the oven. The operators must follow these instructions to prevent injuries and to safeguard their health, environment, and the materials being treated in the oven, as well as to prevent damage to the oven. -
Page 24: Theory Of Operations
OPERATION HEORY OF PERATIONS Heating When powered, the TFO oven heats the oven chamber atmosphere to the current constant temperature set point. The oven can also be programmed with multi-step automated heating recipe profiles. When launched, a profile overrides the constant temperature set point. In its default setting, the oven resumes heating to the constant temperature set point after a profile completes or is aborted. - Page 25 OPERATION Exhaust Vent The oven is provided with an exhaust vent that may be opened or closed using the dampener slide located on the vent body. The dampener is intended to be opened after the heat treatment or bake out phases of an application are complete. Opening the dampener vent during a baking application may speed the rate of material drying depending on the nature of the sample material, outgassed byproducts, and ambient conditions.
-
Page 26: Put The Oven Into Operation
OPERATION UT THE VEN INTO PERATION Perform the following steps and procedures to put the oven into operation after installing it in a new workspace environment. Plug in the power cord Attach the power cord that came with the unit to the power inlet receptacle on the back of the oven. -
Page 27: Set The High Temperature Limit
OPERATION ET THE EMPERATURE IMIT Note: Test the high limit system once per year for functionality. The high temperature limit is set by the operator at least 10°C above the highest temperature the oven will run at during your recipe profile or constant-temperature application. Advance to the Limit High Set Point, starting on the Homepage Push the Advance button repeatedly until “Lh.S1”... -
Page 28: Setting The Constant Temperature Set Point
OPERATION ETTING THE ONSTANT EMPERATURE OINT Adjust the constant temperature set point on the home page. Do not exceed the high limit • set point. Note: Holding down an arrow button will cause the temperature to advance in increments of ten (10). Adjust Release the Arrow buttons after adjusting the Set Point There may be a brief pause as the oven controller... -
Page 29: High Temperature Limit Activated
OPERATION EMPERATURE IMIT CTIVATED The High Limit system blocks heating in the oven chamber if chamber temperature meets or exceeds the present High Limit setting. Heating remains disabled until the High Limit cutoff is manually cleared by the oven operator. Indicators The oven controller display screen flashes two alternating alert screens when a High Alternating Alert... -
Page 30: Data Port And Data Jack
OPERATION ORT AND The 25-pin RS485 data port, located on the back of the oven, connects to the oven temperature controller. It is primarily intended for updating the controller software but can be used for data logging and graphical profile programming. Accessing the controller with a computer requires a 25- pin RS485-to-USB converter cable and driver software. -
Page 31: Auto Tuning
OPERATION UNING The auto tuning function runs the oven for a period of hours to optimize the controller PID parameters. This optimization is intended for use only if the oven temperature is lagging, overshooting, or failing to achieve the set point when large volumes or significant masses of product are present in the oven chamber Auto tuning will not allow the oven to exceed its maximum specified heating rates. -
Page 32: High Exterior Temperatures
OPERATION Note: Allow the oven to cool or use appropriate PPE and tools when adjusting the chamber gasket seating. XTERIOR EMPERATURES If the chamber gasket comes out of alignment, oven chamber air may be drawn into the insulating baffle spaces. This can result in heating of the oven exterior surfaces. If the oven is exterior is unusually warm or hot, push the chamber gasket inward along its entire length to restore the integrity of the seal. -
Page 33: Operator Maintenance
OPERATOR MAINTENANCE Warning: Disconnect the unit from its power supply prior to performing maintenance or services. Avertissement: Avant d'effectuer toute maintenance ou entretien de cet appareil, débrancher le cordon secteur de la source d'alimentation. LEANING If a hazardous material or substance has spilled in the unit, immediately initiate your site’s Hazardous Material Spill Containment protocol. -
Page 34: Gaskets And Chamber Integrity
MAINTENANCE ASKETS AND HAMBER NTEGRITY Periodically, inspect the door latch, trim, catch, and the gasket for signs of deterioration. Failure to maintain the integrity of the door system shortens the life span of the oven. These ovens use snap-in fiberglass chamber gaskets. The only tool required for swapping out these gaskets is a cutting implement for tailoring the length of the new gasket. -
Page 35: Diagnostics - Heating Issues
MAINTENANCE IAGNOSTICS EATING SSUES If the unit is experiencing heating issues, use the following guide to gather information prior to contacting Customer Support. Gathering and sharing this information with Customer Support significantly increases the chance a service technician will be dispatched with the parts needed to fix your unit during the first visit. - Page 36 MAINTENANCE SDRAP Data Log What is the unit doing? See pages 40 - 41 for the detailed walkthrough of the SDRAP questions. SDRAP Record SDRAP Answers and Any Notes Here et Point, present setting: isplay, present Temperature reading: eference device, present reading: mbient, present temperature:...
- Page 37 Find and note the following unit designation and performance information in the user manual. Unit Specification Data Location Record Data Here This manual covers TFO-1, TFO- 3, and TFO-5. See the Model Type: Orientation Photos on pages 8 through 10 or the data plate on the unit to identify your model type.
- Page 38 MAINTENANCE Required Items You must have the following items on hand to answer the diagnostic questions. A temperature reference device – A calibrated digital thermometer with at least one thermocouple sensor probe. The device must be at least accurate to 0.1°C. A copy of the user manual for the unit –...
- Page 39 MAINTENANCE Note: Does the car actually have gas in the tank? Have you physically verified the computer is plugged in? Yes, we are going ask some very basic questions. Please bear with us. Methodical verifications and the elimination of assumptions are often the quickest means of getting a unit back into operation.
- Page 40 MAINTENANCE Diagnostic Data Procedure – SDRAP Questions et point? What is the present constant temperature set point of the unit? See the Set Temperature entry in the “Operation” chapter of the user manual for how to set the constant temperature set point. Figure 11: Set Point in green isplay? What chamber temperature is presently showing on the temperature display?
- Page 41 MAINTENANCE mbient? What is the room temperature? For best results, measure the temperature in the same section of the room where the unit is • located, but do not place your thermometer on the unit! Room Air Temperature ilot Lights? 1) Is the heating active indicator on the control panel flashing or otherwise illuminating.
- Page 42 MAINTENANCE Share! Share the SDRAP and Unit Specifications data with Customer Support. This data is crucial for offsite personnel making accurate remote diagnoses. The information is used to help ensure service techs are dispatched with the tools and parts needed to fix your unit during their first visit. Facilities Technicians SDRAP and Unit Specifications data are also useful to any institutional repair technicians at your facility who may be responsible for servicing of out-of-warranty units.
-
Page 43: Unit Specifications
We reserve the right to alter technical specifications at all times. EIGHT Model Shipping Weight Unit Weight TFO-1 167 lb / 77 kg 126.5 lb / 57.4 kg TFO-3 216 lb / 98 kg 170.5 lb / 77.3 kg... -
Page 44: Shelf Capacity By Weight
*50 lb / 22.7 kg with weight evenly distributed across the shelf. **100 lb / 45.0 kg total load for the TFO-1 shelves. Exceeding this limit risks damaging the chamber liner. ***200 lb / 91.0 kg total load for the TFO-3 and TFO-5 shelves. Exceeding this limit risks damaging the chamber liner. -
Page 45: Air Flow Performance
UNIT SPECIFICATIONS Recovery Time: From a 30-second door opening. Model Recovery to 80°C Recovery to 150° Recovery to 306°C 14.0 Minutes TFO-1 1.5 Minutes 4.5 Minutes 18.0 Minutes TFO-3 1.5 Minutes 2.0 Minutes 45.0 Minutes TFO-5 2.0 Minutes 4.0 Minutes Recovery Time: From a 60-second door opening. -
Page 46: Power
UNIT SPECIFICATIONS OWER Model AC Voltage Amperage Frequency TFO-1 110 – 120 12.0 50/60 Hz TFO-3 110 – 120 14.0 50/60 Hz TFO-5 110 – 120 14.0 50/60 Hz 46 | P a g e... -
Page 47: Replacement Part List
Temperature 7750572 5130890 Parts may be ordered from Cascade TEK by calling 1-888-835-9250. Please have the model number and serial number of the unit ready, as Customer Support will need this information to match your oven with its correct part. - Page 48 Corporate Headquarters Cascade TEK Solutions, LLC 2010 Century Center Blvd, Suite 21 Irving, Texas 75062 support@cascadetek.com cascadetek.com 1-888-835-9250 1-971-371-4096...
Need help?
Do you have a question about the TFO-1 and is the answer not in the manual?
Questions and answers