Contour NEXT User Manual
Hide thumbs
Also See for NEXT:
- Quick start manual ,
- User manual (67 pages) ,
- Quick reference manual (21 pages)
Table of Contents
Advertisement
85476920_CntrNXT_UG_EN.indd 1
PROCESS C
PROCESS M
5050 1st Ave South
Suite #101
Seattle, WA 98134
Tel: 206.587.0800
Fax: 206.587.0356
LASER PROOF
APPROVED
RESUBMIT WITH CHANGES
Blood Glucose Monitoring System
Uses only C
ontour
USER GUIDE
PROCESS Y
PROCESS K
FILE NAME: 85476920_CntrNXT_UG_EN.indd
DESCRIPTION: Contour Next Meter User Guide CA
DATE: 09/03/16
PROGRAM VERS: InDesign CC(2014)
MARKET: CA
LANGUAGES: EN
TRIM SIZE: 6" (H) x 4.5" (W)
EPSONS PROOF
APPROVED
RESUBMIT WITH CHANGES
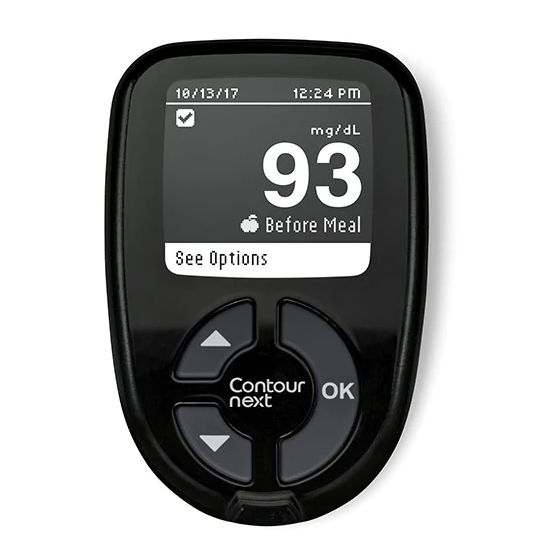
10/13/12
12:24 PM
5.2
mmol/L
Before Meal
See Options
n
blood glucose test strips
®
ext
CLIENT: Ascensia Diabetes Care
SKU: Multi
SPEC: 10000754844 REV -
PARENT BAN: Multi
PREVIOUS BAN: 84671533
MASTER REF: CntrNEXT_M_GDE_USR_0054_R0004_CA
SIGNATURE
PROJ. MGR. SIGNATURE _________________________________ DATE ____________
PROJ. MGR. SIGNATURE _________________________________ DATE ____________
PROJ. MGR. SIGNATURE _________________________________ DATE ____________
9/16/16 3:27 PM
NEW COMP BAN: 85476920
REV: 07/16
V0 08/16/16 Initial Build
V1 09/03/16 DMC Annotations
BAR CODE: 85476920 (12x12 2D Matrix)
VERSION: V1
Advertisement
Table of Contents

Related Manuals for Contour NEXT


Summary of Contents for Contour NEXT
- Page 1 PROCESS M PROCESS Y PROCESS K FILE NAME: 85476920_CntrNXT_UG_EN.indd NEW COMP BAN: 85476920 REV: 07/16 DESCRIPTION: Contour Next Meter User Guide CA DATE: 09/03/16 CLIENT: Ascensia Diabetes Care V0 08/16/16 Initial Build V1 09/03/16 DMC Annotations PROGRAM VERS: InDesign CC(2014)
- Page 2 INTENDED USE of clinical conditions that may adversely affect the measurement of glucose in peripheral blood. The C blood glucose monitoring system (meter, ® ontour Talk to Your Health Care Professional test strips and control solution) is intended for use by persons with diabetes for self-testing and by health care professionals for •...
- Page 3 PRECAUTIONS • Use only approved equipment from the manufacturer or certified body such as UL or TUV. • Read your C meter user guide, the lancing ® ontour • It is advisable to avoid use of electronic devices in very dry device package insert and all instructional materials provided in environments, especially if synthetic materials are present.
-
Page 4: Table Of Contents
Table of Contents Your Meter Features Easy: The C blood glucose monitoring system is ® ontour Intended Use, Important Safety Information ......i about simplicity. You will notice this the first time you use it. Your C ® Meter ...........2 ontour Automatic: The C meter is designed with No Coding ®... -
Page 5: Your C Ontour N Ext Meter
Your C Meter ® ontour Date Time 13.10.12 12:24 Test Result mmol/L In Target AutoLog Before Meal Meal Marker Data Port See Options Up/Down Scroll Buttons Press to scroll up OK Button Press and hold Press and hold to to keep scrolling turn the meter On Press to or Off... -
Page 6: Initial Setup
Initial Setup Your C Test Strip ® ontour 1. Press and hold the OK button until the meter turns on. After a welcome screen, you will see the Select Language screen. LANGUAGE 2. Press the ▼ button if needed to English select your desired language. -
Page 7: Getting Ready To Test
Getting Ready to Test Preparing the Lancing Device The lancing device graphics are for illustration purposes Read your C meter user guide, the ® ontour only. Your lancing device may look different. Refer to lancing device insert and all instructional materials your lancing device insert for detailed instructions on provided in your meter kit before testing. - Page 8 Inserting the Test Strip 1. Remove a C test strip from ® ontour 4. Twist off the round the bottle. Tightly close the bottle lid protective lancet cap. immediately after you have removed Save it for disposing of the test strip. the used lancet.
-
Page 9: Getting The Blood Drop - Fingertip Testing
Getting the Blood Drop – Fingertip Testing Apply More Blood Apply More Blood If the first blood drop is not enough, to continue testing. 1. Press the lancing the meter will beep twice and display device firmly against “Apply More Blood to continue testing.” the puncture site and You have about 30 seconds to apply press the release button. -
Page 10: Test Results
Test Results AutoLog Your meter comes with an AutoLog feature that lets you Test Results with AutoLog On mark your test result as No Mark, Fasting, Before Meal and • Your C meter comes with AutoLog on. ® ontour After Meal. You can turn AutoLog off using the Setup menu No Mark - No Mark can be selected if you are testing at other (see page 45). - Page 11 Test Results with AutoLog Off 10/13/12 10:20 PM mmol/L After making your selection, your test Testing... result appears. Press the OK button to After applying blood to the test strip move to See Options. when AutoLog is Off, your result will After Meal appear.
-
Page 12: Alternative Site Testing (Ast) - Palm
Alternative Site Testing (AST) - Palm If you do not have a clear endcap to perform AST, contact Customer Service. See the back cover for contact information. WARNING Getting a Blood Drop for Alternative Site Testing • Ask your health care professional if Alternative Site Testing is right for you. - Page 13 • Runny blood • Clear fluid mixed with the blood 5. Maintain steady pressure 8. Hold the tip of the test strip in the blood drop until the until a small, round meter beeps. Do not press the tip against the skin or blood drop forms.
- Page 14 Ejecting and Disposing of the Used Lancet WARNING: Potential Biohazard 1. Do not use your fingers • The lancing device, lancets and test strips are for to remove the lancet single patient use. Do not share them with anyone from the lancing device. including other family members! Do not use on The lancing device multiple patients.
- Page 15 Cleaning and Disinfection assistance if your device malfunctions for any cause or if you notice any changes in the meter case or display. Your C meter should be cleaned and ® ontour disinfected once a week. Use only germicidal wipes For more information, see: containing 0.55% sodium hypochlorite (bleach), which has US Food and Drug Administration.
- Page 16 Disinfecting Your Meter Cleaning and Disinfecting Your Lancing Device Supplies Needed for Disinfecting: Refer to the lancing device insert provided with your kit for detailed instructions for cleaning and disinfecting the • Germicidal wipes containing 0.55% sodium hypochlorite lancing device. (bleach) •...
-
Page 17: Expected Test Result Values
Expected Test Result Values Quality Control • Shake the control solution bottle well, about Blood sugar values will vary depending on food intake, 15 times before every use. medication dosages, health, stress, or activity. Non diabetic plasma glucose concentrations are normally maintained •... - Page 18 1. Remove the test strip from the bottle and firmly snap the 10. The meter will count down for 12/05/12 10:20 PM lid closed. 5 seconds and the control test CONTROL TEST mmol/L result will display on the meter. It 2.
-
Page 19: Test Reminders
Test Reminders Turning Off a Reminder After Testing A reminder for your next test can be set after testing or from 1. Press the OK button and if the Countdown is currently on, the Setup menu. See page 40 for Setting a Reminder from the screen will show Reminder in. -
Page 20: Logbook
LOGBOOK When the Reminder time is reached, ABOVE TARGET 3. Press the ▼ button to view your 20 beeps will sound. The meter will Time for your next 10.3 mmol/L individual test results. test. turn on and a Reminder screen will appear. -
Page 21: Notes
Notes Trends (Averages and Summaries) Adding a Note The Trends feature displays your average and a summary of your test results as they compare to your targets, over You may add Notes to your test result that may help explain a period of time that you select. - Page 22 Before Meal Overall 8. Continue to press the ▼ button to see Average (14 Day) Average (14 Day) your Overall 14-day Average. This mmol/L mmol/L example includes ALL your results 4. Continue to press the ▼ button to see for 14 days and shows an overall your 14-day Before Meal Average.
-
Page 23: Setup
Setup Viewing Trends with AutoLog Off If you have AutoLog turned off, you will only see trends for In Setup you can: your overall Target. Turn a Reminder on or off or Set a Reminder, Change the 1. Turn on the meter by pressing and holding the OK button. Date, Change the Time, Set Sound on or off, Turn AutoLog 2. - Page 24 Setting a Reminder Date 1. Press and hold the OK button until SETUP DATE the meter turns on. 1. Press and hold the OK button until mm/dd/yy Reminder: Off the meter turns on. 8/23/12 2. From the Setup Menu, use the ▼ Date button to highlight the Date.
- Page 25 DATE TIME Change Day: Select Time Format: 9/23/12 1:03 7. Change day (highlighted) by using the 4. Change the time format if needed. ▲ or ▼ button. Press the OK button. Press the OK button. 12-hour clock Continue 24-hour clock TIME Date set: Change hour:...
-
Page 26: Autolog
AutoLog Time set: Your meter comes with AutoLog turned On. 2:05 8. Done will be highlighted. Press the AutoLog Settings OK button. SETUP Done 1. Press and hold the OK button until Change Time the meter turns on. Sound Sound 2. - Page 27 When you see the value you want, press the OK button, Discuss your Target range settings with your health – 7.2 and you will move to the next Fasting care professional. Target value (7.2 mmol/L) Continue Setting Targets When AutoLog is ON...
- Page 28 OK button, and you will move to – 1 0.0 Target value you want, press the – 7.2 the next Target value. Press the OK button, and you will move to the OK button when you are finished. next Target value. Continue...
- Page 29 TARGETS Overall you want. Press the OK button to Target ranges are move to the next Target value and use your blood sugar – 1 0.0 3. Set Targets will be highlighted. Press the ▲ or ▼ button to change goals.
- Page 30 Language Display Background You can change the Display to show black background with 12:35 AM white text, or white background with black text. Logbook 1. Press and hold the OK button until SETUP Trends the meter turns on. 1. Press and hold the OK button until Setup Targets the meter turns on.
-
Page 31: Caring For Your Meter
Main menu until the batteries are replaced. Change the Continue batteries right away. You may only test about 10 more times over the next three days before the batteries run out. When you are no longer able to Dead Batteries... -
Page 32: Error Detection Displays
Remove both of the old batteries. Replace with two 3-volt lithium batteries (DL2032 or CR2032). Continue • If your blood sugar reading is over (E22) 33.3 mmol/L, the next screen will tell Place new batteries into the Result Over you to retest. The meter will beep battery compartment with 33.3 mmol/L... -
Page 33: System Support Information
System Support Information Strip Errors Speak to a Customer Service Representative before (E02) (E03) (E04) returning your meter for any reason. See the back cover for Used Test Strip Strip Upside Down Wrong Strip contact information. Remove used strip. Remove strip and Inserted Checklist Repeat test with a... -
Page 34: Technical Information
Technical Information User Accuracy Accuracy A study evaluating glucose values from fingertip capillary blood samples obtained by 221 lay persons showed The C blood glucose monitoring system ® ontour the following results: 100% within ± 0.83 mmol/L of the was tested in 100 capillary blood samples using medical laboratory values at glucose concentrations below 600 C test strips. -
Page 35: Symptoms Of High Or Low Blood Glucose
Symptoms of High or Low Blood Glucose Specifications Test Sample: Venous or capillary whole blood You can better understand your test results by being aware of the symptoms of high or low blood glucose. According to Test Result: Referenced to plasma/serum glucose the Canadian Diabetes Association (www.diabetes.ca), some Sample Volume: 0.6 μL of the most common symptoms are:... - Page 36 Limitations Principles of the Procedure: The C blood ontour ® glucose test is based on measurement of electrical current Preservatives: Blood may be collected by health care caused by the reaction of the glucose with the reagents on professionals into test tubes containing heparin. Do not use the electrode of the strip.
-
Page 37: Warranty
Warranty other than C test strips or when the ® ontour test strip is altered or modified in any ontour Manufacturer’s Warranty: Ascensia Diabetes Care warrants manner. to the original purchaser that this instrument will be free from 5. Ascensia Diabetes Care makes no warranty regarding defects in materials and workmanship for 5 years from the the performance of the C meter or test... -
Page 38: Index
Index Target Settings ................46 Time ..................42 After Meal Marker (AutoLog) ............12 Specifications ................... 63 Alternative Site Testing (AST) ............16 Summaries (Trends) ................35 AutoLog (Meal Markers) ..............12 Symptoms of High or Low Blood Glucose ........62 Averages (Trends) ................ - Page 39 For information on patents, and related licenses, see: www.patents.ascensia.com Ascensia, the Ascensia Diabetes Care logo, Clinilog, Contour, Glucofacts, and the No Coding logo are trademarks and/or registered trademarks of Ascensia Diabetes Care Holdings AG. All other trademarks are the property of their respective owners.
Need help?
Do you have a question about the NEXT and is the answer not in the manual?
Questions and answers