Contour Next User Manual
Blood glucose monitoring system
Hide thumbs
Also See for Next:
- Quick start manual ,
- User manual (67 pages) ,
- Quick reference manual (21 pages)

Related Manuals for Contour Next


Summary of Contents for Contour Next
- Page 1 Blood Glucose Monitoring System Works with the C app available for ® ontour iabetes download from the App Store or on Google Play 6 30 22 7 18 Uses only C ® ontour blood glucose test strips. USER GUIDE...
-
Page 2: Intended Use
INTENDED USE IMPORTANT SAFETY INFORMATION The C blood glucose monitoring system is intended to ontour ® be used for the measurement of blood glucose in both insulin and non- WARNING insulin treated patients with diabetes as an aid for patients and their If your blood glucose reading is under 2.8 mmol/L, follow HCPs in monitoring the effectiveness of the patient’s diabetes control. - Page 3 PRECAUTIONS • All blood glucose measuring systems are considered biohazardous. Health care professionals or persons using this • Read your C user guide, the lancing device ontour system on multiple patients should follow the infection control package insert, if provided, and all instructional materials provided in your meter kit before testing.
-
Page 4: Your Meter Features
• The meter is designed to give accurate blood testing results at ™ For results under 0.6 mmol/L or over 33.3 mmol/L: temperatures between 5°C and 45°C. If the meter or test strip is If your blood glucose reading is under 0.6 mmol/L, the outside this range, you should not test until the meter and test meter displays the LO screen. -
Page 5: Table Of Contents
Alternative Site Testing (AST): Palm ..........23 Control Solution Testing ..............32 FEATURES Logbook..................35 Ascensia, the Ascensia Diabetes Care logo, Contour, Microlet, the No Coding logo, View Averages ................36 Second-Chance, the Second-Chance sampling logo, Smartcolour, and Smartlight are Settings ..................37 trademarks and/or registered trademarks of Ascensia Diabetes Care Holdings AG. -
Page 6: Getting Started
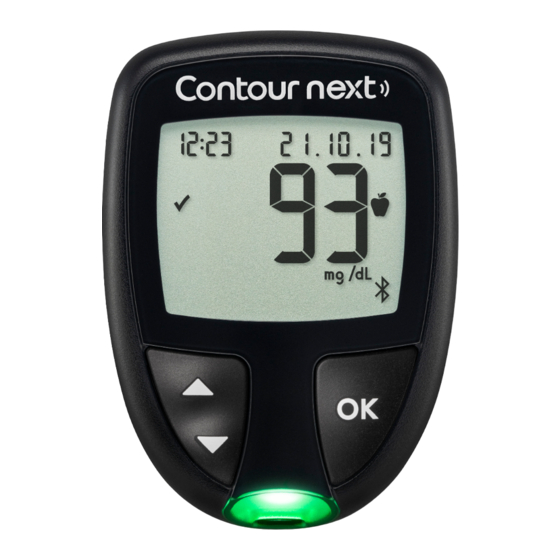
GETTING STARTED Your C meter The C app for Your C meter ..50 ontour ontour iabetes ontour Download the C app ........51 ontour iabetes Pairing Mode ................51 HELP Meter Care ..................53 6 30 22 7 18 Transfer Results to the C app ......54 ontour iabetes... - Page 7 GETTING STARTED Your C meter Screen ontour Symbol What the Symbol Means Fasting marker. Before Meal marker. Time Date 6 30 22 7 18 After Meal marker. Test Result Meal Marker No marker selected. in Target A Target Range or Target Range setting. target range indicator setting.
-
Page 8: Check The Meter Display
GETTING STARTED Your C test strip ontour NOTE: Your meter comes with a pre-set time, date, and target range. You can change these features in Settings. See Settings on page 37. Target Ranges The meter compares your blood glucose results with a Target Range (for example, 3.9 mmol/L–7.2 mmol/L) to let you know if your test result is above, in, or below your Target Range. -
Page 9: Meal Markers
TESTING Meal Markers Symbol What the Symbol Means Comparison/Target Range During a blood glucose test, you can attach a Meal Marker to your After Meal: Use the If you mark your result blood glucose result when the Meal Marker feature in the meter is After Meal marker when as After Meal, the meter turned On. - Page 10 TESTING Fingertip Testing Prepare the Lancing Device Ensure that you have the materials you need before you begin testing: The lancing device graphics are for illustration purposes only. Your lancing device may look different. Refer to your lancing • C meter.
- Page 11 TESTING 1. Remove the endcap from the lancing device. 5. Replace the endcap. 2. Loosen the round protective cap on a lancet by rotating the cap ¼ turn, but do not remove the cap. 6. Rotate the endcap dial to adjust the puncture depth.
-
Page 12: Get The Blood Drop: Fingertip Testing
TESTING 3. Hold the test strip with the grey 1. Press the lancing device firmly square end facing toward the against the puncture site and meter. press the release button. 4. Insert the grey square end firmly into the test strip port until the meter beeps. -
Page 13: Select A Meal Marker
TESTING Select a Meal Marker CAUTION: Do not press the NOTE: During a blood glucose test, if Meal Markers are On, you can tip of the test strip against the select a Meal Marker when the meter displays your result. You cannot skin or place the blood on top select a Meal Marker in the Settings screen. -
Page 14: Set A Reminder
OK button 4. If this is a Before Meal reading, you can set a Reminder to test your blood glucose later. See the next section, Set a Reminder. 2. To select a different Meal Marker, press the button on the meter to scroll between markers. -
Page 15: Smartlight Target Range Indicator
TESTING 4. To set the Reminder, press the OK button. If you do not select a Meal Marker, your blood glucose test result is compared to an Overall Target Range. 10 45 22 11 18 The screen returns to the Before Meal reading. The Reminder symbol displays to confirm the Reminder is set. -
Page 16: Expected Test Result Values
TESTING Test Results LO or HI Results WARNING • If the meter beeps twice and displays the 10 45 26 11 18 LO screen, your blood glucose reading is • Always consult your health care professional before under 0.6 mmol/L. Follow medical advice changing your medication based on test results. - Page 17 TESTING Get a Blood Drop: Alternative Site Testing For Alternative Site Testing, use the clear endcap. Your meter can be used for fingertip or palm testing. See ontour 1. Wash your hands and the the lancing device insert for detailed instructions on Alternative Site puncture site with antibacterial Testing.
- Page 18 TESTING The lancing device graphics are for illustration purposes only. Do not test the blood sample from palm if you get: • Smeared blood. 4. Press the lancing device firmly • Clotted blood. against puncture site, then press • Runny blood. the release button.
- Page 19 TESTING Meal Marker choices if Meal Marker feature is On Do not press the OK button yet. Symbol What the Symbol Means Related Target Range You can select the blinking marker Fasting: Use the Fasting or choose a different Meal Marker. marker when testing blood glucose levels after fasting (no food or drink for 8 hours,...
- Page 20 TESTING Eject and Dispose of the Used Lancet Control Solution WARNING 1. Do not use your fingers to remove the lancet from the Shake the control solution well before testing. lancing device. The lancing device usually CAUTION: Use only C ontour provided with your kit has an control solution (Normal) with your...
-
Page 21: Control Solution Testing
TESTING CAUTION: Do not use expired materials. The meter turns on, displaying a test strip with a 10 45 26 7 18 Using expired material can cause inaccurate flashing blood drop. results. Always check the expiration dates on your test materials. Control solutions are available and sold separately if not included in CAUTION: Do not use control solution that is more than 6 months the meter kit. -
Page 22: Features
FEATURES Logbook 8. Immediately touch the tip of the The Logbook contains blood glucose test results and Meal Markers test strip to the drop of control that you have made to those test results. The Logbook holds up to solution. 800 results. -
Page 23: View Averages
FEATURES Settings If you scroll past the oldest entry, the meter In Settings you can: displays the End screen. • Change the time format. • Change the time. • Change the date format. • Change the date. If you see a LO or HI test result, go to LO or HI Results on page 23 for •... -
Page 24: Change The Time
FEATURES 4. Press the button to navigate to the setting you want to change. 5. To change the time format, if needed, press the button, then press the OK button. 5. Press the OK button when the setting you want to change is blinking. 7 45 19 45 6. -
Page 25: Change The Date
FEATURES Change the Date 6. To change the year (blinking), press the 26 7 18 1. Press and hold the OK button until the meter turns on. button, then press the OK button. The Home screen has 2 options: Logbook and Settings 10 45 26 7 18... -
Page 26: Set Meal Markers
FEATURES Set Meal Markers 4. Press the button repeatedly until the Sound symbol is blinking on the Settings screen, then press the OK button. 1. Press and hold the OK button until the meter turns on. The Home screen has 2 options: Logbook and Settings 10 45 26 7 18... -
Page 27: Set Reminder Feature
FEATURES Set Reminder Feature Change Overall Target Range When Meal Markers are On, you can set a Reminder to test your blood WARNING glucose after you mark a reading as Before Meal. If Meal Markers are Off, see Set Meal Markers on page 43. Discuss your Target Range settings with your health care 1. -
Page 28: Change Individual Target Ranges
FEATURES NOTE: There is only one Low target number for both the Before Meal 7. To change the blinking High end of the Overall 39 -1 00 and After Meal Target Ranges. Target Range, press the button. Change Low for Both Target Ranges 8. -
Page 29: Set Smartlight Target Range Indicator
FEATURES Set smartLIGHT target range indicator 5. To turn the smartLIGHT feature On or Off, press the button to display the option you want. Your meter comes with the smartLIGHT feature turned On. 6. Press the OK button. When the smartLIGHT target range indicator is On, the test strip port displays a colour that indicates if your reading is above, in, or below Set Bluetooth Wireless Functionality your personal Target Range. -
Page 30: Download The C
FEATURES The C app for • The app will always sync your most recent Target Range from the app ontour iabetes or meter, across the system. Your C meter ontour • The app date and time can sync to your meter. Your C meter is designed to work with the ontour... -
Page 31: Meter Care
HELP 2. Press and HOLD the button for about When you have successfully paired your 3 seconds, until you see the blinking meter with the C app, ontour iabetes Bluetooth symbol (as shown in Step 3). the meter’s blue light and the Bluetooth symbol display. -
Page 32: Transfer Results To The C
HELP Transfer Results to a Personal Computer 1. Clean the exterior of the meter using a moist (not wet) lint-free tissue with soapy water, or disinfect for 1 minute using a disinfectant solution made of 1 part bleach mixed with 9 parts water. CAUTION: Do not attempt to perform a blood glucose test when the 2. -
Page 33: Batteries
HELP Batteries 3. Remove both of the old batteries and replace them with two 3-volt CR2032 or DL2032 coin cell batteries. When the batteries are low, the Low Batteries symbol displays on NOTE: If you put the new batteries in the meter within 5 minutes every screen. -
Page 34: Technical Information
TECHNICAL INFORMATION Error Detection Displays Error Code What It Means What to Do The meter screen displays error codes (E plus a number) for test result Testing Errors errors, strip errors, or system errors. When an error occurs, the meter Repeat the test with a new beeps 2 times and displays an error code. -
Page 35: Customer Service Checklist
TECHNICAL INFORMATION Customer Service Checklist Technical Information: Accuracy When speaking with the Customer Service representative: The C blood glucose monitoring system was tested ontour with capillary blood samples from 100 subjects. Two replicates were tested with each of 3 lots of C test strips for a total of ontour 1. -
Page 36: User Accuracy
TECHNICAL INFORMATION User Accuracy Radar Plot Table 3: System accuracy results for glucose concentrations from 1.9 mmol/L to 29.1 mmol/L Within ± 0.83 mmol/L or ± 15% 600 of 600 (100%) Acceptance criterion in ISO 15197:2013 is that 95% of the measured glucose values shall fall within either ±... -
Page 37: Technical Information: Precision
TECHNICAL INFORMATION If a data point is at the centre, there is zero error, which means the test strips was tested once on each of 10 instruments on 10 separate BGMS reading is identical to the laboratory value. days for a total of 300 readings. The following precision results were obtained. -
Page 38: Specifications
TECHNICAL INFORMATION High blood glucose (Hyperglycaemia): Battery Life: Approximately 1000 tests (1 yr. average use, 3 tests per day) • frequent urination • increased fatigue • excessive thirst • hunger Meter Operating Temperature Range: • blurred vision Control Testing Temperature Range: Ketones (Ketoacidosis): Meter Operating Humidity Range: 10% RH–93% RH •... - Page 39 TECHNICAL INFORMATION Hereby, Ascensia Diabetes Care declares that the radio equipment Symbol What It Means type Blood Glucose Meter is in compliance with Directive 2014/53/EU. Catalogue number The full text of the EU declaration of conformity is available at the following internet address: Control Range Low www.diabetes.ascensia.com/declarationofconformity...
- Page 40 TECHNICAL INFORMATION Comparison Options: The C system is designed 5. American Diabetes Association. Standards of medical care in ontour for use with capillary and venous whole blood. Comparison with a diabetes—2016. Diabetes Care. 2016;39(supplement 1):S15. laboratory method must be done simultaneously with aliquots of the 6.
-
Page 41: Warranty
TECHNICAL INFORMATION Warranty 4. Ascensia Diabetes Care has no knowledge of the performance of the C blood glucose meter when used with any test ontour Manufacturer’s Warranty: Ascensia Diabetes Care warrants to the strips other than C test strips, and therefore does not ontour original purchaser that this instrument will be free from defects in warrant the performance of the C... - Page 42 Index Settings ..........19, 37, 38, 40, 41, 43, 44, 48, 49 After Meal Marker ............4, 8, 17, 27, 43 Bluetooth wireless functionality ............49 Alternative Site Testing (AST) ............23, 25 Date .....................40 Averages .....................36 Meal Markers ................43 Batteries ...................4, 56, 57 Reminder Feature ..............19, 44 Low Batteries ..............4, 56, 57 smartLIGHT target range indicator ..........48...
- Page 43 Ascensia, the Ascensia Diabetes Care logo, Contour, Microlet, the No Coding logo, Second-Chance, the Second-Chance sampling logo, Smartcolour, and Smartlight are trademarks and/or registered trademarks of Ascensia Diabetes Care Holdings AG.
Need help?
Do you have a question about the Next and is the answer not in the manual?
Questions and answers
How do I get 5 day 30 day 90 day results
The Contour Next meter provides averages for 7-day, 14-day, 30-day, and 90-day periods. It does not offer a 5-day average. You can obtain 30-day and 90-day results directly from the meter’s memory.
This answer is automatically generated