
Related Manuals for Contour Next EZ


Summary of Contents for Contour Next EZ
- Page 1 Blood Glucose Monitoring System Online meter registration available at www.diabetes.ascensia.com or call our Customer Service. ONTOUR ® Uses only C blood glucose test strips. USER GUIDE...
-
Page 2: Contact Information
For information on patents and related licenses, see: www.patents.ascensia.com . Ascensia, the Ascensia Diabetes Care logo, Clinilog, Contour, Glucofacts, and the No Coding logo are trademarks and/or registered trademarks of Ascensia Diabetes Care Holdings AG. All other trademarks are the property of their respective owners. - Page 3 Table of Contents 1 GETTING STARTED Your Meter and Test Strip Meter Display and Symbols Meter Features 2 TESTING Prepare the Test Strip and Lancing Device Fingertip Testing Understand Test Results Clean and Disinfect Your Meter Test with Control Solution 3 SETUP AND USE Set Time, Date, and Sound Set Basic (L-1) and Advanced (L-2) Modes...
-
Page 4: Intended Use
INTENDED USE ONTOUR ® The C EZ blood glucose monitoring system is an over the counter (OTC) device utilized for self-testing by persons with diabetes at home for the quantitative measurement of glucose in whole blood, is for single-patient use only, and should not be shared. - Page 5 WARNING • The meter and lancing device are for single patient use. Do not share them with anyone including other family members! Do not use on multiple patients! • All parts of the kit are considered biohazardous and can potentially transmit infectious diseases, even after you have performed cleaning and disinfection.
-
Page 6: Getting Started
GETTING STARTED GETTING STARTED GETTING STARTED GETTING STARTED GETTING STARTED ONTOUR ® Your C EZ meter Your C test strip ONTOUR... -
Page 7: Your Meter Display
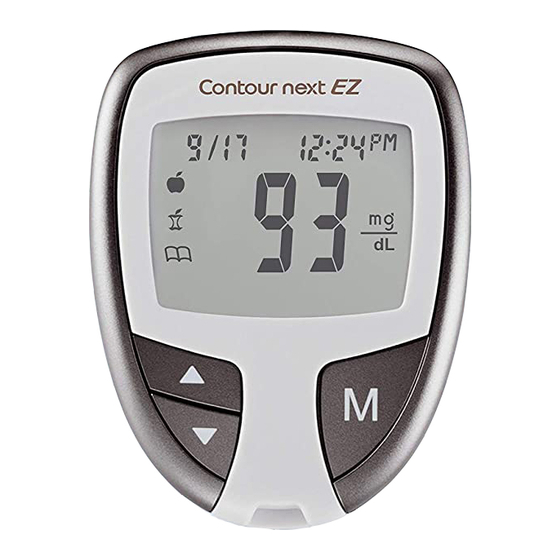
Your Meter Display The picture below shows all the symbols that appear on your meter display. To view, with the meter off , press and hold . All display segments will appear for 10 seconds. If you need more than 10 seconds to check the display, press and hold again. -
Page 8: Your Meter Features
Icon What It Means Day/month format. The batteries are low and need to be changed, and will remain on display until batteries are changed. Appear if the meter is in 12 hour setup. Indicates sound is turned on. Thank you for choosing the C EZ blood ONTOUR glucose monitoring system! We are proud to be your... - Page 9 Check your display to ensure that results are being displayed in mg/dL. If they are not, contact Customer Service. See Contact Information. Customizable: The C EZ meter allows you to set ONTOUR personal choices for some features. For more information, see section 3, Setup and Use.
- Page 10 • Check the expiration dates on your test strips and control solution. It is important to not use the test strips or control solution if the expiration date printed on the bottle label and carton has passed. For the control solution do not use if it has been six months since you fi...
- Page 11 TESTING TESTING TESTING TESTING TESTING Important Safety Information • Have all the materials you will need ready before you begin testing. This includes your C EZ meter, ONTOUR the C test strips, the lancing device and lancets. ONTOUR You will also need C control solution to run a ONTOUR quality control check.
-
Page 12: Preparing The Test Strip
Preparing the Test Strip 1. Wash and dry your hands well before testing. 2. Remove a C test strip from the bottle. ONTOUR 3. Hold the test strip with the gray square end facing up. 4. Insert the gray square end into the test strip port on the meter. -
Page 13: Preparing The Lancing Device
Preparing the Lancing Device The lancing device graphics are for illustration purposes only. Your lancing device may look diff erent. Refer to your lancing device insert for detailed instructions on preparing the lancing device. WARNING: Potential Biohazard The lancing device provided with your kit is intended for self-testing by a single patient. -
Page 14: Getting Ready To Test
Getting Ready to Test 1. Remove the endcap from the lancing device. 2. Loosen the round protective cap on a lancet by rotating the cap ¼ turn, but do not remove the cap. 3. Insert the lancet fi rmly into the lancing device until the lancet comes to a complete stop. -
Page 15: Getting The Blood Drop And Testing
Getting the Blood Drop and Testing 1. Press the lancing device fi rmly against the puncture site and press the release button. 2. Stroke your hand and fi nger towards the puncture site to form a drop of blood. Do not squeeze around the puncture site . - Page 16 Hold the tip of the test strip in the blood drop until the meter beeps. WARNING • The meter and lancing device are for single patient use. Do not share them with anyone including other family members! Do not use on multiple patients! •...
- Page 17 If the fi rst blood drop is not enough, the meter may beep twice and display a strip underfi ll screen image You have 20 seconds to apply more blood to the same strip. If you are not able to apply enough blood within that time, an E2 error code will be displayed.
-
Page 18: Test Results
Test Results Expected Values Blood glucose values will vary depending on food intake, medication dosages, health, stress, or activity. Non-diabetic plasma glucose concentrations should be < 100 mg/dL in the fasting state and < 140 mg/dL in the post-prandial state. should consult with your health care professional for glucose values specifi... - Page 19 Ejecting and Disposing of the Used Lancet 1. Do not use your fi ngers to remove the lancet from the lancing device. The lancing device provided with your kit has an automatic lancet ejection feature. 2. Refer to the separate lancing device insert, if provided with your kit, for instructions on automatic ejection of the lancet.
-
Page 20: Cleaning And Disinfection
Cleaning and Disinfection Your C EZ meter should be cleaned and ONTOUR disinfected once a week. For the meter, use only Clorox Germicidal Wipes containing 0.55% sodium hypochlorite (bleach), which has been proven to be safe to use with the EZ meter. - Page 21 Signs of Deterioration The cleaning and disinfecting directions provided should not cause any damage or degradation to the external case, buttons or display. Your C EZ meter has been tested for 260 cycles ONTOUR of cleaning and disinfection (one cycle per week for 5 years). This device has been demonstrated to withstand 5 years of cleaning and disinfection without damage.
-
Page 22: Cleaning Your Meter
Cleaning Your Meter Supplies Needed for Cleaning: • Clorox Germicidal Wipes containing 0.55% sodium hypochlorite (bleach) • Paper towels 1. Clean the meter with Clorox Germicidal Wipes until all soil is removed. Do not allow cleaning solution to run into the meter through areas such as around the buttons or the meter’s test strip or data ports. -
Page 23: Cleaning And Disinfecting Your Lancing Device
Using a new Clorox Germicidal Wipe, carefully wipe all outer surfaces of your meter until wet. Do not allow cleaning solution to run into the meter through areas such as around the buttons or the meter’s test strip or data ports. Data Port Buttons Test Strip Port... -
Page 24: Control Solution Testing
Control Solution Testing WARNING Shake the control solution well before testing. CAUTION : Use only C control ONTOUR solution with your C test strips. ONTOUR Using any other control solution may cause inaccurate results. Quality Control • Shake the control solution bottle well, about 15 times before every use. - Page 25 CAUTION: Check the expiration date on the test strip bottle and the expiration and discard dates on the control solution bottle. DO NOT use expired materials. Level 1 and Level 2 control solutions are available and sold separately if not included in the meter kit. You can test your EZ meter with control solution when the ONTOUR temperature is 59°F –...
- Page 26 5. Shake the control solution bottle well, about 15 times before every use. 6. Remove the bottle cap and use a tissue to wipe away any solution around the bottle tip before dispensing a drop. 7. Squeeze a small drop of control solution onto a clean nonabsorbent surface.
- Page 27 NOTE: The does not indicate the control test result is within the specifi ed range. It only marks it as a control solution test. It will not be included in your averages. 11. Compare your control test result to the ranges provided on the test strip bottle or carton.
-
Page 28: Setup And Use
SETUP AND USE SETUP AND USE SETUP AND USE SETUP AND USE SETUP AND USE Setting the Time, Date and Sound Your C EZ meter allows you to set the date, time, ONTOUR and sound as you like them. • You can view 12 or 24 hour time; •... - Page 29 If you selected a 12 hour time setting, the AM or PM will now fl ash. Press select AM or PM. Press M to set. Setting the Month and Day Format m/d will now fl ash on the display. Press to select the format you wish (m/d for month/day format or d.m for day.month format).
-
Page 30: Setting The Sound
Setting the Sound The fl ashing bell symbol will now appear on the display along with the word This option controls whether you want to hear the beep sound during testing. To turn the beep sound off during testing, press to display Press M to set. -
Page 31: Set-Up For Basic (L-1) And Advanced (L-2) Modes
Set-up for Basic (L-1) and Advanced (L-2) Modes Your new C EZ meter is pre-set for the Basic Mode ONTOUR and off ers the same easy test procedure in either the Basic or Advanced Mode. BASIC MODE (L-1) ADVANCED MODE (L-2) •... - Page 32 BASIC MODE (L-1) ADVANCED MODE (L-2) Your meter is pre-set to Basic To set your meter to Mode. If you have set your Advanced Mode, and take meter to the Advanced Mode, advantage of meal markers and want to return to Basic and other functions available Mode: to you:...
- Page 33 Personalizing LO, HI and Reminder Settings If you selected Advanced Mode (L-2 on your display) you can change your meter’s personal low and high blood glucose settings. By personalizing these settings, your EZ meter will help you ONTOUR track these HI and LO results. The LO setting will fl...
- Page 34 Post-Meal Test Reminder Set-up To change the reminder time for post- meal testing, press to display the options available. Select 2.5, 2.0, 1.5, or 1.0 hour(s) to set your post-meal reminder (default is 2.0 hours). Press M to set. You have now completed your EZ meter set-up for ONTOUR Advanced Mode!
-
Page 35: Using The Markers
Using the Markers If you have set up your meter in Advanced Mode, your meter will display three markers after you test your blood. Pre-meal = Marks a test result that was taken before a meal. Post-meal = Marks a test result that was taken after a meal. - Page 36 If you want to mark the test result Before you remove your test strip, press to select the marker you want to set. The marker will fl ash. To mark a result with the pre-meal marker, press M when the fl...
- Page 37 Using the Reminder Feature When the reminder sounds, the meter will automatically turn on. The reminder will beep 20 times, and the display will show the pre-meal test result you marked when you set the reminder. Pressing any button will silence the reminder. You can now run another test by placing a test strip in the test strip port and following the testing instructions (see section 2, Testing).
- Page 38 After performing a test To Mark You Will To Set You Will See What It Means Results Result is Pre-Meal marked as a Press Press pre-meal test. (Flashing) You can now set a reminder. Reminder is set to go off in the amount of time you have Reminder...
-
Page 39: Transferring Results To A Computer
Transferring Results to a Computer You can transfer test results from the C EZ meter ONTOUR to a computer, where they can be summarized in a report with graphs and tables. To make use of this feature, you need LUCOFACTS ® software and a data cable. - Page 40 Viewing Basic Mode Results Press M to turn your meter on. Press M again to view the memory. The 14 day average will appear in the center of the display with the number of results shown at the top of the display. Control results are not included in this 14 day average.
- Page 41 NOTES: • Averages include the specifi ed time period plus the current day. • The meter will hold 480 results in the memory. When the maximum is reached, the oldest test result will be removed as a new test is completed and saved to the memory.
- Page 42 Viewing Advanced Mode Results In Advanced Mode (L-2), you have all of the options described in Basic Mode plus additional items available. Press M to turn your meter on. Briefl y press M again to view the 14 day average including the number of results used to obtain the average.
- Page 43 Viewing Advanced Mode Averages Press M to turn your meter on. Press M again to view the 14 day average including the number of results used to obtain the average. Press to view the 7 day high and low summary. At the top of the display you will see the number of HI and LO results.
- Page 44 Press again to view the 30 day average of results marked with a pre-meal marker. Press again to view the 30 day average of results marked with a post-meal marker. Press again and you will see Press M to turn the meter off , or it will automatically turn off...
-
Page 45: Error Codes And Symbols
TECHNICAL, SERVICE & CARE Error Codes and Symbols What You See What It Means What You Should Do Replace the batteries Low batteries. (will remain on as soon as possible. the display) (will fl ash for 10 seconds Dead batteries. Replace the batteries. - Page 46 What You See What It Means What You Should Do Remove the test strip The test strip has and retest using a new not fi lled enough test strip. Wait until you for an accurate see the fl ashing blood test.
- Page 47 What You See What It Means What You Should Do Remove the test strip and retest using a new Incorrect test test strip. Make certain strip. that you are using a test ONTOUR strip. This error occurs only in Communication mode.
- Page 48 What You See What It Means What You Should Do • Wash and dry your hands well and the test site. Repeat the test using a new test Test result is strip. above • If your result still 600 mg/dL. fl...
- Page 49 What You See What It Means What You Should Do Test strip or Check all expiration control solution dates and discard is past the dates. Do not use expiration date expired testing or is past the materials. discard date. Test strip is deteriorated Run another control due to heat or...
- Page 50 What You See What It Means What You Should Do Compare meter display Some display with the illustration in Your Meter Display segments do Possible meter (in section 1, Getting not appear electronics when the Started). If the display failure. meter initially is not correct, contact turns on.
-
Page 51: Changing The Batteries
Changing the Batteries Batteries should be replaced when the meter continually displays or the meter briefl y shows and then turns off (see Error Codes and Symbols in section 4, Technical, Service & Care). 1. Turn off your meter before changing your batteries. - Page 52 4. Place new batteries under the prongs and into the battery compartment with the “+” side up. [Use two 3-volt (DL2032 or CR2032) lithium batteries.] 5. Slide the battery cover back into place, lining up with the open slots, and close fi...
-
Page 53: Caring For Your Meter
Caring for Your Meter • Store meter in the carrying case provided whenever possible. • Wash and dry hands well before handling to keep the meter and test strips free of water, oils and other contaminants. • Handle the meter carefully to avoid damaging the electronics or causing other malfunctions. -
Page 54: Symptoms Of High Or Low Blood Glucose
Symptoms of High or Low Blood Glucose You can better understand your test results by being aware of the symptoms of high or low blood glucose. According to the American Diabetes Association, some of the most common symptoms are: Low blood glucose (Hypoglycemia): •... -
Page 55: System Specifications
System Specifi cations Test Sample: Capillary whole blood Test Result: Glucose measurements are reported as plasma equivalents. Sample Volume: 0.6 µL Measuring Range: 20 mg/dL–600 mg/dL Results: 5-second countdown Memory Feature: Stores most recent 480 test results Battery Type: Two 3-volt lithium batteries, 225 mAh capacity (DL2032 or CR2032) Battery Life: Approximately 1000 tests (1 yr. - Page 56 Electromagnetic Compatibility (EMC): The EZ meter complies with the electromagnetic ONTOUR requirement specifi ed in ISO 15197:2013. Electromagnetic emissions are low and unlikely to interfere with other nearby electronic equipment, nor are emissions from nearby electronic equipment likely to interfere with the C EZ meter.
- Page 57 Limitations Altitude: Up to 20,674 feet (6,301 meters) does not signifi cantly aff ect results. Alternative Site Testing: Not for use with Alternative Site Testing. Lipemic Specimen: Cholesterol concentrations >1,168 mg/dL or triglyceride concentrations >4,709 mg/dL may produce inaccurate results. Peritoneal Dialysis Solutions: Icodextrin does not interfere with C test strips.
-
Page 58: Symbols Used
Symbols Used The following symbols are used throughout the product labeling for the C EZ blood glucose monitoring system ONTOUR (meter packaging and labeling, and reagent and control solution packaging and labeling). Symbol What It Means Batch code Use by Date (last day of month) Consult instructions for use In Vitro Diagnostic Medical Device Shake 15 times... -
Page 59: Technical Information
Technical Information The C EZ blood glucose monitoring system was ONTOUR tested by 115 lay users using capillary blood samples and three test strip lots. The results were compared to the ONTOUR YSI Glucose Analyzer laboratory reference method, traceable to the CDC hexokinase method. - Page 60 Table 2 – System accuracy results for glucose concentration ≥ 75 mg/dL Diff erence range in values between YSI laboratory Within Within Within Within reference ± 5% ± 10% ± 15% ± 20%* method and ONTOUR meter Number (and 83 of 104 of 107 of 108 of...
- Page 61 A repeatability study was conducted with the C ONTOUR blood glucose monitoring system using fi ve venous whole blood specimens with glucose levels from 47 to 326 mg/dL. Multiple replicates (n=100 per lot) were tested using multiple EZ blood glucose meters and three lots of ONTOUR blood glucose test strips.
-
Page 62: Service Information
Service Information If you have a problem and none of the problem solving steps in this user guide help, contact Customer Service. See Contact Information. We have trained specialists to help you. Important • Speak to a Customer Service Representative before returning your meter for any reason. -
Page 63: Warranty
Warranty Manufacturer’s Warranty: Ascensia Diabetes Care warrants to the original purchaser that this instrument will be free from defects in materials and workmanship for 5 years from the date of original purchase (except as noted below). During the stated 5-year period, Ascensia Diabetes Care shall, at no charge, replace a unit found to be defective with an equivalent or current version of the owner’s model. - Page 64 4. Ascensia Diabetes Care has not validated the performance of the C EZ blood glucose meter when used ONTOUR with any test strips other than C test strips, ONTOUR and therefore does not warrant the performance of the EZ meter when used with any test strips other ONTOUR than C test strips or when the C...
- Page 65 References 1. US Food and Drug Administration. Use of fi ngerstick devices on more than one person poses risk for transmitting bloodborne pathogens: initial communication. US Department of Health and Human Services; update 11/29/2010. http://www.fda.gov/MedicalDevices/Safety/AlertsandNotices/ ucm224025.htm 2. Centers for Disease Control and Prevention. CDC clinical reminder: use of fi...
-
Page 66: Replacement Parts
Supplies Replacement Parts To replace missing parts or reorder supplies, call Customer Service. See Contact Information. Item Two 3-volt lithium batteries DL2032 or CR2032 EZ user guide ONTOUR test strips ONTOUR control solution, Level 1 ONTOUR control solution, Level 2 ONTOUR...
Need help?
Do you have a question about the Next EZ and is the answer not in the manual?
Questions and answers