
Subscribe to Our Youtube Channel
Related Manuals for Clarke XR55


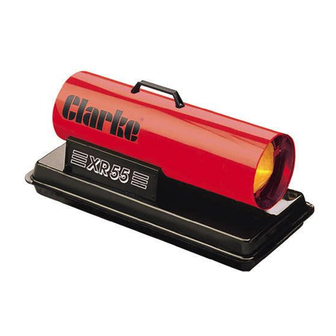
Summary of Contents for Clarke XR55
- Page 1 PARAFFIN/DIESEL HEATERS Model Nos. XR55 • XR75 • XR105 • XR 155 Part Nos. 6920268 • 6920270• 6920280 • 6920290 LS0114...
-
Page 2: Table Of Contents
GUARANTEE This CLARKE product is guaranteed against faulty manufacture for a period of 12 months from the date of purchase. Please keep your receipt as proof of purchase. -
Page 3: Safety Precautions
SAFETY PRECAUTIONS WARNING! Lack of ventilation can cause Carbon Monoxide poisoning. CARBON MONOXIDE CAN KILL Signs of Carbon Monoxide poisoning are, headaches, dizziness and/or nausea. Should anyone show these signs, they must GET FRESH AIR IMMEDIATELY. Turn off the heater and have it serviced before using again. Pregnant women, persons with a heart or lung condition, anaemia or under the influence of alcohol, or those at high altitudes, are more likely to be effected by Carbon Monoxide than others. -
Page 4: Electrical Connections
ELECTRICAL CONNECTIONS Connect the mains lead to a standard, 230 Volt (50Hz) electrical supply through an approved 13 amp BS 1363 plug, or a suitably fused isolator switch. WARNING! THIS APPLIANCE MUST BE EARTHED IMPORTANT: The wires in the mains lead are coloured in accordance with the following code: Green &... -
Page 5: Unpacking
Unpack and check the heater for possible shipping damage. If any damage is found, immediately notify the dealer from whom heater was purchased. Fig. 1 These models (except XR55) are equipped with wheels and handles. The loose items listed below, can be found in the shipping carton. -
Page 6: Assembly
ASSEMBLY ref. Fig.1 1. Slide the axle (6) through the wheel support frame (3), and install the wheels on the axle. NOTE: The extended wheel hubs should be facing inwards. Position the caps (5) on the axle ends and gently tap with a hammer to secure. 2. - Page 7 A. In the case of MODEL XR75, there is insufficient room to store the blanking plate in the position shown above. The plate should therefore be removed and retained for possible future use. B. In the case of Model XR55, no changes are required for the burning of Diesel oil. 2. The Air System.
-
Page 8: Starting Procedure
For XR75, a 3ft window must be open by 10" minimum PARTS & SERVICE Please contact your nearest dealer, or CLARKE International, on one of the following numbers. PARTS & SERVICE TEL: 020 8988 7400 PARTS & SERVICE FAX: 020 8558 3622 or e-mail as follows: PARTS: Parts@clarkeinternational.com... -
Page 9: Maintenance
MAINTENANCE (ref. Parts List) IMPORTANT Before carrying out any adjustment or maintenance, ensure the heater is switched OFF, disconnected from the mains supply, and has been given adequate time to cool down, unless otherwise stated. It is essential that the heater is correctly maintained and kept in top condition at all times. - Page 10 Remove the plug, and install a gauge with a resolution of at least 0.02 bar (0.3psi). Start the heater, and observe the pressure reading, which should be as follows: Fig. 5 Model Air Pump Pressure XR55 0.28 - 0.30bar (4.06 - 4.35psi) XR75 0.26 - 0.33bar (3.84 - 4.8psi) XR105 0.30 - 0.36bar (4.45 - 5.3psi)
-
Page 11: Storage
Fuel Filter Removal of the fuel filter should it become blocked or contaminated, and require cleaning, involves the removal of the burner head complete. The fuel pipe, complete with filter, may then be detached, cleaned, using a good quality solvent, and dried with compressed air. It is recommended however, that if the filter becomes blocked, the complete assembly - fuel pipe with filter- should be renewed. -
Page 12: Parts Diagram
PARTS DIAGRAM (XR55) -
Page 13: Parts List
PARTS LIST (XR55) No. Description Part No. No. Description Part No. Rear Guard AX1006000111 Burner Control Unit AX1047003611 Air Inlet Filter AX1086001711 Washer AX1018000800 Screw AX1016010200 Cover AX1094007211 Motor Support AX1094005911 Gasket AX1002001311 Air Outlet Filter AX1086000111 AX1087006011 Plate AX1094007311... - Page 14 PARTS DIAGRAM (XR75 + XR105 + XR155)
- Page 15 PARTS LIST (XR75 + XR105 + XR155) Part No. Part No. Part No. Description No. Description XR75 XR105 XR155 Grille AX1001039711 AX1001039811 AX1001039911 Air Intake Filter AX1008100911 AX1008100911 AX1008100911 Air Pump End Plate AX2003162911 AX2003162911 AX2003162911 Gasket AX1001039611 AX1001039611 AX1001039611 Air Output Filter AX1001039511 AX1001039511...
- Page 16 52 Nut AX1004051011 AX1004051011 AX1004051011 53 Plug 54 Drain Plug 55 Screw AX1004049811 AX1004049811 AX1004049811 56 Spring AX1008101111 AX1008101111 AX1008101111 57 Ball AX1004049711 AX1004049711 AX1004049711 58 Blanking Plate 59 Blanking Plate Screw - Clarke Labels /Decals #...See your Clarke dealer...
-
Page 17: Trouble Shooting
Check air inlet and outlet. Wait for 5 minutes, and restart. If condition persists contact your Clarke dealer 4. Internal Fuse Blown 4. Check an replace fuse Motor runs, but the 1. Empty fuel tank, dirty or 1. -
Page 18: Specifications
Height (mm) Please note that the details and specifications contained herein, are correct at the time of going to print. However, CLARKE International reserve the right to change specifications at any time without prior notice. Always consult the machine’s data... - Page 19 DECLARATION OF CONFORMITY...
Need help?
Do you have a question about the XR55 and is the answer not in the manual?
Questions and answers