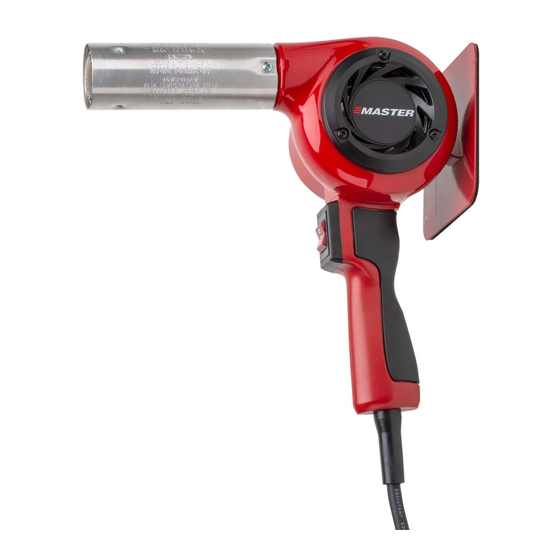
Advertisement
Quick Links
Element Kits – Part No's. 30082, 30083, 30084, 30085, 30086, 30087, 30088
WARNING:
Disconnect heat gun power cord and
allow the heat gun to cool before disassembly.
READ THE SERVICE INSTRUCTIONS CAREFULLY. FAILURE TO
EXACTLY FOLLOW THE INSTRUCTIONS COULD RESULT IN
PERSONAL INJURY OR DAMAGE TO YOUR HEAT GUN. ALL REPAIRS
MUST BE PERFORMED BY A QUALIFIED REPAIR TECHNICIAN.
Ⓐ
If nozzle mounting screws
with #6-32 steel machine screws, 3/16 inch minimum length to ½
inch maximum length.
THIS ELEMENT KIT CONSISTS OF:
•
ELEMENT, (1)
•
MICA INSULATOR, (1)
•
RUBBER WASHER, (1)
•
BRASS NUT, #2-56, (2)
•
SCREW, PAN HEAD, #4-40, (1)
NOTE: Rubber Washer, Brass Nuts, and Screw are not used
on model numbers listed above. They are required for older
model heat guns shown on back side of this instruction sheet.
TO REMOVE OLD ELEMENT
1. Remove (2) nozzle mounting screws.
2. Gently pull shield from gun housing.
3. Pull element out of housing.
TO INSTALL NEW ELEMENT
1. Gently insert new element into housing,
with contacts of element inserted fully into
spring contacts within housing.
2. Wrap new mica insulator around coils of
new element, ensuring all coils are covered.
WARNING:
Failure to properly cover coils
with mica insulator could result in electrical short
3. Gently slide nozzle straight on, aligning
ceramic element with front nozzle indents
and (2) nozzle screw holes. Slide shield over
nozzle, aligning mounting holes. Install (2)
nozzle mounting screws loosely until started,
Ⓐ
and then tighten.
Ⓒ
Wings of ceramic
element to be
supported by
indents in nozzle
MASTER HEAT GUN REPLACEMENT PARTS AND ACCESSORIES ARE ENGINEERED AND MANUFACTURED TO PRECISE MASTER APPLIANCE SPECIFICATIONS.
REPLACEMENT PARTS AND ACCESSORIES FROM OTHER MANUFACTURERS ARE NOT PRODUCED TO THESE PRECISE SPECIFICATIONS. FAILURE TO USE
MASTER APPLIANCE REPLACEMENT PARTS OR FAILURE TO INSTALL MASTER APPLIANCE REPLACEMENT PARTS EXACTLY AS INSTRUCTED MAY CAUSE
PHYSICAL INJURY OR DAMAGE TO THE HEAT GUN.
MASTER APPLIANCE CANNOT ASSUME RESPONSIBILITY FOR PHYSICAL INJURY OR DAMAGE TO THE HEAT GUN RESULTING FROM THE USE OF ANY OTHER
BRAND OF REPLACEMENT PART OR IMPROPER INSTALLATION OF MASTER APPLIANCE REPLACEMENT PARTS OR ACCESSORIES.
Master Appliance Corp.
th
2420 18
St.
Racine, WI 53403-2381
USA
are lost or damaged, replace only
Ⓐ
Ⓑ
New Mica Insulator
Ⓒ
Roll mica over coils
Email: sales@masterappliance.com
Models HG-201D, HG-201T, HG-202D, HG-202T, HG-301D,
HG-301T, HG-302D, HG-302T, HG-501D, HG-501T, HG-502D,
HG-502T, HG-801D, VT-751D, VT-752D
#2 DRIVE PHILLIPS SCREWDRIVER
Element
Mica
Insulator
Nozzle,
not included in kit
Ⓒ
Indents support
ceramic element
Shield,
not included in kit
of element
New Element
Tel: 262-633-7791
PAGE 1 OF 2
TOOLS REQUIRED
Ⓐ
Ⓐ
Nozzle Mounting Screw,
(2),
not included in kit
Ⓑ
Contacts
in housing
Insert into contacts
www.masterappliance.com
Do not touch
nozzle until cool
P/N 58266 REV A
Advertisement

Summary of Contents for Master Appliance HG-201D
- Page 1 PHYSICAL INJURY OR DAMAGE TO THE HEAT GUN. MASTER APPLIANCE CANNOT ASSUME RESPONSIBILITY FOR PHYSICAL INJURY OR DAMAGE TO THE HEAT GUN RESULTING FROM THE USE OF ANY OTHER BRAND OF REPLACEMENT PART OR IMPROPER INSTALLATION OF MASTER APPLIANCE REPLACEMENT PARTS OR ACCESSORIES.
- Page 2 Maintain a minimum gap loosely until started and then tighten. Tighten cover of 1/8 inch. Ⓑ screws. www.masterappliance.com Master Appliance Corp. Tel: 262-633-7791 P/N 58266 REV A 2420 18 Email: sales@masterappliance.com Racine, WI 53403-2381 PAGE 2 OF 2...


