
Related Manuals for Lifetime 90460


Summary of Contents for Lifetime 90460
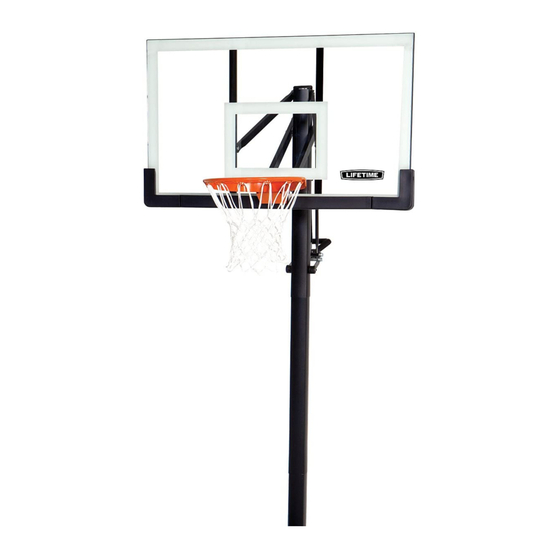
- Page 1 MODEL N° 90460 OWNER’S MANUAL OWNER’S MANUAL Keep this Product ID Number and use when contacting Customer Service:...
- Page 2 REGISTER YOUR PRODUCT ONLINE AT WWW.LIFETIME.COM At Lifetime, we are committed to providing innovative and quality products. While registering, you will have the opportunity to give us your feedback. Your input is valuable to us. Lifetime’s Promise to You: REGISTER today! Save this owner’s manual for future reference and in the event that...
- Page 3 SAFETY INSTRUCTIONS FAILURE TO FOLLOW THESE WARNINGS MAY RESULT IN SERIOUS INJURY OR PROPERTY DAMAGE AND WILL VOID WARRANTY. Most injuries are caused by misuse and/or not following instructions. Use caution when using this product. BEFORE BEGINNING ASSEMBLY...
- Page 4 TOOLS AND PARTS REQUIRED FOR THIS ASSEMBLY 1/2” Wrench 7/16” Wrench 9/16” Wrench 3/4” Wrench Phillips Screwdriver Pliers Rubber Mallet Electric Drill 3/16” Allen Wrench Tape Measure Cement Mix 1/2” x 3’ Rebar Shovel Scrap Wood *Two adults required to complete assembly* Only adults should set up the product.
- Page 5 ASSEMBLY GUIDES Refer to the following areas throughout the instructions to assist in the assembly process: This area is located at the top, TOOLS AND HARDWARE REQUIRED FOR THIS PAGE left-hand corner of the page and indicates which tools and hardware are needed to complete the assembly steps on a page.
-
Page 6: Parts List
PARTS LIST Item Description HARDWARE LIST Item Description Pole Assembly Hardware... - Page 7 HARDWARE LIST Item Description Backboard to Rim Assembly Hardware Backboard to Pole Assembly Hardware Handle Assembly Hardware Frame Pad Assembly Hardware...
-
Page 8: Parts Identifier
PARTS IDENTIFIER Parts shown at 10% of Actual Size ” ” ” ” ” 31”... - Page 9 PARTS IDENTIFIER Parts shown at 10% of Actual Size Parts shown at 5% of Actual Size...
- Page 10 PARTS IDENTIFIER Parts shown at 25% of Actual Size...
-
Page 11: Hardware Identifier
HARDWARE IDENTIFIER Hardware shown at Actual Size Hardware shown at Actual Size... - Page 12 HARDWARE IDENTIFIER Hardware shown at 25% of Actual Size Hardware shown at Actual Size 7 1/16” 7 1/2”...
- Page 13 HARDWARE IDENTIFIER Hardware shown at Actual Size 1/2” 6 1/2 ” AAO* 7 1/16” ACX* Note: The 5/16” x 2 1/2” Hex Bolt (ACX) and the 5/16” Nylock Nut (AAO) will not be used in this assembly. Hardware shown at Actual Size...
-
Page 14: Ground Preparation
GROUND PREPARATION HARDWARE REQUIRED NO HARDWARE REQUIRED FOR THIS SECTION PARTS REQUIRED Part shown at 10% of Actual Size TOOLS REQUIRED 1/2” x 36” Rebar Tape Measure Cement Mix Level Shovel... - Page 15 TOOLS AND HARDWARE REQUIRED FOR THIS PAGE NO HARDWARE REQUIRED FOR THIS PAGE 24” 18” Note: A Ground Sleeve is available as an alternative to cementing the Pole into the ground. Please contact Customer Service or visit Lifetime.com online for more information.
- Page 16 TOOLS AND HARDWARE REQUIRED FOR THIS PAGE NO TOOLS OR HARDWARE REQUIRED FOR THIS PAGE Bottom Pole (ALE) 14.5” Bottom Pole (ALE)
- Page 17 TOOLS AND HARDWARE REQUIRED FOR THIS PAGE NO TOOLS OR HARDWARE REQUIRED FOR THIS PAGE Bottom Pole (ALE) Playing Surface Note: Use a Level to make sure the Bottom Pole is standing vertical. Form the cement into a downward slope away from the pole to allow water runoff. Failure to do so may result in premature rusting of the Pole.
- Page 18 TOOLS AND HARDWARE REQUIRED FOR THIS PAGE 1/2” x 36” Rebar NO HARDWARE REQUIRED FOR THIS PAGE Bottom Pole (ALE) Rebar Note: Allow 1-4 hours for the concrete to set before continuing.
- Page 19 TOOLS AND HARDWARE REQUIRED FOR THIS PAGE NO HARDWARE REQUIRED FOR THIS PAGE Bottom Pole (ALE) Allow the concrete to set for at least 72 hours before installing the rest of the system onto the Bottom Pole. Cement Level Inside Pole Rebar Note: STOP HERE! The concrete must cure for at least 72 hours (3 days) before installing the rest of the system.
-
Page 20: Pole Assembly
POLE ASSEMBLY HARDWARE REQUIRED Hardware shown at Actual Size *Note: Only one #14 x 1” Self-Tapping Screw (ABZ), one Domed Counter- sink Washer (CIH) and one 1/4” x 3/4” Pan Head Screw (ADS) will be used for this section. Save the remaining hardware for later in the assembly. - Page 21 POLE ASSEMBLY PARTS REQUIRED Parts shown at 10% of Actual Size ” ” Part shown at 25% of Actual Size TOOLS REQUIRED 9/16” Wrench Phillips Screwdriver Electric Drill Wood Block...
- Page 22 TOOLS AND HARDWARE REQUIRED FOR THIS PAGE NO TOOLS REQUIRED FOR THIS PAGE 3/8” x 4” Hex Bolts (ABE) 3/8” Washers (AAF) Pole (ALH) 1/2” x 3.41” Spacers (ABR) Large holes Small holes...
- Page 23 TOOLS AND HARDWARE REQUIRED FOR THIS PAGE 9/16" Pole Bracket (ALL) 3/8” x 4” Hex Bolts (ABE) Top Pole (ALH)
- Page 24 TOOLS AND HARDWARE REQUIRED FOR THIS PAGE Top Pole (ALH) Middle Pole (ALF) 1/4” x 3/4” Screw (ADS) Warning Sticker Note: The 1/4” x 3/4” Screw should be fl ush with the Pole, but will spin freely once installed. Do not jam the Poles together until instructed.
- Page 25 TOOLS AND HARDWARE REQUIRED FOR THIS PAGE Wood Block NO HARDWARE REQUIRED FOR THIS PAGE ATTENTION: THIS STEP CANNOT BE REVERSED! Top Pole (ALH) Middle Pole (ALF) DO NOT COMPLETE ASSEMBLY WARNING The Poles must be seated together! Even if the Poles cover the slots before seating, they must be struck on a hard surface fi...
- Page 26 TOOLS AND HARDWARE REQUIRED FOR THIS PAGE #14 x 1”Self-Tapping Screw (ABZ) Note: Chuck the #14 x 1” Self-Tapping Screw (ABZ) directly into an Electric Drill for easy installation, or use a 3/8” Hex Driver.
- Page 27 BACKBOARD TO RIM ASSEMBLY HARDWARE REQUIRED Hardware shown at Actual Size ABK (x4) APX (x2) AAQ (x2) 5/16” Nylock Flange ADR (x4) AAV (x2) DFE (x4) ABB (x4) 5/16”Jam Nut 3/8” x 3/4” Bolt 3/8” Centerlock Nut Hardware shown at 25% of Actual Size AOU (x1) 4 1/2”...
- Page 28 BACKBOARD TO RIM ASSEMBLY PARTS REQUIRED Part shown at 10% of Actual Size Parts shown at 5% of Actual Size Part shown at 25% of Actual Size AMA (x1) Rim Cover Plate TOOLS REQUIRED 1/2” Wrench Phillips Screwdriver 1/2” Socket Wrench...
- Page 29 TOOLS AND HARDWARE REQUIRED FOR THIS PAGE APY (x1) 1/2” APX (x2) ABQ (x1) AAQ (x1) 5/16” x 1 1/4” Carriage Bolts (APX) Rim Pivot Bracket (APY) 3/8” Push Nut (AAQ) 3/8” x 5 1/2” Axle (ABQ) Note: The Push Nut should rest about 1/4” from the end of the Axle. If the Push Nut slips on too far, continue sliding it to the other end of the Axle to remove it and try again.
- Page 30 TOOLS AND HARDWARE REQUIRED FOR THIS PAGE 1/2” 1/2” AAQ (x1) 3/8” x 5 1/2” Axle (ABQ) Rim (ALX) Rim Pivot Bracket (APY) Push Nut (AAQ)
- Page 31 TOOLS AND HARDWARE REQUIRED FOR THIS PAGE 1/2” 4 1/2” U-Bolt (AOU) U-Bolt Support Bracket (DFD) Backboard (AJI) Rim (ALX) Plastic Guard (ALD) Backboard (AJI) 5/16” Nylock Flange Nuts (ABK) Tap Bolts (AAM)
- Page 32 TOOLS AND HARDWARE REQUIRED FOR THIS PAGE 1/2” 5/16” Jam Nuts (AAV) 4 1/2” U-Bolt (A0U)
- Page 33 TOOLS AND HARDWARE REQUIRED FOR THIS PAGE AOW (x1) AJW (x2) 1/2” ABK (x2) Compression Springs (AJW) 4 1/2” U-Bolt (AOU) Spring Retainer Plate (AOW) 5/16” Nylock Flange Nuts (ABK) Rim (ALX) Note: DO NOT COMPLETELY TIGHTEN THE 5/16” NYLOCK FLANGE NUTS IN THIS STEP! Only tighten the Nuts until the Rim (ALX) does not wobble.
- Page 34 TOOLS AND HARDWARE REQUIRED FOR THIS PAGE 9/16” ADR (x4) Rim Cover Plate (AMA) Rim (ALX) Backboard Brackets (AMY)
- Page 35 BACKBOARD TO POLE ASSEMBLY HARDWARE REQUIRED Hardware shown at Actual Size 7 1/16” 7 1/2” PARTS REQUIRED Parts shown at 10% of Actual Size ” ” Part shown at 25% of Actual Size TOOLS REQUIRED 3/4” Wrench Rubber Mallet...
- Page 36 TOOLS AND HARDWARE REQUIRED FOR THIS PAGE 7 1/2” 3/4” Short Extension Arms (AKC) Note: Tighten the 1/2” Centerlock Nut (AAX) until it is fl ush with the end of the Bolt.
- Page 37 TOOLS AND HARDWARE REQUIRED FOR THIS PAGE 7 1/2” 3/4” Long Extension Arms (AKB) Note: Tighten the 1/2” Centerlock Nut (AAX) until it is fl ush with the end of the Bolt.
- Page 38 TOOLS AND HARDWARE REQUIRED FOR THIS PAGE 3/4” 7 1/16” CAUTION: HAVE ONE ADULT HOLD THE BACKBOARD IN PLACE UNTIL ASSEMBLY HAS BEEN COMPLETED! Long Extension Arms (AKB) Top Pole (ALH) AKB AKB...
- Page 39 TOOLS AND HARDWARE REQUIRED FOR THIS PAGE 3/4” 7 1/16” Short Extension Arms (AKC) Top Pole (ALH)
-
Page 40: Handle Assembly
HANDLE ASSEMBLY HARDWARE REQUIRED Hardware shown at Actual Size ACX* AAO* 7 1/16” 6 1/2 ” 1/2” Note: The 5/16” x 2 1/2” Hex Bolt (ACX) and the 5/16” Nylock Nut (AAO) will not be used in this assembly. - Page 41 HANDLE ASSEMBLY PARTS REQUIRED Parts shown at 10% of Actual Size 31” Parts shown at 25% of Actual Size TOOLS REQUIRED 9/16" Wrench 3/4" Wrench Pliers...
- Page 42 TOOLS AND HARDWARE REQUIRED FOR THIS PAGE Gas Spring (AKF Bellows (AJO) Zip Ties (AMX) 1/2” 1” Note: Use Pliers to tighten the Zip Ties (AMX) securely, then cut off the ends of the Zip Ties. Pole Bracket (ALL) Cotter Pin (AAH) Clevis Pin (AAI)
- Page 43 TOOLS AND HARDWARE REQUIRED FOR THIS PAGE 6 1/2 ” 9/16” Trigger (AMN) Handle (AKI) Note: Tighten the 3/8” Centerlock Nut (ABB) until it is fl ush with the end of the Bolt. Height Sticker (AKP) Top Pole (ALH)
- Page 44 TOOLS AND HARDWARE REQUIRED FOR THIS PAGE 1/2” 3/4” Release Pin (AQE) Gas Spring (AKF) Handle (AKI) Gas Spring (AKF) Release Pin (AQE) Trigger (AMN) Rear Lifter Arms (ALS) Note: Tighten the 1/2” Centerlock Nut (AAX) until it is fl ush with the end of the Bolt.
- Page 45 TOOLS AND HARDWARE REQUIRED FOR THIS PAGE 6 1/2 ” 9/16” Handle (AKI) Middle Pole (ALF) 3/8” x 1/2” Spacers (ABM)
- Page 46 TOOLS AND HARDWARE REQUIRED FOR THIS PAGE 3/4” 7 1/16” Rear Lifter Arms (ALS) Long Extension Arms (AKB) .62” x 3.20” Spacer (ABT) WARNING The Handle mechanism is designed to lift only the weight of the Backboard and Rim. Do not hang anything from the Handle, Rim, Backboard, or Lifter Arms as this will damage the system and void the warranty.
- Page 47 TOOLS AND HARDWARE REQUIRED FOR THIS PAGE NO TOOLS OR HARDWARE REQUIRED FOR THIS PAGE Grease Packet (AKH) Release Pin (AQE)
-
Page 48: Final Assembly
FINAL ASSEMBLY HARDWARE REQUIRED Hardware shown at Actual Size Hardware shown at Actual Size *Take this hardware from Section 2 PARTS REQUIRED Parts shown at 10% of Actual Size Part shown at 25% of Actual Size TOOLS REQUIRED Scrap Wood Electric Drill Rubber Mallet Ladder... - Page 49 TOOLS AND HARDWARE REQUIRED FOR THIS PAGE Backboard (AJI) Left Right Frame Pads (BAA BAB) Center Frame Pads (AJQ) Backboard (AJI)
- Page 50 TOOLS AND HARDWARE REQUIRED FOR THIS PAGE AT LEAST THREE ADULTS ARE REQUIRED. DO NOT ATTEMPT ASSEMBLY WITH FEWER THAN THREE ADULTS AND THREE LADDERS. BEFORE CONTINUING: Middle Pole (ALF) Bottom Pole (ALE) 1/4” x 3/4” Screw (ADS) Domed Countersink Washer (CIH), WARNING Playing Surface...
- Page 51 TOOLS AND HARDWARE REQUIRED FOR THIS PAGE NO HARDWARE REQUIRED FOR THIS PAGE You must have wood on top of the Pole before hitting it with a hammer to prevent scratching the powder coating. Middle Pole (ALF) Bottom Pole (ALE) DO NOT COMPLETE ASSEMBLY Wood Block WARNING...
- Page 52 TOOLS AND HARDWARE REQUIRED FOR THIS PAGE Middle Pole (ALF) #14 x 1” Self-Drilling Screw (ABZ) Note: Chuck the #14 x 1” Self-Drilling Screw (ABZ) directly into an Electric Drill for easy installation, or use a 3/8” Hex Driver.
- Page 53 TOOLS AND HARDWARE REQUIRED FOR THIS PAGE NO HARDWARE REQUIRED FOR THIS PAGE Pole Cap (ALM) Net (AKZ) Rim (ALX) Note: If a replacement Net is needed, please call our Customer Service Department. Our Nets are shorter than average to reduce the risk of entanglement.
- Page 54 OPERATION OF HEIGHT ADJUSTMENT SYSTEM To Adjust the Height of the Hoop: POLE CARE AND SYSTEM MAINTENANCE IF RUST HAS PENETRATED THROUGH THE POLE ANYWHERE, REPLACE IT IMMEDIATELY!
- Page 55 NOTES...
- Page 56 NOTES...
- Page 57 NOTES...
- Page 58 ® ENHANCE YOUR LIFETIME PURCHASE BY ADDING ACCESSORIES OR OTHER GREAT PRODUCTS: To purchase accessories or other Lifetime Products, visit us at: www.lifetime.com Or call: 1-800-424-3865...
- Page 59 ADVERTENCIA AVERTISSEMENT SI NO SE OBEDECEN ESTAS ADVERTENCIAS PUEDEN PRODUCIRSE GRAVES LESIONES Y/O FAUTE DE NE PAS SUIVRE CES AVERTISSEMENTS, VOUS RISQUEZ DE CAUSER DES BLES- DAÑOS A LA PROPIEDAD. SURES GRAVES ET/OU DES DOMMAGES À L’ÉQUIPEMENT. www.lifetime.com #FS16400 10/12/2004...
-
Page 60: Warranty Information
THE MANUFACTURER RESERVES THE RIGHT TO MAKE SUBSTITUTIONS TO WARRANTY CLAIMS IF PARTS ARE UNAVAILABLE OR OBSOLETE. ALL WARRANTY CLAIMS MUST BE ACCOMPANIED BY A SALES RECEIPT. REPORT PRODUCT DEFECTS IN WRITING TO: To register the product, visit our Web site at www.lifetime.com www.lifetime.com...
Need help?
Do you have a question about the 90460 and is the answer not in the manual?
Questions and answers