Table of Contents
Advertisement
Advertisement
Table of Contents

Related Manuals for Olympus IPLEX UltraLite


Summary of Contents for Olympus IPLEX UltraLite
- Page 2 Shinjuku Monolith, 3-1 Nishi-Shinjuku 2-chome, Shinjuku-ku, Tokyo 163-0914, Japan Telephone: +81 3 6901 4038 Wendenstrasse 14-18, 20097 Hamburg, Germany Telephone: +49 40 23 77 30 48 Woerd Ave Waltham, MA 02453, U.S.A. Telephone: +1 781 419 3900 KeyMed House, Stock Road, Southend-on-Sea, Essex SS2 5QH, U.K. Telephone: +44 0 1702 616333 491B, River Valley Road #12-01/04, Valley Point Office Tower, Singapore 248373 Telephone: +65 6834 0010...
-
Page 3: Table Of Contents
Contents Introduction ....................1 Intended use........................1 Instruction manual......................1 Product configuration ...................... 1 Important Information–Please Read Before Use........1 Marks used in this manual ....................1 Safety precautions......................2 General safety precautions................... 2 Battery precautions....................... 5 Main unit rating plate/caution plate............7 Unpacking Unpacking the instrument .................. - Page 4 Replaying an image....................23 Playing back on a full-screen view (retrieve screen) ..........23 Multi-image view (thumbnail screen) ................24 Using images on a PC....................25 Menu operations and functions Performing menu operations .................. 26 Using the live screen/freeze screen................ 27 Menu display and functions ..................
-
Page 5: Introduction
Before using the instrument, carefully read the contents of this manual to ensure that you use the instrument correctly. After reading the manual, store it and the warranty agreement in a safe place. If you have any questions about any information in this manual, please contact Olympus. Product configuration For information about the configuration of devices required by this product and devices that can be used in combination with it, see "System chart"... -
Page 6: Safety Precautions
This instrument does not contain any user serviceable parts. Do not disassemble, modify or attempt to repair. User injury and/or equipment damage can result. Contact Olympus for all repair and servicing. • Immediately stop using the instrument at the first sign of smoke, abnormal odor, abnormal noise, or any other abnormality. - Page 7 Using equipment not specified by Olympus may damage the instrument causing smoke or fire. • To ensure electrical safety, connect the power cord to a 3P power outlet. Electrical safety designed into the product by Olympus cannot be guaranteed if there is no connection to power outlet ground.
- Page 8 • If an optical adapter cannot be mounted or removed because the nut will not turn, stop using it. Contact Olympus. • Do not allow metal or other foreign objects to enter the main unit through connectors or any other openings.
-
Page 9: Battery Precautions
Battery precautions Should you experience any problems when using the instrument with batteries, contact Olympus. Observe the precautions described below when handling the battery. Otherwise, battery fluid leak, excessive heat generation, smoke, battery burst, electric shock and/or burns may result. - Page 10 Should any foreign object enter the main unit, remove the battery and disconnect the AC adapter, and immediately contact Olympus. • Do not use a commercially available travel converter with the battery charger. Otherwise, the battery charger may be damaged.
-
Page 11: Main Unit Rating Plate/Caution Plate
Main unit rating plate/caution plate The safety ratings, cautions, and serial number are on stickers on the battery cover and in the battery compartment. If labels are missing or if their contents are illegible, contact Olympus. Rating and caution plate CAUTION •... -
Page 12: Unpacking
Unpacking Unpacking the instrument When unpacking the instrument, check to make sure that all of the items listed below are included. Should anything be missing or damaged, contact your original vendor or Olympus. Name Count IPLEX UltraLite (main unit) SD card... -
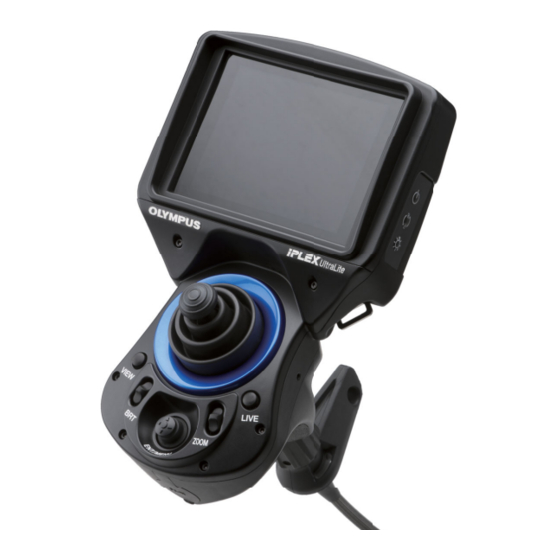
Page 13: Nomenclature
Nomenclature Main unit/insertion tube nomenclature Name Name Main unit LCD monitor SD card slot POWER button ( USB connector ROTATE button ( SD card cover LIGHT button ( Strap Strap holder Insertion tube fastening belt Angulation section VIEW button* Distal end BRT lever Tip cap AC adapter connector... -
Page 14: Distal End/Optical Adapter Nomenclature
2 Nomenclature Distal end/optical adapter nomenclature 4-mm type 6-mm type Distal end Distal end Optical adapter Optical adapter Optical adapter internal view Optical adapter internal view Name Name Optical adapter positioning cut surface First screw thread O-ring Second screw thread Illumination Connecting screw thread Index... -
Page 15: Lcd Monitor Nomenclature
2 Nomenclature LCD monitor nomenclature Live screen Name Logo Brightness level Zoom level Date/Time Title Temperature indicator Number of images that can be recorded SD card icon Battery indicator Freeze indicator Thumbnail screen Movie recording indicator Folder name File name Remaining media capacity Movie image indicator... -
Page 16: Pre-Observation/Pre-Operation Preparation And Inspection
Pre-observation/pre-operation preparation and inspection Be sure to finish the preparation and inspection work described in this chapter before using the instrument. At the first sign of any abnormality, immediately stop using the instrument and perform the required actions as described in "7 Troubleshooting" (P. 36). Inspections are not only required before use, but should be conducted periodically. -
Page 17: Pre-Operation Preparation
3 Pre-observation/pre-operation preparation and inspection Using the AC adapter AC inlet After connecting the provided AC power cord to the AC inlet of the AC adapter, plug the plug end of the AC power cord securely into a 3P power outlet. CAUTION •... -
Page 18: Turning On Power
3 Pre-observation/pre-operation preparation and inspection Turning on power Hold down the POWER button ( ) for at least 3 seconds to turn on power. Display screen and menu operations become enabled about 3 seconds after the POWER button ) is pressed. Turning off power Hold down the POWER button ( ) for at least two seconds. -
Page 19: Checking The Illumination Of The Distal End
3 Pre-observation/pre-operation preparation and inspection Turn the nut of the optical adapter clockwise until the second screw thread is screwed onto the connecting screw thread. Tighten the nut until it stops. Removing the optical adapter To remove the optical adapter, repeat the above attachment steps in reverse order. Optical adapter attachment and detachment messages Attachment or detachment of the optical adapter is automatically detected and indicated by a message. -
Page 20: Attaching The Tripod Adapter
3 Pre-observation/pre-operation preparation and inspection Attaching the tripod adapter Attach the tripod adapter to the instrument to use a tripod to do observations. Perform the following steps to install the tripod adapter. Check the orientation of the tripod adapter (as shown in the illustration on the right). -
Page 21: Pre-Operation/Post-Operation Inspections
Any cracks, scratches, or other defects to the insertion Replacement tube, battery cover, or SD card cover? required. Contact Any irregularities such as damage to or deformation of the Olympus. exterior material, buttons, joysticks, or levers? Insertion tube, Any looseness in materials other than the angulation angulation section? - Page 22 Replacement required. NOTE Contact Olympus. The LCD monitor is manufactured based on precision technologies. The LCD monitor may contain pixels that do not light (visible as black dots) or light permanently (visible as bright dots). This does not indicate a defect or malfunction of the product.
-
Page 23: Basic Operation
Basic operation Viewing an observation object WARNING • The distal end will be hot immediately after use in a high-temperature environment. Do not touch it directly. Doing so creates the risk of burn injury. Turn on optical adapter illumination. While watching the display screen, insert the insertion tube into the observation object. -
Page 24: Adjusting The Image Display
4 Basic operation Adjusting the image display Still image display (Freeze) While a live image is displayed, short-press the [FRZ/REC] button. This will freeze the observation screen image and display the freeze indicator ( ) in the upper right corner of the LCD monitor. Do not insert or withdraw the insertion tube while an image is frozen. -
Page 25: Recording Images
4 Basic operation Recording images Still images and movie images can be recorded during observation. Data can be stored on the provided SD card. Use either the provided SD card or a recommended Class 6 or higher SDHC card for storage. Use of SDXC cards is not supported. -
Page 26: Recording A Still Image
4 Basic operation File names File names are generated and assigned automatically as images are stored on an SD card. You can change a file if you want (up to 30 alphanumeric characters and symbols). IV0?????.*** File name extension ".JPG" for still image files, ".AVI" for movie files. 5-digit file name serial number The file number is assigned sequentially from 00001 to 99999. -
Page 27: Replaying An Image
4 Basic operation Replaying an image Recorded images can be displayed using either of two screen views: a full-screen view of a single image (retrieve screen) or a multi-image view of thumbnail images (thumbnail screen). The thumbnail screen shows multiple images at a single glance, which makes it useful when finding a particular image among a large group of images. -
Page 28: Multi-Image View (Thumbnail Screen)
4 Basic operation Multi-image view (thumbnail screen) The thumbnail screen shows multiple recorded movie and still images on a single screen (nine images per screen). You can use the thumbnail screen to search for a desired image, or to select multiple images to move them or delete them. -
Page 29: Using Images On A Pc
4 Basic operation Using images on a PC Use the provided USB cable to import recorded images directly from the instrument to your computer. On the live screen, use the SETUP menu to select [PC] to configure the instrument's PC settings. Use the USB cable to connect the instrument to a PC that is running. -
Page 30: Menu Operations And Functions
Menu operations and functions Performing menu operations Long-press the [ENT/ MENU] joystick. This displays the main menu. Tilt the [ENT/MENU] joystick up, down, left or right to select the menu item you want to execute. Short-press the [ENT/ MENU] joystick to apply the setting and return to the screen in which the main menu was... -
Page 31: Using The Live Screen/Freeze Screen
5 Menu operations and functions Using the live screen/freeze screen Menu display and functions The settings described in the table below can be configured using the live screen/freeze screen menu. *: Initial default Available settings Menu Title input TITLE INPUT A title can be displayed in the live screen and in registered images. - Page 32 • ALL : Show the date, time, title, "OLYMPUS" logo, zoom level, and brightness level. • DATE/TIME/LOGO: Show the date, time, title, and "OLYMPUS" logo. • DATE/TIME : Show the date, time, and title. • OFF : Hide information.
-
Page 33: Inputting A Title
5 Menu operations and functions Inputting a title The following are the two methods that can be used to input a title. • Input text from the on-screen keyboard • Select a preset title Input text from the on-screen keyboard Select the input mode and then press the [ENT/MENU] joystick. -
Page 34: Registering A Character String As A Preset Title
5 Menu operations and functions Select the preset title you want from the list and then press the [ENT/MENU] joystick. The text string you select appears in the title input box. Repeat steps 1 and 2 to complete input of the title. NOTE •... -
Page 35: Changing The Display Language
5 Menu operations and functions Changing the display language Use the procedure below to select the language for menus and error messages that appear on the display. SETUP > LANGUAGE > Select a language. Selecting a language displays the message to let you know that the process is being performed. After the message disappears, LCD monitor contents will be in the language you selected. -
Page 36: Using The Thumbnail/Retrieve Screens
5 Menu operations and functions Using the thumbnail/retrieve screens Menu display and functions The menu displayed on the thumbnail/retrieve screen can be used for the following settings. Available settings Button Image delete DELETE • CANCEL : Do not delete image. •... -
Page 37: Storage And Maintenance
For details about how to load and remove the battery, see "Using the battery" (P. 12). CAUTION • Never use a battery other than the one specified by Olympus. Otherwise, failure of the instrument may not only lead to a malfunction but also a fire. -
Page 38: Cleaning The Distal End
6 Storage and maintenance Cleaning the distal end Dirt or water droplets on the objective lens or electrodes of the distal end Grasping the rigid portion of the distal end, use a clean, soft piece of gauze or a cotton swab to wipe off the dirt or water. -
Page 39: Cleaning The Lcd Monitor
6 Storage and maintenance Cleaning the LCD monitor LCD monitor viewing problems due to fingerprints and dirt Wipe the LCD monitor with a soft cloth dampened with clean water. Next, lightly wipe it with a clean, dry cloth. CAUTION • Never use a chemically treated cloth or strong detergent, such as benzine or alcohol. Doing so may damage the surface of the LCD monitor. -
Page 40: Troubleshooting
Olympus for repairs. Should even the slightest irregularity be suspected, do not use the instrument. Perform the actions described in "7.1 Troubleshooting guide" (P. 36). If the problem cannot be resolved by the described remedial action, stop using the instrument and send it to Olympus for repair. -
Page 41: Common Problems
7 Troubleshooting Message Cause and recommended action This message prompts you to stop inspection because the self-check function was triggered because the distal end was overheating. ➝ Immediately withdraw the insertion tube from the observation object. HIGH TEMPERATURE (DISTAL END). NOTE PLEASE IMMEDIATELY PULL OUT •... - Page 42 The SD card being used for image recording is not the one provided and is not one recommended by Olympus. All the functions stopped during ➝ Remove the AC adapter or the battery from the main unit to turn off the power. motion image recording. ➝ Use an SD card recommended by Olympus.
-
Page 43: Requesting Repair Of This Product
7 Troubleshooting Requesting repair of this product WARNING • Olympus is not liable for any accidents or instrument damage that occurs as a result of repairs attempted by non-Olympus personnel. CAUTION • Olympus will not repair an instrument contaminated by noxious substances. -
Page 44: Specifications
Specifications Operating environment Operating temperatures ° Insertion tube In air : -25 to 100 ° In water: 10 to 30 Other parts than above In air ° : -10 to 40 C (Battery-powered operation) ° 0 to 40 C (AC adapter-powered operation) Operating atmospheric pressure Insertion tube In air... - Page 45 (Provided that Windows Media Player Ver.11 or later and Xvid video codec are installed.) Moving image playback Restrictions Images recorded on IPLEX UltraLite (this instrument) can be played back. Carrying case dimensions and weight Dimensions 460 (W) x 360 (H) x 165 (D) mm Weight Approximately 1.7 kg (IV8420U with all items stowed: 3.5 kg)
-
Page 46: External Application Standard
In accordance with European Directive 2002/96/EC on Waste Electrical and Electronic Equipment, this symbol indicates that the product must not be disposed of as unsorted municipal waste, but should be collected separately. Refer to your local Olympus distributor for return and/or collection systems available in your country RoHS Directive... -
Page 47: Optical Adapter Specifications
8 Specifications Optical adapter specifications For 4-mm type insertion tube When the optical adapter is mounted on the insertion tube. AT120D/NF AT120D/FF AT120S/NF AT120S/FF -IV84 -IV84 -IV84 -IV84 Product abbreviation 120DN V84 120DF V84 120SN V84 120SF V84 Character color Green Green °... -
Page 48: Appendix
• AT120S/ NF-IV84 • AT120D/ NF-IV86 • AT120S/ FF-IV84 • AT120D/ FF-IV86 • AT80S-IV86 • AT120S/ NF-IV86 • AT120S/ FF-IV86 Tip cap Insertion tube IPLEX UltraLite fastening belt Strap main unit 4-mm type • IV8420U • IV8435U Tripod adapter MAJ-2017 6-mm type (optional) •...
Need help?
Do you have a question about the IPLEX UltraLite and is the answer not in the manual?
Questions and answers
How to measurement off
The Olympus IPLEX UltraLite uses Stereo Measurement technology to measure defects from various angles with simple operation. It supports diverse measurement modes, including distance, height, and depth.
This answer is automatically generated