Table of Contents
Advertisement
Quick Links
Advertisement
Table of Contents

Related Manuals for Eaton XVM PCBA Series


Summary of Contents for Eaton XVM PCBA Series
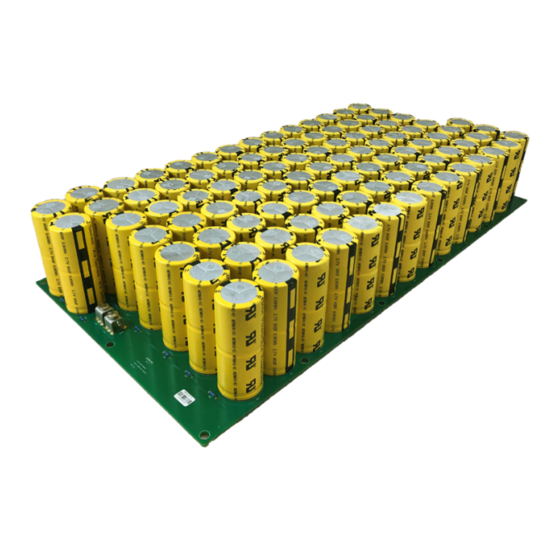
- Page 1 XVM PCBA Modules Instruction Manual...
-
Page 2: Table Of Contents
. . . . . . . . . . . . . . . . . . . . . . . . . . . . . . . . . . . . . . . . . . . . . . . . . . . . . . . . . . . . . . .7 XVM PCBA MODULES INSTRUCTION MANUAL Technical note 10966 August 2019 www.eaton.com/electronics... -
Page 3: Introduction
(duty cycle >1 .5%) and above 40 A continuous current . Prior to installation or removal from the equipment, it is • mandatory to fully discharge the module . XVM PCBA MODULES INSTRUCTION MANUAL Technical note 10966 August 2019 www.eaton.com/electronics... -
Page 4: Installation
PCB and shown in Figure 4 and Figure 5 Figure 5: XVM-315V top view dimensions, including mounting holes for XVM-259 and XVM-315 respectively . See the respective data sheets for available mounting locations click here . XVM PCBA MODULES INSTRUCTION MANUAL Technical note 10966 August 2019 www.eaton.com/electronics... - Page 5 (as shown in Figure 8 and Figure 9) . Figure 10 and Figure 11 show series-parallel wire configurations . Figure 7: Series connected XVM-315 modules XVM PCBA MODULES INSTRUCTION MANUAL Technical note 10966 August 2019 www.eaton.com/electronics...
- Page 6 XVM PCBAs Instruction manual Figure 8: Parallel connected XVM-259 modules Figure 10: Series and parallel XVM-259 wiring configuration Figure 11: Series and parallel XVM-315 wiring configuration Figure 9: Parallel connected XVM-315 modules XVM PCBA MODULES INSTRUCTION MANUAL Technical note 10966 August 2019 www.eaton.com/electronics...
-
Page 7: Operation
. or externally . Discharge Procedure Proceed as follow to discharge the module: Using a voltmeter, measure the voltage between the positive and negative terminals . XVM PCBA MODULES INSTRUCTION MANUAL Technical note 10966 August 2019 www.eaton.com/electronics... - Page 8 Electronics Division 1000 Eaton Boulevard Cleveland, OH 44122 United States Eaton .com/electronics © 2019 Eaton All Rights Reserved Eaton is a registered trademark. Printed in USA Publication no . 10966 BU-MCN19095 All trademarks are property August 2019 of their respective owners.
Need help?
Do you have a question about the XVM PCBA Series and is the answer not in the manual?
Questions and answers