
Related Manuals for Eaton Vickers DF3S4-16 Series


Summary of Contents for Eaton Vickers DF3S4-16 Series
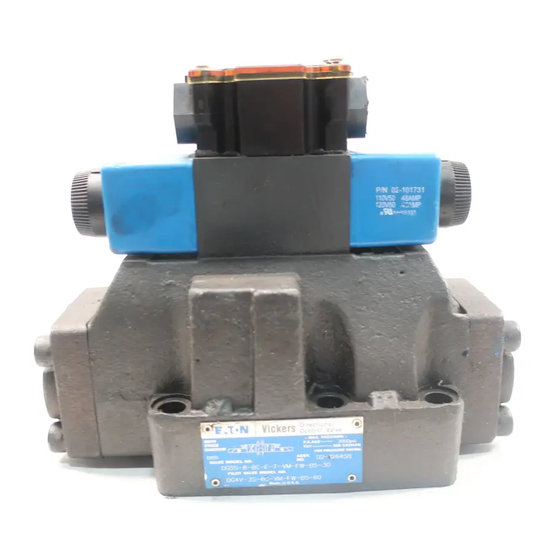
- Page 1 ® Vickers Overhaul Manual Directional Controls Directional Controls Revised 11/1/86 I-3618-S...
-
Page 3: Table Of Contents
Table of Contents Section Page I. Introduction ....................A. -
Page 4: Introduction
Section I – Introduction A. Purpose Of Manual 2. Model Codes - Variations within each basic model series are covered in the model code. Table 2 shows a This manual describes operational characteristics, complete breakdown of the model codes covering these maintenance requirements and overhaul information for units. - Page 5 DG17S/DG17S8/DG17/20V-3 SERIES Model Description 10/11 Design 40 Design 50 Design 53 Design Installation Drawing DG17S4-012 I-3546-S 514500 DG17S4-012A I-3546-S 514500 DG17S4-01*C/N I-3546-S 514500 DG17S4-06A/C/N I-3567-S 514705 DG17S4-10A/C/N I-3568-S 514705 DG17S4-10A/C/N I-3564-S I-3551-S DG17/20V-3-*A* DG17/20V-3-*C* I-3551-S 514381 I-3872-S I-3632-S DG17/20V-3-*N* DG17S-8-*C 514701 DG17S-8-*N 514701...
- Page 6 DG4S2/DG4S4 SERIES Model Description 50 Design 51 Design Installation Drawing DG4S2-012A-*AC I-3478-S DG4S2-012A-*DC I-3507-S DG4S2-012A-H I-3485-S DG4S2-012C-*AC I-3477-S 517401 DG4S2-012N-*AC I-3471-S DG4S2-012N-*DC I-3522-S DG4S2-012N-H I-3472-S DG4S2-01*A-W(3) I-3557-S 517410 DG4S2-01*N-W(3) I-3559-S DG4S4-01*A-*AC I-3478-S 517401 DG4S4-01*A-*DC I-3507-S DG4S4-01*A-H I-3485-S DG4S4-01*A-W(3) I-3557-S 517410 DG4S4-01*B-W(3) I-3558-S DG4S4-01*C-*AC...
- Page 7 DG5S-H8/DG5S-8/DG5S4-H06**/DG5S4-06**/DG5S4-10**/XDG5S4-06**/XDG5S4-10** SERIES 10/11 20/21 53/54 Addl. Installation Model Description 40 Design 50 Design 51 Design Design Design Design Design Drawing Drawing DG5S-H8-*A/B/C/N I-3445-S 517930 DG5S-8-*A/B/C/N I-3439-S I-3869-S 517840 DG5S-8-*D I-3440-S I-3873-S DG5S4-H06*A-M I-3446-S 517850 DG5S4-H06*A-*AC I-3459-S 517920 DG5S4-H06*C-M I-3447-S 517850 DG5S4-H06*C-*AC I-3458-S 517920...
- Page 8 DG5S-H8/DG5S-8/DG5S4-H06**/DG5S4-06**/DG5S4-10**/XDG5S4-06**/XDG5S4-10** SERIES 10/11 20/21 53/54 Addl. Installation Model Description 40 Design 50 Design Design Design Design Design Design Drawing Drawing DG5S4-10*N-W(3) I-3627-S DG5S4-10*N-*AC DG5S4-10*N-*DC I-3512-S I-3499-S 518000 DG5S4-06*N-*H I-3498-S DG5S4-06*N-* I-3624-S XDG5S4-06*A I-3502-S XDG5S4-06*C I-3473-S 517900 XDG5S4-06*D I-3504-S XDG5S4-06*N I-3474-S I-3501-S XDG5S4-10*A I-3513-S...
- Page 9 Model Code Pilot Valve and/or Solenoid Type F3 Viton Seals Spool Type - Main Stage Section M - DG4V-3 pilot valve and adapter (omit for standard models) 0 - Open center plate (omitted on DG5S-8 1 - Open center, P-A (DG5S-H8 models) 2 - Closed center X - Hazardous...
-
Page 10: Description
Section II – Description A. General C. Two Stage Directional Valve Construction Directional valves are devices used to change the flow direction of fluid within a hydraulic circuit. A valve is Two stage directional valves are pilot pressure operated. A designed to control the direction of movement of a work two stage valve is constructed by combining a pilot valve cylinder or the direction of rotation of a fluid motor. -
Page 11: Valve Operation
Section III – Valve Operation A. General b. Type “3” spool is designed with ports (A) and (T) interconnected and ports (P) and (B) blocked in the center Directional Valve operation is determined by four factors; position. spool type, spool positioning, method of control, and special c. -
Page 12: Methods Of Spool Control, Main Stage
Type Type Open Center, Partial - All Ports Pressure and “B” Closed - “A” Open to Tank Type Type Closed Crossover, Pressure to “T” with “A” Closed - Pressure Open to Tank thru “B” “A” & “B” Blocked Type Type Pressure Closed - “A”... - Page 13 The following paragraphs (1 through 4) describe these 2. Spring Centered: A spring and washer arrangement is arrangements. A fifth function can be obtained by the use of a used on both ends of the main stage spool in the spring detent pilot valve.
- Page 14 3. Spring Offset: Single stage spring offset models use Pressure centered valves are not available with integral one spring to return the spool to an offset position. In two- check valves. (Refer to Section V, Internal Valve Functions, stage models, the spring and washer is removed from the for integral check valve information.) Pressure centered main stage and offset action is obtained from the pilot valve.
- Page 15 1. Solenoids are de-energized. Pilot spool is in center position. (P-A & B, T blocked) (shown). 2. Pilot pressure keeps main stage spool in center position. Flow is blocked to all ports. 3. When solenoid “B” is energized, the pilot spool shifts to the left. Oil under pressure enters piston area causing the main stage spool to shift to the right.
-
Page 16: Optional Features (Main Stage)
E. Optional Features (Main Stage) clockwise. To increase the rate of spool travel, turn the adjusting screws counterclockwise. When a pilot choke is Control of the main stage spool can be modified with certain used, pilot pressure should be taken from a constant optional features. - Page 17 DGMFN-3-21 Part No. Part Name Qty. Screw Needle Housing O-Ring Needle O-Ring Spring Poppet Body O-Ring Roll Pin Figure 10a. Part Tab Figure 10a. Pilot Choke - DGFN-01-20 (Use with DG4S4-01 Series) DGFN-01-20 Part No. Part Name Qty. Retaining Ring Plug O-Ring Spring...
-
Page 18: Pilot Valve Section
Pilot Stage Spool Adjustable orifice restricts pilot exhaust flow to slow main stage spools shift. Main Stage Spool Free flow through this check valve when pilot pressure is directed in. Adjustments to restrict pilot exhaust flow. Pilot Choke Block Stroke adjustments limit maximum spool travel. -
Page 19: Methods Of Control - Pilot Valve
1. Spring Centered: A spring and washer are installed Pilot Stage Valve DG18S4 DG19S4-06**-*-52 at each end of the pilot valve spool. The spring moves the Directional Valve DG19S4-H06**-*-52 spool until the washer contacts the end of the valve body. In DG19S4-10**-*-52 the de-energized condition of the pilot valve, the spool is held in center position within the body by the springs and... - Page 20 Solenoid “A” De-energized Air pressure is appliedto piston area and shift pilot spool. Solenoid “B” De-energized Oil under pressure enters main stage section and shifts main stage spool. PIston PIston Open Center Air Connection #1 Air Connection #2 Control Flow to 12a.
- Page 21 PA - A prefix of PA in the model code indicates 180° from the position shown in Figure 13a. Wire grounding the male plug section of the insta-plug feature is included screws are provided for convenience. on the valve. g. Manual Override: Each solenoid (electrical or air PB - A prefix of PB in the model code indicates type) has a manual override plunger to shift the pilot spool.
- Page 22 1/2 (NTPF) Thread Connection Terminal Box Manual Override Plunger Wet Armature (Standard) Body Push Pin End Cover (“A” “B”, or “F” Models) Solenoid “A” Missing Core Tube “C” Models Solenoid Coil Pilot Spool Figure 13a. DG4V-3-40 Pilot Valve, Sectional View “B”...
-
Page 23: Internal Valve Functions
Section V – Internal Valve Functions A. General PIlot Pressure (1000 psig) 1000 To insure the proper application of a two stage valve, pilot Tank Line Pressure Surge (850 psig) pressure, pilot drain and integral check valve options must be considered. The following paragraphs (B through D) discuss these options. -
Page 24: Installation
Section VI – Installation A. Installation Drawings 2. To minimize flow resistance and the possibility of external leakage, use only the necessary fittings and con- nections required for proper installation. The installation drawings listed in Table 1 show installation dimensions, port locations and operating parameters. Man- 3. -
Page 25: Vii.service, Inspection & Maintenance
Section VII – Service, Inspection & Maintenance A. Service Tools D. Adjustments No periodic adjustments are required other than normal No special tools are required to service this valve series. system maintenance. B. Inspection E. Replacement Parts Periodic inspection of the fluid condition and tube or piping Reliable operation throughout the specified operating range connections can save time consuming breakdowns and is assured only if genuine Vickers parts are used. -
Page 26: Viii.overhaul
Section VIII – Overhaul b. If the valve has an air operated pilot section, turn off air supply and disconnect the pressure lines from the WARNING connection plate. Before breaking any circuit connections, be certain the electrical power is off and all branches of the CAUTION circuit are relieved of trapped pressure. - Page 27 DG5S4-10*-****-53 Item Nomenclature Quantity Screw Nameplate (Pilot Valve Gasket Screw O-Ring Body (Main Section) Screw Cover O-Ring Spring Washer Screw Cover O-Ring Spring Washer Spool O-Ring O-Ring O-Ring Seat Poppet Spring Sleeve Rest Pin 26 - 48 Plug (Consecutive even #’s) 27 - 49 O-Ring (Consecutive odd #’s)
-
Page 28: Disassembly
Also obtain a flat washer. Remove seat (21), Figure 15, per B. Disassembly instructions noted in Figure 16. Remove poppet (22) and spring (23). DO NOT remove sleeve (24). General This manual describes the disassembly sequence of a typical NOTE: Screw DG5S4-10*C-W3-53 two-stage directional valve. - Page 29 DG5S4-10*D-W(3)-*-53 32 33 34 35 Item Nomenclature Quantity Pilot Valve Screws O-Rings Body Plug O-Ring Screw Cover O-Ring O-Ring Spring Sleeve Piston Spool Screw Cover O-Ring Spring Washer 20 - 45 Plugs & O-Rings 13 each O-Ring O-Ring O-Ring O-Ring Rest Pin Figure 17.
- Page 30 DG4S4-01-**W3-51 NOTE: Model Source Code DG4S4-01-**A-50 DG4S4-01-**B-50 DG4S4-01-**C-50 DG4S4-01-**N-51 ∅ Included in serviceable core tube S/A Item Nomenclature Quantity Model Source Code Detent S/A Washer B, C Screw C, N Screw A, B Coil S/A C, N Cover A, B Gasket C, N O-Ring...
- Page 31 DG4S4-01-50 26 27 23 24 21 22 28 29 DG4S4-01-C/N-**-50 Item Nomenclature Quantity Nameplate Gasket Screw O-Ring DC Solenoid Assembly (offset “A” units) DC Solenoid Assembly AC Solenoid Assembly (offset “A” units) AC Solenoid Assembly Oil Immersed Solenoid Assy. (offset “A” units) Oil Immersed Solenoid Assy.
- Page 32 DG4V-3-**-M-40 “C” or “N” Models NOTE: Model Source Code DG4V-3-**A-40 DG4V-3-**B-40 DG4V-3-**C-40 DG4V-3-**F-40 DG4V-3-**N-40 “A”, “B” or “F” Models Item Nomenclature Quantity Model Source Item Nomenclature Quantity Model Source Code Code Screw A, B, C, F, N Detent S/A Carrier A, B, C, F, N Washer Screw...
- Page 33 DG18V-3-C-40 Item Nomenclature Quantity Screw End Cover Manual Plunger O-Ring Plunger Seal Guide O-Ring O-Ring Retainer Spring Washer Spool Body O-Ring Figure 21. DG18V-3-C-40 Air Operated Pilot Valve for DG19S4-**-52 Two-Stage Unit...
-
Page 34: Cleaning
5. Remove spring (14), spacer (15) and washer (16) 2. Inspect all screws for evidence of damaged threads. from body bore. If threads are damaged, replace the screws. 3. Inspect all springs for distortion or wear. The ends of NOTE the springs shall be square and parallel to each other. -
Page 35: Assembly
f. Lubricate spool lands with clean system fluid and Land Balancing then carefully install spool (17) into main body bore. Make Grooves sure the spool moves freely inside the body bore and is oriented properly. (See parts drawing.) g. Install washer (16) and spring (15) on end of spool (17). - Page 36 b. Install armature (27) into core tube as NOTE shown. Make sure the armature fits over the manual plunger Observe the model code. If left hand (LH) assembly at the bottom of the tube. Use the correct armature S/A for is required, reverse all pilot parts except body and AC and DC operation.
-
Page 37: Internal Body Passages And Plug Locations
Section IX – Internal Body Passages & Plug Locations Two stage directional valves can be converted to different Operational Mode Change operational modes, i.e., internal/external, pilot pressure or (Reference model code, Table 2) drain, fast response, etc. To accomplish this, internal plugs * - Standard K/R/S - Integral check valve must be removed or added within the main stage body... -
Page 38: Start-Up And Test
Section X – Start-up and Test A. Start-up B. Test Start the system and sequence the unit through all A test stand having regulated flow, temperature control and positions while watching for appropriate movement of special fixtures is required to fully test the performance of actuators. - Page 39 Plug Installation Table NOTE: “A” “B” “C” Open Center Spools 0, 4, 8 & 9 cannot function unless Model Plug Plug Plug External Pilot Pressure “E” or a 50/75 psi Check DG5S4-04-K/R/S-40 “R”/“S” is used. DG5S4-04-X-K/R/S-40 DG5S4-04-E-K/R/S-40 DG5S4-04-X-E-K/R/S-40 * - Denotes Orifice Plug “B”...
- Page 40 Plug Installation Table “A” “B” “C” Model Plug Plug Plug DG5S4-06*-51 DG5S4-06*-E-51 DG5S4-06*-X-51 DG5S4-06*-X-E-51 * - Denotes Orifice Plug “B” Plug “C” Plug “X” Port Figure 24a. DG5S4-06*-51 or DG5S4-06*-D-52 Internal Pressure Passages & Plug Locations Plug Installation Table “A” “B”...
- Page 41 Drain Port Internal Coring “T” Plug (Remove for Internal Drain Models) “Y” Port Figure 24c. DG5S4-06-T-51 Internal Drain Passages & Plug Locations Plug Installation Table “A” “B” “C” Model Plug Plug Plug DG5S4-H06*C-51 Does DG5S4-H06*C-E-51 DG5S4-H06*C-X-51 Exist DG5S4-H06*C-X-E-51 * - Denotes Orifice Plug “B”...
- Page 42 Plug Installation Table “A” “B” “C” Model Plug Plug Plug DG5S4-H06*C-KRS-51 DG5S4-H06*C-E-KRS-51 DG5S4-H06*C-X-KRS-51 DG5S4-H06*C-X-E-KRS-51 * - Denotes Orifice Plug “B” Plug Check Valve Pressure Pickup Line “C” Plug “A” Plug Gauge Connection Figure 25b. DG5S4-H06-(K/R/S)-51 Internal Pressure Passages & Plug Locations Drain Port Internal Coring “T”...
- Page 43 Plug Installation Table “A” “B” “C” Model Plug Plug Plug DG5S4-10**-53 Does DG5S4-10**-E-53 DG5S4-10**-X-53 Exist DG5S4-10**-X-E-53 * - Denotes Orifice Plug “B” Plug “C” Plug “X” Port Figure 26a. DG5S4-10**-53/54 Internal Pressure Passages & Plug Locations Plug Installation Table “A” “B”...
- Page 44 Drain Port Internal Coring “T” Plug (Remove for Internal Drain Models) “Y” Port Figure 26c. DG5S4-10**-T-53 Internal Drain Passages & Plug Location Plug Installation Table “A” “B” “C” Model Plug Plug Plug DG5S-8-**-10 Does DG5S-8-**-E-10 DG5S-8-**-X-10 Exist DG5S-8-**-X-E-10 * - Denotes Orifice Plug “B”...
- Page 45 Plug Installation Table “A” “B” “C” Model Plug Plug Plug DG5S-8-**-KRS10 Does DG5S-8-**-E-KRS-10 “A” Plug DG5S-8-**-X-KRS-10 Exist DG5S-8-**-X-E-KRS-10 * - Denotes Orifice Plug “C” Plug “X” Port Check Valve Figure 27b. DG5S-8-** (K/R/S)-10 or DG5S-H8-**(K/R/S)-20 Internal Pressure Passages & Plug Locations DG5S8-10 (with or w/o check valve) or DG5SH8-20 (with or w/o check valve) Internal Drain Passages &...
Need help?
Do you have a question about the Vickers DF3S4-16 Series and is the answer not in the manual?
Questions and answers