
Subscribe to Our Youtube Channel
Related Manuals for Riello GAS 9/2


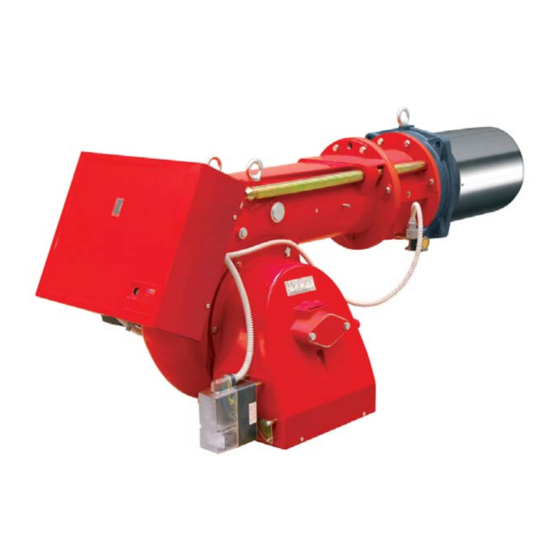
Summary of Contents for Riello GAS 9/2
- Page 1 Installation, use and maintenance instructions Forced draught gas burners Two-stage operation CODE MODEL TYPE 20014057 GAS 9/2 1114 T 20014058 GAS 9/2 1114 T 20014474 (5) - 01/2018...
-
Page 3: Table Of Contents
Final checks..........18 To ensure a periodic check, Riello recommends the drawing up of Maintenance . -
Page 4: Guarantee And Responsibility
INTRODUCTION ance with the regulations in force and/or the sales contract. At the mo- The Riello burners have been designed and built in compliance with cur- ment of the first start-up, check that the burner is integral and complete. rent regulations and directives, applying the known technical rules of safety and envisaging all the potential danger situations. -
Page 5: Technical Data
TECHNICAL DATA Model GAS 9/2 Output 2nd stage 1750 - 3200 Mcal/h 1500 - 2752 1st stage 1000 - 1750 Mcal/h 860 - 1500 Fuel NATURAL GAS: G20 - G21 - G22 - G23 - G25 - Net calorific value... -
Page 6: Accessories
ACCESSORIES (optional) L=130 L1 = 314 mm SPACER FOR SHORTENING THE COMBUS- TION HEAD (A) Code 3000723 L = Spacer thickness L1= Resulting blast tube length KIT FOR LPG OPERATION (B) This kit must be fitted whenever the burner is to be operated on LPG. -
Page 7: Burner Description
Checking the consignment After removing all the packag- ing, check the integrity of the contents. In the event of doubt, do not use the burner; contact CAUTION the supplier. GAS 9/2 2040 1130 1180 packaging elements (wooden cage or cardboard box, nails, clips, plastic bags, etc.) must not be abandoned as... -
Page 8: Firing Rates
S8056 lines gives the operating point, which must lie within the FIRING RATES. Example: for GAS 9/2 the range is defined by: • the 1750 - 3200 kW output axis • the 0 + 17 mbar comb. chamber pressure axis •... -
Page 9: Gas Pressure
= 2 mbar 24 - 2 = 22 mbar in the GAS 9/2 graph, this corresponds to an out- put in stage 2 of 1750 kW. This reading is an initial approximation. The effective delivery is be read at the meter. -
Page 10: Installation
INSTALLATION BOILER PLATE (A) GAS 9/2 Drill the combustion chamber locking plate as shown in (A). The position of the threaded holes can be marked using the thermal screen sup- plied with the burner BLAST TUBE LENGTH (B) The length of the blast tube should be selected in... -
Page 11: Setting The Combustion Head
2. WARNING D3439 Example: a GAS 9/2 burner is installed on a 2250 kW boil- er. If a 90% efficiency rate is considered, the burner should deliver approximately 2500 kW in stage 2. Graphs (C) indicates that for this capacity, the gas and air should be set on notch 4 and 5 re- spectively. -
Page 12: Gas Line
MVD 5080/5+MVD5065/5+MVDLE 415/5 indicated in Table (A) L1 - The responsibility of the installer TABLE : C mbar A = GAS BURNERS AND RELEVANT GAS GAS 9/2 Ø TRAINS APPROVED ACCORDING TO EN 2” B = GAS TRAIN COMPONENTS DN 65... -
Page 13: Electrical System
Do not pull the electric cables. LAYOUT (A) Burners GAS 9/2 (3-phase) - These models leave the factory preset for 400 V power supply. - If 230 V power supply is used, change the mo-... - Page 14 If this is not the case, a time switch should be fitted in series to IN to provide for burner shut- down at least once every 24 hours. • The GAS 9/2 burner is factory set for two-stage operation and must therefore be connected to control device TR.
-
Page 15: Adjustments Before Firing
ADJUSTMENTS BEFORE FIRST FIRING MIN GAS PRESSURE SWITCH All the installation, mainte- nance and disassembly opera- tions must be carried out with the electricity supply discon- DANGER nected. The installation of the burner must be carried out by qualified personnel, as indicated in this manual and in compliance with WARNING the standards and regulations... -
Page 16: Burner Starting
Orange lever. SERVOMOTOR This lever sets the position of the air gate valve 5)(A)p.5 during stage 1 operation. Open the air gate valve by moving the orange le- ver to the left (+ sign on the plate) and close it by moving the lever to the right (- sign on the plate). -
Page 17: Burner Calibration
BURNER CALIBRATION The optimum calibration of the burner requires an analysis of the flue gases at the boiler outlet. Adjust successively: 1 - First firing output 2 - 1st stage burner output 3 - 2nd stage burner output 4 - Air pressure switch 5 - Maximum gas pressure switch 6 - Minimum gas pressure switch 1 - FIRING OUTPUT... -
Page 18: 2Nd Stage Burner Output
3 - 2ND STAGE BURNER OUTPUT AIR PRESSURE SWITCH MAX gas setting Measure gas delivery. - If it is to be reduced, close the 2nd stage gas valve a little. - If it is to be increased, first open the 2nd stage gas valve all the way and then, if it is not enough, in- crease the gas pressure coming from the pres- sure governor. -
Page 19: Burner Operation
BURNER OPERATION NORMAL FIRING BURNER STARTING (A) (n° = seconds from instant 0) • Remote control device TL closes. The control box starting cycle begins. • Fan motor starts. Servomotor starts: it rotates to right, un- til contact is made on cam St1 (orange lever). -
Page 20: Final Checks
FINAL CHECKS (with burner running) • Disconnect one of the wires on the minimum gas pressure switch: • Open remote control device TL: • Open remote control device TS: the burner must stop • Disconnect the common wire P from the air pressure switch: •... - Page 21 OPENING THE BURNER IF THE ELECTRICAL SUP- PLY OF THE GAS VALVES OCCURS AT UNEXPECTED TIMES, DO NOT OPEN MAN- WARNING BALL VALVE, SWITCH OFF POWER LINE; CHECK THE WIRES; COR- RECT THE ERRORS AND RE- PEAT THE COMPLETE TEST. Combustion The optimum calibration of the burner requires an analysis of the flue gases.
-
Page 22: Fault - Probable Cause - Suggested Remedy
FAULTS - POSSIBLE CAUSES - SUGGESTED REMEDY FAULT PROBABLE CAUSE SUGGESTED REMEDY The burner does not start - No electrical power supply ......Close all switches - Check connections - A limiter or safety control device is open . -
Page 23: Burner Start-Up Cycle Diagnostics
BURNER START-UP CYCLE DIAGNOSTICS During start-up, indication is according to the following table: COLOUR CODE TABLE Sequences Colour code Pre-purging Ignition phase Operation, flame ok Operating with weak flame signal Electrical supply lower than ~ 170V Lock-out Extraneous light Key: Yellow Green OPERATING FAULT DIAGNOSTICS... - Page 24 RIELLO S.p.A. I-37045 Legnago (VR) Tel.: +39.0442.630111 http:// www.riello.it http:// www.riello.com Subject to modifications...
Need help?
Do you have a question about the GAS 9/2 and is the answer not in the manual?
Questions and answers