
Subscribe to Our Youtube Channel
Related Manuals for Bomar Vertical Series


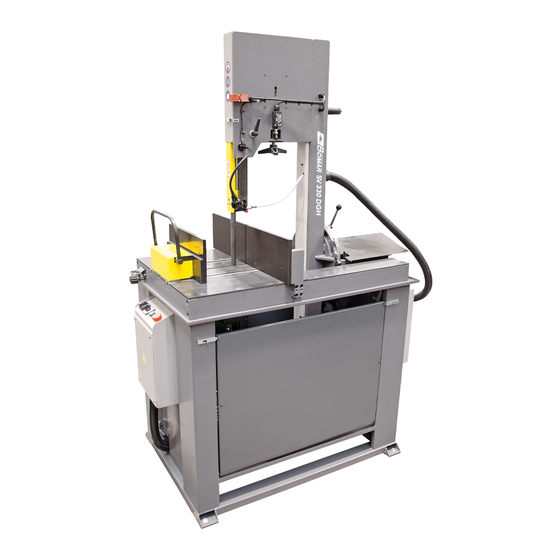
Summary of Contents for Bomar Vertical Series
- Page 1 Series Vertical SV 330 DGH hydraulic vice Operating instructions Before transporting and using the machine, please read the instructions thoroughly! Seriové číslo / Serien Nummer / Serial Number ___________________...
- Page 2 533 426 109 Czech Republic, EU e-mail: info@bomar.cz www: http://www.bomar.c We are available: Mondays to Fridays – 16 Version: 2.00/May 2016 rev. 2 BOMAR, spol. s r.o. © – Subject to modifications and amendments. Manual version: 2.00/May 2016 Manual rev.:...
- Page 3 3) The authorized or accredited body co-operating on the conformity judging If the equipment is installed without safety equipment offered by BOMAR, spol. s ro or its agents and used by the customer (or buyer) then EC declaration loses validity.
- Page 4 Manual version: 2.00/May 2016 Manual rev.:...
-
Page 5: Table Of Contents
Content BEZPEČNOSTNÍ POKYNY / SAFETY NOTES / SICHERHEITSHINWEISE ............7 1.1. Machine determination ..................9 1.2. Protective clothing and personal safety ..............9 1.3. Safety instructions for machine operator ............. 10 1.4. Safety notes for the servicing and repairs ............11 1.5. - Page 6 ÚDRŽBA STROJE / MACHINE MAINTENANCE / WARTUNG ................45 4.1. Saw band dismantling ..................47 4.2. Saw band installation ..................48 4.3. Saw band stretching and inspection..............49 4.3.1. Saw band stretching ................49 4.3.2. Saw band inspection ................49 4.4.
-
Page 7: Bezpečnostní Pokyny / Safety Notes / Sicherheitshinweise
Bezpečnostní pokyny / Safety notes / Sicherheitshinweise... - Page 8 Bezpečnostní pokyny Sicherheitshinweise Safety notes...
-
Page 9: Machine Determination
The operating instructions must be read by any person, who gets in contact with the machine during transportation, installation, using, servicing, reparation, stocking or removal! The operating instructions include relevant information. The operator must familiarize himself with the installation and operation, safety notes and machine servicing, to reach maximum reliability and lifespan. -
Page 10: Safety Instructions For Machine Operator
Operate the machine only when you are fit enough for work. Illnesses or injuries diminish concentration. Avoid machine work, which may jeopardize the safety of you and your colleagues! 1.3. Safety instructions for machine operator Attention! Machine can only be operated by a person older than 18 years! Machine can be operated only by a person physically and mentally fit for this activity. -
Page 11: Safety Notes For The Servicing And Repairs
Any use of the saw, accessories or machine parts other than that intended by BOMAR, spol. s r.o. company is not permitted. The guarantee on this product will be lost afterward and BOMAR, spol. s r.o. takes no responsibility for damage caused. -
Page 12: Safety Accessories Of The Machine
1.6. Safety accessories of the machine The machine is equipped with safety accessories. They protect the operator from injuries and the machine from damage. The safety accessories include blocking accessories, emergency switches and covers. Check the function of safety accessories regularly once a week. If the safety accessories are not fulfilling their function, interrupt your work and repair or replace the faulty accessory. -
Page 13: Saw Band Stretching And Rupture Inspection
1.6.3. Saw band stretching and rupture inspection This device checks the saw band tension and causes immediate machine halt if the band accidentally ruptures. The device includes a limit switch. Its adjustment is described in chapter „Maintenance“. Check the switch carefully and periodically – adjust it if necessary 1.6.4. - Page 14 If swallowed, drink a lot of water and induce vomiting. Look for medical help Manual version: 2.00/May 2016 Manual rev.:...
-
Page 15: Umístění Štítku Stroje / Maschinenschild Position / Position Of Machine Label
1.8. Umístění štítku stroje / Maschinenschild position / Position of machine label Machine label is placed on the base of the saw near the hydraulic aggregate. -
Page 16: Umístění Bezpečnostních Značek / Verteilung Der Sicherheitszeichen / Position Of Safety Symbols
1.9. Umístění bezpečnostních značek / Verteilung der Sicherheitszeichen / Position of safety symbols Manual version: 2.00/May 2016 Manual rev.:... - Page 17 Bezpečnostní pokyny Sicherheitshinweise Safety notes...
-
Page 18: Dokumentace Stroje / Machine
Dokumentace stroje / Machine documentation / Dokumentation der Maschine Manual version: 2.00/May 2016 Manual rev.:... - Page 19 Dokumentace stroje Dokumentation der Maschinen Machine documentation...
-
Page 20: Technická Data / Technische Daten / Technical Data
2.1. Technická data / Technische Daten / Technical data Hmotnost stroje / Maschinengewicht / Machine weight: • Hmotnost / Gewicht / Weight 380 kg Rozměry stroje / Maschinengröße / Machine size : • Délka / Länge / Lenght 1490 mm •... -
Page 21: Rozměrové Schéma / Aufstellzeichnung / Installation Diagram
2.2. Rozměrové schéma / Aufstellzeichnung / Installation diagram... -
Page 22: Popis / Beschreibung / Description
2.3. Popis / Beschreibung / Description Manual version: 2.00/May 2016 Manual rev.:... -
Page 23: Transportation And Stocking
2.4. Transportation and stocking 2.4.1. Conditions for transportation and stocking Follow the recommendations of the manufacturer for transportation and stocking! If the recommendations are not kept, damage may occur to the machine. • Don’t use a forklift truck for handling the machine, if you do not have a license for it! •... - Page 24 Place the forks of a fork lift truck according to these signs! Manual version: 2.00/May 2016 Manual rev.:...
-
Page 25: Transportní Schéma / Transportschema / Transport Diagram
2.4.4. Transportní schéma / Transportschema / Transport diagram... -
Page 26: Activation Of The Machine
2.5. Activation of the machine 2.5.1. Machine working conditions Keep the conditions of the manufacturer for machine operation! If the recommendations are not kept, damage can occur to the machine. The manufacturer warrants the correct function of the machine for these conditions: •... - Page 27 • The machine and all appended parts and accessories must be visible from the place of operation...
-
Page 28: Saw Frame Locking Screw (For Transportation)
2.6.2. Saw frame locking screw (for transportation) The saw frame should be secured in place with a bolt (see arrows) for transportation. Remove the bolt before saw frame operation. 2.7. Machine disposal after lifetime Pour all service fluids (cooling liquid, hydraulic oil) from the machine over into designated reservoirs. -
Page 29: Filling The Hydraulic Unit With Oil
2.8.1. Filling the hydraulic unit with oil Fill the tank with one of the oils stated in the chart below. These are hydraulic oils class HM and HV in accordance with the European CETOP RP 91H specification in viscosity classes ISO VG 32. Do not pour the oil directly from the barrel into the tank but use a filtration device with a grid spacing of 20 µm or finer. -
Page 30: Kotevní Plan / Verankerungsplan / Grounding Plan
2.9. Kotevní plan / Verankerungsplan / Grounding plan Manual version: 2.00/May 2016 Manual rev.:... -
Page 31: Electrical Connection
2.10. Electrical connection Attention! Only a qualified professional must carry out the servicing and repairs of the electric equipment! Take special care during work with the electrical equipment. High voltage accident can have fatal consequences! Always follow instructions for work safety. Electrical parameters of the machine: Service voltage: ~ 3×400 V, 50 Hz, TN-C-S... -
Page 32: 2.10.2. Check Of Connection To The Electrical Network
2.10.2. Check of connection to the electrical network Attention! When you connect the machine to the electrical network secure a correct connection of all phases! THE HYDRAULIC AGGREGATE ENGINE MUST NOT BE OPERATED IN REVERSED DIRECTION FOR MORE THEN 10 SECONDS!!! 2.11. -
Page 33: Saw Band
BOMAR recommends variable tooth system for its band saws. In the table below the type of the tooth system depending on the sizes and profile of the cutting material is advised. -
Page 34: 2.13.4. Tables For Teeth Selection
2.13.4. Tables for teeth selection: SHAPED MATERIAL (D , S = mm) Note: Table shows tooth system selection for cutting one piece of selected profile. When cutting more pieces of the selected profile (bundle), you must double the corresponding wall thickness of the profile to get an accurate estimation (i.e., wall thickness equates to 2×S). -
Page 35: Ovládání Stroje / Machine Control / Bedienung Der Maschine
Ovládání stroje / Machine control / Bedienung der Maschine... - Page 36 Ovládání stroje Bedienung der Maschine Machine control...
-
Page 37: Starting The Band Saw
3.1. Starting the band saw » Turn the main switch into position 1 – ON. Main switch is placed on the control panel at the front. 3.1.1. Throttle valve The valve regulates the movement of saw band into cut. Throttle valve is located on the left side at the front above the control panel (see arrow). -
Page 38: Control Panel
3.2. Control panel Manual version: 2.00/May 2016 Manual rev.:... -
Page 39: Halogen Lighing Of Working Area
TOTAL STOP button In a case of emergency, this button immediately stops the machine. Main switch Switches the saw on /off Saw band speed and rinsing switch Tap symbol – only rinse the saw band while it holds still. Position 1 – saw band speed 32 m.min with cooling. -
Page 40: Machine Control
3.3. Machine control 3.3.1. Semi-automatic cycle Cutting: Move the saw frame into the initial position (further from vice) by button “5“. Set the cutting angle (see chapter Angular cut setting). If you want to make a vertical cut (i.e. 0°), screw the auxiliary metal boards to the fixed vice jaws (see below). -
Page 41: Semi-Automatic Cycle Interruption Possibilities
Press button “4“ (Start) to start the cut. Attention! You can stop the semi-automatic mode by pressing button no. 5 or the TOTAL STOP – emergency button. Attention! Saw frame movement can be stopped only by closing the throttle valve or pressing the TOTAL STOP button! 10. - Page 42 Open corresponding cover on the side of the saw. Move the saw frame to the back position (furthermost from vice). Pull out the locking pin (arrows). Grip the rubber handle (arrow 1) on the saw frame and loosen the locking lever (arrow 2).
-
Page 43: Setting Of The Optimal Span Of The Guiding Cubes
Put the locking pin back into the opening. If you are setting the angle with the help of the stops, make sure the head of the bolt of the angular stop rests either against the locking pin or against the facet on the other side of the frame (see below). -
Page 44: Material Insertion
If you are cutting long pieces (for example rods, tubes), you must use a roller conveyor for shifting the material to the band saw. Contact Bomar for more information about roller conveyors. Make sure the conveyor is long enough and the material cannot drop off the conveyor. -
Page 45: Údržba Stroje / Machine Maintenance / Wartung
Údržba stroje / Machine maintenance / Wartung... - Page 46 Manual version: 2.00/May 2016 Manual rev.:...
-
Page 47: Saw Band Dismantling
4.1. Saw band dismantling Open the cover on the pedestal (side of the driving wheel). Open upper cover of the tightening wheel and lower cover of the driving wheel (after loosening the securing screws with plastic head). Dismantle the yellow protective cover and guiding cubes. The cover is fastened by two hex screws. -
Page 48: Saw Band Installation
4.2. Saw band installation Prior to installation, clean the track wheels, guiding cubes and inner side of the arm thoroughly of all traces of chips and dirt. Keep in mind the teeth direction when installing the saw band. Insert the new saw band in the guide cubes. Make sure the saw band runs between both guiding rollers and that it is pushed all the way to the top. -
Page 49: Saw Band Stretching And Inspection
4.3. Saw band stretching and inspection Correct saw band stretching is one of the most important factors, which influence accuracy and saw band lifespan. Stretch the saw bands according to the band saw and the selected saw band type. Keep to the recommendation of your manufacturer. -
Page 50: Adjustment
Open cover of the wheels and check the position of the saw band on the both wheels. • If the distance between backside of the saw band and the wheel rim is 1 mm, the setting is right. • If the distance is bigger than 1 mm, or the saw band runs on the rim of the wheel, adjust the saw band. -
Page 51: Adjusting The Limit Switch Of The Saw Band Stretching
4.4.2. Adjusting the limit switch of the saw band stretching After the saw band is replaced, the limit switch setting must be checked. If the limit switch is not set correctly, the band is stretched either too much or too little. -
Page 52: Guiding Cubes Adjustment
Release the stop screw and at the same time grip the saw band by hand and check if the hard metal guide does not put up to much resistance against the movement of the band. As soon as it is possible to move the band without resistance the hard metal guides are adjusted properly. -
Page 53: Adjusting The Limit Switch Of The Saw Band Stretching
Set the brush to the saw band. Ends of the brush bristles should not touch the base of the saw band teeth (see picture below). Attention! The brush must not touch the bottom of the saw teeth! Tighten the bolt again and switch on the saw band drive. If the brush is adjusted properly, it runs fluently together with the saw band. -
Page 54: Saw Frame Furthermost Position Stop Adjustment
4.4.7. Saw frame furthermost position stop adjustment This stop limits the furthermost position of the saw frame from the vice. This stop has to be checked at least once a month. If the lower stop is adjusted incorrectly Move the saw frame to the furthermost position Release the nuts of the adjusting screw and adjust the stop Fasten the adjusting screw with the nuts again Set the limit switch of the furthermost arm position... -
Page 55: Cooling Agents And Chip Disposal
Switch setting Release the nut of the stop screw and screw in the stop screw Move the arm to the furthermost position stop and turn on the band drive Screw out the stop screw until the band drive stops Secure the screw with nut again and check the limit switch setting once more 4.5. -
Page 56: Chips Disposal
Use oils with DIN 51517 specification for the gearboxes. Select the ISO VG viscosity class according to the original oil. Attention: When replacing the oil, use oils recommended by BOMAR or oils from other manufacturers, which have comparable parameters. Do not forget, that mineral and synthetic oils must not be mixed! -
Page 57: Lubricant Greases
Comparative table of the gearbox oils Viscosity grade Manufacturer ISO VG 100 ISO VG 220 ISO VG 320 Energol GR-XP 100 Energol GR-XP 220 Energol GR-XP 320 Alpha SP 100 Alpha SP 220 Castrol Alpha MW 100 Alpha MW 220 Reductelf SP 220 Reductelf SP 100 Reductelf SP 320... -
Page 58: Spots For Lubrication
Use oils with specification DIN 51524-HLP, ISO 6743-4 and viscosity class ISO VG 32 in hydraulic aggregates. Note: When replacing, use oils recommended by BOMAR or oils, from the other manufacturers which have comparable parameters. Do not forget, that mineral and synthetic oils must not be mixed! Manual version: 2.00/May 2016... -
Page 59: Hydraulic Unit Maintenance
Comparative table of hydraulic oils Manufacturer Type Manufacturer Type Agip Oso 32 Hidraol 32 HD Aral Vitam GF 32 Klüber Lamora HLP 32 Avia Avilub RSL 32 Maďarsko Hidrokomol P 32 Benzina OH-HM 32 Mobil Mobil DTE 25 Energol HLP 32 ÖMV HLP 32 Bulharsko... -
Page 60: Machine Cleaning
To secure high reliability of the hydraulic unit, the manufacturer lays down following inspection intervals three Interval daily weekly monthly annually monthly monthly Hydraulic fluid • Level • Temperature Condition • Change interval • Filter Change interval Other checks • External Leakages •... -
Page 61: Worn Parts Replacement
4.8. Worn parts replacement 4.8.1. Hard metal guides replacement If the hard metal guides cannot be adjusted any more, they have to be replaced. Remove the hosepipe leading to the cooling agent tank and dismantle the saw band and saw band guiding cube. Fasten the guiding cube in a vice and screw out the screws on both hard metal plates. -
Page 62: Saw Band Guiding Rollers Replacement
4.8.2. Saw band guiding rollers replacement If the saw band is not sufficiently guided by guiding rollers and/or if the rollers are obviously worn, the rollers should be replaced. Attention! Guiding rollers must be replaced on both guiding cubes! Remove the hosepipe leading to the cooling agent tank and dismantle the saw band and saw band guiding cube. -
Page 63: Worn Brush Replacement
Put new guide rollers on the eccentrics and screw the eccentrics to the guide cube. Now insert a short test piece of a saw band (cca 15 -- 20 cm) into the guiding cube. Adjust both eccentrics so that the band runs in the middle of the milled groove. - Page 64 Manual version: 2.00/May 2016 Manual rev.:...
-
Page 65: Závady / Troubleshooting / Störungen
Závady / Troubleshooting / Störungen... - Page 66 Manual version: 2.00/May 2016 Manual rev.:...
-
Page 67: Mechanical Problems
5.1. Mechanical problems Problem Possible causes Repair Wrongly adjusted hard metal Set according to the chapter „Servicing guides. and adjustment“ Worn hard metal guides. Replace according to the chapter „Worn pieces replacement“ Wrongly adjusted cubes of the Set according to the chapter „Servicing saw band guiding. - Page 68 Problem Possible causes Repair described in chapter „Worn pieces replacement“ Wrongly adjusted swarf brush. Check swarf brush adjustment, set it according to chapter „Servicing and adjustment“ Over stretched saw band Lower the stretching of the saw band and set the limit switch of the saw band stretching according to chapter „Servicing and adjustment“...
- Page 69 Problem Possible causes Repair valve. Pressure switch is wrongly Set the pressure switch according to Saw band drive adjusted. chapter „Servicing and adjustment“ cannot be started. Pressure switch is defective. Replace defective parts of the pressure switch. Saw band run not adjusted Adjust the distance of band from the rim properly according to operating instructions.
-
Page 70: Electrical Problems
5.2. Electrical problems Problem Possible causes Repair No voltage in the socket Line voltage must be checked. Machine is not possible to start. Overload relay is defective Each FA overload relay’s condition (thermal protection) (on/off) must be checked. Limit switch of either saw band Check the saw band stretching and stretching, band cover or saw covers. -
Page 71: Hydraulic Problems
5.3. Hydraulic problems Problem Possible causes Repair • Reversed rotation Check the correct connection of each phase. Reconnect the electrical phases properly. • Shortage of oil in the tank Add hydraulic oil Hydro generator • Oil viscosity does not correspond to Change hydraulic oil. - Page 72 • The slider of the switchboard Replace slider – Call service slackens Manual version: 2.00/May 2016 Manual rev.:...
- Page 73 Závady Troubleshooting Störungen...
-
Page 74: Schémata / Schemas / Schematics
Schémata / Schemas / Schematics Manual version: 2.00/May 2016 Manual rev.:... - Page 75 Schémata Schemas Schematics...
-
Page 76: Elektrické Schema / Elektroschema / Wiring Diagrams 3X400 +Pe, 50 Hz
6.1. Elektrické schema / Elektroschema / Wiring diagrams 3x400 +PE, 50 Hz Manual version: 2.00/May 2016 Manual rev.:... - Page 77 Schémata Schemas Schematics...
- Page 78 Manual version: 2.00/May 2016 Manual rev.:...
- Page 79 Schémata Schemas Schematics...
- Page 80 Manual version: 2.00/May 2016 Manual rev.:...
- Page 81 Schémata Schemas Schematics...
- Page 82 Manual version: 2.00/May 2016 Manual rev.:...
- Page 83 Schémata Schemas Schematics...
- Page 84 Manual version: 2.00/May 2016 Manual rev.:...
-
Page 85: Hydraulické Schéma Hydraulisches Schéma Hydraulic Diagram
6.2. Hydraulické schéma Hydraulisches Schéma Hydraulic diagram... - Page 86 Poz. Název položky Pos. Bezeichnung Menge Pos. Item Pcs. kod 55, s drzakem Nádrž / Behälter / Tank 10dm3l MA-AL63 Elektromotor / Elektromotor / Electromotor 0,12kW P23-2,1L.66017 Hydrogenerátor / Hydraulikaggregat / Hydrogenerator 2,1cm3/ot. Jednosměrný ventil / Einwegventil / One-way VJ01-06/SG-1 valve Přepouštěcí...
- Page 87 Schémata Schemas Schematics...
-
Page 88: Výkresy Sestav Pro Objednání Náhradních Dílů / Zeichnungen Für Bestellung Der Ersatzteile / Drawing Assemblies For Spare Parts Order
Výkresy sestav pro objednání náhradních dílů / Zeichnungen für Bestellung der Ersatzteile / Drawing assemblies for spare parts order- Při objednávání náhradních dílů vždy uvádějte: typ stroje (např. practix PR1247 SV 330 DGH) , výrobní číslo (např. 125) a rok výroby (např. 1999). -
Page 89: Pila Pásová / Bandsäge / Bandsaw
7.1. Pila pásová / Bandsäge / Bandsaw... -
Page 90: Kusovník / Stückliste / Piece List - Pila Pásová / Bandsäge / Bandsaw
7.2. Kusovník / Stückliste / Piece list – Pila pásová / Bandsäge / Bandsaw Manual version: 2.00/May 2016 Manual rev.:... -
Page 91: Pila Pásová / Bandsäge / Bandsaw
7.3. Pila pásová / Bandsäge / Bandsaw... -
Page 92: Kusovník / Stückliste / Piece List - Pila Pásová / Bandsäge / Bandsaw
7.4. Kusovník / Stückliste / Piece list – Pila pásová / Bandsäge / Bandsaw Manual version: 2.00/May 2016 Manual rev.:... -
Page 93: Podstavec / Untersatz / Base
7.5. Podstavec / Untersatz / Base... - Page 94 Manual version: 2.00/May 2016 Manual rev.:...
-
Page 95: Vozík / Wagen / Cart
7.6. Vozík / Wagen / Cart... -
Page 96: Kusovník / Stückliste / Piece List - Vozík / Wagen / Cart
7.7. Kusovník / Stückliste / Piece list – Vozík / Wagen / Cart Manual version: 2.00/May 2016 Manual rev.:... -
Page 97: Svěrák / Schraubstock / Vice
7.8. Svěrák / Schraubstock / Vice... -
Page 98: Kusovník / Stückliste / Piece List - Svěrák / Schraubstock / Vice
7.9. Kusovník / Stückliste / Piece list – Svěrák / Schraubstock / Vice Manual version: 2.00/May 2016 Manual rev.:... -
Page 99: Rameno / Sägerahmen / Saw Arm
7.10. Rameno / Sägerahmen / Saw arm... -
Page 100: Kusovník / Stückliste / Piece List - Rameno / Sägerahmen / Saw Arm
7.11. Kusovník / Stückliste / Piece list – Rameno / Sägerahmen / Saw arm Manual version: 2.00/May 2016 Manual rev.:... -
Page 101: Kartáč / Brush / Bürste
7.12. Kartáč / Brush / Bürste... -
Page 102: Pohon / Antrieb / Drive
7.13. Pohon / Antrieb / Drive Manual version: 2.00/May 2016 Manual rev.:... -
Page 103: Napínání / Spannung / Tensioning
7.14. Napínání / Spannung / Tensioning... -
Page 104: Kusovník / Stückliste / Piece List - Napínání / Spannung / Tensioning
7.15. Kusovník / Stückliste / Piece list – Napínání / Spannung / Tensioning Manual version: 2.00/May 2016 Manual rev.:... -
Page 105: Vedení Pásu / Sägebandführung / Belt Guide
7.16. Vedení pásu / Sägebandführung / Belt guide... -
Page 106: Kusovník / Stückliste / Piece List - Vedení Pásu / Sägebandführung / Belt Guide
7.17. Kusovník / Stückliste / Piece list – Vedení pásu / Sägebandführung / Belt guide Manual version: 2.00/May 2016 Manual rev.:... -
Page 107: Chlazení / Kühlung / Cooling
7.18. Chlazení / Kühlung / Cooling... - Page 108 Manual version: 2.00/May 2016 Manual rev.:...
-
Page 109: Válec Tlumící / Dämpfungszylinder / Damping Cylinder
7.19. Válec tlumící / Dämpfungszylinder / Damping cylinder... -
Page 110: Kusovník / Stückliste / Piece List - Válec Tlumící / Dämpfungszylinder / Damping Cylinder
7.20. Kusovník / Stückliste / Piece list – Válec tlumící / Dämpfungszylinder / Damping cylinder Manual version: 2.00/May 2016 Manual rev.:... -
Page 111: Stůl / Table / Tisch
7.21. Stůl / Table / Tisch... -
Page 112: Kusovník / Stückliste / Piece List - Stůl / Table / Tisch
7.22. Kusovník / Stückliste / Piece list – Stůl / Table / Tisch Manual version: 2.00/May 2016 Manual rev.:... -
Page 113: Ovládací Panel / Bedienpult / Control Panel
7.23. Ovládací panel / Bedienpult / Control panel...
Need help?
Do you have a question about the Vertical Series and is the answer not in the manual?
Questions and answers