Table of Contents
Advertisement
Available languages
Available languages
Quick Links
Advertisement
Table of Contents

Subscribe to Our Youtube Channel
Related Manuals for Sport-thieme R-350


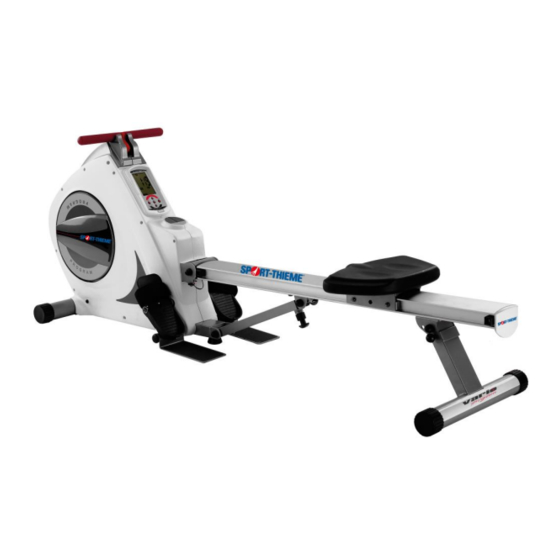
Summary of Contents for Sport-thieme R-350
- Page 1 Art.-Nr.:2269939 Instrucciones de montaje y utilización Instructions for assembly and use Instructions de montage et utilisation Montage und Gebrauchsanleitung Instruções de montagem e utilização Istruzioni di montaggio e uso Montage-en gebruiksinstrukties...
- Page 2 Fig.0...
- Page 3 Fig.1 Fig.2...
- Page 4 Fig.3 Fig.4 Fig.5...
- Page 5 Fig.6 Fig.7 Fig.8...
- Page 6 Fig.9 Fig.10...
- Page 7 Fig.11 Fig.12...
-
Page 8: Instrucciones De Seguridad
Español tener en cuenta la naturaleza curiosa INSTRUCCIONES DE de estos y que puede llevarles a SEGURIDAD.- situaciones y conductas que pueden Antes comenzar cualquier resultar peligrosas. programa de ejercicio, consulte a su Esta unidad no ha de utilizarse en médico. -
Page 9: Instrucciones De Montaje
(79) Tapón de tuerca. (81) Tornillo allen M-8x70. (89) Arandela de muelle M8. (94) Tornillo allen M-8x15. (95) Tornillo allen M-6x15. (97) Arandela plana M-8. (109) Tornillo M-8x15. Llave de allen de 6 mm. Realice cada estiramiento aproximada- Llave combinada mente durante 30 segundos, no fuerce Llave de tubo mixta con destornillador los músculos. -
Page 10: Montaje Del Sillín
Seguido coja el apoya pie izquierdo la Fig.6, cuando llegue a la cremallera (46L) y móntelo en el eje (44) Fig.2, a (N) gire el pomo (67) y suelte el pomo continuación realice la misma operación para que se introduzca en los vanos con el apoya pie derecho (46R). -
Page 11: Conexión A La Red
A continuación sujete con una mano 11.-DESPLEGADO DE SU el carril de aluminio y con la otra tire UNIDAD.- del pomo (59) Fig.7 y baje el carril con Para el desplegado de su unidad precaución hasta el suelo Fig.8. Fig.10 siga los pasos siguientes: Compruebe que al bajar el carril se ha 1.- Tire con una mano del pomo (59) oído un “CLIP”... -
Page 12: Safety Instructions
English 6 Parents and/or those responsible for SAFETY INSTRUCTIONS.- children should always take their Consult your doctor before starting curious nature into account and how any exercise program. It is advisable this can often lead to hazardous undergo complete physical situations and behaviour resulting in examination. -
Page 13: Fitting The Footrests
(89) Spring washer M8. (94) Allen screw M-8x15. (95) Allen screw M-6x15. (97) Flat washer M8. (109) Screw M-8x15. Allen key 6 mm Combination spanner. Box spanner with star screw-driver Each stretch should last approximately 2. FITTING THE STABILISER 30 seconds, do not overexert the BARS.- muscles. -
Page 14: Locking Pin
5.- FITTING THE ALUMINIUM 7.- FITTING THE REAR RAIL.- SUPPORT.- Insert the aluminium rail (52) onto the Position the support (60) at the top of main body (1) in the direction of the the rail, Fig.6. arrow, Fig.3. Fit the bolt (102) with its nut (105), Fit the bolt (103) in the direction of the Fig.6, and tighten securely. -
Page 15: Mains Connection
Plug the jack for the stroke counter 2.- Pull out the locking pin (63) and (74) into the socket (75) located on the swing the rear support (62) backward aluminium rail support, as shown in and reinsert the locking pin (63). Fig.8. -
Page 16: Consignes De Sécurité
Français 6 Les parents ou personnes à qui des CONSIGNES DE SÉCURITÉ.- enfants ont été confi és doivent tenir Avant de commencer tout exercice, compte de leur soif de curiosité qui demandez l’avis de votre médecin. Il peut les conduire à avoir des con- est conseillé... -
Page 17: Montage
musculaires. Il est conseillé de faire VISSERIE quelques exercices d’étirement (63) Goujon de sécurité. comme indiqué ciaprès. (78) Caches embellisseurs. (79) Cache écrou. (81) Vis Allen M-8x70. (89) Rondelle ressort M-8. (94) Vis Allen M-8x15. (95) Vis Allen M-6x15. (97) Rondelle plate M-8. (109) Vis M-8x15. -
Page 18: Montage De La Selle
comme indiqué dans la Fig.2. Détachez la butée de la selle (54) Prendre le repose-pied gauche (46) et Fig.7 et après avoir monté la selle, montez-le dans l’axe (44) Fig.2 puis l’introduire dans la glissière aluminium faire la même opération avec le comme indiqué... -
Page 19: Branchement Au Réseau
Ensuite, retenir d’une main la glissière 11.- DÉPLIAGE DE L’APPAREIL.- en aluminium et avec l’autre main, Pour déplier l’appareil, Fig.10, faire tirez le pommeau (59) Fig.7 puis avec comme indiqué ci-après: précaution, abaisser jusqu’au sol la 1.- Tirez d’une main le pommeau (59) glissière Fig 8. -
Page 20: Allgemeine Hinweise
Deutsch SICHERHEITSHINWEISE.- 5 Stellen Sie das Gerät auf eine fest Bevor einem und ebene Fläche. Benutzen Sie das Trainingsprogramme beginnen, Gerät nicht in der Nähe von Wasser konsultieren Sie bitte Ihren Arzt. Wir oder im Freien. empfehlen dabei eine komplette Untersuchung. - Page 21 (52) Auflagerführung. HINWEISE ZUM TRAINING.- (55) Deckel hintere Stützvorrichtung. Aufwärmphase. (60) Halterung der Sicherung beim dieser Phase werden Zusammenklappen. Blutkreislauf im Körper beschleunigt und (62) Hintere Stützvorrichtung die Muskeln für das Training vorbereitet. Führung. Damit wird das Risiko von Krämpfen (64) Halterung Sitz.
- Page 22 Bezug zum Rahmen. Richten Sie sie mit der zuvor gelösten Schraube (101) mit der Bohrung für die Schraube (94) fest. Fig.2 ziehen Heben Sie die Aluminiumführung, die Schraube (94) fest. Sie gerade montiert haben, wie in Anschließend schieben Sie in die Enden Fig.4 gezeigt an.
- Page 23 Boden aufsitzen Fig.8). 8.- SICHERUNGSSTIFT.- Verbinden Sie den Zähleranschluss Setzen Sie den Sicherungsstift (63) für die Ruderschläge (74) mit der Fig.7 dargestellt Steckverbindung (75), die sich an der Halterung ein. Drehhalterung der Aluminiumführung befindet Fig.8. WICHTIG: Dieser Sicherungsstift (63) muss unbedingt seiner 10 ZUSAMMENKLAPPEN DES...
-
Page 24: Transport Und Lagerung
Sie dann den Sicherheitsstift (63) wieder ein. NETZANSCHLUSS.- Transformator 6V-1 Amp. 12 TRANSPORT UND Stecken Sie den Verbindungsstecker (m) des Transformators (119) in den LAGERUNG.- Anschluss Hauptrahmen Das Gerät verfügt über Räder (77), die (Rückseite unten) und schließen Sie das Verschieben desselben wesentlich den Transformator (119) an das 220 V erleichtern. -
Page 25: Instruções De Segurança
Português poderá levá-las situações INSTRUÇÕES DE SEGURANÇA.- comportamentos podem Antes de começar qualquer programa perigosos. Este aparelho nunca deverá de exercício, consulte o seu médico. utilizar-se como um brinquedo. Recomendamos a realização de um 7 A sua unidade só poderá ser usada exame físico completo. - Page 26 Realize cada estiramento aproximada- Chave combinada. mente durante 30 segundos; não force Chave tubo mista os músculos. Se sentir dor, PARE. desaparafusador estrela. Guarde estas instruções. 2. COLOCAÇÃO DOS TUBOS CAVALETE.- 1. INSTRUÇÕES DE Aproxime o tubo de cavalete dianteiro MONTAGEM.- com rodas (2) do corpo central (1), Retire a unidade da caixa e comprove...
- Page 27 Uma vez realizada a montagem dos Coloque o parafuso de topo do selim apoios de pés, pegue nas faixas de (54) soltou anteriormente sujeição de pés (47) e encaixe-as no introduza a tampa decorativa (55) apoio para pés. como mostra a Fig.7. 5.- MONTAGEM DO CARRIL 7.-MONTAGEM DO SUPORTE DE ALUMÍNIO.-...
-
Page 28: Ligação À Rede
se ouviu o “CLIP” de encravamento, 1.- Puxe com uma mão o manípulo extraia até ao solo o topo de (59) para fora - Fig.J - e com a outra regulação (43) situado parte mão baixe o carril de deslizamento do assento, até... -
Page 29: Istruzioni Di Sicurezza
Italiano condotto possono risultare ISTRUZIONI DI SICUREZZA.- pericolose. Questo appa- recchio non Prima cominciare qualsiasi si deve usare in nessun caso come un programma d’ allenamento, chieda giocattolo. consulenza medica. Si consiglia di 7 Il suo apparecchio solo può essere realizzare un controllo fisico completo. -
Page 30: Istruzioni Di Montaggio
Realizzi ogni stiramento più o meno Chiave a tubo mista con cacciavite a durante 30 secondi, non sforzi i stella. muscoli. Se sente dolore, si FERMI. 2. COLLOCAZIONE DEI TUBI Conservi queste istruzioni. DEL CAVALLETTO.- Avvicinare il tubo del cavalletto anteriore 1.- ISTRUZIONI DI con ruote (2) al corpo centrale (1), MONTAGGIO.-... - Page 31 decorativo (55) come indica la Fig.7. 5.- MONTAGGIO DELLA GUIDA DI ALLUMINIO.- 7.- MONTAGGIO DEL Inserire la guida di alluminio (52) SUPPORTO POSTERIORE.- secondo il verso della freccia, nel corpo centrale (1) Fig.3. Posizionare il supporto (60) nella parte Inserire la vite (103) secondo il verso superiore della guida Fig.6.
-
Page 32: Collegamento Alla Rete Elettrica
fermo di regolazione (43) situato sulla mano, abbassare guida parte inferiore del corpo centrale (1), scorrimento del sedile, fino a quando si ode un “CLIP” d'incastro del pomello fino a incastrare il pomello (59) come è indicato nella Fig.8. (59) Fig.H. Nel caso in cui, mentre si abbassa la Togliere il perno di sicurezza (63) e guida si ode un “CLIP”... -
Page 33: Algemene Aanwijzingen
Nederlands dezen van nature nieuwsgierig zijn en VEILIGHEIDSAANWIJZINGEN dat dit tot gevaarlijke situaties en Raadpleeg uw geneesheer alvorens u gedrag kan leiden. Dit apparaat mag met een oefe ningenprogramma onder geen beding als speelgoed begint. Het wordt aangeraden om een gebruikt worden. -
Page 34: Montage Instructies
Bewaar deze instructies. toestel, Fig.1, bevestig schroeven (81), monteer de borgringen (89). Gebruik de 6 mm. stiftsleutel om alles 1. MONTAGE INSTRUCTIES.- goed aan te draaien. Haal het toestel uit de doos en controleer of alle onderdelen er zijn Fig.0: 3.- HOUDERAS VOETSTEUN De hulp van een tweede persoon wordt aanbevolen bij het monteren... - Page 35 hoofdframe (1). Positioneer 8.- VERGRENDELINGSPIN.- bevestigingssteun (60) op het “U”-stuk Bevestig de vergrendelingspen (63) maak eerder verwijderde op de steun, zoals weergegeven in schroef (101) vast. Fig.7. Til de aluminium stang op die u net BELANGRIJK: Zorg ervoor dat deze gemonteerd hebt, zoals weergegeven vergrendelingspin (63)
- Page 36 10.- UW TOESTEL OPVOUWEN.- 12.- VERPLAATSING EN Als u uw toestel wilt opvouwen, Fig.9, doet u het volgende: OPBERGEN.- Dit apparaat is uitgerust met wieltjes 1.- Vergrendel eerst het zadel (68) op (77) verplaatsen het rek op de aluminium stang (52), vergemakkelijkt.
- Page 37 ESPAÑOL TÉCNICA DEL REMO 1.- ATAQUE 4.- FINAL - Brazos parcialmente estirados - El tirador del remo se coloca a la - Piernas recogidas contra el cuerpo altura del pecho. - Cuerpo ligeramente hacia delante - Piernas parcialmente estiradas. - Cuerpo ligeramente inclinado 2.
- Page 38 MOVIMIENTO LIBRE DEL ASIENTO: 1.- En el carro del asiento en su parte derecha inferior esta situado el pomo de bloqueo (67), para desenclavarlo tire del mismo hacia fuera, como le indica la flecha (A) y girándolo en sentido contrario agujas del reloj según le muestra la flecha (B), se libera el asiento de la...
- Page 39 ENGLISH ROWING TECHNIQUE 1.- ATTACK 4.- END - Arms partially stretched - The rowing bar is brought to chest - Legs brought up against the body level - Body leaning slightly forward - Legs partially straightened out - Body leaning slightly backward 2.- BEGIN THE ACTION 5.- RECOVERY - Arms stretched fully out...
- Page 40 FREE MOVING SEAT: 1.- There is a locking knob (67) on the bottom right of the seat slide, to unlock it pull outward direction of arrow (A) and turn it anticlockwise, arrow (B). This will free the seat from the positioner rack. LOCKED SEAT: 1.- There is a locking knob (67) on the bottom right of...
- Page 41 FRANÇAIS TECHNIQUE DU RAMEUR 1. ATTAQUE 4. FIN - Bras partiellement etires - La corde du rameur est placee au - Jambes repliees contre le corps niveau de la poitrine - Corps legerement en avant. - Jambes partiellement etirees - Corps legerement incline 2.
- Page 42 MOUVEMENT LIBRE DE LA SELLE: 1.- Le pommeau de blocage (67) est placé en bas à droit sur le chariot de la selle. Pour le déverrouiller, tirez pommeau vers l’extérieur, dans le sens de flèche pour dégager la selle de la crémaillère positionnement, il faudra le tourner...
- Page 43 DEUTSCH RUDERTECHNIK 1.ANGRIFF 4. ENDE - Die Arme teilweise gestreckt. - Die Beine gegen den Korper - Die Zugvorrichtung des Ruders angezogen wird auf Brusthohe gebracht - Den Korper leicht nach vorn - Die Beine sind teilwelse gestreckt gebeugt. - Der Korper ist leicht nach hinten geneigt 2.
- Page 44 FREIE BEWEGUNG DES SITZES: 1.- Rechts unten an dem Schlitten des Sitzes befindet sich der Verriegelungsknauf (67). Entriegeln ziehen Sie diesen bitte heraus (in Richtung des Pfeils A). Durch Drehen des Knaufes gegen den Uhrzeigersinn (in Richtung des Pfeils B) wird der Sitz auf der Positionierzahnstange entriegelt.
- Page 45 PORTUGUES TECNICA DO REMO 1.- ATAQUE 4.- FINAL - Os braços deverao estar parcialment esticados - O puxador do remo devera ser - As pemas deverao estar colocado na zona do peito recolhidas de encontro ao corpo - As pernas deverao estar - O corpo devera estar ligeiramente...
- Page 46 MOVIMENTO LIVRE DO ASSENTO: 1.- No carro do assento, na sua parte inferior direita está situado o manípulo de bloqueio (67); para desencaixar, puxe o mesmo para fora, como indica a seta (A) e, rodando-o no sentido contrário ao dos ponteiros relógio, conforme mostra a seta (B), liberta o assento da cremalheira posicionadora.
- Page 47 ITALIANO TECNICA DELLA VOGATA 1.- ATTACCO 4.- FINE DELLESERCIZIO - Braccia parcialmente tese - Maniglia del vogatore allaltezza - Gambe flesse verso it corpo del petto - Corpo leggermente in avanti - Gambe parcialmente inclinato allindietro 2.- INIZIO DELLESERCIZIO 5.- RECUPERO - Braccia tese - Iniziare movimento...
- Page 48 SCORRIMENTO LIBERO DEL SEDILE: 1.- Nella slitta del sedile sul lato destro inferiore si trova il blocco (67), per disattivarlo tirare verso l’esterno, come indica la freccia (A) e girarlo in senso antiorario come indica la freccia (B), in questo modo si libera il sedile dal posizionatore.
- Page 49 NEDERLANDS TECHNIEK VAN HET ROEIEN 1.- AANZET 4.- EINDE - Armen gedeeltelijk gestrekt - De riem op borsthoogte - Benen gebogen tegen het lichaam - Benen gedeeltelijk gestrekt - Lichaam licht naar voren - Lichaam licht naar achteren heliend 2.- BEGIN VAN DE ACTIE 5.- HERSTEL - Armen gestrekt - Begin van de beweging van de...
- Page 50 VRIJ BEWEGEND ZADEL: 1.- Er bevindt zich een vergrendelingsknop (67) aan de rechteronderzijde zadelschuif, om deze te ontgrendelen dient naar buiten trekken in de richting van de pijl (A) en tegen de wijzers van de klok in te draaien, pijl (B). Dit zal het zadel vrijmaken van het regelrek. VERGRENDELD ZADEL: 1.- Er bevindt zich een vergrendelingsknop...
- Page 51 R-350...
- Page 52 Per ordinare pezzi di ricambio: Indicare il modello della macchina Nº che corrisponde al pezzo Quantità Bestellen van vervangingsonderdelen: Geef het model van het toestel op Nummer van het onderdeel Hoeveelheid Ejemplo / E.g. / Exemple / Beispiel / Exemplo /Esempio / Bijvoorbeeld: R-350...
- Page 53 Declaración de Conformidad Nós Exercycle S.L. declaramos sob nossa única Nosotros Exercycle S.L. declaramos bajo nuestra responsabilidade que o produto R-350 a que se única responsabilidad que el producto R-350 al que refere esta declaração está em conformidade com se refiere esta declaración es conforme con las...
- Page 54 Germany Tel: +49 5357 181 81 Email: info@sport-thieme.de _________________________________________________________________________________ SPORT-THIEME SE RESERVA EL DERECHO A MODIFICAR LAS ESPECIFICACIONES DE SUS PRODUCTOS SIN PREVIO AVISO. SPECIFICATIONS MAY BE CHANGED WITHOUT PRIOR NOTICE DUE TO OUR PROGRAMME OF CONTINUOUS PRODUCT DEVELOPMENT. SPORT-THIEME SE RÉSERVE LE DROIT DE MODIFIER LES SPECIFICATIONS DE SES PRODUITS SANS PRÉAVIS.
Need help?
Do you have a question about the R-350 and is the answer not in the manual?
Questions and answers