Advertisement
Table of Contents
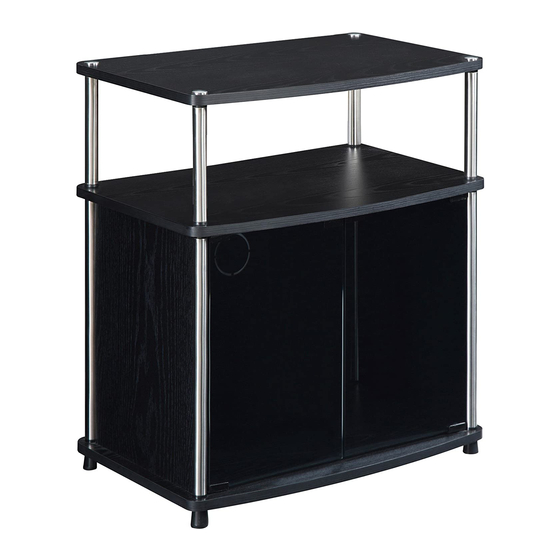
ASSEMBLY INSTRUCTIONS
We have designed our furniture with you , the customer in mind . Our clear , easy to follow ,
step by step instructions will guide you through the project from start to finish .
Feel confident that this will be a fun and rewarding project . The final product will be a quality
piece of furniture that will go together smoothly and give years of enjoyment .
Please do not return to the store
STOP
Broken or missing parts?
Need help with assembly?
If you have any questions just call 1-800-468-6447 or email us at
parts@convenience-concepts.com
ith
151056
Advertisement
Table of Contents

Related Manuals for convenience concepts 151056


Summary of Contents for convenience concepts 151056
- Page 1 151056 ASSEMBLY INSTRUCTIONS We have designed our furniture with you , the customer in mind . Our clear , easy to follow , step by step instructions will guide you through the project from start to finish . Feel confident that this will be a fun and rewarding project . The final product will be a quality piece of furniture that will go together smoothly and give years of enjoyment .
- Page 2 Hardware List Middle panel Short Long Cable Tie X 2 Eyelet Screw X 2 Plastic Anchor X 2 Exploded Views Page 2 of 6...
- Page 3 Step 1 (1) Place Bottom Panel (B) with groove side up over Plastic Feet (J). Step 2 (1) Gently screw Long Poles (C) into unit using care not over tighten. Page 3 of 6...
- Page 4 Step 3 (1) Slide Side Walls (E) and Back Wall (F) into grooves of Bottom Board (B). Step 4 (1) Place Middle Panel (G) with groove side down and magnet facing front, on top of unit . (2) Align Side Walls (E) and Back Wall (F) with groove on underside of Middle Board (G).
- Page 5 Step 5 (1) Screw Short Poles (H) loosely into unit (one turn clockwise) allowing room to adjust doors and walls if necessary. (2) Carefully place Glass Doors (D) ( Metal Tab up) into designated holes on Middle and Bottom Boards. (3) Check alignment of walls and doors, keeping light pressure on Middle Panel (G).
- Page 6 Step 7 1.Drill holes slightly smaller than anchors(M) into drywall and gently tap anchors into holes. 2.Screw eyelet screws (L) into anchors and fasten unit to wall using cable ties (K). WALL WALL STUD Page 6 of 6...
Need help?
Do you have a question about the 151056 and is the answer not in the manual?
Questions and answers