Table of Contents
Advertisement
Quick Links
Advertisement
Table of Contents
Troubleshooting

Related Manuals for Vendlet BASIC


Summary of Contents for Vendlet BASIC
- Page 1 B A S I C M A N UA L VALUE IN CARING...
- Page 2 Declaration of Conformity We, Vendlet ApS hereby declare that the devices mentioned below comply with the Medical Device Regulation (EU) 2017/745. Legal manufacturer Vendlet ApS, Egelund 33, 6200 Aabenraa, DK Product Product no. and name UDI-DI: VENDLET Basic 05714038001056 Designation VENDLET Basic is an electromechanical turning aid.
- Page 3 This manual covers the VENDLET Basic. Max. user weight is 150 kg The instructions in this manual must be followed. Vendlet ApS shall not be liable should the VENDLET Basic be used, modified, or assembled in a way that is not described in this manual.
-
Page 4: Table Of Contents
PART 1 - General information Prone position Side rail Using VENDLET Basic in combination with bed functionality INTENDED USE Pressure-relieving mattresses Patient target group Incontinence How VENDLET Basic works Urine bag and drainage tube Stop button ATTACHING THE SHEETS Accessories... - Page 5 PART 3 - Technical manual UNPACKING MAINTENANCE/CHECK Parts list Annual check Mechanical parts MOUNTING Sheets Preparations Functional tests Tools Electrical parts Overview of bolts TROUBLESHOOTING - TECHNICIANS Dimensional requirements, side rails TECHNICAL DATA Maximum loads Mounting Battery backup Attaching a side Recharging during storage: Height adjustment LED functionality...
-
Page 6: Part 1 - General Information
(BMI) above 17. sessment made by the responsible healthcare professional. Prior to the first use of the VENDLET, it is important to assess whether the VENDLET is suitable for the client in question. It may be necessary to take special precautions, for example if... -
Page 7: How Vendlet Basic Works
VENDLET Basic VENDLET Basic hand control The bars on the VENDLET Basic turn together. If the red bar pulls, the blue bar starts slackening, and vice versa. If you don’t want the sheet to be slackened at the opposite bar,... -
Page 8: Stop Button
If the hand control button controlling the tight- a number of ways to move and/or transfer clients. See the ening of the sheet fails, the operation can be “How to Use the VENDLET” section in Part 2 – User Manual stopped by pressing the button. -
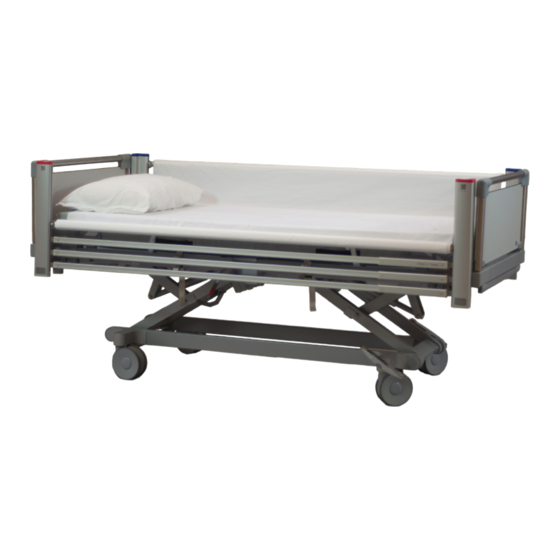
Page 9: Bed And Mattress Compatibility
Following the mounting of the VENDLET Basic, the distance The bed must meet the EN 60601-2-52 standard or the ex- The VENDLET Basic service life is 5 years. The service life may between the mattress sides and side rails must be minimum pired EN 1970 or EN 60601-2-38 standards. -
Page 10: Symbols
PART 1 - General information SYMBOLS Hand control symbols CE marking: The product complies with the Medical Device Regulation (EU) 2017/745 Power / stop button This product is a medical device Tighten the sheet on the red or blue bar Legal manufacturer Slacken the sheet on the red or blue bar Date of manufacture... -
Page 11: Part 2 - User Manual
PART 2 - User manual OPERATION 2. Raise the blue bar by lifting until it locks in both corner The turning sheet on VENDLET Basic can only be operated posts. with the hand control. The turning motors lock in position 3. -
Page 12: Moving From One Side Of The Bed To The Other
Moving from one side of the bed to the other 6. Press the button to slacken the sheet before VENDLET Basic may also be used to move clients to the side the client is left unattended in the bed. of the bed. -
Page 13: Repositioning The Client Up In The Bed
In such situations, you may use VENDLET Basic to move the client up in the bed again. Work in a zig zag pattern moving the client diagonally from side to side of the bed pulling the turning sheet on to the bar, whilst guiding the sheet to the upper end of the bar. -
Page 14: Applying A Sling
PART 2 - User manual Applying a sling It is easy to apply a sling on the client when VENDLET Basic is used. 1. Turn VENDLET Basic on by double clicking the button. 2. Use the turning function of the VENDLET system to move the client onto his/her side. -
Page 15: Prone Position
PART 2 - User manual Prone position VENDLET Basic can also be used to turn a client to a prone position. 3. Raise the blue bar by lifting until it locks in both corner 5. Check that the clients head is comfortable and that there posts. -
Page 16: Side Rail
If it is assessed that the client must use side rails, VENDLET VENDLET Basic does not reduce the effect of either pres- ulcers. -
Page 17: Attaching The Sheets
The slide sheet is subject to extensive wear and must be VENDLET systems suitable for wider beds as well. checked regularly. The friction of the turning sheet against the mattress will increase and the comfort of the client will... -
Page 18: Turning Sheet
, button until the sheet covers the mattress evenly with the red line at the centre of the mattress. 7. The bars on the VENDLET Basic turn together. If the red bar pulls, the blue bar starts slackening, and vice versa. If you don’t want the sheet to be slackened at the oppo-... -
Page 19: Evacuation
Evacuation via the side of the bed In case you have power: 1. Lower the bar on the evacuation side. 2. Use the VENDLET to pull the client to the side of the bed and evacuate. In case you do not have power: 5. -
Page 20: Daily Maintenance
Yes No when VENDLET Basic was mounted? Are the care givers familiar with the instructions of this manual and have they received training in the use of VENDLET Basic? Yes No Is the quick guide located at an easily accessible spot near the bed? ... -
Page 21: Cleaning And Washing Instructions
Cleaning of electric and mechanical parts must not change the surface structure or adhesive properties Recommended washing temperature The VENDLET Basic is machine washable by automatic wash- of the plastic and must not break down grease. pH-value Max. 4% shrinking ing systems according to IEC 60529 (IPX6 washable). -
Page 22: Troubleshooting - Daily Use
Troubleshooting - daily use Problem Checklist VENDLET Basic does not work Is the control unit connected to 230V outlet and is the power on? Is the green diode on the control unit illuminated? Are all plugs properly connected on the control unit? -
Page 23: Unpacking
PART 3 - Technical manual UNPACKING Parts list unit Blue side complete The VENDLET is delivered in 2 boxes with a weight of approx. 17 kg each. unit Red side complete unit Suspension bracket for control unit unit Control unit... -
Page 24: Mounting
The length must be adjusted in order to ensure that the gap Button head bolts: between the board and VENDLET Basic is less than 0,8 cm or 16 M8 x 40 mm more than 2,5 cm (D). However, the gap must not exceed 6 A distance of 2.5 –... -
Page 25: Maximum Loads
The red bar must be placed on the right side and the blue bar on the left side of the client. Since VENDLET Basic is always mounted on beds, it is impor- The bars must be in upper position during mounting. -
Page 26: Height Adjustment
PART 3 - Technical manual Height adjustment Always adjust the height of VENDLET Basic in accordance with the instructions on page 24 and the height of the mat- tress. The height can be adjusted up to 7,7 cm. The height adjust- ment has 7 possible positions. -
Page 27: Electrical Parts
PART 3 - Technical manual Electrical parts Mounting the control unit The control unit is mounted under the bed, usually on the bed frame against the headboard but could also be placed in other locations with free space. 4. Slide the control unit onto the suspension bracket till it clicks on. -
Page 28: Connection Of Power Cables
PART 3 - Technical manual Connecting the control unit The hand control should be connected before the power Connection of power cables cable is connected to a main plug. The last step is to connect the control unit power cable to an easily accessible 230V mains plug. - Page 29 Final inspection checklist Is VENDLET Basic mounted by a qualified technician? Is the combined weight of the client, VENDLET Basic and any other equipment on/in the bed below or equal to the max. safe working load of the bed? Have the side rail dimensioning requirements been met (length and height)?
-
Page 30: Dismounting, Storage And Remounting
Check whether it is possible to raise and lower the bars freely. Check whether the motor has full Check whether the VENDLET Basic works as intended when the hand Follow the procedure described in this manual if remounting pulling power when you press the control is activated. -
Page 31: Troubleshooting - Technicians
TROUBLESHOOTING - TECHNICIANS Problem Checklist Repairs VENDLET does not work Has the power been turned on? Connect the power cable to the control unit. Turn on the switch. Is the green diode on the control unit under the bed illuminated? Is the green diode on the hand control illuminated? Make sure all cables are properly mounted and intact. -
Page 32: Technical Data
PART 3 - Technical manual TECHNICAL DATA In accordance with the Medical Device Regulation (EU) Battery backup 2017/745, the VENDLET systems are class I products. Recharging during storage: First recharge of the battery must be no later than 12 months VENDLET Basic VENDLET Basic after production date stated on the label. -
Page 33: Power Consumption
PART 3 - Technical manual ENVIRONMENTAL CONDITIONS AND DISPOSAL Power consumption Environmental conditions Disposal Do not discard VENDLET Basic with general household waste. VENDLET Basic Operation: On disposal of VENDLET Basic, Vendlet ApS recommends that Standby 0,5 Watt Temperature 5 – 40 °C... - Page 36 Manufacturer: Vendlet ApS Egelund 33 6200 Aabenraa Tel.: 96 31 00 50 All rights reserved. vendlet@vendlet.dk Copyright Vendlet ApS www.vendlet.com...
Need help?
Do you have a question about the BASIC and is the answer not in the manual?
Questions and answers