Table of Contents
Advertisement
Quick Links
Download this manual
See also:
Manual
Advertisement
Table of Contents
Troubleshooting

Related Manuals for Vendlet V5S


Summary of Contents for Vendlet V5S
- Page 1 VEN D LE T V5S VEN D LE T V5S+ VEN D LE T V5S S p e e d Adjust VEN D LE T V5S+ S p e e d Adjust M AN UAL VALUE IN CARING...
- Page 2 3 speeds The product is tested IEC 60601-2-52: Medical electrical equipment - Parts Whenever this manual refers to VENDLET, it applies to all 4 models. If the situation only according to following 2-52: Particular requirements for basic safety and es- applies to one or more of the models, it will refer specifically to each model.
-
Page 3: Table Of Contents
Attaching a side Transferring from one bed to another Height adjustment Side rail Adjustment of width of mounting brackets Height extension set Using the VENDLET in combination with bed functionality Stop button Electrical parts Mounting the control unit Pressure-relieving mattresses Incontinence... -
Page 4: Part 1 - General Information
VENDLET V5S / VENDLET V5S Speed Adjust has a load capacity of max. 200 kg. SPARE PARTS VENDLET V5S+ / VENDLET V5S+ Speed Adjust has a load capacity of 400 kg. The target TECHNICAL DATA group for these is bedridden bariatric clients / patients. -
Page 5: Product Description
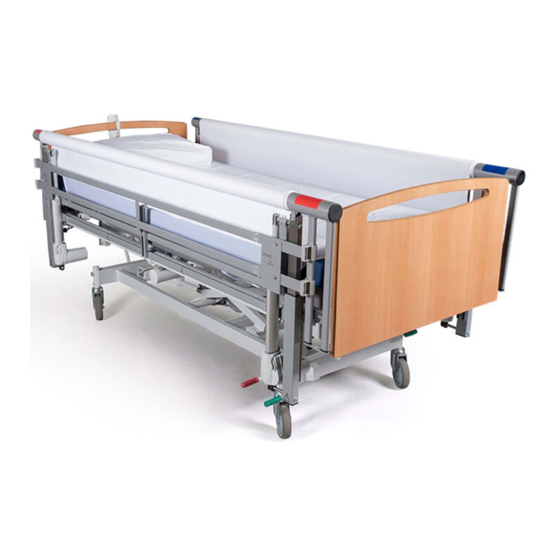
Note! This applies only to the VENDLET models that this manual covers. The VENDLET system consist of two bars fitted with motors. The bed is fitted with a motorised bar on both sides; the bar on the left side of the client has a blue colour How the VENDLET work marking and the bar on the right side of the client has a red colour marking. -
Page 6: Accessories
See the “How to Use the VENDLET” section in Part 2 – User Manual for further The following bed and mattress requirements must be met. -
Page 7: Warranty And Service Life
Speed Adjustment cident happened and to the Danish Health and Medicines Authority. Likewise, we kindly request that you also inform Vendlet ApS on tel. +45 9631 0050 or Tighten the sheet on the red or blue bar vendlet@vendlet.dk. -
Page 8: Part 2 - User Manual
How to use VENDLET Moving from one side of the bed to the other The VENDLET may also be used to move clients to the side of the bed. Turning The VENDLET may be used to turning clients. Follow this procedure to move a client 1. -
Page 9: Repositioning The Client Up In The Bed
Typically, when a client slides towards the foot of the bed, the turning sheet follows 2. Use the turning function of the the body of the client. In such situations, you may use the VENDLET to move the cli- VENDLET system to move the ent up in the bed again. -
Page 10: Prone Position
5. Place the other bed right next to the bed with the VENDLET and lower or raise the pillow. the bed to a slightly lower position relative to the bed with the VENDLET. -
Page 11: Using The Vendlet In Combination With Bed Functionality
If the alternating air mattress is very thick (i.e. approx. 22 cm or more), the VENDLET when moving or turning clients. For example, if the client has wide hips and frail must be installed with height extensions. -
Page 12: Attaching The Sheets
Slide sheets and turning sheets are available the bed, velcro tape facing downward. in standard bed sizes and with increased width which makes the VENDLET systems suitable for wider beds as well. -
Page 13: Changing The Turning Sheet On An Occupied Bed
If a ”Yes” checkbox is marked, this indicates a desired result. If a ”No” checkbox is bar facing the back of the client and marked, this indicates a risk in which case the VENDLET system must not be used. Fold the old turning sheet behind the back of... -
Page 14: Cleaning And Washing Instructions
Is the control unit connected to 230V outlet and is the power on? ethanol. Is the green diode on the control unit illuminated? Never hose down or steam clean a VENDLET system. Are all plugs properly connected on the control unit? Washing instructions, slide sheet... -
Page 15: Part 3 - Technical Manual
PART 3 - Technical manual UNPACKING Before using a VENDLET system with a client, it is important to assess whether the system is suitable for the given client and whether the situation at hand requires The VENDLET is delivered in 3 boxes. -
Page 16: Maximum Loads
O-ring on the bed at the client’s right side. Mount the side with yellow O- ring on the bed at the clients left side. A distance of 2.5 – 4 cm is required between the mattress and the VENDLET on both Unscrew the lower bolt on both mounting... -
Page 17: Height Adjustment
Use the positioning bolt on the backside of the mounting bracket to adjust the height of the VENDLET. Press in the red button and subsequently pull out on the black part. Now move the actuator fitting up or down to the desired position. Use the scale on the backside or the side of the actuator fitting when choosing position. -
Page 18: Adjustment Of Width Of Mounting Brackets
PART 3 - Technical manual PART 3 - Technical manual Adjustment of width of mounting brackets Height extension set: Use up to 3 10 mm spacers if necessary to pull the mounting bracket away from the A height extension set will be required when bed frame, cf. -
Page 19: Electrical Parts
PART 3 - Technical manual PART 3 - Technical manual Electrical parts Connection of cables to control unit The next step is to connect the actuator cables. Mounting the control unit The control unit is mounted under the bed, usu- The red side actuator cables have plugs with ally on the bed frame against the headboard but green O rings;... -
Page 20: Quick Guide Location
It is possible to upgrade a VENDLET V5S and a VENDLET V5S+ to a VENDLET V5S Speed Adjust or a VENDLET V5S+ Speed Adjust. It requires the purchase of a new Bracket for Volker 3080 hand control and perhaps a new control unit. -
Page 21: Dismounting, Storage, And Remounting
2. Disconnect the power cable from the outlet. from the bed frame? 3. Then the VENDLET can be removed by the same procedure as described in the Do both bars run freely up and down? mounting section on page 31-33, ie: Do both bars slacken and pull in the sheet? •... -
Page 22: Maintenance/Check
The VENDLET system must be service checked by a qualified technician annually. This Check whether the timer deactivates after 90 seconds of idle time. check will ensure that the safety issues pertaining to the VENDLET system are in com- pliance with the standard as well as a long service life. -
Page 23: Troubleshooting
Problem Checklist Switch the plugs of the two bars. If the same bar still does not work, VENDLET does not work Has the power been turned on? then the bar motor is defective. If the other bar is not working, then the hand control or the control unit is defective. -
Page 24: Repairs
PART 3 - Technical manual REPAIRS Only a limited number of VENDLET system components need regular replacement. On the next pages, we will explain the more general repairs. Please do not hesitate to contact us or our consultants if you need assistance or guidance or to perform repairs or troubleshooting. -
Page 25: Replacing The Actuator
In accordance with the Danish Ministry of the Interior and Health Executive Order No. 1263 of 15 December 2008 on Medical Devices, the VENDLET systems are class I 8. Secure the actuator cable with two new cable ties and route it along the inside products. -
Page 26: Environmental Conditions
Disposal Red side incl. actuator 27 kg 27 kg Do not discard a VENDLET with general household waste. On disposal of a VENDLET, Blue side incl. actuator 27 kg 27 kg Vendlet ApS recommends that the system be divided into individual parts and compo-... - Page 27 Vendlet ApS Egelund 33 6200 Aabenraa Tel.: 96 31 00 50 vendlet@vendlet.dk All rights reserved. www.vendlet.dk Copyright 2016 Vendlet ApS...
Need help?
Do you have a question about the V5S and is the answer not in the manual?
Questions and answers