
Subscribe to Our Youtube Channel
Related Manuals for Roxell Optimax


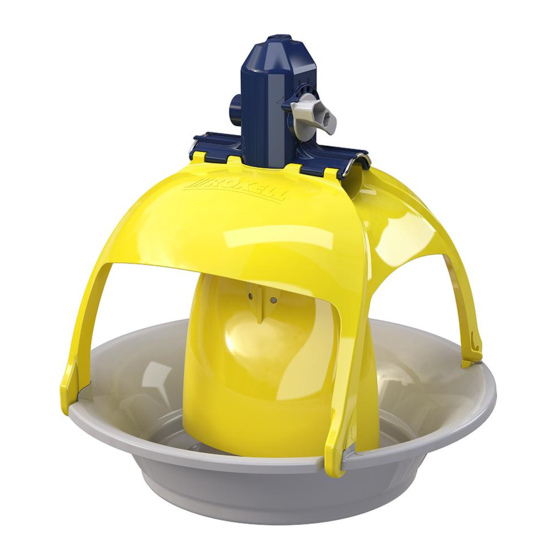
Summary of Contents for Roxell Optimax
- Page 1 004 - 00400614 *00400614* Use and Assembly Guide ENGLISH Original use and assembly guide...
-
Page 2: Table Of Contents
I- 5 - USE OF OPTIMAX AND OPTIMAX STARTPAN .......... - Page 3 ROXELL - 004 - 4215 OPTIMAX - TABLE OF CONTENTS OPTION : INTERMEDIATE CONTROL UNIT WITH SENSOR - WITHOUT PAN ..II-26/27 CUT-OFF SWITCH ............. .
- Page 4 Subsequent changes to any manual made by any third party have not been reviewed nor authenticated by Roxell. Such changes may include, but are not limited to, translation into languages other than English, and additions to or deletions from the original content. Roxell disclaims responsibility for any and all damages, injuries, warranty claims and/or any other claims associated with such changes, inasmuch as such changes result in content that is different from the authoritat- ive Roxell- -published English version of the manual.
-
Page 5: General Information
Roxell’s most current use and maintenance manuals; use of cleansing agents and disinfectants in violation with the instructions received from the suppliers; or use of the Products in an ATEX- surrounding. - Page 6 ROXELL - 0516 6. INFORMATION ABOUT THE RESIDUAL RISKS - USED SAFETY SIGNS There are three levels of danger, which you can recognize from the signal word * DANGER * WARNING * CAUTION The nature and source of the imminent danger and possible consequences of not obeying warnings is stated here! DANGER indicates a direct imminent danger that can result in a serious or even fatal accident if the safety measures are not respected.
- Page 7 1. In the European Union If you have used the product for commercial purposes and you want to dispose of it, contact Roxell who will give you information about the return of the product. It is possible that you will have to pay a disposal charge for the return and recycling.
-
Page 9: Part I : Instructions For The User
PART I INSTRUCTIONS FOR THE USER I- -1... - Page 10 OPTIMAX - - INSTRUCTIONS FOR THE USER ROXELL - 004 - 2111 I- -2...
-
Page 11: General Safety Rules
ROXELL - 004 - 2111 OPTIMAX - - INSTRUCTIONS FOR THE USER GENERAL SAFETY RULES Multimax/Optimax Nr: 004... Automatisch pannen voedersysteem voor opfok en productie van kalkoenen Automatic pan feeding system for rearing and production of turkeys Winching systeem Liersysteem voor voer- en drinklijnen... -
Page 12: Directions For Operating The System
OPTIMAX - - INSTRUCTIONS FOR THE USER ROXELL - 004 - 2111 DIRECTIONS FOR OPERATING THE SYSTEM PUTTING THE SYSTEM INTO USE You can help to ensure that enough birds eat from the last li- ne by taking care over :... -
Page 13: Programmed Feeding
Occupation per pan and per drinker cannot exceed our re- level rings (until 6- -7 weeks.) commendations. At that moment the Optimax starter pans are replaced by the standard Optimax feeder pan If there is a disease problem : stop programming and do not let the system run empty. -
Page 14: Directions For Use Of The Antiperch Wire
OPTIMAX - - INSTRUCTIONS FOR THE USER ROXELL - 004 - 2111 4. USE OF OPTIMAX STARTER PAN 1ST WEEK Management recommendation for use of the starter pan Set the feed level ring assembly in position 1. MAX C with Optimax winching up system. -
Page 15: Maintenance
ROXELL - 004 - 2111 OPTIMAX - - INSTRUCTIONS FOR THE USER MAINTENANCE The feeding system for turkeys requires very little mainte- After cleaning, remove water from the pans and if possible nance. raise the house temperature so that pans dry quickly. -
Page 16: Maintenance Instructions
ROXELL - 004 - 0715 OPTIMAX - INSTRUCTIONS FOR THE USER MAINTENANCE INSTRUCTIONS Switch off the main switch first. Use personal protective equipment. DANGER ACTIONS IN GREY BACKGROUND MUST BE DONE BY A TECHNICALLY TRAINED PERSON. 1. Power unit - Make fan dust-free - Check possible damages to electrical wiring 2. -
Page 17: Trouble Shooting Guide
ROXELL - 004 - 0715 OPTIMAX - INSTRUCTIONS FOR THE USER TROUBLE SHOOTING GUIDE Switch off the main switch first. Use personal protective equipment. DANGER ACTIONS IN GREY BACKGROUND MUST BE DONE BY A TECHNICALLY TRAINED PERSON. PROBLEM CAUSE CORRECTIVE ACTION No current. - Page 18 ROXELL - 004 - 0715 OPTIMAX - INSTRUCTIONS FOR THE USER PROBLEM CAUSE CORRECTIVE ACTION 8.Hopper 1 is empty Birds massively move to one side of A. The problem occurs sporadically : while the feed the house, i.e. depending upon the...
-
Page 19: Operators Guide
OPERATOR’S GUIDE For floor feeding for turkeys up to 25 kg. AVOID FEED WASTAGE = ADJUST FEEDER HEIGHT 2-house system 1 house Winch up Separate rearing farms OPTIMAX PAN STARTER PAN Winch up EASY START Lower Age of birds Weeks 6 - 7 Max. - Page 20 * Remove possible feed residues by turning the pans a couple of times 180 degrees around the tubes or by removing the pans from the grills. 40 50 Optimax * Protect electrical components against water. * Clean the whole system by means of a high- -pressure cleaner (max. 100 Bar).
-
Page 21: Declaration Of Incorporation Of Partly Completed Machinery
Fax: +32 50 71 67 21 Verklaart geheel onder eigen verantwoordelijkheid dat het product: “This part may only be filled out if all built-in subparts are delivered by Roxell” Declares on its own responsibility that the product: EG-verklaring van overeenstemming (Richtlijn 2006/42/EG, Bijlage II.1.A) -
Page 22: Ec-Declaration Of Conformity
EG-verklaring van overeenstemming (Richtlijn 2006/42/EG, Bijlage II.1.A) EC-declaration of conformity (Directive 2006/42/EC, Annex II.1.A) Fabrikant/Manufacturer: Roxell, Industrielaan 13, 9990 Maldegem Tel: +32 50 72 91 72 Fax: +32 50 71 67 21 Verklaart geheel onder eigen verantwoordelijkheid dat het product:... -
Page 23: Part Ii : Components
COMPONENTS 1. ENVIRONMENTALLY- FRIENDLY DESIGN Roxell complies with the Commission Regulation (EU) No. 4/2014 of 6 January 2014, amend- ing Regulation (EC) No 640/2009 implementing Directive 2005/32/EC (the European standard IEC 60034) of the European Parliament and of the Council with regard to eco design require- ments for electric motors. -
Page 25: Product Numbers
ROXELL - 004 - 2414 OPTIMAX - COMPONENTS PRODUCT NUMBERS Name Number Page 100KG HOPPER 00100602 II- 15 CHAIN DIAM. 3,5MM 00100750 HEAVY DUTY PULLEY 00100412 SMALL PULLEY WITH METAL HOOK 00101527 SCREW HOOK - 90MM 05000872 CABLE CLAMP NO.5... -
Page 26: Parts Optimax Pan
OPTIMAX - COMPONENTS ROXELL - 004 - 2414 PARTS OPTIMAX PAN Key Nam e Part Nr. 1 TOP CAP 00400713 TOP CAP FOR TUBE Ø50.8MM 00402750 2 TOP CAP INSERT 00400721 TOP CAP INSERT FOR TUBE Ø50.8MM 00402743 3 PAN SHIELD 00400895 PAN SHIELD Ø50.8MM... -
Page 27: Suspension Components
OPTIMAX - COMPONENTS ROXELL - 004 - 2414 SUSPENSION COMPONENTS ’ Key Nam e Part Nr. Key Nam e Part Nr. 1 SCREW HOOK 90 MM 05000039 12 SUSPENSION HOOK M6x60 05000302 SCREW HOOK 160 MM 05000237 13 SUSPENSION PLATE... -
Page 28: Hand Operated Central Winch
ROXELL - 004 - 4215 OPTIMAX - COMPONENTS HAND OPERATED CENTRAL WINCH - 00102368 MOUNTING PLATE F/HAND OPERATED CENTRAL WINCH - 02001188 TELESCOPICAL WINCH DRIVE ASSEMBLY - 00102962 II- 6... -
Page 29: Single Eye Pulley
ROXELL - 004 - 4215 OPTIMAX - COMPONENTS SINGLE EYE PULLEY - 00100420 Key Nam e Part Nr. 1 LOCKNUT M10-DIN 985 20100426 2 CABLE GUIDE WHEEL 10111417 3 PULLEY SIDE PLATE (SE) 10111391 4 BOLT M10X35-DIN 933 20102190 5 CLEVIS PIN... -
Page 30: Feeder Line Components
ROXELL - 004 - 4215 OPTIMAX - COMPONENTS FEEDER LINE COMPONENTS Key Nam e Part Nr. Key Nam e Part Nr. 1 SPRING CORD GUARD 00100529 10 TUBE 3.05M W/2 RECTANGULAR HOLES 00102285 2 ANCHOR BRACKET - HIGH 00402362 TUBE 3.05M W/1 RECTANGULAR HOLE... -
Page 31: Motor
ROXELL - 004 - 4215 OPTIMAX - COMPONENTS MOTOR System WINCH 10106136 Gearbox With Key Motor Shaft Ø14 Ratio FOR CENTRAL WINCH - MOTOR OPERATED Output speed Construction size 1500 Motor speed 50Hz(RPM) 1800 Motor speed 60Hz(RPM) 3x230/400V 50Hz IE1... -
Page 32: Winch W/Switch + Cp - Motor Operated
ROXELL - 004 - 4215 OPTIMAX - COMPONENTS WINCH W/SWITCH - MOTOR OPERATED - 00107190 Key Nam e Part Nr. FLANGE BEARING DIAMETER 25 11006756 GEARBOX FRA60 PC1 - 1/320 10106136 LIMIT SWITCH WINCH 10111845 OPTION : CONTROL PANEL FOR CENTRAL WINCH... -
Page 33: Feed Intake Boot
OPTIMAX - COMPONENTS ROXELL - 004 - 4114 FEED INTAKE BOOT - 00106500 TUBE ∅ 44,5 mm Key Nam e Part Nr. BOOT BODY WELDMENT 10102192 REINFORCEMENT HOOK 10107597 TUBE CLAMP ASSEMBLY DIA. 45 MM 00102921 NUT M5 - DIN 934... -
Page 34: Poultry Intake Boot With Sensor (Option
OPTIMAX - COMPONENTS ROXELL - 004 - 4114 POULTRY INTAKE BOOT WITH SENSOR (OPTION)- 00106526 Key Nam e Part Nr. 1 BOOT BODY WELDMENT W/SENSOR 10111706 2 REINFORCEMENT HOOK 10107597 3 TUBE CLAMP ASSEMBLY DIA. 45 MM 00102921 4 BOLT M5X10 DIN 933... -
Page 35: Thumper Assembly (Option
OPTIMAX - COMPONENTS ROXELL - 004 - 4114 CANNON BALL (OPTION) - 00102228 THUMPER ASSEMBLY (OPTION) - 00103036 Key Nam e Part Nr. 1 THUMPER BODY POULTRY 10107548 2 THUMPER STOP 13107982 3 THUMPER HOLDER 13107974 4 LOCKNUT M6 - DIN 985 20100400 5 BOLT M6 X 16 - DIN 933 - 8.8... -
Page 36: Thumper Kit For Double Intake Boot(Option
OPTIMAX - COMPONENTS ROXELL - 004 - 4114 THUMPER KIT FOR DOUBLE INTAKE BOOT(OPTION) - 00106765 (SEE PAGE 31) DOUBLE POULTRY INTAKE BOOT W/SENSOR (OPTION) - 00106534 Key Nam e Part Nr. 1 DOUBLE BOOT WELDMENT F/SENSOR 10111722 2 SENSOR DISTANCE PIECE 10111714 3 WASHER 4.3x9x0.8... -
Page 37: Cover Half For 100Kg Hopper
OPTIMAX - COMPONENTS ROXELL - 004 - 4114 COVER HALF FOR 100KG HOPPER - 10102267 100KG HOPPER - 00100602 Key Nam e Part Nr. Qt. Key Nam e Part Nr. 1 HOPPER SIDE 10102259 9 PATENT DECAL COM-ATF-MINIMAX 10103893 2 PVC TUBE DIAM. 90 - L = 700 MM 10102382 *10 SCREW M4x10-DIN 84 - 4.8... -
Page 38: 100Kg Hopper
OPTIMAX - COMPONENTS ROXELL - 004 - 4114 STRAINER FOR 100KG HOPPER - 00100982 HOPPER EXTENSION 50KG- 00101238 Key Nam e Part Nr. 1 HOPPER EXTENSION SIDE 10104719 2 NUT M6 - DIN 934 20100210 12 3 BOLT M6 X 12 - DIN 933-8.8... -
Page 39: Power Unit
ROXELL - 004 - 0715 OPTIMAX - COMPONENTS POWER UNIT Nam e Part Nr. On Demand SERV ICE PARTS FA N COV ER On Demand CONNECTION BOX On Demand CA PA CITOR 1-PHA SE MOTOR On Demand CA BLE RING... - Page 40 OPTIMAX - COMPONENTS ROXELL - 004 - 4114 CONTROL UNIT WITHOUT PAN - 00400911 II- 18...
-
Page 41: Control Unit Without Pan
OPTIMAX - COMPONENTS ROXELL - 004 - 4114 CONTROL UNIT WITHOUT PAN - 00400911 Key Nam e Part Nr. 2 ANTI ROOST GUARD 10400455 3 TOP CLOSURE ASS'Y 10401339 4 CONTROL SIDE PLATE ASS'Y - RH 10401362 5 BOLT M6X12 - DIN 933-8.8... - Page 42 OPTIMAX - COMPONENTS ROXELL - 004 - 4114 CONTROL UNIT OPTIMAX WITHOUT PAN ⊘50.8MM - 00401042 ROXELL II- 20...
-
Page 43: Control Unit Optimax Without Pan
OPTIMAX - COMPONENTS ROXELL - 004 - 4114 CONTROL UNIT OPTIMAX WITHOUT PAN 50.8MM - 00401042 Key Nam e Part Nr. 2 ANTI ROOST GUARD 10400455 3 TOP CLOSURE ASS'Y 10401339 4 CONTROL SIDE PLATE ASS'Y - RH 10401362 5 BOLT M6X12 - DIN 933-8.8... - Page 44 OPTIMAX - COMPONENTS ROXELL - 004 - 4114 OPTION : INTERMEDIATE CONTROL UNIT WITHOUT PAN - 00400937 II- 22...
-
Page 45: Option : Intermediate Control Unit Without Pan
OPTIMAX - COMPONENTS ROXELL - 004 - 4114 OPTION : INTERMEDIATE CONTROL UNIT WITHOUT PAN - 00400937 Key Nam e Part Nr. Key Nam e Part Nr. 1 INTERMEDIATE PAN SHIELD 10401594 1 INTERMEDIATE PAN SHIELD 10401594 2 SWITCH PROTECTION PLATE... - Page 46 OPTIMAX - COMPONENTS ROXELL - 004 - 4114 OPTION : CONTROL UNIT WITH SENSOR - WITHOUT PAN - 00400929 II- 24...
-
Page 47: Option : Control Unit With Sensor - Without Pan
OPTIMAX - COMPONENTS ROXELL - 004 - 4114 OPTION : CONTROL UNIT WITH SENSOR - WITHOUT PAN - 00400929 Key Nam e Part Nr. 1 ROUND PVC PROTECTOR-Ø4 10104677 2 ANTI ROOST GUARD 10400455 3 TOP CLOSURE ASS'Y 10401339 4 CONTROL SIDE PLATE ASS'Y - RH 10401362 5 BOLT M6X12 - DIN 933-8.8... - Page 48 OPTIMAX - COMPONENTS ROXELL - 004 - 4114 OPTION : INTERMEDIATE CONTROL UNIT WITH SENSOR - WITHOUT PAN - 00400945 II- 26...
- Page 49 OPTIMAX - COMPONENTS ROXELL - 004 - 4114 OPTION : INTERMEDIATE CONTROL UNIT WITH SENSOR - WITHOUT PAN - 00400945 Key Nam e Part Nr. 1 DECAL - ROXELL 73X18 10102697 2 SPRING CORD GUARD 00100529 3 NUT M6 - DIN 934 20100210 4 WASHER 6.4X18X1.5 - DIN 9021...
- Page 50 ROXELL - 004 - 0516 OPTIMAX - COMPONENTS MOTOR STARTER STOP START STOP START Key Nam e Part Nr. ENCLOSURE MOTOR STARTER 15011934 CONTACTOR 3P+1NO 230VAC 15011926 MOUNT SOCLE GV2-AF01 15010291 THERMAL MAGNETIC PROTECTION : See : w here used...
- Page 51 ROXELL - 004 - 4114 OPTIMAX - COMPONENTS CONTROL PANEL WITH TIME CLOCK - 00100685 THUMPER KIT FOR DOUBLE INTAKE BOOT(OPTION) - 00106765 Key Nam e Part Nr. 1 DOUBLE THUMPER HOLDER 10111805 2 THUMPER STOP 13107982 3 THUMPER HOLDER 13107974 4 BOLT M6 X 16 - DIN 933 - 8.8...
- Page 52 OPTIMAX - COMPONENTS ROXELL - 004 - 4114 SPARES SET BEAR.CAP HOLD - Ø44.5 - 00106929 Nam e Part Nr. SPARES SET BEAR.CAP HOLD-Ø44.5 00106929 10 Used in : 00106500 FEED INTAKE BOOT POULTRY 00106526 POULTRY INTAKE BOOT WITH SENSOR...
- Page 53 PART III INSTALLATION INSTRUCTIONS III- - 1...
- Page 54 OPTIMAX - - INSTALLATION INSTRUCTIONS ROXELL - 004 - 3503 NOTES III- - 2...
- Page 55 ROXELL - 004 - 3911 OPTIMAX - - INSTALLATION INSTRUCTIONS GENERAL SAFETY RULES IMPORTANT Carefully read the following instructions INSTALL before you the system DANGER 1. Be CAREFUL when handling the ROLLS OF AUGER. When you release the BINDING WIRE, it is possible that the auger UNROLLS.
-
Page 57: Cable 3/32" - Ø2.5 Mm - 500M 00106895
ROXELL - 004 - 2414 OPTIMAX - INSTALLATION INSTRUCTIONS COMPONENT NUMBERS Name Number Page 100KG HOPPER 00100602 II- 15 CHAIN DIAM. 3,5MM 00100750 HEAVY DUTY PULLEY 00100412 SMALL PULLEY WITH METAL HOOK 00101527 SCREW HOOK - 90MM 05000872 CABLE CLAMP NO.5... - Page 58 ROXELL - 004 - 2414 OPTIMAX - INSTALLATION INSTRUCTIONS TOOLS 1. LOCK GRIP PLIERS 6. SET OF FLAT OPEN END 10. DRIVER FOR SCREW HOOKS WRENCHES AND RING DIA. 6MM - 09700220 WRENCHES (6-22MM) 2. HEAVY HAMMER, LIGHT HAM- 7. CABLE CUTTING PLIERS 11.
- Page 59 ROXELL - 004 - 2414 OPTIMAX - INSTALLATION INSTRUCTIONS INSTALLING THE FEEDER PAN (WITHOUT WINCHING UP SYSTEM) WHEN USING A SYSTEM WITH WINCHEABLE TELESCOPICAL TUBES : SEE PAGE III- 23. 1. Place the pan cover upside down with the tooth in front of you.
- Page 60 ROXELL - 004 - 2414 OPTIMAX - INSTALLATION INSTRUCTIONS TO ASSEMBLE THE FEEDER PAN Put the pan on a solid support and proceed as follows : Put the pan cover with the 8 guiding pins in the holes in the pan.
- Page 61 Install two feeder pans per tube. Put the tube on the as- sembled pans, with drop holes point straight down, both lips INSIDE the pan. Attention : with Optimax 50.8mm : first insert the in- sert-half for tube dia. 50.8mm in the top cap insert for tube dia. 50.8mm.
- Page 62 ROXELL - 004 - 2414 OPTIMAX - INSTALLATION INSTRUCTIONS TO INSTALL THE FEEDER LINE Put the tubes with the pans on the floor. Tube sockets pointed towards the 100kg hopper. Slide a tube clamp over each socket. Make a row at the spot where you will suspend the tubes.
- Page 63 ROXELL - 004 - 2414 OPTIMAX - INSTALLATION INSTRUCTIONS TO INSTALL THE CONTROL UNIT Remove the COVER and the MOTOR MOUNT. Fix the POWER UNIT to the motor mount with the 4 bolts supplied, then put back the assembly on the control unit.
- Page 64 Hopper hook. end of the line. Chain 3,5mm. Install hopper cover lock. FIGURE 16. Roxell supplies the 100Kg hopper unassembled. Install as shown on page II-14. Install hopper cover lock. FIGURE 17. Decal in front After suspending the hopper : fix it to the feed intake boot with a clamp, hook and spring cotter.
- Page 65 ROXELL - 004 - 2414 OPTIMAX - INSTALLATION INSTRUCTIONS SUSPENSION THE SUSPENSION OF THE SYSTEM IS VERY IMPORTANT : IT MUST BE DONE CAREFULLY AND ACCURATELY ! ATTENTIVELY READ THE INSTRUCTIONS BEFORE STARTING THE SUSPENSION. IN A WOODEN BEAM : WOOD : + INSULATION Drill a small hole in HARD WOOD.
- Page 66 ROXELL - 004 - 2414 OPTIMAX - INSTALLATION INSTRUCTIONS SUSPENSION FOR FEEDER LINE SUSPEND THE CONTROL UNIT AT LEAST 3M FROM THE HOUSE END WALL ! PROCEDURE : - First determine the position of the feeder lines. - Then measure the distance from the wall to the first feeder line.
- Page 67 FIGURE 29. RESULTING FORCE : 165,5KG = HAND OPERATED CENTRAL WINCH. Roxell supplies the hand operated winch without mounting plate and bolts/nuts. Fix the winch directly to a SOLID CEILING. If you want to use a mounting plate : see drawing.
- Page 68 ROXELL - 004 - 2414 OPTIMAX - INSTALLATION INSTRUCTIONS TO INSTALL THE MAIN CABLE CONSIDER THE DOUBLE DIVERSION !! ONLY THEN INSTALL THE CABLE. YOU CAN HANG THE MAIN CABLE IN THE SCREW HOOKS FOR THE TIME BEING. - Start at the end of the circuit.
- Page 69 ROXELL - 004 - 2414 OPTIMAX - INSTALLATION INSTRUCTIONS SINGLE DIVERSION Bottom view Required cable length : 4 x height. FIGURE 33. FIGURE 34. III- 15...
- Page 70 ROXELL - 004 - 2414 OPTIMAX - INSTALLATION INSTRUCTIONS DRAWINGS OF SUSPENSION SYSTEM WITH CENTRAL WINCH FOR YOUR SAFETY : NEVER MAKE THE INSTALLATIONS LONGER THAN THE RECOM- MENDED LENGTH. 30 - 81M (MAX 593KG ) 05000872 00100545 00102368 00100412...
- Page 71 ROXELL - 004 - 2414 OPTIMAX - INSTALLATION INSTRUCTIONS FEEDER LINE SUSPENSION MAKE SURE THAT THE MAIN CABLE 5mm DOES NOT HANG IN, BUT BESIDE THE SCREW HOOKS AND PULLEYS ! Hang a SMALL PULLEY on each SCREW HOOK. Slide a piece of suspension cord through each pulley (towards the central winch)
- Page 72 ROXELL - 004 - 2414 OPTIMAX - INSTALLATION INSTRUCTIONS TO INSTALL THE TELESCOPICAL TUBE S-hook Chain dia 3,5. Tube clamp w/S-hook Cut a hole in the cover at any desired location. Screw link 100Kg Hopper Hook for 100kg hopper FIGURE 40.
- Page 73 ROXELL - 004 - 2414 OPTIMAX - INSTALLATION INSTRUCTIONS TO INSTALL THE AUGER ALWAYS USE SAFETY GLOVES WHEN YOU WORK ON THE AUGER ! FIRMLY TIGHTEN THE CLAMPS AND MAKE SURE THAT ALL HOLES IN THE TUBES POINT DOWN- WARDS Remove all wires, labels etc...
- Page 74 ROXELL - 004 - 2414 OPTIMAX - INSTALLATION INSTRUCTIONS Put the auger coil about 4m from the intake boot. Fix the auger to the drive shaft of the gearhead with Gradually unroll while giving short pushes to slide the the drive block.
- Page 75 ROXELL - 004 - 0715 OPTIMAX - INSTALLATION INSTRUCTIONS Slide the auger slowly back into the tube. Reinstall the bearing holder and fix with a tube clamp. Cautiously slide the cannon ball dia. 75mm (option - if ordered) into the feed intake boot.
- Page 76 ROXELL - 004 - 2414 OPTIMAX - INSTALLATION INSTRUCTIONS OPTIONAL : SYSTEM WITH WINCHABLE TELESCOPICAL TUBES The system can be equipped with a winching-up facility (winch + cable sets) for the telescopical tubes. Split up the feeder line into 2 or more equal parts.
- Page 77 ROXELL - 004 - 2414 OPTIMAX - INSTALLATION INSTRUCTIONS ATTENTION : There is not enough room for the spring between the 100kg hopper and the first pan. Install the spring between the first and the second pan. Return the cable to the first pan and fix it to the cable set of the feed level tube.
- Page 78 ROXELL - 004 - 2414 OPTIMAX - INSTALLATION INSTRUCTIONS TO INSTALL THE POULTRY PERCH GUARD Position of the anchor brackets. every 3 feeder tubes when 3 pans/tube every 2 feeder tubes when 1 or 2, of 1 & 2 pans/tube...
- Page 79 ROXELL - 004 - 2414 OPTIMAX - INSTALLATION INSTRUCTIONS NEXT TO THE CONTROL UNIT Fasten the cable the same way as in fig. 73. Slide the end through the spring towards the insulator. ATTENTION : Cut the surplus cable 25-30cm from the cable clamp.
- Page 80 - Motor protections are set at minimum by the manufacturer. - If you do not use a Roxell control panel, make sure to provide the necessary motor protections. - Compare motor label plate and motor connection with local voltage :...
- Page 81 ROXELL - 004 - 4114 OPTIMAX - INSTALLATION INSTRUCTIONS ELECTRICAL SYMBOLS 2/T1 4/T2 6/T3 Automatic fuse - Si1 Main Switch - Fu2 1/L1 3/L2 5/L3 - Q1 1/L1 3/L2 5/L3 - M1 Motor I> I> I> Thermal-magnetic motor pro- 1.1kW...
- Page 82 MAXIMUM CABLE LENGTHS TO THE MOTORS: SEE PAGE III-35 Junction box Junction box 1x230V AC (IEC38) Connection of start/stop conditions From motor starter 1/L1 3/L2 5/L3 2-wire 5-wire L2 PE First start/stop condition 1 L1 3 L2 5 L3 1 L1 3 L2 5 L3 2/T1...
- Page 83 MAXIMUM CABLE LENGTHS TO THE MOTORS: SEE PAGE III-35 Junction box Junction box 3x230V AC (IEC38) Connection of start/stop conditions 1/L1 3/L2 5/L3 From motor starter 2-wire 5-wire First start/stop condition 1 L1 3 L2 5 L3 1 L1 3 L2 5 L3 2/T1 4/T2...
- Page 84 MAXIMUM CABLE LENGTHS TO THE MOTORS: SEE PAGE III-35 Junction box Junction box 3x400V AC+N (IEC38) Connection of start/stop conditions From motor starter 1/L1 3/L2 5/L3 2-wire 5-wire First start/stop condition 1 L1 3 L2 5 L3 1 L1 3 L2 5 L3 2/T1 4/T2...
- Page 85 ROXELL - 004 - 0715 OPTIMAX - INSTALLATION INSTRUCTIONS ADJUSTMENT FIGURE 77. 1 = Max 2 = Min ADJUSTMENT 1 = Max 2 = Min Left Right Right Left III- 31...
- Page 86 ROXELL - 004 - 2415 OPTIMAX - INSTALLATION INSTRUCTIONS ADJUSTMENT LIMIT SWITCH 1 = Max 2 = Min CONNECTION DIAGRAM : SEE CP CENTRAL WINCH FIGURE 78. III- 32...
- Page 87 ROXELL - 004 - 0715 OPTIMAX - INSTALLATION INSTRUCTIONS OPTION : TO INSTALL THE AUGER BY MEANS OF THE AUGER INJECTOR FIGURE 79. III- 33...
- Page 88 ROXELL - 004 - 0715 OPTIMAX - INSTALLATION INSTRUCTIONS MOTOR PROTECTION STOP START III- 34...
- Page 89 ROXELL - 004 - 0715 OPTIMAX - INSTALLATION INSTRUCTIONS MAXIMUM CABLE LENGTHS TO THE MOTORS Calculation method: IEC-HD 60364-5 Cable type: PVC – XLPE – Silicon Placing: Open cable trough Materials used: Schneider Electric GV2 motor protections Please be aware that you have to follow the local regulations for your country!
- Page 90 ROXELL - 004 - 0715 OPTIMAX - INSTALLATION INSTRUCTIONS Motor Power (kW) Net voltage Protection Max. cable length (m) Wire gauge (mm²) 0 - 44 45 - 73 1x230V 50Hz GV2ME10 74 - 117 0 - 69 0.75 70 - 116...
- Page 92 ROXELL bvba, Industrielaan 13, B-9990 Maldegem (Belgium) Tel. +32 50 72.91.72 - Fax. +32 50 71.67.21 - E-mail info@roxell.com - Website www.roxell.com ROXELL Russia, LLC Roxell, Leningradskiy Prospekt 37, bld. 9, premise № 653, 125167 Moscow, Russian Federation - OGRN : 1157746055026 Tel: +7 495 9833015 - E-mail info.russia@roxell.com - Website www.roxell.com...
Need help?
Do you have a question about the Optimax and is the answer not in the manual?
Questions and answers