Chapters
Table of Contents

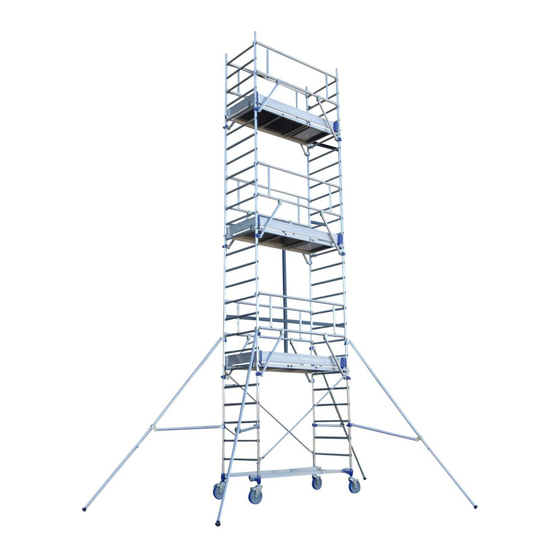
Related Manuals for TUBESCA-COMABI TOTEM 2


Summary of Contents for TUBESCA-COMABI TOTEM 2
- Page 1 Manuel de montage et d'utilisation Échafaudage roulant TOTEM 2 : 180-250-300 Ce manuel doit impérativement être remis aux utilisateurs code: 61029/304 indice 4 du 06/10/2016 – EN1298 - FRANCAIS...
-
Page 2: Table Of Contents
T T T T OTEM 2 OTEM 2 OTEM 2 OTEM 2 Sommaire Chapitre 1 : Les spécifications de l’échafaudage ......................3 1-1 Le marquage ................................3 1-2 : Caractéristiques techniques ..........................3 1-3 : Nomenclature des différents modèles ......................... 4 1-4 : Schéma de composition des modèles (par taille) .................... -
Page 3: Le Marquage
T T T T OTEM 2 OTEM 2 OTEM 2 OTEM 2 Chapitre 1 : Les spécifications de l’échafaudage 1-1 Le marquage EN 1004 3 7.9M / 7.9M XXXD référence à la norme classe de hauteur maximale hauteur maximale accès par escalier : non la charge pour usage intérieur accès par escalier à... - Page 4 T T T T OTEM 2 OTEM 2 OTEM 2 OTEM 2 1-3 : Les nomenclatures des différents modèles Schémas des kits composants: SCHEMAS 200mm 2402-207 20400-062 02004-901 20400-042 REF. composants TOTEM 180 20403-010 20400-002 20403-011 20403-013 20400-021 20400-022 20400-033 20400-063 02004-902 20400-043 REF.
- Page 5 T T T T OTEM 2 OTEM 2 OTEM 2 OTEM 2 SCHEMAS 200mm 2402-207 20400-062 20403-050 20403-080 20400-042 REF. composants TOTEM 180 20403-010 20400-002 20403-011 20403-013 20400-021 20400-022 20400-033 20400-063 20403-051 20403-081 20400-043 REF. composants TOTEM 250 20400-034 20400-064 20403-052 20403-082 20400-044 REF.
- Page 6 T T T T OTEM 2 OTEM 2 OTEM 2 OTEM 2 1-4 : Les schémas de composition des modèles (par taille) n° échelon Hauteur max plateau : 1.9m Hauteur max plateau : 2.9m...
- Page 7 T T T T OTEM 2 OTEM 2 OTEM 2 OTEM 2 n° échelon Hauteur max plateau : 3.9m Hauteur max plateau : 4.9m n° échelon Hauteur max plateau : 5.9m Hauteur max plateau : 6.9m...
-
Page 8: Précautions De Montage Et D'utilisation
T T T T OTEM 2 OTEM 2 OTEM 2 OTEM 2 n° échelon Hauteur max plateau : 7.9m 1-5 : Précautions de montage et d'utilisation • Monter l'échafaudage suivant ce manuel de montage et d'utilisation. • S'assurer que toutes les goupilles nécessaires et tous les crochets soient bien en place. -
Page 9: Chapitre 2 : Le Montage
T T T T OTEM 2 OTEM 2 OTEM 2 OTEM 2 Chapitre 2 : Le montage 2-1 : Le montage des roues: Le frein doit être mis en position blocage Mettre les flûtes de roues dans les échelles Réglage des roues : Le réglage de la roue se fait tous les 12,5mm à... -
Page 10: Montage De La Base Fixe
T T T T OTEM 2 OTEM 2 OTEM 2 OTEM 2 2-2 : Le montage de la base fixe: Relier les deux échelles de base par deux diagonales, placées en opposition, à l'extérieur des montants. Diagonale : TOTEM2 Diagonale pliante : TOTEM 250 ET 300... - Page 11 T T T T OTEM 2 OTEM 2 OTEM 2 OTEM 2 Relier les deux échelles de base par deux lisses placées à l'intérieur de chaque montant, et refermer les crochets: (astuce: appuyer l'une des deux échelles de base contre un mur ou autre, afin de la maintenir verticale, ce qui facilitera les manipulations ultérieures) Vérifier que l’échafaudage soit bien de niveau aussi bien dans le sens horizontal que dans le sens vertical.
-
Page 12: Montage De La Base Pliante
T T T T OTEM 2 OTEM 2 OTEM 2 OTEM 2 2-3 : Le montage de la base pliante: La base pliante Replié Déplié... -
Page 13: Montage Du Premier Niveau
T T T T OTEM 2 OTEM 2 OTEM 2 OTEM 2 2-4 : Le montage du premier niveau: Retirer les goupilles des bases des échelles à ajouter ( échelles supplémentaires pour les hauteurs de 1 plancher ≥ 2m Pour éviter la perte des goupilles, il faut les mettre en place sur le premier échelon. -
Page 14: Montage Des Stabilisateurs
T T T T OTEM 2 OTEM 2 OTEM 2 OTEM 2 2-5 : Le montage des stabilisateurs: 2-5-1 : Les stabilisateurs de 2 à 6m desserrage serrage Ces stabilisateurs sont extensibles : Aucun mouvement ne doit être possible une fois la pince verrouillée Position rentrée Position sortie appuyer sur les pions au milieu du tube principal... -
Page 15: Les Stabilisateurs De 7 À 8M
T T T T OTEM 2 OTEM 2 OTEM 2 OTEM 2 2-5-2 : Les stabilisateurs de 7 à 8m Vérifier le bon serrage des pinces! 1,580 Mise en place stabilisateur 6-8m :... -
Page 16: Les Encombrements Des Échafaudages Avec Les Stabilisateurs
T T T T OTEM 2 OTEM 2 OTEM 2 OTEM 2 2-5-3 : les encombrements des échafaudages avec les stabilisateurs Monter les stabilisateurs à l’aide des schémas ci-dessous : Montage standard Montage le long d’un mur Long 90° TOTEM α’... -
Page 17: Le Montage Des Gardes Corps
T T T T OTEM 2 OTEM 2 OTEM 2 OTEM 2 2-6 : Le montage des gardes corps Mise en place des garde-corps : Aucun mouvement ne doit être possible une fois la pince verrouillée 1- Glisser le garde corps d’un côté à la hauteur voulue. 2- Mettre en place le garde corps en faisant bien attention qu’il y est bien contact entre la partie plate des crochets et les montants 3- Fixer les bras du garde corps aux montants des échelles, pour la pince de garde-corps voir le serrage idem à... -
Page 18: Le Montage Du Plateau
T T T T OTEM 2 OTEM 2 OTEM 2 OTEM 2 2-7 : Le montage du plateau :... - Page 19 T T T T OTEM 2 OTEM 2 OTEM 2 OTEM 2 Vérifier le bon verrouillage des crochets du plancher! Monter alors les plinthes autours de ce plancher, en commençant par celles d'extrémité(1), puis en y emboitant les latérales (2).
-
Page 20: Le Montage Des Plinthes
T T T T OTEM 2 OTEM 2 OTEM 2 OTEM 2 2-8 : Le montage des plinthes 2-8-1 : Les plinthes bois:... -
Page 21: Les Plinthes Alu
T T T T OTEM 2 OTEM 2 OTEM 2 OTEM 2 2-8-2 : Les plinthes alu: 2-8-3 : Le plateau bac Sur le plateau bac, les plinthes sont intégrées. - Page 22 T T T T OTEM 2 OTEM 2 OTEM 2 OTEM 2...
- Page 23 T T T T OTEM 2 OTEM 2 OTEM 2 OTEM 2 Vérifier le bon verrouillage des crochets du plancher! Monter alors les plinthes autours de ce plancher, en commençant par celles d'extrémité(1), puis en y emboitant les latérales (2).
-
Page 24: Le Montage Des Niveaux Supérieurs
T T T T OTEM 2 OTEM 2 OTEM 2 OTEM 2 2-9 : Le montage des niveaux supérieurs: Ce chapitre s'adresse aux possesseurs de TOTEM à double niveau. Les étapes de montage des niveaux supérieurs sont strictement identiques à celles détaillées dans le chapitre 2-1-2, à la différence près que ces étapes ne se font plus depuis le sol, mais depuis le premier niveau de l'échafaudage. -
Page 25: Le Décalage De Niveau
T T T T OTEM 2 OTEM 2 OTEM 2 OTEM 2 2-10 : Le décalage de niveau 2-10-1 : Le décalage de niveau sans base pliante maxi 2-10-2 : le décalage de niveau avec base pliante... - Page 26 T T T T OTEM 2 OTEM 2 OTEM 2 OTEM 2 maxi...
-
Page 27: Chapitre 3: Après Montage Et Avant Utilisation
T T T T OTEM 2 OTEM 2 OTEM 2 OTEM 2 Chapitre 3: L’après montage et l’avant utilisation La conformité du montage doit être vérifiée par le responsable chargé par le chef d'entreprise de la sécurité sur le chantier. Les vérifications porteront sur: •... -
Page 28: Les Consigne De Déplacement
T T T T OTEM 2 OTEM 2 OTEM 2 OTEM 2 • D'utiliser une potence, même manuelle, placée sur l'extérieur de l'échafaudage. • De bâcher un échafaudage roulant, même partiellement. • D'augmenter la hauteur au-delà de celle autorisée. • D'utiliser des composants autres que ceux fournis et décris dans la nomenclature. -
Page 29: Chapitre 5: La Vérification, L'entretien, La Maintenance Et Le Démontage
T T T T OTEM 2 OTEM 2 OTEM 2 OTEM 2 • Le TOTEM se déplace à deux personnes, on "Pousse" l'échafaudage, on ne le "tire" pas à une hauteur maxi indiquée par le fabriquant. Chapitre 5: La vérification, l’entretien, la maintenance et le démontage Inspecter les pièces avant chaque montage et particulièrement: - les bandages et les freins des roues. -
Page 30: Chapitre 6: Le Démontage
T T T T OTEM 2 OTEM 2 OTEM 2 OTEM 2 Vérification : Les vérifications réglementaires (prévues dans l’arrêté du 21 Décembre 2004) sont déclinées de la façon suivante : Une vérification avant mise en service sur chaque site d’installation : - lors de la première utilisation, - en cas de démontage suivi d’un remontage de l’échafaudage, - à... -
Page 31: Chapitre 7: La Garantie
T T T T OTEM 2 OTEM 2 OTEM 2 OTEM 2 • Avant le démontage: - S'assurer de la stabilité de l'échafaudage: _ roues à frein bloquées _ stabilisateurs bien positionnés etc... - S'équiper de cordes pour manutentionner les éléments si besoin est. •... - Page 32 Assembly and utilisation manual TOTEM 2: 180-250-300 Mobile scaffolding This manual must ALWAYS be made available to users code: 61029/304 index 4 dated 06/10/2016 – EN1298 - ENGLISH...
- Page 33 T T T T OTEM 2 OTEM 2 OTEM 2 OTEM 2 List of Contents Chapter 1: Scaffolding specifications ......................... 3 1-1: Markings ................................3 1-2: Technical features ..............................3 1-3: Parts lists for the different models ........................4 1-4: Assembly diagrams for different models (per size) ....................6 1-5: Precautions for assembly and use .........................
-
Page 34: Chapter 1: Scaffolding Specifications
T T T T OTEM 2 OTEM 2 OTEM 2 OTEM 2 Chapter 1: Scaffolding specifications 1-1: Markings EN 1004 3 7.9M / 7.9M XXXD Reference to standard Load class Maximum height for Maximum height for Access by ladder: no inside use outside use Access by stepladder: no... -
Page 35: 1-3: Parts Lists For The Different Models
T T T T OTEM 2 OTEM 2 OTEM 2 OTEM 2 1-3: Parts lists for the different models Diagrams for component kits: Schemes 200mm 2402-207 20400-062 20403-053 20400-042 components ref. TOTEM 180 20403-010 20400-002 20403-011 20403-013 20400-021 20400-022 20400-033 20400-063 20403-054 20400-043 Components ref. - Page 36 T T T T OTEM 2 OTEM 2 OTEM 2 OTEM 2 schemes 200mm 2402-207 20400-062 20403-050 20403-080 20400-042 Components ref. TOTEM 180 20403-010 20400-002 20403-011 20403-013 20400-033 20400-063 20403-051 20403-081 20400-043 20400-021 20400-022 Components ref. TOTEM 250 20400-034 20400-064 20403-052 20403-082 20400-044...
-
Page 37: 1-4: Assembly Diagrams For Different Models (Per Size)
T T T T OTEM 2 OTEM 2 OTEM 2 OTEM 2 1-4: Assembly diagrams for different models (per size) Rung n° Max. work-surface height: 1.9m Max. work-surface height: 2.9m... - Page 38 T T T T OTEM 2 OTEM 2 OTEM 2 OTEM 2 Rung n° Max. work-surface height: 3.9m Max. work-surface height: 4.9m Rung n° Max. work-surface height: 5.9m Max. work-surface height: 6.9m...
-
Page 39: 1-5: Precautions For Assembly And Use
T T T T OTEM 2 OTEM 2 OTEM 2 OTEM 2 Rung n° Max. work-surface height: 7.9m 1-5: Precautions for assembly and use • Assemble the scaffolding following these instructions for assembly and use • Make sure that all the necessary pins and hooks are correctly in place. •... -
Page 40: Chapter 2: Assembly
T T T T OTEM 2 OTEM 2 OTEM 2 OTEM 2 Chapter 2: Assembly 2-1: Fitting the wheels: Insert the wheel shafts into the ladders The brake must be locked in the ‘ON’ position Adjusting wheel positions: The position of the wheel can be set every 12.5 mm using the upper and lower holes on the ladder over a total distance of 175 Wheels are adjustable solely for levelling the scaffolding. -
Page 41: 2-2: Fitting The Fixed Base
T T T T OTEM 2 OTEM 2 OTEM 2 OTEM 2 2-2: Fitting the fixed base: Connect the two base ladders using two diagonals, placed opposite each other outside the uprights. Diagonal: TOTEM2 180 Folding diagonal: TOTEM 250 & 300... - Page 42 T T T T OTEM 2 OTEM 2 OTEM 2 OTEM 2 Connect the two ladders using two bars placed inside each upright, and close the hooks: (Tip: Lean one of the base unit ladders against a wall or a similar surface to keep it vertical, which will make later handling operations easier to carry out) Check that the scaffolding is square and level both horizontally and vertically.
-
Page 43: 2-3: Fitting The Folding Base
T T T T OTEM 2 OTEM 2 OTEM 2 OTEM 2 2-3: Fitting the folding base: Folding base Folded Unfolded... -
Page 44: 2-4: Fitting The First Level
T T T T OTEM 2 OTEM 2 OTEM 2 OTEM 2 2-4: Fitting the first level: Remove the pins from the bases of the ladders to be added (extra ladders for 1 floor heights ≥ 2m) To avoid losing pins, put them in place on the first rung. -
Page 45: 2-5: Fitting The Stabilizers
T T T T OTEM 2 OTEM 2 OTEM 2 OTEM 2 2-5: Fitting the stabilizers: 2-5-1: Stabilizers from 2 to 6m Loosening Tightening These stabilizers can be extended: Withdrawn position Extended position Press on the pins in the middle of the main tube... -
Page 46: 2-5-2: Stabilizers From 7 To 8M
T T T T OTEM 2 OTEM 2 OTEM 2 OTEM 2 2-5-2: Stabilizers from 7 to 8m Check that the clips are tightened correctly 1.580 Positioning a 6-8m stabilizer:... -
Page 47: 2-5-3: Overall Dimensions Of Scaffolding With Stabilizers
T T T T OTEM 2 OTEM 2 OTEM 2 OTEM 2 2-5-3: Overall dimensions of scaffolding with stabilizers Fit the stabilizers as per the following diagrams: Standard assembly Assembly along a wall Long 90° TOTEM α’ α’ TOTEM Long Scaffolding up to 6m high: Long (m) Lat (m) -
Page 48: 2-6: Fitting The Guardrails
T T T T OTEM 2 OTEM 2 OTEM 2 OTEM 2 2-6: Fitting the guardrails Positioning guardrails: No movement should be possible once the clip is locked in position 1- Slide the guardrail for one side to the required height. 2- Position the guardrail correctly taking care that the flat part of the hooks and the uprights are in contact with each other. -
Page 49: 2-7: Fitting The Work Surface
T T T T OTEM 2 OTEM 2 OTEM 2 OTEM 2 2-7: Fitting the work surface:... - Page 50 T T T T OTEM 2 OTEM 2 OTEM 2 OTEM 2 Check that the floor hooks are correctly locked in position! Then assemble the skirting boards around the flooring, beginning with those at the end (1), and then by fitting in the boards on the sides (2).
-
Page 51: 2-8: Fitting The Skirting Boards
T T T T OTEM 2 OTEM 2 OTEM 2 OTEM 2 2-8: Fitting the skirting boards 2-8-1: Wooden skirting boards:... -
Page 52: 2-8-2: Aluminium Skirting Boards
T T T T OTEM 2 OTEM 2 OTEM 2 OTEM 2 2-8-2: Aluminium skirting boards: 2-8-3: The tray-type work surface Skirting boards are integrated on tray-type work surfaces. - Page 53 T T T T OTEM 2 OTEM 2 OTEM 2 OTEM 2...
- Page 54 T T T T OTEM 2 OTEM 2 OTEM 2 OTEM 2...
- Page 55 T T T T OTEM 2 OTEM 2 OTEM 2 OTEM 2 Check that the flooring hooks are correctly locked in position! Then assemble the skirting boards around the flooring, beginning with those at the end (1), and then by fitting in the boards on the sides (2).
-
Page 56: 2-9: Fitting Higher Levels
T T T T OTEM 2 OTEM 2 OTEM 2 OTEM 2 2-9: Fitting higher levels: This chapter is for the attention of possessors of 2-level TOTEMs The fitting stages for upper levels are identical to those described in chapter 2-1-2, except for the fact that operations are not carried out from the ground but from the first level of scaffolding. -
Page 57: 2-10: Offsetting The Level
T T T T OTEM 2 OTEM 2 OTEM 2 OTEM 2 2-10: Offsetting the level 2-10-1: Offsetting the level without a folding base Max. 2-10-2: Offsetting the level with a folding base... - Page 58 T T T T OTEM 2 OTEM 2 OTEM 2 OTEM 2...
-
Page 59: Chapter 3: Post-Assembly And Pre-Use Operations
T T T T OTEM 2 OTEM 2 OTEM 2 OTEM 2 Chapter 3: Post-assembly and pre-use operations The person named by the company manager as being in charge of safety on the site must check that assembly-work on the scaffolding is compliant. These checks concern: •... -
Page 60: Instructions For Moving The Scaffolding
T T T T OTEM 2 OTEM 2 OTEM 2 OTEM 2 The following are not allowed: • Using a jib, even a manual jib, placed on the outside the scaffolding. • Covering mobile scaffolding with a tarpaulin, even partially. •... -
Page 61: Chapter 5: Control, Servicing, Maintenance And Dismantling
T T T T OTEM 2 OTEM 2 OTEM 2 OTEM 2 • Do not raise scaffolding with a crane or a gantry • The TOTEM should be moved by two persons. It must be "pushed", but not pulled, at the maximum height indicated by the manufacturer. -
Page 62: Chapter 6: Dismantling
T T T T OTEM 2 OTEM 2 OTEM 2 OTEM 2 Controls: Statutory controls (stipulated in the order of December 21, 2004) are as follows: A check must be made on every work-site before the unit is put into use: - When used for the first time, - After the scaffolding has been dismantled and re-assembled. -
Page 63: Chapter 7: Guarantee
T T T T OTEM 2 OTEM 2 OTEM 2 OTEM 2 • During dismantling: Use the assembly procedure but exactly in reverse order. Chapter 7: Guarantee Our products are guaranteed for 5 years, parts and labour included. The guarantee comes into force as of the date of invoice. Our guarantee will only be valid on condition that the purchaser fulfils his contractual obligations, especially payment of the equipment.
Need help?
Do you have a question about the TOTEM 2 and is the answer not in the manual?
Questions and answers