Table of Contents
Advertisement
Available languages
Available languages
Quick Links
Advertisement
Chapters
Table of Contents

Subscribe to Our Youtube Channel
Related Manuals for TUBESCA-COMABI X-TOWER


Summary of Contents for TUBESCA-COMABI X-TOWER
- Page 1 X-TOWER Manuel de montage et d'utilisation Échafaudage roulant X-TOWER Ce manuel doit impérativement être remis aux utilisateurs Notice vidéo en ligne code: 61029/358 indice 3 du 04/04/2017– EN1298 - FRANCAIS...
-
Page 2: Table Of Contents
1-2 : Le marquage ................................. 3 1-3 : Caractéristiques dimensionnellle.......................... 3 1-4 : Vues de l’échafaudage X-TOWER 2m à ses différentes hauteurs de plateau ............4 1-5 : Vues de l’échafaudage X-TOWER 3m à ses différentes hauteurs de plateau ............5 1-6 : Précautions de montage ............................ -
Page 3: Description Du Produit
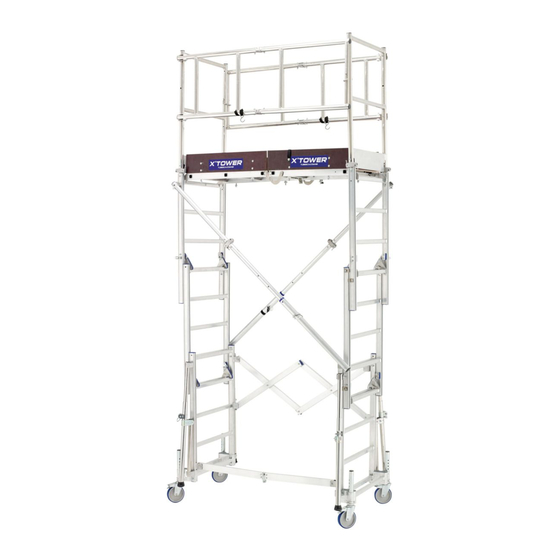
Les spécifications de l’échafaudage 1-1 : Description du produit L’échafaudage X-Tower est conçu pour être utilisé et manipulé par une seule personne. Sa conception rend son montage rapide et sécurisé, les différents éléments de l’échafaudage étant solidaire, aucun risque d’oubli ou de perte de l’un d’entre eux. -
Page 4: Vues De L'échafaudage X-Tower 2M À Ses Différentes Hauteurs De Plateau
X-TOWER 1-4 : Vues de l’échafaudage X-TOWER 2m à ses différentes hauteurs de plateau Hauteur plateau : 1,55 m Hauteur plateau : 1,3 m Hauteur plateau : 2,05 m Hauteur plateau : 1,8 m Mise en place obligatoire des diagonales... -
Page 5: Vues De L'échafaudage X-Tower 3M À Ses Différentes Hauteurs De Plateau
X-TOWER 1-5 : Vues de l’échafaudage X-TOWER 3m à ses différentes hauteurs de plateau Hauteur plateau : 1,55 m Hauteur plateau : 1,3 m Hauteur plateau : 2,05 m Hauteur plateau : 1,8 m Mise en place obligatoire des diagonales... - Page 6 X-TOWER Hauteur plateau : 2,55 m Hauteur plateau : 2,3 m Hauteur plateau : 2,8 m...
-
Page 7: Précautions De Montage
Monter et utiliser l'échafaudage suivant ce manuel (à lire en entier avant la première utilisation). • Le X-Tower doit être monté et démonté uniquement par un personnel formé aux instructions de montage et d'utilisation. • Les éléments endommagés ou de marques différentes ne doivent pas être utilisés. -
Page 8: Chapitre 2 : Le Montage, Hauteur Plateau 1.3M
X-TOWER Chapitre 2 : Le montage, hauteur plateau 1.3m Cette partie est commune aux modèles 2 et 3 mètres 2-1 : Ouverture de l’échafaudage Si le produit est équipé d’un kit chargement, l’enlever (voir le chapitre 9). Sinon, retirer uniquement la sangle qui entoure le produit. -
Page 9: Mise En Place Du Plateau
X-TOWER Verrouiller la lisse en appuyant dessus Vérifier le bon enclenchement du verrou 2-2 : Mise en place du plateau : Sortir le plateau de l’ensemble et le Relever la partie trappe vers le haut poser au sol verticalement pour ouvrir complètement le plateau... - Page 10 X-TOWER Poser le plateau de manière à ce que les crochets soit en appui sur les échelles les plus à l’extérieur. Vérifier le bon positionnement des 4 crochets de plateau sur les échelons. Rabattre les 2 crochets de support vers le bas Bloquer les deux autres roues de l’échafaudage.
-
Page 11: Réglage Des Roues
X-TOWER 2-3 : Réglage des roues Vérifier le niveau du plancher par rapport au sol dans le sens longitudinale et transversale. Si l’échafaudage se trouve sur un sol non plan, il est possible de régler les roues afin de le mettre de niveau. - Page 12 X-TOWER Défaire la sangle d’un des gardes corps et déplier la partie longitudinale pour l’amener jusqu’au verrou du garde-corps opposé sans enclencher l’articulation centrale Garde-corps longitudinal Garde-corps latéral Verrou de garde-corps Articulations centrales Verrouiller le garde-corps Soulever le verrou et insérer...
- Page 13 X-TOWER Tirer sur le garde-corps pour verrouiller l’articulation centrale Vérifier le bon enclenchement des verrous sur les 2 articulations Répéter l’opération sur le second garde-corps...
-
Page 14: Mise En Place Des Plinthes
X-TOWER 2-5 : Mise en place des plinthes : Abaisser la plinthe verticalement, puis verrouiller Détacher les sangles qui relient les plinthes, la avec les molettes sous le montant. puis relever une première plinthe. Serrer les 2 molettes pour que la plinthe soit correctement positionnée et ne bouge plus. -
Page 15: Mise En Place Des Stabilisateurs
X-TOWER 2-6 : Mise en place des stabilisateurs: Déployer le stabilisateur jusqu’à ce qu’il soit Tout en appuyant sur la poignée, tirer le stabilisateurs vers l’arrière. complètement en appui sur le sol et relâcher le verrou. Poignée Répéter l’opération sur les 3 autres stabilisateurs L’échafaudage est alors prêt à... -
Page 16: Mise En Place De La Diagonale
X-TOWER Chapitre 3: Elévation du modèle 2 mètres 3-1 : Mise en place des diagonales La diagonale doit être installée uniquement lorsque le produit est élevé à sa hauteur maximale. Accrocher la diagonale sur le verrou Déclipser la diagonale pour la déplier de l’échelle opposée... -
Page 17: Elévation Du Produit
X-TOWER 3-2 : Elévation du produit Lever l’échelle vers le haut d’un échelon selon les schémas ci-dessous Désengager les 2 verrous du basculeur en appuyant dessus sous l’échelon Verrou Ne pas mettre ses doigts entres les deux échelles, tenir l’échelon par le dessous Lever l’échelle sans tenir le basculeur, celui-ci... - Page 18 X-TOWER Le basculeur revient à sa position une fois Descendre l’échelle jusqu’à ce que le basculeur l’échelon dépassé appui sur l’échelon Désengager les 2 verrous sur le basculeur de l’échelle opposée, puis lever l’échelle. Pour une hauteur de plateau de 1.55m, poser le basculeur sur l’échelon juste au-dessus et réenclencher les verrous de basculeur.
- Page 19 X-TOWER Lever de nouveau la première échelle. Pour une hauteur de plateau de 1.8m, poser le basculeur sur l’échelon juste au-dessus et réenclencher les verrous de basculeur. Pour une hauteur de plateau supérieure, poser le basculeur deux échelons plus haut.
- Page 20 X-TOWER Enclencher les 4 verrous sur les basculeurs en appuyant dessus. Pousser sur les articulations de diagonales pour les verrouiller. (Uniquement si le plateau est à 2.05m) L’échafaudage est alors prêt à être utilisé à une hauteur de plateau de 2.05m.
-
Page 21: Chapitre 4 : Elévation Du Modèle 3 Mètre
X-TOWER Chapitre 4 : Elévation du modèle 3 mètre 4-1 : Elévation des échelles extérieures Pour les échelles extérieures, procéder comme pour le 2 mètres mais sans mettre les diagonales (voir chapitre 3-2). 4-2 : Mise en place des diagonales Déplier la diagonale pliante, en la détachant... -
Page 22: Elévation Des Échelles Intermédiaires
X-TOWER Insérer la diagonale pliante dans la partie Ø50, sans mettre la goupille et sans verrouiller la diagonale si vous souhaitez élevez l’échafaudage plus haut. Si l’échafaudage est à la hauteur souhaité, aller au chapitre 4-4. 4-3 : Elévation des échelles intermédiaires Lever l’échelle vers le haut jusqu’à... - Page 23 X-TOWER Pour une hauteur de plateau de 2.3m, poser le basculeur sur l’échelon juste au-dessus et réenclencher les verrous de basculeur. Pour une hauteur de plateau supérieure, poser le Désengager les 2 verrous sur le basculeur de l’échelle opposée, puis basculeur deux échelons plus haut.
-
Page 24: Verrouillage De La Diagonale
X-TOWER Lever la seconde échelle d’un échelon et ainsi obtenir la hauteur de travail maximale de 2,8m. Enclencher les 4 verrous sur les basculeurs en appuyant dessus. 4-4 Verrouillage de la diagonale Manœuvre à effectuer quand le plateau est à la hauteur désirée. - Page 25 X-TOWER Insérer la goupille pour relier les deux Pousser sur l’articulation pour la verrouiller, puis procéder parties de diagonales. de la même manière avec la seconde diagonale. L’échafaudage est prêt à être utilisé. Chapitre 5: L’après montage et l’avant utilisation La conformité...
-
Page 26: Chapitre 6: Les Consignes
X-TOWER Chapitre 6: Les consignes 6-1 : Les consignes d’utilisations Cette notice ne remplace pas la réglementation en vigueur à laquelle il convient de se référer. • Respecter les charges admissibles sur le plancher et la structure. • Les forces horizontales ne doivent pas dépasser 30Kg. -
Page 27: Les Consignes De Déplacement
• Il est interdit de déplacer l'échafaudage roulant lorsque du personnel ou du matériel se trouve sur celui-ci. • Ne pas soulever l'échafaudage à la grue ou avec un pont roulant. • Le X-Tower se déplace à une personne, on "pousse" l'échafaudage, on ne le "tire" pas. Chapitre 7: La vérification, l’entretien et la maintenance... -
Page 28: Chapitre 8: Le Démontage
X-TOWER Vérification : Les vérifications réglementaires (prévues dans l’arrêté du 21 Décembre 2004) sont déclinées de la façon suivante : Une vérification avant mise en service sur chaque site d’installation : - lors de la première utilisation, - en cas de démontage suivi d’un remontage de l’échafaudage, - à... - Page 29 X-TOWER Faire attention lors du repliement des garde-corps, se mettre sur le côté avant de les basculer pour éviter les risques de blessures à la tête. Pour replier le plateau, tirer sur l’anneau au niveau du verrou pour le désenclencher.
-
Page 30: Chapitre 9: Le Déplacement Et Le Chargement Dans Un Véhicule
X-TOWER Chapitre 9: Le déplacement et le chargement dans un véhicule 9-1 Mise en place du kit chargement (option) Le kit de chargement peut s’installer d’un côté ou de l’autre de l’échafaudage en position repliée. Poser les pattes d’accrochage sur l’échelon du support de roues. -
Page 31: Chargement De L'échafaudage Dans Un Véhicule
X-TOWER 9-2 Chargement de l’échafaudage dans un véhicule Amener l’échafaudage jusqu’à l’arrière du véhicule sans Basculer le produit vers l’avant jusqu’à coller au parechoc et enclencher les freins sur les 4 roues. ce que la patin appui sur le véhicule. -
Page 32: Chapitre 10: La Garantie
Chapitre 10: La garantie Les échafaudages X-Tower sont garantis 2 ans, pièces et main d'œuvre. Cette garantie prend effet à partir de la date de la facturation. Notre garantie est soumise à l'accomplissement de ses obligations contractuelles par l'acheteur et notamment de paiement. - Page 33 X-TOWER Assembly & operating manual for X-TOWER mobile scaffolding: This manual must ALWAYS be made available to users Video instructions on-line Code: 61029/358 index 3 dated 04/04/2017 – EN1298 - ENGLISH...
- Page 34 1-2: Marking .................................. 3 1-3: Dimensions ................................3 1-4: Views of the 2m X-TOWER scaffolding at its different platform heights .............. 4 1-5: Views of the 3m X-TOWER scaffolding at its different platform heights .............. 5 1-6: Assembly precautions ............................7 Chapter 2: Assembly, platform height 1.3 m ......................
-
Page 35: Chapter 1: Scaffolding Specifications
Scaffolding specifications 1-1 : Unit description X-Tower scaffolding is designed for being used and handled by a single person. It has been designed for rapid, safe assembly. As the different scaffolding elements are connected together, there is no risk of forgetting or losing any item. -
Page 36: 1-4: Views Of The 2M X-Tower Scaffolding At Its Different Platform Heights
X-TOWER 1-4: Views of the 2m X-TOWER scaffolding at its different platform heights Platform height: 1.55 m Platform height: 1.3 m Platform height: 2.05 m Platform height: 1.8 m Diagonals are compulsory in this configuration... -
Page 37: 1-5: Views Of The 3M X-Tower Scaffolding At Its Different Platform Heights
X-TOWER 1-5: Views of the 3m X-TOWER scaffolding at its different platform heights Platform height: 1.55 m Platform height: 1.3 m Platform height: 2.05 m Platform height: 1.8 m Diagonals are compulsory in this configuration... - Page 38 X-TOWER Platform height: 2.55 m Platform height: 2.3 m Platform height: 2.8 m...
-
Page 39: 1-6: Assembly Precautions
• Assemble and use the scaffolding as per the instructions contained in this manual (Read the manual in totality before the first use). • The X-Tower most only be assembled and dismantled by personnel trained for its assembly and use. -
Page 40: Chapter 2: Assembly, Platform Height 1.3 M
X-TOWER Chapter 2: Assembly, platform height 1.3 m This part is identical for 2 and 3 metre models 2-1: Opening the scaffolding If the unit is equipped with a transport kit, remove the kit (see Chapter 9). Otherwise, only remove the strap holding the unit together. -
Page 41: 2-2: Installing The Platform
X-TOWER Lock the strut in position by pushing on it Check that the catch has latched correctly into place 2-2: Installing the platform: Pull the platform out of the unit and Raise the trap section upwards for position it vertically on the floor... - Page 42 X-TOWER Place the platform in position so that the hooks bear on the outermost ladders. Check that the 4 platform hooks are correctly in position on the rungs. Push the 2 support hooks downwards Lock the other two scaffolding wheels in position.
-
Page 43: 2-3: Adjusting The Wheels
X-TOWER 2-3: Adjusting the wheels Check that the floor is horizontal both lengthwise and crosswise. If the scaffolding is placed on a non-flat floor, the wheels can be adjusted for putting the unit level. Align the hole on the wheel closest to the hole... - Page 44 X-TOWER Undo the strap on one of the guard-rails and unfold the longitudinal part until it contacts the catch on the opposite guard-rail. Do not engage the central hinge catch Longitudinal guard-rail Side guard-rail Guard-rail catch Central hinges Lock the guard-rail in place...
- Page 45 X-TOWER Pull on the guard-rail for locking the central hinge in position Check that the catches are correctly engaged on the 2 hinges Repeat the operation for the second guard-rail...
-
Page 46: 2-5: Installing Skirting Boards
X-TOWER 2-5: Installing skirting boards: Lower the skirting board vertically and then lock it Remove the straps holding the skirting boards in place with the knurled wheels under the upright together and then lift up the first skirting board Tighten the 2 wheels so that the board is correctly in place and cannot move. -
Page 47: 2-6: Installing Stabilizers
X-TOWER 2-6: Installing stabilizers: Extend the stabilizer until it is firmly in contact with the Hold the handle down and pull the stabilizers ground and release the catch. backwards. Handle Carry out the same operation on the other 3 stabilizers The scaffolding is now ready for use with a platform 1.3m high. -
Page 48: Chapter 3: Erecting The 2-Metre Model
X-TOWER Chapter 3: Erecting the 2-metre model 3-1: Installing diagonals Diagonals must only be fitted when the unit has been erected at its maximum height. Hook the diagonal on to the catch on Unclip the diagonal for extending it the opposite ladder... -
Page 49: 3-2: Erecting The Unit
X-TOWER 3-2: Erecting the unit Raise the ladder to the top of a rung as shown below Release the 2 catches on the locking pivot by pushing on them from under the rung Catch Do not put your fingers between the two ladders. Hold the rung from underneath. - Page 50 X-TOWER The locking pivot will come back into position once Lower the ladder until the locking pivot bears on it is above the rung the rung Release the 2 catches on the locking pivot on the opposite ladder. Then raise the ladder.
- Page 51 X-TOWER Raise the first ladder once again. To put the platform at a height of 1.8m, place the locking pivot on the rung directly above it and re-engage the catches on the locking pivot. For positioning the platform higher, place the locking pivot two rungs higher.
- Page 52 X-TOWER Engage the 4 catches on the locking pivots by pushing on them. Push on the hinges on the diagonals for locking them in position. (Only when the platform is 2.05m high) The scaffolding is now ready for use with a platform 2.05m high.
-
Page 53: Chapter 4: Erecting The 3-Metre Model
X-TOWER Chapter 4: Erecting the 3-metre model 4-1: Erecting external ladders Proceed in the same way as for the 2-metre model for mounting external ladders but without fitting the diagonals (see chap 3-2). 4-2: Installing diagonals Unfold the folding diagonal by unclips first from the Pivot the Ø50 part of the diagonal... -
Page 54: 4-3: Erecting Intermediate Ladders
X-TOWER Insert the folding diagonal in the diagonal Ø50, without put the pin and without locking diagonal hinge if you want up the scaffolding higher. If the scaffolding is at the desired height, go to chapter 4-4. 4-3: Erecting intermediate ladders Lift the ladder upwards until the locking pivot bears on the next rung. - Page 55 X-TOWER To have a platform height of 2.3m, put the locking pivot on the rung directly above and re-engage the locking pivot Disengage the 2 catches on the locking catches. For positioning the platform higher, place the pivot on the other ladder. Then raise the locking pivot two rungs higher.
- Page 56 X-TOWER Raise the second ladder by one rung for attaining the maximum working height of 2.8m. Engage the 4 catches on the locking pivots by pushing on them. 4-4 Locking the diagonals in position Operation to be carried out when the platform is at the required height.
-
Page 57: Chapter 5: Post-Assembly And Pre-Use Operations
X-TOWER Insert the pin for connecting the two Push on the hinge to lock it in position and then carry out diagonal sections together. the same operation on the second diagonal. The scaffolding is now ready for use. Chapter 5:... -
Page 58: Chapter 6: Instructions
X-TOWER Chapter 6: Instructions 6-1: Instructions for use These instructions do not replace regulations in force, which must also be followed. • Comply with permissible loads on the flooring and the structure. • Horizontal forces must not be over 30Kg. -
Page 59: Instructions For Moving The Scaffolding
• Scaffolding MUST NEVER BE MOVED with any persons or equipment on it. • Do not lift up scaffolding with a crane or a gantry. • The X-Tower can be moved by one person. It must always be “pushed”. but never “pulled”. -
Page 60: Chapter 8: Dismantling
X-TOWER Replace or clean any plates or stickers that provide information on how to use the unit or on safety. Check: Statutory checks (stipulated in the order of December 21, 2004) are as follows: A check must be made on every worksite before the unit is put into use: - For the first time, - After the scaffolding has been dismantled and re-assembled. - Page 61 X-TOWER guard-rails. Move to one side before tipping them over for preventing them from hitting you on the head. For folding the platform, pull on the ring on the lock for releasing it. When the platform has been reclosed, put the support hooks in position so that they are parallel to the platform.
-
Page 62: Fitting The Transport Kit (Optional)
X-TOWER Chapter 9: Moving and loading the unit onto a vehicle 9-1 Fitting the transport kit (optional) The transport kit can be installed on either side of the scaffolding after it has been folded up. Place the hooks on the rung on the wheel holder. - Page 63 X-TOWER 9-2 Loading the scaffolding onto a vehicle Tilt the unit forward onto the pad bears Push the scaffolding to the back of the vehicle leaving a gap behind the rear bumper. Put the 4 wheel-brakes on. on the vehicle.
-
Page 64: Chapter 10: Guarantee
Chapter 10: Guarantee X-Tower scaffolding unit are guaranteed for 2 years against defects in parts and workmanship. The guarantee comes into force as of the date of invoice. Our guarantee will only be valid on condition that the purchaser fulfils his contractual obligations, especially concerning payment for the equipment.
Need help?
Do you have a question about the X-TOWER and is the answer not in the manual?
Questions and answers