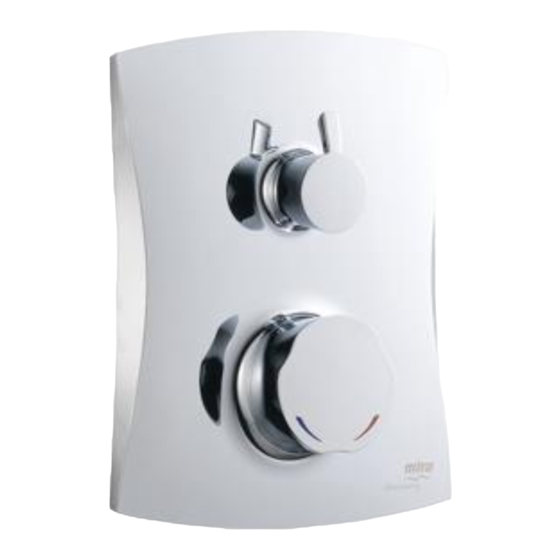
Mira Discovery Installation And User Manual

Mira Discovery Installation And User Manual

Thermostatic mixer shower

Advertisement

mIra dIscovery and dIverter
thermostatIc mIxer shower
Installation and User Guide
These instructions are to be left with the user
1

Advertisement

Table of Contents
loading

Summary of Contents for Mira Discovery

  • Page 1 Installation and User Guide These instructions are to be left with the user...
  • Page 2: Table Of Contents

    IntrodUctIon Introduction thank you for purchasing a quality mira product. to enjoy the full potential of your new product, please Patents and design registration take time to read this guide thoroughly, having Safety Warnings done so, keep it handy for future reference.
  • Page 3: Patents And Design Registration

    General lack of experience and knowledge, unless mira thermostatic mixers are precision engineered they have been given supervision or instruction and should give continued safe and controlled concerning the use of the appliance by a...
  • Page 4: Pack Contents

    Pack contents tick the appropriate boxes to familiarise yourself with the part names and to confirm that all of the parts are included. 1 x concealing Plate and control assembly 1 x thermostatic mixing valve (attached to the building in shroud) 4 x compression nuts 4 x olives 3 x wall Plugs...
  • Page 5: Specifications

    Flow Rates sPecIFIcatIons Typical flow rates on high pressure systems (1 to For Type 2 Valves, the supply conditions specified 5 Bar), mixer valve and divertor only with open in section: ‘Type 2 Valves - Application’ take outlet and 12 L/Min flow regulator fitted. precedence over the operating parameters which Note! additional pressure losses may occur follow.
  • Page 6: Installation Methods

    INSTALLATION METHODS Rear Fixing For installation into a solid wall or stud Partition using the Rear Fixing Points, go to section: ‘Installation, Solid Wall or Stud Partition Using Rear Mountings’. Behind Panel Fixing For installation behind a Laminated Panel using the Securing Brackets, go to section: ‘Installation, Panel Fixing using Securing Brackets - Mounting off Rear Face’.
  • Page 7: Installation

    5. do not install the product in a position in which INSTALLATION service access is restricted. 6. Pipework dead-legs should be kept to a Suitable Plumbing Systems minimum. 7. decide on a suitable position for the mixer Gravity Fed: and outlet fittings. If you are installing variable the thermostatic mixer must be fed from a cold shower fitttings then they must provide water cistern (usually fitted in the loft space) and...
  • Page 8: Solid Wall Or Stud Partition Fixing Using

    5. cut away the plasterboard or brick work to the Solid Wall or Stud Partition Fixing required depth. Using Rear Mountings Important! this depth ‘x’ will depend on the finished wall thickness e.g. tiles or facia board. 1. determine the route for the hot and cold supply pipework and for the outlet pipework.
  • Page 9 Important! There are various shower fittings, 6. offer up the mixer valve into the hole, make sure that it is level, central, and square spouts, bath fillers etc. that can be used to the finished wall surface (or the control with this product, refer to the appropriate components will not fit correctly), then mark installation instructions supplied with your...
  • Page 10: Panel Fixing Using Securing Brackets

    15. Re-fit the building-in shroud to the shower Panel Fixing using Securing valve using the three fixing screws. Brackets - Mounting off Rear Face 16. Using the building-in shroud as a guide for the finished wall thickness, finish the wall. Note! For laminated panels the mixer must be positioned from the rear of the panel.
  • Page 11 8. Install the hot and cold supply pipes (Hot - Left, m5 Fixing hole Cold - Right). 9. Caution! It is essential at this point that the supply pipework is thoroughly flushed through before connection to the mixer. Failure to do so may result in product malfunction and may invalidate your guarantee.
  • Page 12: Solid Wall Or Stud Partition Fixing Using

    Solid Wall or Stud Partition Fixing 4. remove the building-in shroud 5. Fit the securing brackets to the mixer. using Securing Brackets Important! the securing brackets must be 1. Refer to section: ‘Solid Wall or Stud Partition fixed vertically, as illustrated. Fixing using Rear Mountings’...
  • Page 13 Important! There are various shower fittings, spouts, bath fillers etc. that can be used with this product, refer to the appropriate installation instructions supplied with your outlet fittings and install the outlet pipework to suit. Spirit Level Building-in shroud securing screws 11.
  • Page 14: Control Assembly

    Control Assembly 3. Fit the backplate to the shower control and secure with the three securing screws (removed from the building-in shroud). Make concealing Plate sure that the seal is fully compressed on the finished wall surface. Note! If the finish is particularly uneven (i.e. due to grout lines), apply a small amount of silicone sealant to ensure a seal.
  • Page 15: Reversed Inlet Supplies

    7. Position the cartridge lugs into the body slots rate too high then 2 x 12 l/min flow regulators are and tighten clockwise. provided. these can be installed in the discovery 8. restore the hot and cold water supplies and fixed showerhead and/or in the hose between the check for leaks.
  • Page 16: Commissioning

    6. once the desired maximum blend temperature commIssIonInG has been achieved, refit the temperature hub without disturbing the spindle, positioning the Maximum Temperature Setting temperature hub so that the lug is against the left side of the stop on the cartridge face (refer Before using the shower the maximum temperature to illustration).
  • Page 17: Type 2 Valves

    HP-S, LP-S, HP-B its valves and the commissioning and testing of divertor the tmv can be undertaken.
  • Page 18: Fault Diagnosis

    FAULT DIAGNOSIS the water seeping from the valve is no more than 2°c above the designated maximum mixed water If you require a mira trained service engineer or outlet temperature setting of the valve. agent, refer to section: ‘Customer Services’.
  • Page 19: Maintenance

    Inlet Filter Note! the cartridge contains no internally serviceable parts. check valve If you require a mira trained engineer or agent, refer to section: ‘Customer Service’. Lubricants silicone based lubricants must only be used on the rubber seals.
  • Page 20 Divertor Filter Cartridge Note! The filters must not be removed except for cleaning. If the thermostatic mixer is operated without the inlet filters or check valves fitted the warranty on the product will be void. Filter cover cartridge 1. Isolate the supplies to the shower control and 1.
  • Page 21 sPare Parts 1142347 1142350 Diverter Control Assembly Diverter Assembly 1142349 Diverter Cap 1691.145 Outlet Adapter (89 ctrs) 1691.144 Detent and Flow Hub 1142348 Diverter Filter Pack 1142354 Filter and Checkvalve Assembly 1142355 Cartridge Assembly 1624.114 1624.112 Outlet Plug Filter 1142352 Nut and Olive Pack 1142351...
  • Page 22: Spare Parts

    sPare Parts 450.20 RAC Mounting Pack 1595.035 Right Angle Connector (RAC) Shroud...
  • Page 23: Accessories

    Genuine mira accessories can be purchased direct from customers services (our contact details can be found on the back cover of this guide) or from approved stockists or merchants. Shower Seat Showerhead Holder Wall Mounted Soap Dish White - 2.1536.128 White - 2.1605.149...
  • Page 24: Customer Services

    You have the assurance of a ● Water or electrical supply, waste and isolation issues. fully trained Mira Technician, genuine Mira spare parts and a 12 month guarantee on any chargeable work done. ● Compensation for loss of use of the product or consequential loss of any kind.
  • Page 25 Pdf Supplied By http://www.plumbworld.co.uk/...

This manual is also suitable for:

Diverter

Table of Contents