Table of Contents
Advertisement
Quick Links
Advertisement
Table of Contents

Related Manuals for Chauvin Arnoux C.A 10101


Summary of Contents for Chauvin Arnoux C.A 10101
- Page 1 DT - Calibration procedure C.A 10101 C.A 10401 pH-meter & conductivity-meter...
- Page 2 Running the device ......................3 FUNCTIONAL VERIFICATION ...................... 5 ERROR MESSAGES ........................7 FIRMWARE UPDATE ........................8 Firmware update using boot loader ..................8 INSTRUMENT CALIBRATION ..................... 11 Calibration of C.A 10101 ....................11 5.1.1 Requirement ......................11 5.1.2 Calibration connection .................... 11 5.1.3 Calibration operation ....................
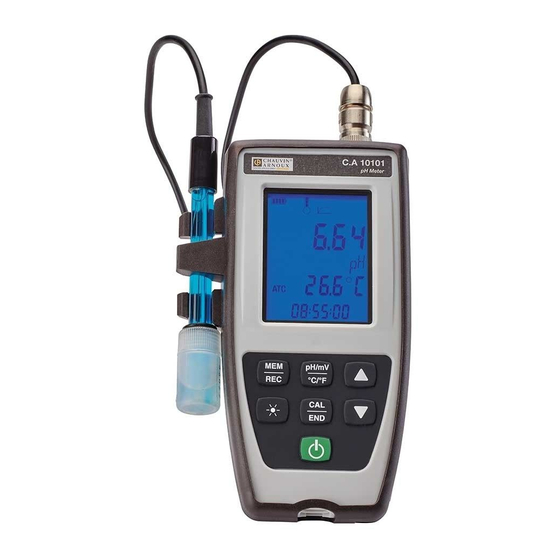
- Page 3 1. SUMMARY GENERAL DESCRIPTION Instrument C.A 10101 C.A 10141 Function pH / ORP meter Conductivity meter RUNNING THE DEVICE There are two ways to power the device: Cells: Open the battery cover at the back of the device and insert 4 AA cells.
- Page 4 USB: open the USB cover at the bottom of the device and connect a micro USB type B cable in. On the other side, connect to a powered computer or a USB wall plug. The device should start. If not, press power button for two seconds.
- Page 5 This process confirms that the device can work properly but it does not verify the device’s specifications. Power up the device with cell as seen previously and then follow the process according to the device part number Instrument C.A 10101 or C.A 10141 Needed Computer with Windows ® 7 or later material Micro USB type B cord.
- Page 6 Instrument C.A 10101 or C.A 10141 Press , the last calibration coefficients should be displayed. Do a long press on the same button to back to measurement. Disconnect the sensor, and press : temperature (Manual Temperature Setting) should increase or decrease.
- Page 7 3. ERROR MESSAGES Instrument may detect some errors, and signal these errors displaying “Er.XX”, with XX the error code. Error Signification Action Hardware malfunction detected The instrument must be sent back to customer service. Error in internal memory Format it using Windows. No longer exists on electrochemistry.
- Page 8 4. FIRMWARE UPDATE The procedure is the same for both instrument, but the firmware to download is specific to each ones. IRMWARE UPDATE USING BOOT LOADER MEM FULL COR. REF TEMP cor lin f(T) OFFSET CAL SET Ref 20°C Ref 25°C Figure 1 LCD OFF Start with the instrument off, nothing is displayed on the screen.
- Page 9 Once all buttons are released, LCD screen then shows “COPy” and MEM FULL a virtual USB drive is mounted on the PC: Connect the instrument to the PC with a micro USB cable. SET COR. REF TEMP The user can copy the firmware (file name “firmware.bin”) on the no cor mounted disk.
- Page 10 MEM FULL In case of “Fail”, pressing a button will turn OFF the product. SET COR. REF TEMP no cor cor lin cor f(T) OFFSET CAL SET Ref 20°C Ref 25°C Figure 4 update PASS message...
- Page 11 5.1.2 Calibration connection If you want to power the C.A 10101 with USB, connect it to the USB PC via the USB isolator. Power it on by a long pressing on button.
- Page 12 5.1.3 Calibration operation During this mode, measurement type selection button is disabled. Instrument calibration is done by first entering into calibration MEM FULL mode. SET COR. REF TEMP After a short press on and during the 3 seconds no cor which the last sensor calibration values are displayed, a short cor lin cor f(T)
- Page 13 MEM FULL SET COR. REF TEMP no cor cor lin cor f(T) OFFSET CAL SET Ref 20°C Ref 25°C TEMP: the resistor value to be applied physically in place of MEM FULL the PT1000 is displayed. SET COR. REF TEMP “Set”...
- Page 14 In a second step, the display requests another resistor value (1500 Ohm) to be applied physically in place of the PT1000 is displayed. “Set” blinks waiting for the user to plug the right value of resistor and a short press on to validate and start the calculation of new parameters for the instrument.
- Page 15 MEM FULL SET COR. REF TEMP no cor cor lin cor f(T) OFFSET CAL SET Ref 20°C Ref 25°C MEM FULL SET COR. REF TEMP A long press on will terminate the instrument calibration and return it into measurement mode. “Cancel” is displayed.
- Page 16 MEM FULL When it is finished, the next value required as input is SET COR. REF TEMP displayed. “SET” is again blinking waiting for validation no cor cor lin cor f(T) OFFSET CAL SET Ref 20°C Ref 25°C The instrument waits for the user to apply this voltage by displaying “SET”...
- Page 17 MEM FULL SET COR. REF TEMP no cor cor lin cor f(T) OFFSET CAL SET Ref 20°C Ref 25°C MEM FULL SET COR. REF TEMP A long press on without validating the new setup will terminate the instrument calibration and return it into measurement mode.
- Page 18 Before testing new values, an error screen is displayed if offset MEM FULL and/or gain values are out of range. The device calibration mode is thus left and instrument is back in real time SET COR. REF TEMP measurement mode. no cor cor lin cor f(T)
- Page 19 C.A 10141 ALIBRATION OF 5.2.1 Requirement In order to proceed to the calibration of C.A 10141, it is recommended to use the C.A 10141 powered by batteries. If it used powered by USB, an USB isolator shall be used to connect the C.A 10141 to the PC (You also need an USB cable with a Micro-B connector on one end and a Type A on the other) Following equipment is needed:...
- Page 20 In order to keep good measurement precision and avoid calibration failure, care must be taken for the connection of the resistors via the cable 695780. During conductivity calibration, the device will ask for some resistor value and connection must be done properly as follow: Short circuit (SC): •...
- Page 21 • 2KΩ: OUTER OUTER 2KΩ SIDE 2 (blue) SIDE 1 (red) INNER SIDE INNER SIDE 1 (white) 2 (yellow) • 200Ω: OUTER OUTER 200Ω SIDE 2 (blue) SIDE 1 (red) INNER SIDE INNER SIDE 1 (white) 2 (yellow) • 1Ω: OUTER OUTER 1Ω...
- Page 22 Note: During this mode, measurement type selection button is disabled. Instrument calibration is done by first entering into calibration MEM FULL mode. SET COR. REF TEMP After a short press on and during the 3 seconds no cor which the last sensor calibration values are displayed, a short cor lin cor f(T) press on both MEM/REC and BACKLIGHT will makes the...
- Page 23 Temperature calibration MEM FULL TEMP: the resistor value to be applied physically in place of SET COR. REF TEMP the PT1000 is displayed. “Set” blinks waiting for the user to plug the right value of no cor cor lin cor f(T) OFFSET CAL SET resistor and a short press on...
- Page 24 When there is no more value to use as input, “tESt” is MEM FULL displayed thus allowing the user to check the validity of the new instrument parameters. SET COR. REF TEMP Different values of resistors can be measured to test it. no cor cor lin cor f(T)
- Page 25 MEM FULL SET COR. REF TEMP A long press on will terminate the instrument calibration and return it into measurement mode. “Cancel” is displayed. no cor The values considered will be the ones from the last cor lin cor f(T) calibration.
- Page 26 Conductivity calibration Select VOLT: The first connection to be applied physically in place of the conductivity sensor is displayed. Note: different connection will be required for all steps of calibration: short circuit (SC), open circuit (O.C), 10Mohm, 20kohm, 2 kohm, 200ohm and 1ohm. For each measurement point, The instrument waits for the user to apply the request connection, displaying “SET”...
- Page 27 MEM FULL SET COR. REF TEMP no cor cor lin cor f(T) OFFSET CAL SET Ref 20°C Ref 25°C MEM FULL SET COR. REF TEMP no cor cor lin cor f(T) OFFSET CAL SET Ref 20°C Ref 25°C MEM FULL SET COR.
- Page 28 MEM FULL SET COR. REF TEMP no cor cor lin cor f(T) OFFSET CAL SET Ref 20°C Ref 25°C MEM FULL SET COR. REF TEMP no cor cor lin cor f(T) OFFSET CAL SET Ref 20°C Ref 25°C MEM FULL SET COR.
- Page 29 MEM FULL SET COR. REF TEMP no cor cor lin cor f(T) OFFSET CAL SET Ref 20°C Ref 25°C MEM FULL SET COR. REF TEMP no cor cor lin cor f(T) OFFSET CAL SET Ref 20°C Ref 25°C MEM FULL SET COR.
- Page 30 MEM FULL SET COR. REF TEMP no cor cor lin cor f(T) OFFSET CAL SET Ref 20°C Ref 25°C MEM FULL SET COR. REF TEMP no cor cor lin cor f(T) OFFSET CAL SET Ref 20°C Ref 25°C MEM FULL SET COR.
- Page 31 MEM FULL SET COR. REF TEMP no cor cor lin cor f(T) OFFSET CAL SET Ref 20°C Ref 25°C When there is no more value to use as input, “tESt” is MEM FULL displayed thus allowing the user to check the validity of the new instrument parameters.
- Page 32 MEM FULL SET COR. REF TEMP no cor cor lin cor f(T) OFFSET CAL SET Ref 20°C Ref 25°C...
- Page 33 MEM FULL SET COR. REF TEMP A long press on without validating the new setup will terminate the instrument calibration and return it into measurement mode. “Cancel” is displayed. no cor cor lin The values considered will be the ones from the last cor f(T) calibration.
- Page 36 FRANCE INTERNATIONAL Chauvin Arnoux Group Chauvin Arnoux Group 190, rue Championnet Tél : +33 1 44 85 44 38 75876 PARIS Cedex 18 Fax : +33 1 46 27 95 69 Tél : +33 1 44 85 44 85 Our international contacts Fax : +33 1 46 27 73 89 info@chauvin-arnoux.com...
Need help?
Do you have a question about the C.A 10101 and is the answer not in the manual?
Questions and answers