Table of Contents
Advertisement
Quick Links
Advertisement
Table of Contents

Related Manuals for Ikelite 6146.19


Summary of Contents for Ikelite 6146.19
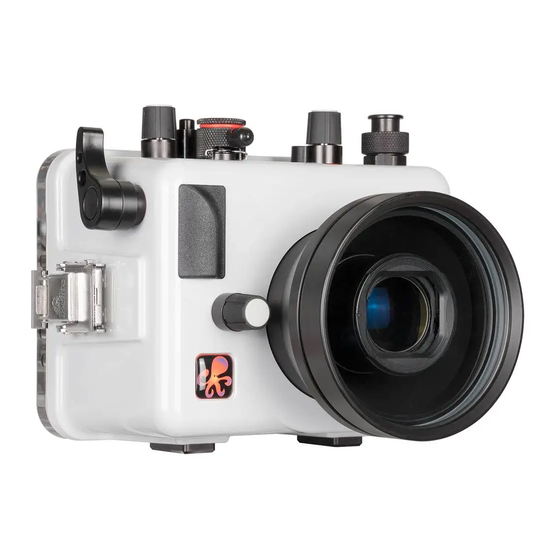
- Page 1 Underwater Housing for Canon PowerShot G1 X Mark II Camera Product Number 6146.19 Product Registration Please register your product at ikelite.com within 15 days of purchase. Our product registration database is the best way for us to contact you in the event of a product update.
-
Page 2: About This Product
About this Product Thank you for your purchase of Ikelite equipment. Please read this instruction manual completely before attempting to operate or dive with this product. Please visit ikelite.com to register your product to receive information on any updates or notices pertaining to your equipment. -
Page 3: Important Notices
Vacuum Kit # 47012. Your housing features one 1/2-20 threaded Accessory Port which may be used for attachment of factory optional or aftermarket housing accessories. Visit ikelite.com for an updated list of factory optional accessories. -
Page 4: Table Of Contents
Contents Product Registration About this Product Included in the Box Specifications Important Notices Accessory Port Getting to Know Your Housing Setting Up Your Camera Pre-Installation Checklist & Initial Camera Settings Setting Up Your Housing Opening the Housing Inserting the Camera Attaching the Hotshoe Closing the Housing Final Check... -
Page 5: Getting To Know Your Housing
Troubleshooting Spare Parts / Optional Accessories Limited Warranty Service and Repairs Contact Us Getting to Know Your Housing Zoom Lever Playback Button Mode Dial Continuous Ring Shutter Electrical Bulkhead Button Finger Grip Lens Port Step Ring Snap Tray Mounts... -
Page 6: Setting Up Your Camera
Power Button Fiber Optic Ports Control Dial Movie Button Q-SET DISP MENU Accessory Port Hole Plug Main Housing O-Ring Setting Up Your Camera Pre-Installation Checklist & Initial Camera Settings 1. Insert a fully charged camera battery. 2. Set Mode Dial to “Av” Aperture Priority, or “M” Manual Mode if shutter speeds faster than 1/60th second are required. - Page 7 3. In MENU: Set AF Frame to “1-point” and Digital Zoom to “Off.” Set AF-Point Zoom to “Off” and Set Servo AF to “On.” Set Continuous AF to “Off” and AF-assist Beam to “Off.” In the Flash Control Built-in Flash Settings Menu, set Flash Mode to “Auto”, Shutter Sync.
- Page 8 8. FLASH USE (read carefully): When using Fiber Optic strobe(s) - RAISE the camera flash BEFORE placing camera in housing. DO NOT attach hotshoe to camera when using a FIBER OPTIC cord and strobe. The camera will detect a connected hotshoe and not allow the internal camera flash to fire.
-
Page 9: Setting Up Your Housing
Diagram B Camera Flash Closed Hotshoe Attached Properly Manual power settings can be selected in the “Flash Control” section of the camera menu. DISP MENU Settings not mentioned should be set to the user’s preference. Setting Up Your Housing Opening the Housing 1. -
Page 10: Inserting The Camera
2. Lid snaps are designed to provide enough force to compress the o-ring for a proper seal. Keep firm pressure against the lid snap while lifting it away. Lid Snap Lock 3. Repeat with remaining lid snap(s). 4. Remove the housing back. Inserting the Camera 1. - Page 11 4. Line up the Mounting Screw with the Camera Tripod Socket. Use a coin or flat head screwdriver (preferred) to tighten the mounting plate to the camera. 1/4-20 Threaded Hole Camera Tripod Socket 1/4-20 Mounting Screw Camera Mounting Plate 5. Pull out on the housing control knobs to move the controls out of the way.
-
Page 12: Attaching The Hotshoe
Attaching the Hotshoe DO NOT attach the Hotshoe if you are using a fiber optic strobe. Once the Hotshoe is connected to the camera, the internal camera flash is disabled. 2. Make sure the Hotshoe and camera contacts are clean. 3. -
Page 13: Final Check
5. Push the lid snaps towards the housing until they are flat against the housing and the lock has engaged. Close opposing lid snaps at the same time. 6. Check the o-ring seal. The o-ring should form a uniform, solid line around the back of the housing. -
Page 14: Setting Up An External Strobe
When a compatible Ikelite DS strobe is attached via sync cord, circuitry built into the housing allows the strobe to communicate directly with the camera to trigger the strobe and adjust its power for... -
Page 15: Attaching A Sync Cord
1. Remove the bulkhead cap. 2. Lightly lubricate the sync cord o-rings. We recommend using only Ikelite silicone lubricant to eliminate the possibility of swelling due to incompatible compounds. 3. Line up the pins and receptacles and gently insert the sync cord plug into the housing bulkhead. -
Page 16: About Fiber Optic Cords
5. If using an Ikelite strobe, set the strobe to TTL. If using a non-Ikelite strobe, set the strobe to manual flash and select a manual power setting. 6. Turn on the strobe(s). 7. Turn on the camera. 8. Take a test photo to ensure that your strobe(s) are functioning properly. -
Page 17: Installing An Accessory Via The Accessory Port
2. Check the accessory fitting o-ring sealing area. Check o-ring and housing o-ring sealing area. All should be clean and free of hair, sand, or other debris. 3. Lightly lubricate o-ring with Ikelite lubricant. Use ONLY Ikelite lubricant. Other manufacturer lubricants can cause the o-ring to swell. -
Page 18: Wide Angle And Macro Close-Up
INON, Subsee, Nauticam, and other manufacturers. The adapter should not be used with 67mm threaded wide angle lenses. The wide angle lens would be too far away from the camera’s lens to provide an improved image. For additional information, refer to the product webpage at ikelite. com. -
Page 19: Maintenance
Maintenance Post-Dive 1. Rinse the housing in fresh water. Rotate the housing’s controls and press each button while submerged in fresh water to flush out any salt or debris to ensure smooth operation on future dives. 2. NEVER leave your housing in the fresh water rinse tank. Collisions with other peoples’... - Page 20 8. Like regulators and other pressure-sensitive equipment, we recommend careful care and cleaning along with annual replacement of the factory seals. Troubleshooting Water enters the housing • Re-clean and re-install the main o-ring. • Take the housing underwater without a camera installed to ensure that the leaking has been corrected.
- Page 21 • Make sure that the camera’s flash is set to fire on every photo. • Check that the fiber optic cord or sync cord is properly attached. Buttons are stuck • Soak the housing in lukewarm fresh water. Depress each button several times while the housing is submerged.
- Page 22 This Ikelite product is warranted against any manufacturing defects for a period of one (1) year from the original date of purchase. Defective products should be returned to Ikelite postage paid. Ikelite will, at its sole discretion, repair or replace such products, and will return to customer postage paid.
- Page 23 Service and Repairs Ikelite is most interested in performing any service to ensure that all products perform as intended. Evidence of purchase date must be provided to obtain warranty service. No prior authorization is required. You may return directly to us or through your dealer. Please include a brief description of the problem, any relevant email correspondence, and/or description of the service request.
- Page 24 If you have any questions about your product or need advice on getting the images you want, please contact us and we’ll do everything we can to help you capture your unique perspective. Ikelite Underwater Systems 50 W 33rd St. Indianapolis, IN 46208 USA (317) 923-4523 ikelite@ikelite.com...
Need help?
Do you have a question about the 6146.19 and is the answer not in the manual?
Questions and answers