Table of Contents
Advertisement
Quick Links
Download this manual
See also:
Manual
Advertisement
Table of Contents

Related Manuals for Ikelite DS-125


Summary of Contents for Ikelite DS-125
- Page 1 6148.11 Canon SX110 IS Thank you for your purchase of Ikelite equipment. Please read this instruction manual completely before attempting to operate or dive with this...
-
Page 2: Table Of Contents
Table of Contents Product Registration ...P. 3 Package Contents ...P. 3 Preparation ...P. 3 Initial Camera Setup...P. 4 Parts of the Housing - Front View ...P. 5 Parts of the Housing - Back View ...P. 6 Opening the Housing ...P. 7 Installing the Camera ...P. -
Page 3: Product Registration
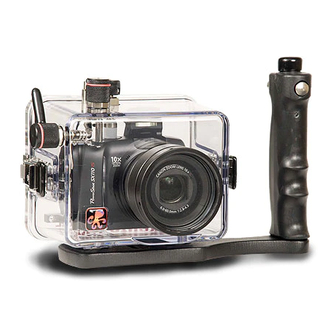
Product Registration Please take a moment to fill out the online Ikelite Product Registration form at http://www.ikelite.com/forms/regForm.htm. Package Contents - Ikelite Digital Housing - Silicone Lubricant - Vinyl Port Cover - Tray and Handle Preparation This product has been water pressure tested at the factory and is depth rated to 200 ft. -
Page 4: Initial Camera Setup
In the Power Saving menu, set Auto Power Down to “Off” and Display Off to “3 min.” NOTE: Make sure that the camera flash is in the “up” or “raised” position before closing your housing with the camera inside. .”... -
Page 5: Parts Of The Housing - Front View
Parts of the Housing - Front View Zoom Dial Shutter Button Lid Snap Mode Dial Lens Lens Port Port External Tray Mounts... -
Page 6: Parts Of The Housing - Back View
Parts of the Housing - Back View Housing Controls 1. Print/Share 2. Playback 3. Face Selector 4. Exposure Compensation ISO/Jump, 6. Macro Power Button 7. FUNC./SET Button 8. Flash 9. Continuous, 10. Display Button 11. Menu Button / Control Dial,... -
Page 7: Opening The Housing
- diagram A. Do not cross thread or over tighten the mounting bolt or you may damage the camera tripod socket threads. 4. RAISE the camera flash. This must be done before closing the housing. RAISE flash before... -
Page 8: Closing The Housing
Closing the Housing 1. Place housing face down in your lap or on flat surface. 2. Check to see that there is an o-ring on the housing back and that it is clean and in its proper location. 3. Guide the back into the housing front. The o-ring should touch the housing all the way around. -
Page 9: Usage
(You can test this above water). See Diffuser/Deflector Installation - page 10. For the best results, we recommend using an external Ikelite Substrobe. The camera’s built-in flash CANNOT be used with optional Wide-Angle or Accessory lenses. -
Page 10: Diffuser And Deflector Installation And Use
Deflector Use The deflector should be installed when using an Ikelite external strobe. The deflector will block and redirect the camera’s flash to the AF35 slave unit or EV-controller which controls the external strobe’s output. -
Page 11: Entering The Water
Lubricant Ikelite provides silicone lubricant with the housing. We recommend you use only Ikelite lubricant on Ikelite products. Other brands may cause the main housing o-ring to swell and not seal properly. Use only enough lubricant to lightly cover the main housing o-ring or lubricate a sticky control. -
Page 12: Housing Maintenance
Housing Maintenance The Ikelite Digital Housing should be given the same care and attention as your other photographic equipment. In addition to normal maintenance, we recommend that the housing be returned to Ikelite periodically to be checked and pressure tested. -
Page 13: Control Maintenance
To lubricate the control, gently pull on the knob until the stainless steel shaft is exposed. Lightly lubricate the shaft, then move the shaft in and out several times. This will lubricate the x-ring in the Ikelite control gland. This should be done before using the housing after a prolonged storage period, or once a week when the housing is in constant use. - Page 14 Control Maintenance - Slide the shaft back into the control gland and gently slide it back and forth a few times without fully removing the shaft from the gland. Replace the knob noting the flat area on the shaft. The set screw in the knob should tighten down against the flat area on the control so the knob does not turn on the shaft.
-
Page 15: Specifications
Specifications Width ...7.0 in. (178mm) including controls Height ...6.0 in. (152mm) including controls Depth ...6.0 in. (152mm) including controls and lens port Weight ...approx. 4.7 lb (2131g) Buoyancy ...slightly negative in freshwater Photo Tips The number one rule in underwater photography is to eliminate as much water between the camera and subject as possible. - Page 16 Photo Tips - continued If you error in exposure, it is better to have the image slightly underexposed rather than overexposed. An overexposed image is missing color information which cannot be adjusted in a photo processing program. A slightly underexposed image has color information that can be adjusted.
-
Page 17: Troubleshooting
If still sticky, see the Control Maintenance section - pages 13 & 14. - Return housing to Ikelite for routine maintenance. - Check that the camera flash is firing when taking a picture. Camera flash should be forced “on.”... - Page 18 Place one or two packs in your housing before each day of diving. - If water droplets or moisture is present around the controls or sealing areas, return the housing to Ikelite for evaluation. - Clean the main housing o-ring and sealing surface of the housing.
-
Page 19: Replacement Parts
- Reassemble the housing without a camera installed and pressure test or take diving. - Return housing to Ikelite for routine maintenance. - Use custom (manual) white balance if available. Reset for each working depth or when attaching a color correcting filter. - Page 20 Recommended Accessories - Tray and Handle(s) Add stability and gripping point(s) for comfortable use of the housing above and below water. Some tray and handles offset the slightly positive buoyancy of the housings. Handles offer attachment points for external lighting systems. External Strobes A separate external strobe adds color to restore the warmer colors filtered out by the water as well as to illuminate the subject.
- Page 21 Please Read If Using an EV Manual Controller The EV-Controller used with Ikelite DS Substrobes has two user knobs. One user knob is for setting strobe selection; the other is for pre-flash “P” or non pre-flash “ P .”...
-
Page 22: Technical Support
This Ikelite product is warranted against any manufacturing defects for a period of one (1) year from the original date of purchase. Defective products should be returned to Ikelite postage paid. Ikelite will, at its sole discretion, repair or replace such products, and will return to customer postage paid. -
Page 23: Returning Products For Service
Returning Products for Service Ikelite is most interested in performing any service to ensure that all products perform as intended. Evidence of purchase date must be provided to obtain warranty service. No prior authorization is required. You may return directly to us or through your dealer. - Page 24 Ikelite Underwater Systems 50 West 33rd Street Indianapolis, IN 46208 USA www.ikelite.com 6148.11_Canon_SX110_SX120_02-0711...
Need help?
Do you have a question about the DS-125 and is the answer not in the manual?
Questions and answers