Spectra BlackPearl Rack Mounting Instructions
Converged
Hide thumbs
Also See for BlackPearl:
- User manual (204 pages) ,
- Installation & configuration manual (32 pages)

Subscribe to Our Youtube Channel
Related Manuals for Spectra BlackPearl


Summary of Contents for Spectra BlackPearl
- Page 1 Spectra BlackPearl Converged Storage System Rack Mounting Instructions SpectraLogic.com...
- Page 2 Information furnished in this manual is believed to be accurate and reliable. However, no responsibility is assumed by Spectra Logic for its use. Due to continuing research and development, Spectra Logic may revise this publication from time to time without notice, and reserves the right to change any product specification at any time without notice. Trademarks ArcticBlue, BlackPearl, BlueScale, BlueVision, CC, Spectra, SpectraGuard, Spectra Logic, TeraPack, TFinity, TranScale, and Verde are registered trademarks of Spectra Logic Corporation. SeeVault, Eon Protect, and MigrationPass are trademarks of Spectra Logic Corporation. All rights reserved worldwide. All other trademarks and registered trademarks are the property of their respective owners. Part Number 90990098 Revision F Revision History Revision Date Description October 2014 Initial release. January 2015 Second release. May 2015 Third release. Updated process to include 2U chassis. February 2016 Fourth release. June 2016 Minor correction. May 2019 Updated to reflect new process. May 2019 Rack Mounting Instructions—Spectra BlackPearl Converged Storage System...
-
Page 3: Contacting Spectra Logic
Phone: 1.303.449.0160 Spectra Logic Sales Website: shop.spectralogic.com United States and Canada Europe Phone: 1.800.833.1132 or 1.303.449.6400 Phone: 44 (0) 870.112.2150 Fax: 1.303.939.8844 Fax: 44 (0) 870.112.2175 Email: sales@spectralogic.com Email: eurosales@spectralogic.com To Obtain Documentation Spectra Logic Website: support.spectralogic.com/documentation May 2019 Rack Mounting Instructions—Spectra BlackPearl Converged Storage System... -
Page 4: Before You
Note: These instructions do not apply to the ArcticBlue™ expansion node for the BlackPearl system. ArcticBlue expansion nodes are installed by Spectra Logic Professional Services. If you are not installing any other equipment in the rack, install the BlackPearl WARNING system near the bottom of the rack to prevent the rack from being top-heavy. WARNUNG Wenn Sie nicht die Installation eines anderen Geräts im Rack, installieren Sie die BlackPearl in der Nähe der Unterseite des Racks zu verhindern,... - Page 5 Inner rack rails Attach to the posts of the 19‐inch rack. The chassis‐mounted inner rack rails will slide into the outer rack rails. Outer rack rails Secure the inner rack rail to the chassis (4). Inner rail screws Attach the rail assemblies to the rack (8). Outer rail screws Used with the outer rail screws to attach the rail assemblies to the rack (8). Washers Secure the chassis to the rack (2). Chassis screws Attach to the ends of the outer rack rails, allowing installation of the rack kit in a rack (optional) with circular mounting cutouts. Circular cutout rack adaptors May 2019 Rack Mounting Instructions—Spectra BlackPearl Converged Storage System...
-
Page 6: Prepare Your Site
Keep the following in mind when selecting a rack: Make sure that the distance between the mounting surfaces on the front and rear posts is between 27 inches (68.6 cm) and 36 inches (91 cm). Note: If you are using the adaptors to install the rack‐mount kit in a rack with circular mounting cutouts, the distance between the front and rear posts must be at least 28.5 inches (72.4 cm), and not more than 37.5 inches (95.25 cm). Allow approximately 3 inches (8 cm) of additional depth at the back of the rack for cable clearance. If the rack has a door, allow at least 2 inches (5 cm) clearance between the front door frame and the front mounting posts of the rack to allow the door to close over the BlackPearl front bezel. Check your rack’s specifications to make sure it will accommodate the weight and depth of the BlackPearl chassis. The use of a two‐post rack is not supported. Notes: An enclosed 19‐inch, four‐post rack is available for purchase from Spectra Logic. The rack has two doors and removable side panels. Contact Spectra Logic Sales for more information (see Contacting Spectra Logic on page 3). In earthquake prone areas, provide restraints as necessary. May 2019 Rack Mounting Instructions—Spectra BlackPearl Converged Storage System... - Page 7 Figure 1. This clearance is needed to allow the front door to close over the front bezel. If necessary, move the front mounting posts toward the back of the rack to provide the necessary clearance. 2 in. (5 cm), minimum Front mounting post Door frame Door Figure 1 Ensure clearance between the rack’s front door and the front posts. Identify the location in the rack where you want the BlackPearl system installed. If no other devices are installed in the rack, Spectra Logic recommends mounting the system near the bottom of the rack. May 2019 Rack Mounting Instructions—Spectra BlackPearl Converged Storage System...
- Page 8 Figure 3 Extend the inner rail beyond the outer rail. 3. Flip the rail assembly over so the outer rail is on top and the self‐ locking latch is facing you (see Figure 4). 4. Press the self‐locking latch toward the closest edge of the inner rail and then fully extract the inner rail from the outer rail. Latch Figure 4 Self-locking latch. Figure 5 Press the latch toward the closest outer edge. May 2019 Rack Mounting Instructions—Spectra BlackPearl Converged Storage System...
- Page 9 BlackPearl 4U chassis. position and the BlackPearl 2U chassis. 2. Position the outer rack rail at the desired height in the rack with the open end facing the front of the rack. Make sure the mounting hooks are behind the cut‐outs in the posts and face down. 3. Insert the mounting hooks on the open end of the rail into the cut‐outs in the front of the rack. This action also depresses the black tabs used to lock the rail in the rack. (depressed) Hooks Figure 8 Insert the mounting hooks through the cut-outs in the rack. May 2019 Rack Mounting Instructions—Spectra BlackPearl Converged Storage System...
- Page 10 Figure 9 Press the rail down to lock it into place. 5. Repeat Step 2 on page 9 through Step 4 to attach the rear mounting hooks of the outer rack rail to the rear post of the rack. 6. Use a level to make sure that the outer rack rail is level. 7. Using a #2 Phillips screwdriver, secure the outer rail to the rack. a. Install two outer rail screws and washers in the holes above and below the bottom mounting hook in the front mounting bracket to secure the rail to the front post (see Figure 9). b. Install two outer rail screws and washers in the upper and lower holes to secure the back of the outer rail to the rear post. 8. Repeat Step 2 on page 9 through Step 7 to attach the second outer rail to the other side of the rack. 9. Use a level to make sure the installed rails are level in relation to each other. 10. Continue to Install the Inner Rails on page 14. May 2019 Rack Mounting Instructions—Spectra BlackPearl Converged Storage System...
- Page 11 Figure 10 Location of the adaptor labels. 3. With the inside of the outer rail facing upwards, position the adaptor with the label side facing upward, and the square gaps in the side of the adaptor facing toward the end of the outer rail. Outer rail Gaps Label side Figure 11 Position the adaptor with the label side facing up and the gaps facing the outer rail. May 2019 Rack Mounting Instructions—Spectra BlackPearl Converged Storage System...
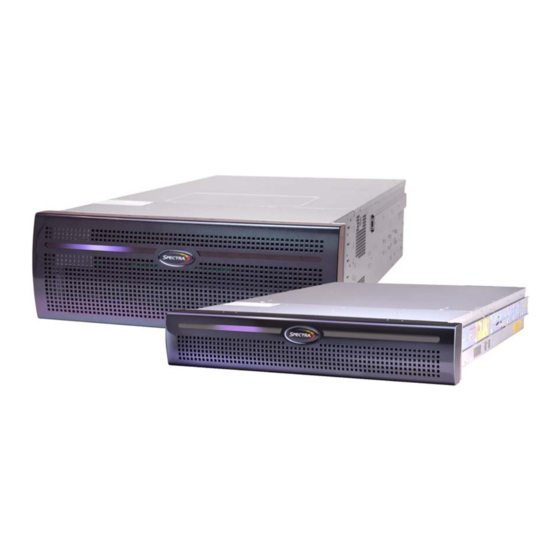
- Page 12 BlackPearl 2U Rack system Figure 14 Relationship between the rack kit Figure 15 Relationship between the rack kit position and the position of the BlackPearl 4U position and the position of the BlackPearl 2U chassis. chassis. May 2019 Rack Mounting Instructions—Spectra BlackPearl Converged Storage System...
- Page 13 Install the Outer Rail Using Adaptors 7. Position the outer rack rail at the desired height in the rack with the open end facing the front of the rack. Make sure the inner side of the outer rack rail is facing toward the inside of the rack. Middle screw hole Figure 16 Position the outer rail. 8. Using a #2 Phillips screwdriver, secure the outer rail to the rack. a. Install two outer rail screws and washers in the middle and lowest screw holes in the front mounting bracket to secure the rail to the front post. b. Install two outer rail screws and washers in the upper and lower holes to secure the back of the outer rail to the rear post. 9. Repeat Step 7 through Step 8 to attach the second outer rail to the other side of the rack. 10. Use a level to make sure the installed rails are level in relation to each other. 11. Continue to Install the Inner Rails on page 14. May 2019 Rack Mounting Instructions—Spectra BlackPearl Converged Storage System...
-
Page 14: Install The Inner Rails
Hooks (12) Front Rear of chassis of chassis Plastic tab Self-locking latch Figure 17 Install the inner rail on the BlackPearl 4U chassis. Hooks (12) Front Rear of chassis of chassis Plastic tab Self-locking latch Figure 18 Install the inner rail on the BlackPearl 2U chassis. - Page 15 5. Using a #2 Phillips screwdriver, secure the rail to the chassis using one screw for the 4U chassis, and two screws for the 2U chassis. Screw Figure 19 Install the inner rail screw on the BlackPearl 4U chassis. Screws Figure 20 Install the inner rail screws on the BlackPearl 2U chassis. 6. Repeat Step 2 on page 14 through Step 5 for the other side. May 2019 Rack Mounting Instructions—Spectra BlackPearl Converged Storage System...
-
Page 16: Slide The Chassis Into The Rack
Slide the Chassis into the Rack LIDE THE HASSIS INTO THE The Spectra BlackPearl 4U system weighs between 66.6 lb (30.2 kg) and 97.8 lb WARNING (44.4 kg) depending on how many drives are installed. Spectra Logic requires using two people, or using a lift to support the weight of the system while installing it into, or removing it from a rack. - Page 17 5. While supporting the front of the chassis with one hand or a lift, press the self‐locking latches on both inner rails downward. Push the chassis the rest of the way into the rack until the mounting brackets on the front of the chassis are flush with the front posts of the rack. Locking latch Figure 22 Press the self-locking latch downward. 6. Using a #2 Phillips screwdriver, install one chassis screw into the hole in the mounting bracket on each side of the chassis to secure the chassis to the rack. Do not over‐tighten the screw. Mounting bracket Screw Figure 23 Secure the chassis to the rack. 7. Attach the front bezel if you removed it in Step 2 on page 16. May 2019 Rack Mounting Instructions—Spectra BlackPearl Converged Storage System...
Need help?
Do you have a question about the BlackPearl and is the answer not in the manual?
Questions and answers