
Related Manuals for Breville LOV600


Summary of Contents for Breville LOV600
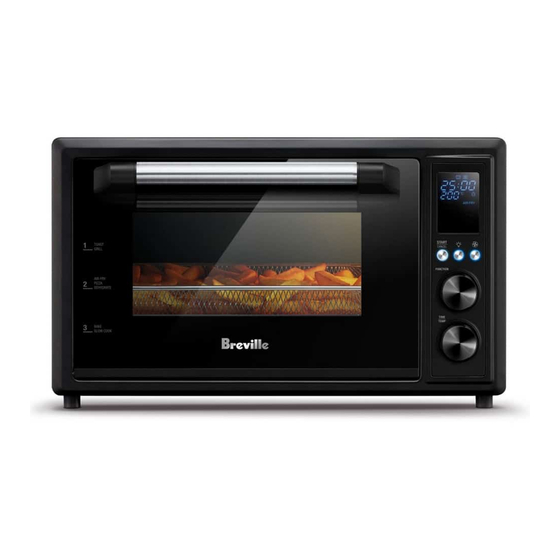
- Page 1 Multi Oven Air Fryer Instruction Book - Suits all LOV600 models LOV600BLK_ANZ_IB_B20.indd 1 21/2/20 2:41 pm...
-
Page 2: Table Of Contents
BREVILLE Contents RECOMMENDS SAFETY FIRST 2 Breville recommends safety first At Breville we are very safety 8 Components conscious. We design and 9 Functions List manufacture consumer 10 Before first use products with the safety of you, 12 Functions our valued customer, foremost –... - Page 3 • Do not place the oven near the They may catch fire. If this occurs, edge of a bench or table during please keep the oven door closed operation. and switch off and unplug oven until flame has extinguished. • Ensure the surface is level, clean and free of water and other •...
- Page 4 • Caution should be exercised • Do not insert oversized foods when using lids in the oven, as into the oven as they create risk pressure build up in a covered of fire or electric shock. pan or dish which may cause •...
- Page 5 • The use of any accessory Do not store any item on attachments not recommended top of the oven when in use by Breville may cause injuries. and when stored. • Do not place the oven in direct • Do not leave the oven sunlight.
- Page 6 • Any maintenance other than (including children) with cleaning should be performed reduced physical, sensory at an authorised Breville or mental capabilities, or Service Centre. lack of experience and knowledge, unless they have • It is recommended to regularly been given supervision or inspect the appliance.
- Page 7 Return the entire appliance to the nearest authorized Breville Service Centre for examination and/or repair. • The installation of a residual current device (safety switch) is recommended to provide additional safety protection when using electrical appliances. It is advisable...
- Page 8 Components A. Large 28 litre capacity F. Crumb tray B. 3 optimised rack height positions G. Wire rack C. Dual-wall tempered glass door H. Air Fry basket D. Cool touch handle for safe and easy I. Baking tray handling J. Rotisserie rod, spikes and handle E.
-
Page 9: Functions
Functions K. LED screen L. START/CANCEL button M. FUNCTION dial TOAST AIR FRY N. TIME/TEMPERATURE dial/ BAKE ROTISS Toast darkness control GRILL PIZZA O. CONVECTION (FAN FORCED HIGH/LOW) button SLOW DEHY COOK P. OVEN LIGHT button KEEP PRE- WARM HEAT START CANCEL FUNCTION... - Page 10 Before first use This guide is designed for first time use. For safety and more information, refer to the rest of the Instruction Book. PREPARING THE OVEN 8. Turn the FUNCTION dial to the right until the indicator reaches the PIZZA function. Before first use, please run the oven empty for 9.
- Page 11 OVEN FUNCTIONS OVERVIEW FUNCTION RACK DEFAULT CONVECTION HEATING TEMP DEFAULT TIME KEEP PRE- POSITION TEMP ELEMENTS RANGE COOK TIME RANGE WARM HEAT FORCED ADJUST ADJUST TIME TIME TOAST MIDDLE OR 230°C Top & Bottom 230°C BROWNING SETTING 4 BROWNING (FOOD SETTINGS DEPENDANT) BAKE...
-
Page 12: Slow Cook
TIME TEMP Functions OPERATING YOUR BREVILLE OVEN REDUCE INCREASE 1. Position the wire rack so the spokes face TEMPERATURE TEMPERATURE upward and insert it into the desired 5. For settings without a preheat time rack position. The rack positions are... - Page 13 NOTE The cooking cycle can be stopped at any time by pressing the START/CANCEL button. This will cancel the cycle and the button backlight will illuminate white. TOAST AIR FRY NOTE BAKE ROTISS Press the CONVECTION button to choose between no convection or convection. GRILL PIZZA Convection may adjust the temperature to...
- Page 14 AIR FRY FUNCTION The AIR FRY function combines intense heat and maximized airflow to cook foods crispy and brown. 1. Turn the FUNCTION dial until the indicator on the LED screen reaches the AIR FRY function. The top figure on the TOAST AIR FRY LED screen indicates the preset time...
- Page 15 BAKE FUNCTION The BAKE function is ideal for baking cakes, muffins, brownies and pastries. The BAKE function is also ideal for cooking pre-packaged frozen meals such as lasagne and pies. 1. Insert the wire rack, with the spokes facing Place food to be cooked on the rotisserie upward, into the bottom rack height rod by running the rod directly through the position.
- Page 16 10. The timer will automatically begin to count down. The cycle can be stopped at any time by pressing the START/CANCEL button. At the end of the ROTISSERIE cycle, the oven alert will sound. The START/CANCEL button backlight will go out and the LED screen will illuminate blue.
- Page 17 5. The grilling time and temperature can be 1. Insert the wire rack, with the spokes facing upward, into the middle rack adjusted before or during the grilling cycle. height position. a) The grilling time is displayed as the top 2.
- Page 18 8. After the PRE-HEAT alert has sounded, 5. Place food inside covered oven-proof the timer will automatically begin to count cookware, on the centre of the wire rack so down. The cycle can be stopped at any time air will flow around all sides of the food. by pressing the START/CANCEL button.
-
Page 19: Dehydrate
TIPS FOR SLOW COOKING 5. Press the START/CANCEL button to activate the DEHYDRATE function. The 1. Ensure cookware is oven-proof and does not button backlight will illuminate white and exceed 4 kgs when empty. the oven will start. 2. Fill cookware to a minimum of ½ and maximum of ¾... -
Page 20: Replacing The Oven Light
REPLACEMENT BULB Please contact Breville Customer Service Centre for further support. WARNING Only use the light bulb approved by Breville Always unplug oven and let cool before for use in this oven. replacing bulb. 1. Remove the wire rack from the oven before replacing the light. -
Page 21: Care & Cleaning
Cleaning the crumb tray 1. After each use, slide out the crumb tray and Care & Cleaning discard crumbs. Wipe the tray with a soft, damp sponge. A non-abrasive liquid cleanser may be used to avoid build-up of stains. Apply Before cleaning, ensure the oven is turned the cleanser to the sponge, not the tray, before off by removing the power plug from the power... -
Page 22: Troubleshooting
The LED screen will display 'E01' when there is a non-resettable issue with displays 'E01' the appliance. Should this occur, immediately remove the power cord from the power outlet and call Breville Consumer Support. • The LED screen The LED screen will display 'E02' when there is a non-resettable issue with displays 'E02' the appliance. - Page 23 Notes: LOV600BLK_ANZ_IB_B20.indd 23 21/2/20 2:41 pm...
- Page 24 Breville and the Breville Logo are trademarks of Breville Pty Ltd (“Breville”) and Breville's products are distributed in Australia and New Zealand under license. Copyright Breville Pty. Ltd. 2019. All other brand names may be trademarks of their respective owners. Due to continued product improvement, the products illustrated/photographed in this booklet may vary slightly from the actual product.
Need help?
Do you have a question about the LOV600 and is the answer not in the manual?
Questions and answers