
Related Manuals for Breville Smart Oven Air BOV900


Summary of Contents for Breville Smart Oven Air BOV900
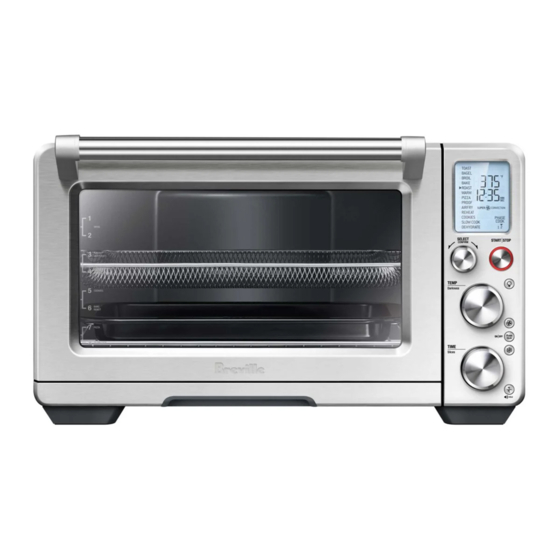
- Page 1 Smart Oven ® Instruction Book - Suits all BOV900 models BOV900_USC_IB_A16.indd 1 25/05/2016 11:47 am...
-
Page 2: Table Of Contents
BREVILLE Contents RECOMMENDS SAFETY FIRST 2 Breville recommends safety first At Breville we are very safety 7 Components conscious. We design and 9 Before first use manufacture consumer 12 Functions products with the safety of you, – OPERATING YOUR our valued customer, foremost BREVILLE OVEN in mind. - Page 3 • Do not use the appliance near • Do not lay cooking utensils, the edge of a countertop or roasting pans or dishes on the table. Ensure the surface is glass door. stable, level, heat-resistant and • Do not leave the door standing clean.
- Page 4 Misuse can cause has been damaged in any way. injury. Immediately stop use and call Breville Consumer Support. • If the appliance is to be: cleaned, moved, assembled or • Servicing should be performed stored, always switch the unit...
- Page 5 SPECIFIC WARNING INSTRUCTIONS To reduce the risk of FIRE, ELECTRIC SHOCK, FOR BOV900 EXPOSURE TO EXCESSIVE UV RADIATION, OR INJURY • We recommend operating TO PERSONS: the oven on a dedicated • Always unplug the oven and circuit separated from other let all parts (including the appliances.
- Page 6 PLUG ® INSTRUCTIONS Your Breville appliance comes with a unique Assist Plug, Your Breville appliance is fitted ® conveniently designed with a with a short power supply cord finger hole to ease removal from to reduce personal injury or the power outlet.
-
Page 7: Components
G. Door handle Reversible for 8 different rack positions. H. Ventilation slots C. 9" x 13" broiling rack I. Crumb tray D. 9" x 13" enamel roasting pan J. Breville Assist Plug ‰ E. Air fry/dehydrate basket BOV900_USC_IB_A16.indd 7 25/05/2016 11:47 am... - Page 8 K. LCD screen L. SELECT/CONFIRM dial and ROTATE REMIND button M. TEMPERATURE dial/toast and bagel darkness control N. TIME dial/toast and bagel slice selection O. START/STOP button P. OVEN LIGHT button Q. CONVECTION button R. PHASE COOK button S. FROZEN FOODS button T.
-
Page 9: Before First Use
6. Unwind the power cord completely ‰ ELEMENT IQ and insert the power plug into a grounded power outlet. The Breville Smart Oven Air features Element ‰ , a cooking technology that adjusts the 7. The oven alert will sound and the LCD ‰... - Page 10 OVEN FUNCTIONS OVERVIEW FUNCTION SUGGESTED OPTIONAL PRESETS PREHEAT RANGE RACK SETTINGS POSITION TOAST FROZEN FOODS Darkness 4 Darkness 1–7 Slices 4 Slices 1–9 BAGEL FROZEN FOODS Darkness 4 Darkness 1–7 Slices 4 Slices 1–10 BROIL 1 – 2 HIGH LOW, MED, HIGH Up to 20 MIN BAKE CONVECTION...
- Page 11 FUNCTION SUGGESTED OPTIONAL PRESETS PREHEAT RANGE RACK SETTINGS POSITION AIRFRY CONVECTION 400°F 120°F – 480°F TEMPERATURE 18 MIN Up to 1:00 HR CONVERSION SUPER CONVECTION FROZEN FOODS FROZEN FOODS ROTATE REMINDER REHEAT Various CONVECTION 325°F 120°F – 480°F TEMPERATURE 15 MIN Up to 2:00HR CONVERSION CONVECTION...
-
Page 12: Functions
For the TOAST and BAGEL settings it indicates the number of slices. Turn the TIME dial to the left to OPERATING YOUR BREVILLE OVEN reduce the cooking time or to the right to increase the cooking time. -
Page 13: Door Sensor
a) When the oven is ready for use, the blinking Always open the door slowly when the wire ‘PREHEATING’ will go out, the oven alert rack is in this position to prevent the rack from will sound and the timer will start counting ejecting too quickly. -
Page 14: Toast
a) The darkness setting is indicated by the NOTE row of circles at the top of the LCD screen. Turn the TEMPERATURE dial to the left to When cooking food on baking pans or other reduce the darkness setting, or to the right cooking vessels on multiple wire racks, it is to increase it. -
Page 15: Bagel
BAGEL FUNCTION As general guide: The BAGEL function crisps the insides of Desired bagel color Setting your cut bagel while only lightly toasting the outside. This function is also ideal for toasting Light 1 or 2 crumpets or thick sliced specialty breads Medium 3, 4 or 5 which require one side to be toasted more than... -
Page 16: Broil
BROIL FUNCTION 7. The timer will be displayed and automatically begin to count down. The The BROIL function is ideal for cooking power level and time can be adjusted open-faced sandwiches, thin cuts of meat, during the broiling cycle by turning the poultry and fish, sausages and vegetables. - Page 17 4. The baking temperature, time and 8. After the PREHEATING alert has sounded, convection settings can be adjusted before the timer will automatically begin to count or during the baking cycle. down. The temperature and time can be adjusted during the baking cycle by turning a) The baking temperature is displayed as the corresponding TEMPERATURE and the top figure on the LCD screen.
-
Page 18: Roast
ROAST FUNCTION 5. Press the START/STOP button to activate the ROAST function. The button backlight The ROAST function is ideal for cooking a will illuminate red, the oven alert will sound variety of meats and poultry. Food will be and the LCD screen will illuminate orange. tender and juicy on the inside and roasted to The LCD screen will indicate a blinking perfection on the outside. -
Page 19: Warm
WARM FUNCTION 5. The temperature, time and convection settings can be adjusted before or during The WARM function maintains hot foods at the warming cycle. the recommended temperature to prevent a) The warming temperature is displayed bacterial growth, 160°F/70°C or above. as the top figure on the LCD screen. -
Page 20: Pizza
PIZZA FUNCTION 5. Press the START/STOP button to activate the PIZZA function. The button backlight The PIZZA function melts and browns cheese will illuminate red, the oven alert will sound and toppings, while crisping up the pizza crust. and the LCD screen will illuminate orange. 1. -
Page 21: Proof
PROOF FUNCTION A note on pizza stones When using a pizza stone, it is necessary to The PROOF function is designed to precisely preheat the stone, without a pizza, for optimum hold low temperatures, providing an ideal results. environment for proofing bread, rolls, pizza and other doughs. -
Page 22: Airfry
NOTE You can fit a total of 4 air frying/dehydrating 4. The AIRFRY temperature, time, convection baskets in this oven. Visit www.breville.com and frozen settings can be adjusted before for more information on purchasing additional or during the AIRFRY cycle. -
Page 23: Reheat
REHEAT FUNCTION 5. The reheating temperature, time, convection and frozen settings can The REHEAT function is ideal for gently be adjusted before or during the reheating leftovers without browning or drying reheating cycle. them out. a) The reheating temperature is displayed 1. -
Page 24: Cookies
COOKIES FUNCTION 5. Press the START/STOP button to activate the COOKIES function. The button The COOKIES function is ideal for baking backlight will illuminate red, the oven homemade or commercially prepared cookies alert will sound and the LCD screen will and other baked treats. -
Page 25: Slow Cook
SLOW COOK FUNCTION 5. Place food, inside covered oven-proof cookware, on the center of the wire rack The SLOW COOK function has cooking so air will flow around all sides of the food. profiles designed for long cook times at Close the oven door. -
Page 26: Dehydrate
DEHYDRATE FUNCTION TIPS The DEHYDRATE function combines low and stable heat with maximized airflow to evenly TIPS FOR SLOW COOKING dry out foods without cooking or overheating. 1. Ensure cookware is oven-proof and does not 1. Arrange food evenly on the included exceed 13 pounds when empty. -
Page 27: Phase Cook
6. The timer will be displayed and begin to 3. The arrow will now blink above the ‘2’, indicating you are programming the second count down. The temperature and time can be adjusted during the dehydrating phase of cooking. cycle by turning the corresponding a) Turn the SELECT/CONFIRM dial until the TEMPERATURE and TIME dial. -
Page 28: Replacing The Oven Light
The top of the oven is very hot during and after operation. As a result, storing items on top of the oven is not recommended. The only exception is the optional Breville Bamboo Cutting Board and Serving Tray that fits in the ribbed section on top of the oven. -
Page 29: Care & Cleaning
Cleaning the interior Care & Cleaning The walls on the inside of the oven feature a non-stick coating for easy cleaning. To clean any splattering that may occur while cooking, Before cleaning, ensure the oven is turned wipe the walls with a soft, damp sponge. A non- off by removing the power plug from the abrasive liquid cleanser or mild spray solution power outlet. - Page 30 5. Ensure the door is closed. 6. Store the appliance in an upright position standing level on its support legs. Do not store anything on top. The only exception is the optional Breville Bamboo Cutting Board and Serving Tray. BOV900_USC_IB_A16.indd 30 25/05/2016 11:47 am...
-
Page 31: Troubleshooting
Troubleshooting POSSIBLE PROBLEM EASY SOLUTION • Oven will not switch "ON" Check that the power plug is securely inserted into the outlet. • Insert the power plug into an independent outlet. • Insert the power plug into a different outlet. •... - Page 32 Remove the plug from the power outlet, allow the oven to cool for 15 minutes, then plug back in. • Call Breville Consumer Support if the 'E03' message continues. • The LCD screen The LCD screen will display 'E06' when there is a non-resettable issue with displays 'E06' the appliance.
- Page 33 Smart Oven ® Manuel d'instructions - Convient à tous les modèles BOV900 BOV900_USC_IB_A16.indd 33 25/05/2016 11:47 am...
- Page 34 BREVILLE VOUS Tables des RECOMMANDE matières LA SÉCURITÉ 34 Breville recommande la AVANT TOUT sécurité avant tout 39 Composants Chez Breville, la sécurité 41 Avant la première utilisation occupe une place de choix. 44 Fonctions Nous concevons et fabriquons –...
- Page 35 • Retirez et jetez en lieu sûr • Pour éviter tout risque tout matériel d'emballage et d'électrocution, n'immergez pas promotionnel avant d'utiliser le le cordon, la fiche ou la base four pour la première fois. motorisée dans l'eau (ou tout autre liquide).
- Page 36 • Ne recouvrez pas le plateau • Cet appareil est conçu pour un ramasse-miettes ou toute usage domestique seulement. autre partie du four de papier Ne l'utilisez dans aucun type métallique, car cela entraînera de véhicule en mouvement ni à une surchauffe du four.
- Page 37 62. endommagé de quelque façon. Cessez immédiatement l'usage AVERTISSEMENT et contactez le Soutien aux Pour réduire le risque consommateurs de Breville. D'INCENDIE, • L'entretien doit être effectué D'ÉLECTROCUTION, par un représentant de service D'EXPOSITION EXCESSIVE autorisé. .
- Page 38 Cet appareil contient des COURT CORDON produits chimiques connus de D'ALIMENTATION l'État de la Californie comme Votre appareil Breville est muni pouvant causer le cancer, des d'un court cordon d'alimentation malformations congénitales très sécuritaire qui réduit les ou autres problèmes de risques de blessures ou de reproduction.
-
Page 39: Composants
Réversibles pour 8 différentes positions. H. Évents C. Grilloir de 23 x 33 cm I. Ramasse-miettes D. Lèchefrite en émail de 23 x 33 cm J. Fiche Assist de Breville ‰ E. Panier pour frire à air chaud/déshydrater BOV900_USC_IB_A16.indd 39 25/05/2016 11:47 am... - Page 40 K. Écran ACL L. Cadran SÉLECTION/CONFIRMER et bouton RAPPEL ROTATION M. Cadran de TEMPÉRATURE/coloration de toast & bagel N. Cadran de TEMPS/nombre de tranches de toast & bagel O. Bouton MARCHE/ARRÊT P. Bouton pour LAMPE DE FOUR Q. Bouton de CONVECTION R.
-
Page 41: Avant La Première Utilisation
10 cm (4 po) de chaque côté du four ‰ ELEMENT IQ et de 15 cm (6 po) au-dessus. Le Smart Oven Air de Breville dispose de ® 5. Insérez le ramasse-miettes dans le four. la technologie ELEMENT IQ qui ajuste la ®... - Page 42 SURVOL DES FONCTIONS DU FOUR FONCTION POSITION RÉGLAGES PRÉRÉGLAGES PRÉ- ÉCHELLE DE GRILLE OPTIONNELS CHAUFFAGE SUGGÉRÉE TOAST FROZEN Coloration 4 Coloration 1-7 (CONGELÉS) Tranches 4 Tranches 1-9 BAGEL FROZEN Coloration 4 Coloration 1-7 (CONGELÉS) Tranches 4 Tranches 1-10 BROIL 1 – 2 HIGH (HAUT) BAS, MED, HAUT (GRILLER)
- Page 43 FONCTION POSITION RÉGLAGES PRÉRÉGLAGES PRÉ- ÉCHELLE DE GRILLE OPTIONNELS CHAUFFAGE SUGGÉRÉE PROOF (LEVER) CONVECTION 85°F (30°C) 80°F/27°C - TEMPÉRATURE 1:00 HR 100°F/38°C CONVERSION CONVECTION Jusqu'à 2:00 HR ROTATE (ROTATION) AIRFRY (FRIRE CONVECTION 400°F (205°C) 120°F/50°C - À AIR CHAUD) TEMPÉRATURE 18 MIN 480°F/250°C CONVERSION...
-
Page 44: Fonctions
TOAST et BAGEL, il indique le nombre de tranches. Tournez le cadran de TEMPS vers FONCTIONNEMENT DE la gauche pour réduire le temps de cuisson VOTRE FOUR BREVILLE ou vers la droite pour l'augmenter. CADRAN 1. Insérez la grille à la position désirée. Les DE TEMPS positions de la grille sont imprimées sur le... -
Page 45: Capteur De La Porte
CAPTEUR DE LA PORTE a) Lorsque le four sera prêt à être utilisé, le message 'PREHEATING' Si la porte est ouverte durant la cuisson, la (PRÉCHAUFFAGE) disparaîtra, le signal minuterie fera une pause et la lampe de four sonore se fera entendre et le compte à s'allumera. -
Page 46: Rotation
ROTATE REMIND (ROTATION) FONCTION TOAST Lorsque vous faites cuire des aliments sur La fonction TOAST colore et rend la croûte de plusieurs grilles à la fois, utilisez la fonction votre pain croustillante pendant que l'intérieur Rotate Remind (Rotation) pour vous rappeler est tendre et moelleux. -
Page 47: Bagel
FONCTION BAGEL À titre indicatif : La fonction BAGEL rend l'intérieur (côté Coloration désirée Réglage coupé) du bagel croustillant tout en grillant Pâle 1 ou 2 légèrement la croûte. Cette fonction est idéale pour griller les crumpets ou tranches épaisses Moyenne 3, 4 ou 5 de pain de spécialité... -
Page 48: Griller
FONCTION BROIL (GRILER) À titre indicatif : La fonction BROIL (GRILLER) est idéale Coloration désirée Réglage pour cuire les sandwichs ouverts, les coupes Pâle 1 ou 2 de viande minces, le poulet, le poisson, les saucisses et les légumes. Elle peut aussi servir Moyenne 3, 4 ou 5 à... -
Page 49: Cuire
5. Les réglages de puissance et de temps 3. Tournez le cadran SÉLECTION/ peuvent être ajustés avant ou durant le CONFIRMER jusqu'à ce que la flèche cycle de grillage. indique BAKE (CUIRE) sur l'écran ACL. Le chiffre du haut sur l'écran ACL indique la a) Le chiffre du haut sur l'écran ACL indique température de cuisson préréglée de '325°F', le niveau de puissance de grillage. -
Page 50: Rôtir
FONCTION ROAST (RÔTIR) 6. Une fois le préchauffage terminé, un signal sonore se fera entendre, signifiant que les La fonction ROAST (RÔTIR) est idéale pour aliments peuvent être insérés dans le four. cuire une variété de viande ou de poulet. Les 7. -
Page 51: Garder Chaud
FONCTION WARM (GARDER CHAUD) 5. Appuyez sur le bouton MARCHE/ARRÊT pour activer la fonction ROAST (RÔTIR). La fonction WARM (GARDER CHAUD) Le bouton sera rétroéclairé en rouge, le maintient les aliments à la température signal sonore se fera entendre et l'écran recommandée pour prévenir la croissance ACL s'illuminera en orange. - Page 52 FONCTION PIZZA 5. Les réglages de température, de temps et de convection peuvent être ajustés avant La fonction PIZZA faire fondre et brunit le ou durant le cycle de maintien au chaud. fromage et les garnitures et fait simultanément a) Le chiffre du haut sur l'écran ACL indique croustiller la croûte de la pizza.
-
Page 53: Pizza
5. Appuyez sur le bouton MARCHE/ARRÊT Une note sur les pierres à pizza pour activer la fonction PIZZA. Le bouton Lorsque vous utilisez une pierre à pizza, il est sera rétroéclairé en rouge, le signal sonore nécessaire de la préchauffer, sans pizza, pour se fera entendre et l'écran ACL s'illuminera obtenir de meilleurs résultats. -
Page 54: Lever
FONCTION PROOF (LEVER) 5. Les réglages de température, de temps et de convection peuvent être ajustés avant ou La fonction PROOF (LEVER) est conçue durant le cycle de lever. précisément pour maintenir des températures a) Le chiffre du haut sur l'écran ACL indique basses, créant un environnement idéal pour la température de levée. -
Page 55: Frire À Air Chaud
à air chaud/déshydrater dans ce four. le temps de FRITURE À AIR CHAUD. Si vous désirez vous procurer des paniers Tournez le cadran de TEMPS pour ajuster le supplémentaires, visitez www.breville.com temps jusqu'à un maximum d'une heure. pour plus d'informations. BOV900_USC_IB_A16.indd 55... -
Page 56: Réchauffer
FONCTION REHEAT (RÉCHAUFFER) 5. Les réglages de température, de temps, de convection et pour aliments congelés La fonction REHEAT (RÉCHAUFFER) est peuvent être ajustés avant ou durant le idéale pour réchauffer lentement les restes cycle de réchauffage. d'aliments sans les brunir ni les dessécher. a) Le chiffre du haut sur l'écran ACL indique 1. -
Page 57: Biscuits
FONCTION COOKIES (BISCUITS) 5. Appuyez sur le bouton MARCHE/ ARRÊT pour activer la fonction La fonction COOKIES (BISCUITS) est idéale COOKIES (BISCUITS). Le bouton sera pour cuire les biscuits maison ou achetés, ou rétroéclairé en rouge, le signal sonore se autres pâtisseries. -
Page 58: Mijoter
FONCTION SLOW COOK (MIJOTER) 5. Déposez les aliments dans un plat de cuisson couvert allant au four, et placez- La fonction SLOW COOK (MIJOTER) dispose le au centre de la grille pour faciliter une de profils conçus pour cuire à long terme à bonne circulation d'air autour des aliments. -
Page 59: Déshydrater
3. Tournez le cadran SÉLECTION/ TRUCS CONFIRMER jusqu'à ce que la flèche indique DEHYDRATE (DÉSHYDRATER) TRUCS DE MIJOTAGE sur l'écran ACL. Le chiffre du haut sur l'écran ACL indique la température 1. Assurez-vous que votre plat résiste au four préréglée de '125°F', tandis que le chiffre et ne pèse pas plus de 6 kg/13 lb lorsque du bas indique le temps préréglé... -
Page 60: Phases De Cuisson
7. À la fin du cycle de déshydratation, le 3. La flèche clignotera alors au-dessus du '2', signal sonore se fera entendre, le bouton indiquant que vous programmez la seconde MARCHE/ARRÊT s'éteindra et l'écran ACL phase de cuisson. sera illuminé en blanc. a) Tournez le cadran SÉLECTION/ CONFIRMER jusqu'à... -
Page 61: Remplacer La Lampe De Four
En conséquence, il n'est pas recommandé d'y ranger des objets. La seule exception est la planche à découper/ plateau de service en bambou de Breville conçue pour reposer parfaitement dans la partie nervurée sur le dessus du four. Visitez www.breville.com pour plus d'informations. -
Page 62: Entretien & Nettoyage
Nettoyer l'intérieur Entretien & Les parois internes du four sont recouvertes nettoyage d'un matériau antiadhésif qui facilite le nettoyage. Pour nettoyer les éclaboussures qui Avant de nettoyer le four, assurez-vous qu'il est peuvent survenir durant la cuisson, essuyez éteint en le débranchant de la prise électrique. les parois avec une éponge douce et humide. - Page 63 6. Assurez-vous que l'appareil est en position verticale, de niveau et reposant sur ses pieds. Ne rangez aucun objet sur le dessus du four, la seule exception étant la planche à découper/plateau de service en bambou de Breville. BOV900_USC_IB_A16.indd 63 25/05/2016 11:48 am...
-
Page 64: Guide De Dépannage
Guide de dépannage PROBLÈME POSSIBLE SOLUTION FACILE • Le four ne se met Vérifiez si la fiche d'alimentation est bien insérée dans la prie électrique. • pas sous tension Branchez le cordon d'alimentation dans une prise indépendante. • Branchez le cordon d'alimentation dans une autre prise. •... - Page 65 L'écran ACL affiche 'EO3' si la température excède la limite maximale réglée. Débranchez le cordon d'alimentation de la prise électrique, laissez le four refroidir 15 minutes, puis rebranchez-le. • Appelez le Soutien aux consommateurs de Breville si le message 'EO3' persiste. • L'écran ACL affiche 'EO6' L'écran ACL affiche 'EO6' si l'appareil ne peut être réinitialisé.
- Page 66 Notes BOV900_USC_IB_A16.indd 66 25/05/2016 11:48 am...
- Page 67 BOV900_USC_IB_A16.indd 67 25/05/2016 11:48 am...
- Page 68 Web: www.breville.ca Breville is a registered trademark of Breville Pty. Ltd. A.B.N. 98 000 092 928. Copyright Breville Pty. Ltd. 2016. Due to continued product improvement, the products illustrated/photographed in this booklet may vary slightly from the actual product.
Need help?
Do you have a question about the Smart Oven Air BOV900 and is the answer not in the manual?
Questions and answers