Table of Contents
Advertisement
Available languages
Available languages
Quick Links
Advertisement
Chapters
Table of Contents

Related Manuals for Megasat Countryman GPS Premium


Summary of Contents for Megasat Countryman GPS Premium
- Page 1 Countryman GPS Premium Countryman GPS Professional Deutsch BENUTZERHANDBUCH...
-
Page 2: Table Of Contents
Inhalt 1. Einführung Sicherheitshinweise ............. 03 Kurzbeschreibung ..............03 Richtiger Einsatz und Betrieb ......... 03 Lieferumfang ................04 Bezeichnungen der Teile ..........05 2. Betrieb Anschlussdiagramm ............06 Funktionsbeschreibung ............ 07 Kurzanleitung ................09 3. Programm Update Anschlussdiagramm für Updates ........ 10 4. -
Page 3: Einführung
1. Einführung Sicherheitshinweise Vorsicht - Unsachgemäße Handhabung kann zu schweren Schäden an die- sem Gerät führen. Sie können auch für daraus resultierende weitere Schäden am Gerät verantwortlich gemacht werden. Hinweis – Lesen Sie das Benutzerhandbuch sorgfältig durch bevor Sie mit der Installation beginnen. -
Page 4: Lieferumfang
1. Einführung Lieferumfang • Countryman GPS Premium/Professional • Montageplatte • Bedienpult inkl. Halterung • Dachdurchführung • KFZ-Anschlusskabel • Kabelverschraubung • 12 m Koaxialkabel für Bedienpult (schwarz) • Schraubenset • 12 m Koaxialkabel für Receiver (grau) • Bedienungsanleitung Bezeichnungen des Bedienpultes... -
Page 5: Bezeichnungen Der Teile
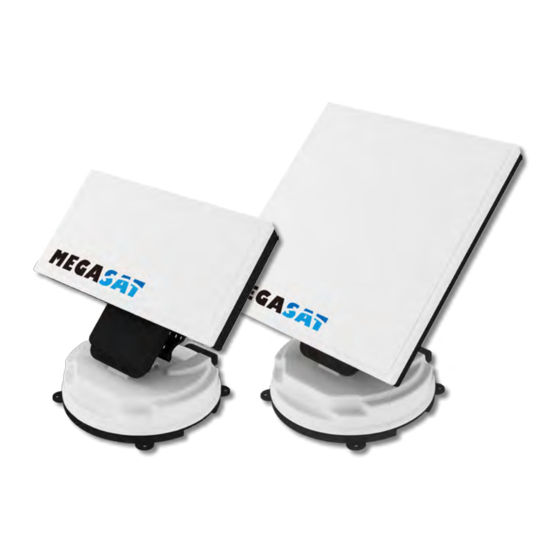
1. Einführung Bezeichnungen der Teile Skew Drehpunkt: -60° ~ +60° Elevation: 5° ~ 90° Verstärkung gegen hohe Windlast Gehäuse: 360° Drehung zum Bedienpult zum Receiver Basisplatte DEUTSCH... -
Page 6: Betrieb
2. Betrieb Anschlussdiagramm Fernseher Receiverkabel (dünnes Kabel) Receiver Bedienpultkabel (dickes Kabel) Pluspol (+) KFZ Anschlusskabel Minuspol (-) Zündungsplus Benutzen Sie das schwarze Steuerkabel zwischen Bedienpult und der Antenne. Das Bedienpultkabel ähnelt dem Antennenkabel, aber man kann sie durch die Stärke und Kennzeichnung unterscheiden. DEUTSCH... -
Page 7: Funktionsbeschreibung
2. Betrieb Funktionsbeschreibung A Einschalten Funktion Beschreibung Bedienung “Netzschalten” betätigen Wenn die alle Kabelverbindungen angeschlossen wurden, betätigen Sie den Netzschalter auf der Oberseite des Bedienpults. “Home/GPS Position” Wenn die Position der Antenne in Grundstellung ist, leuchtet durchgehend leuchten die Anzeigen durchgehend und die Antenne ist einsatzbereit. - Page 8 2. Betrieb D Satellit wechseln Funktion Beschreibung Bedienung “Satellit hoch/runter Wenn Sie den gewünschten Satelliten ändern möchten, Taste” können Sie ihn mit den „hoch/runter“-Tasten ändern. Drücken Sie anschließend die OK Taste, um den neuen “OK” Taste Satelliten auswählen. E Zurück zur „Home Position“ Funktion Beschreibung Bedienung...
-
Page 9: Kurzanleitung
2. Betrieb Kurzanleitung Beschreibung 1. Montieren Sie die Antenne auf einem flachen Untergrund auf dem Dach Ihres Fahrzeugs. 2. Verbinden Sie den linken Anschluss der Antenne (an der Rückseite) mit dem Bedienpult. a) Ein Ende des Steuerungskabel führt zum Bedienpult-Anschluss. b) Das andere verbinden Sie mit der Haupteinheit der Antenne. -
Page 10: Programm Update
“USB Anschluss ist nur für Firmware Updates” Notebook / PC Verbinden Sie einfach das Bedienpult mit dem USB Kabel an Ihren PC. Das USB-Kabel ist nicht im Lieferumfang enthalten. Hinweis: Für Firmware und Satelliten-Updates besuchen Sie bitte unsere Homepage: www.megasat.tv DEUTSCH... -
Page 11: Fehlerbehebung
4. Fehlerbehebung Es gibt eine Reihe von gemeinsamen Themen, die die Empfangsqualität oder den Be- trieb des Countryman GPS beeinflussen können. In den folgenden Abschnitten werden Probleme und Lösungen aufgelistet. A. Keine Funktion beim Einschalten des Bedienpults 1. Überprüfen Sie noch einmal alle Kabelverbindungen ordnungsgemäß. •... -
Page 12: Technische Daten
5. Technische Daten Technische Daten Countryman GPS Premium Countryman GPS Professional Produkt Gewicht 13,5 kg 16,5 kg Einsatz Stationär Stationär Antennengewinn 33.7 dBi @ 12.7GHz 36.1 dBi @ 12.7GHz min EIRP 50 dBW 47 dBW Polarisation Linear (Horizontal / Vertikal) -
Page 13: Abmessungen
5. Technische Daten Abmessungen Countryman GPS Premium 222 mm 511 mm 491 mm Countryman GPS Professional 246 mm 511 mm 638 mm DEUTSCH... -
Page 14: Montageabmessungen
5. Technische Daten Montageabmessungen Countryman GPS Premium Fahrtrichtung Max. Schwenkradius Drehpunkt von 38 cm 44 cm 51,5 cm DEUTSCH... - Page 15 5. Technische Daten Montageabmessungen Countryman GPS Professional Fahrtrichtung Max. Schwenkradius Max. Schwenkradius von 50 cm Drehpunkt 44 cm 66,5 cm DEUTSCH...
-
Page 16: Montageanleitung
6. Montageanleitung Fahrtrichtung Säubern Sie gründlich die Oberfläche. Platzieren Sie die Montageplatte an die gewünschte Position. Legen Sie das Isolierband mit ca. 4 mm Tragen Sie das Silikon mit einem Abstand um die Monatgeplatte. Abstand von ca. 2cm auf. Legen Sie die Platte auf und bohren Sie Füllen Sie die Löcher mit ein wenig die 6 Löcher mit einem 2 mm Bohrer. - Page 17 6. Montageanleitung Tragen Sie Silikon rund um die Achten Sie auf eine saubere Montageplatte auf. Silikonoberfläche. Entfernen Sie das Isolierbband. Setzen Sie die Antenne auf die fertig installierte Montageplatte. Befestigen Sie die Antenne auf der Montageplatte Das Zubehör für die Dachdurchführung. Führen Sie die Kabel durch die Dachdurchführung.
- Page 18 6. Montageanleitung Positionieren Sie die Dachdurchführung mittig zur Antenne mit einem Abstand von ca. 30 cm und bringen Sie das Isolierband mit ca. 4 mm Abstand an. Bohren Sie ein 15 mm dickes Loch Führen Sie die Kabel ein. Legen Sie die Dachdurchführung auf und Tragen Sie Silikon rund um die bohren Sie die Löcher mit einem 2 mm Bohrer.
- Page 19 6. Montageanleitung Achten Sie auf eine saubere Entfernen Sie das Isolierbband. Silikonoberfläche. Anschluss an der Fahrzeugbatterie Zündungsplus Das Kabel für die Stromversorgung. Achten Sie auf die Polung (+/-) der Batterie und dem Zündungsplus des Fahrzeuges. Verbinden Sie das Steuerkabel und die Befestigen Sie das Bedienpult mit der Stromversorgung mit dem Bedienpult.
- Page 20 Stand: v1.1 August 2014 // Technische Änderungen, Druckfehler und Irrtümer vorbehalten. Megasat Werke GmbH | Industriestraße 4a | D-97618 Niederlauer | www.megasat.tv | info@megasat.tv...
- Page 21 Countryman GPS Premium Countryman GPS Professional English User manual...
- Page 22 Content 1. Introduction Safety information ..............03 Short description ..............03 Proper use and operation ..........03 Delivery ..................04 Name of parts ................05 2. Operating Instruction Connection Diagram ............06 Functional Description ............07 Quick Reference ..............09 3.
-
Page 23: Introduction
1. Introduction Safety information Caution – Improper handling by unqualified personnel can cause serious da- mage to this equipment. Unqualified personnel who tamper with this equip- ment may be held liable for any resultant damage to the equipment. Note – Before you begin, carefully read each of the procedures in this manual. If you have not performed similar operations on comparable equipment, do not attempt to perform these procedures. -
Page 24: Delivery
1. Introduction Delivery • Countryman GPS Premium/Professional • Mounting plate • Controller incl. bracket • Cable holder • Car cable • Cable gland • 12 m coaxial cable for controller (black) • Screw set • 12 m coaxial cable for set-top box (grey) •... - Page 25 1. Introduction Name of parts Skew pivot: -60° ~ +60° Elevation: 5° ~ 90° reinforcement against high wind load Main body: 360° turning to controller to set-top box Base ENGLISH...
-
Page 26: Operating Instruction
2. Operating instruction Connection Diagram Television Receiver cable color grey set-top box Controller cable color black plus pole (+) car cable Minus pole (-) Ignition Use the black color 5C Power cable to connect between the controller and antenna. The controller cable looks similar to the antenna receiver cable but you can distinguish them by the color and labeling. -
Page 27: Functional Description
2. Operating instruction Functional Description A Power On Function Description Operation “Power” Switch When the all cable connections are completed, switch on with the “Power Switch” button on the top of the controller. „Home Status“ light If the antenna was at home position, “Home status” light Stand By „ON“... - Page 28 GPS LED light will remain on, regardless if the antenna is pausing or moving. GPS can help to search for the satellite faster & catch the optimum satellite signal, and assist Countryman GPS Premium to acheive the best elevation „GPS“ LED & skew angle.
- Page 29 2. Operating instruction Quick Start Description 1. Take out the antenna from carrying case, and place it on the flat ground (or mount it on the top of the camper) facing South & no obstacle. 2. Connect the left port of the antenna, which located at the rear of the main unit, to the controller using controller cable.
-
Page 30: Program Update
Mini USB (A Typ) “USB port only for firmware updates” Notebook / PC Simply connect the Controller to PC using USB cable. USB cable is not included in the package. Note: For frimware and satellite updates, please visit our homepage: www.megasat.tv ENGLISH... -
Page 31: Troubleshooting
4. Troubleshooting There are a number of common issues that can affect the signal reception quality or the operation of the Countryman GPS. The following sections address these issues and po- tential solutions. A. No function when you power on the Controller 1. -
Page 32: Specifications
5. Specifications Specifications Countryman GPS Premium Countryman GPS Professional Product Weight 13,5 kg 16,5 kg Work Condition Stationary Stationary Antenna Gain 33.7 dBi @ 12.7GHz 36.1 dBi @ 12.7GHz Min EIRP 50 dBW 47 dBW Polarization Linear (Horizontal / Vertical) -
Page 33: Dimensions
5. Specifications Dimensions Countryman GPS Premium 222 mm 511 mm 491 mm Countryman GPS Professional 246 mm 511 mm 638 mm ENGLISH... -
Page 34: Mounting Dimensions
5. Specifications Mounting Dimensions Countryman GPS Premium direction of travel Max. radius of 38 cm pivot point 44 cm 51,5 cm ENGLISH... - Page 35 5. Specifications Mounting Dimensions Countryman GPS Professional direction of travel Max. radius of 50 cm pivot point 44 cm 66,5 cm ENGLISH...
-
Page 36: Mounting Instruction
6. Mounting instruction Fahrtrichtung Clean the surface with cleaner. Locate mounting plate in the center of car roof. Attach friction tape outside of the moun- Apply silicone within the guided tape ting plate by 4mm away from plate edges. line but leave 2cm gap from the line. Put back the mounting plate on the sili- Apply silicone on the holes. - Page 37 6. Mounting instruction Apply silicone around mounting plate. Tidy the area silicone applied. Remove friction tape and get dry. The image you will see. Place main unit on the top of fixed plate. Attach the antenna to the mounting plate Equipment to initiate Cable holder Insert cables like picture.
- Page 38 6. Mounting instruction Arrange cable holder in front of (30cm apart from) antenna center by facing open side of cable holder toward projected part of the mounting plate. Then attach friction tape outside of cable holder Make 15mm drill hole in the center of Insert Receiver &...
- Page 39 6. Mounting instruction Tidy silicon. Remove friction tape. Connection battery Zündungsplus Power Input Cable Check Car Battery Polarities (+/-) and Ignition Terminal Use Power Input Cable and 5c Power Place the Controller at where you want cable to connect to Controller ENGLISH...
- Page 40 Status: v1.1 August 2014 // Technical changes, misprints and errors reserved. Megasat Werke GmbH | Industriestraße 4a | D-97618 Niederlauer | www.megasat.tv | info@megasat.tv...
Need help?
Do you have a question about the Countryman GPS Premium and is the answer not in the manual?
Questions and answers