Table of Contents
Advertisement
Quick Links
Advertisement
Table of Contents

Related Manuals for Samoa Larius Vega 13:1


Summary of Contents for Samoa Larius Vega 13:1
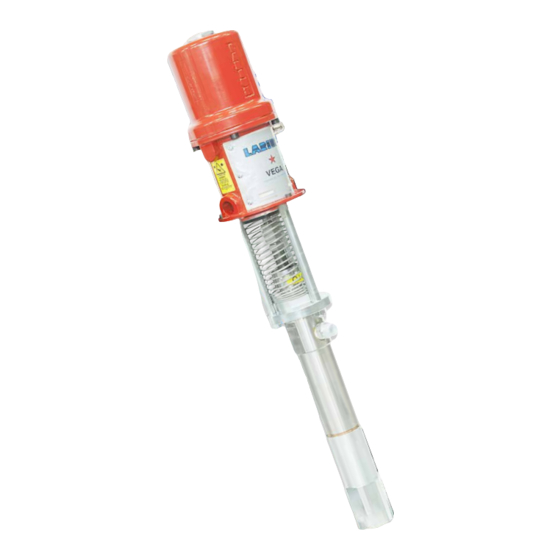
- Page 1 w w w . l a r i u s . c o m VEGA 13:1 Pneumatic pump for extrusion...
- Page 2 This manual is to be considered as an English language translation of the original manual in Italian. The manufacturer shall bear no responsibility for any damages or inconveniences that may arise due to the incorrect translation of the instructions contained within the original manual in Italian. Due to a constant product improvement programme, the factory reserves the right to modify technical details mentioned in this manual without prior notice.
-
Page 3: Table Of Contents
VEGA 13:1 VEGA 13:1 Pneumatic pump for extrusion INDEX WARNINGS .................................2 WORKING PRINCIPLE ..............................3 TECHNICAL DATA ...............................3 DESCRIPTION OF THE EQUIPMENT .........................5 TRANSPORT AND UNPACKING ..........................6 CONDITIONS OF GUARANTEE ..........................6 SAFETY REGULATIONS ..............................6 TYPICAL INSTALLATION .............................7 SETTING-UP ................................8 WORKING ...................................8 CLEANING AT THE END OF THE WORK ........................9 ROUTINE MAINTENANCE ............................9 MANUAL SERVICING OF THE PNEUMATIC MOTOR ....................10... -
Page 4: Awarnings
VEGA 13:1 WARNINGS The table below provides the meaning of the symbols used in this manual in relation to using, earthing, operating, maintaining, and repairing of this equipment. • Read this operator’s manual carefully before using the equipment. • An improper use of this machine can cause injuries to people or things. •... -
Page 5: Bworking Principle
VEGA 13:1 WORKING PRINCIPLE VEGA 13:1 is a medium pressure pneumatic pump used for piston ending with a shovel plate alowing to suck very viscous extrusion and transferring of high viscosity products. products. The pump is essentially constituted of an air motor and of a struc- The ratio 13:1 means that the outlet pressure of material is 13 ture called "material pumping group"... - Page 6 VEGA 13:1 L/MIN. 2000 17,5 1750 1500 12,5 1250 1000 GPM 0 L/MIN. PUMP DELIVERY BLACK CURVE: PRODUCT EXIT PRESSURE GREY CURVE: AIR CONSUMPTION 7 bar (100 psi) 5 bar (70 psi) 3 bar (40 psi) Fig. 1C www.larius.com REV. 01 - 06/2020 - Cod. 150143...
-
Page 7: Ddescription Of The Equipment
VEGA 13:1 DESCRIPTION OF THE EQUIPMENT Fig. 1D Pos. Description Pos. Description Pump motor air inlet Bleeder valve Wet cup Upper packing nut Material outlet Pneumatic motor Material pumping group Shovel plate www.larius.com REV. 01 - 06/2020 - Cod. 150143... -
Page 8: Etransport And Unpacking
VEGA 13:1 TRANSPORT AND SAFETY RULES UNPACKING Read carefully and entirely the following instructions before using the product. Please save these • The packed parts should be handled as indicated in the symbols instructions in a safe place. and markings on the outside of the packing. •... -
Page 9: Htypical Installation
VEGA 13:1 TYPICAL INSTALLATION FOR CONNECTION BETWEEN PUMP, FLEXIBLE HOSE AND SPRAY GUN BEFORE USING THE EQUIPMENT. VEGA PUMP 13 :1 is usually supplied complete with shovel plate • ALWAYS USE THE FLExIBLE HOSE SUPPLIED WITH STAN- DARD KIT. and fastened on a double post ram (see illustration). The double post ram allows to suck the product directly from the drum and to •... -
Page 10: Setting-Up
VEGA 13:1 SETTING-UP PUMP FASTENING ON THE RAM CONNECTION OF THE MATERIAL OUTLET HOSE For the correct fastening of the pump on the ram, use the holes Connect the high pressure hose at the outlet of the pump. placed on the base of the pneumatic motor. It is recommended to tighten the fittings. -
Page 11: Kcleaning At The End Of The Work
VEGA 13:1 CLEANING AT THE END OF THE WORK By "cleaning at the end of the work" is meant the cleaning to • Point the spray gun or the delivery valve at a container and carry out in case of use with a different product or if a long period drain all the product left inside the pump till a clean solvent of storage is foreseen. -
Page 12: Mmanual Servicing Of The Pneumatic Motor
VEGA 13:1 MANUAL SERVICING OF THE PNEUMATIC MOTOR • The pump feeding air pressure shall never be higher than • Should the motor be blocked, proceed as follows: the maximum value provided by the technical data sheet. Failure in respecting this value could cause the blocking of close the air supply to the pump and discharge the valves of the pneumatic motor in the cycle inversion the residual pressure in the circuit... -
Page 13: Ndisassembling The Motor
VEGA 13:1 DISASSEMBLING THE MOTOR • Place the piston to the upper point of its run and unscrew • Remove the screws (N4). the plug (N1). Block the guide rod (N2) with clamping pliers and replace the plug (N1) with a M8 nut (N3). Fig. - Page 14 VEGA 13:1 • By keeping the hands far from the cross piece (N6), press • Remove the valve screws (N9) and check the wear condition on the rocker arm (N7) so that the cross piece (N6) trigs of the gaskets (N10). downwards (drain valves closed).
- Page 15 VEGA 13:1 • Block the roller (N11) with the pliers and by pressing on the spring (N12), remove it from its seat. In this way, it will be possible to remove all the run inversion group. Fig. 10N • Adjust then the distance (A) between the gaskets and the surface of the piston.
-
Page 16: Odisassembly And Reassembly Of The Pumping Unit
VEGA 13:1 DISASSEMBLY AND REASSEMBLY OF THE PUMPING UNIT Always close the compressed air supply and release the pressure in the plant beforecarrying out the disassembly of the pumping group. In case the product being used is toxic, follow the procedure of cleaning indicated in the specific chapter, on to avoid the contact with the product during the disassembly of the pumping group. - Page 17 VEGA 13:1 Necessary tools and equipment Procedure 3.1 Disconnect the pumping group (3a) from the motor (3b) Necessary tools and equipment Procedure 4.1 Unscrew the nuts (4a) using a wrench (4b) www.larius.com REV. 01 - 06/2020 - Cod. 150143...
- Page 18 VEGA 13:1 Necessary tools and equipment Procedure 5.1 Slide the complete pumping group (5a) www.larius.com REV. 01 - 06/2020 - Cod. 150143...
- Page 19 VEGA 13:1 Necessary tools and equipment Procedure 6.1 Remove the component (6a) 6.2 Slide off the component (6b) 6.3 Loosen the ring nut (6c) with pin (6d) 6.4 Unscrew and remove the ring nut (6e) www.larius.com REV. 01 - 06/2020 - Cod. 150143...
- Page 20 VEGA 13:1 Necessary tools and equipment Procedure 7.1 Push downwards the motor piston rod (7a) till the shovel plate comes out of the housing (7b) Necessary tools and equipment Procedure 8.1 Unscrew and remove the components (8a), (8b) e (8c) www.larius.com REV.
- Page 21 VEGA 13:1 Procedure 9.1 Unscrew the cylinder (9a), remove the washer (9b) and the shutter housing (9c) Necessary tools and equipment Procedure 10.1 Unscrew the component (10a) and slide the rod (10b) 10.2 Unscrew the component 10c) and remove the copper rings (10d) www.larius.com REV.
- Page 22 VEGA 13:1 Necessary tools and equipment CLEANER Procedure 11.1 Remove the superior seals 11.2 Clean and lubricate the gasket housing and replace it with the new spare parts (11a) SUPERIOR SEALS NOTE Follow the direction of rotation of gaskets A: Female steel ring cod. 96984 B: Gasket cod.
- Page 23 VEGA 13:1 Necessary tools and equipment CLEANER Procedure 12.1 Remove the intermediate seals 12.1 Clean and lubricate the gasket housing and replace it with the new spare parts (12a) NOTE Follow the direction of rotation of gaskets Direction of assembly INTERMEDIATE SEALS Necessary tools and equipment Procedure...
- Page 24 VEGA 13:1 Necessary tools and equipment CLEANER Procedure 14.1 Unscrew the component (14a) and slide the rod 14.2 Clean and lubricate the gasket housing and replace it with the new spare parts (14b) PTFE Polietilene Direction of assembly www.larius.com REV. 01 - 06/2020 - Cod. 150143...
- Page 25 VEGA 13:1 Necessary tools and equipment CLEANER Procedure 15.1 Unscrew the component (15a) and slide the rod 15.2 Check the wear of components (15b) and (15c) and replace it if necessary 15.3 Clean and lubricate the threaded area and reassemble the component Necessary tools and equipment Procedure 16.1 Insert the component (16a) and screw with the wrench...
- Page 26 VEGA 13:1 Necessary tools and equipment Procedure 17.1 Insert the component (17a) and screw the rod 17.2 Insert the copper rings , reassemble the component (17b) and insert the rod (17c) 17.3 Screw the component (17d) www.larius.com REV. 01 - 06/2020 - Cod. 150143...
- Page 27 VEGA 13:1 Necessary tools and equipment Procedure 18.1 Reassemble the washer and the shutter housing and screw the cylinder (18a) 18.2 Reassemble shovel plate (18c) and insert the motor piston Necessary tools and equipment Procedure 19.1 Insert e screw the ring nut (19a) 19.2 Fix the ring nut (19a) with the pin (19b) www.larius.com REV.
- Page 28 VEGA 13:1 Necessary tools and equipment Procedure 20.1 Insert the component (20a) 20.2 Insert the component (20b) and and screw with the wrench Necessary tools and equipment Procedure 20.1 Insert the complete pumping group (21a) 20.2 Screw the nuts (21b) using the wrench (21c) www.larius.com REV.
- Page 29 VEGA 13:1 Necessary tools and equipment Procedure 22.1 Connect the pumping group (22a) to motor (22b) Necessary tools and equipment Procedure 23.1 Connect the component (23a) to pump (23b) www.larius.com REV. 01 - 06/2020 - Cod. 150143...
- Page 30 VEGA 13:1 Necessary tools and equipment Procedure 24.1 Reassemble the shovel plate (24a) (if provided) www.larius.com REV. 01 - 06/2020 - Cod. 150143...
-
Page 31: Pproblems And Solution
VEGA 13:1 PROBLEMS AND SOLUTION Problem Possible cause Solution The pump does not start Feed air not sufficient Check on the air supply line. Increase the diameter of the feed hose Outlet product line clogged Clean. Disconnect the outlet hose of the product, feed the pump at the minimum pressure and verity if the pump starts without the outlet hose... -
Page 33: Spare Parts
VEGA 13:1 SPARE PARTS Complete pumping motor pag. 32 Spare part list pump group pag. 34 www.larius.com REV. 01 - 06/2020 - Cod. 150143... -
Page 34: Exploded View Of Pneumatic Motor
VEGA 13:1 VEGA PUMP 13:1 RIF. 91805 EXPLODED VIEW OF PNEUMATIC MOTOR WARNING: always indicate code and quantity for each part required. www.larius.com REV. 01 - 06/2020 - Cod. 150143... - Page 35 VEGA 13:1 Pos. Code Description Q.ty Pos. Code Description Q.ty 91805 Complete pneumatic motor pump 18 91032 Traverse guide spring 1 96001 19 91035 Motor piston 2 95075 O-Ring 20 96027 Complete valve screw 3 91028 Motor cylinder 21 91036 Washer 4 96005...
-
Page 36: Rexploded View Of Pumping - Complete Pumping Unit
VEGA 13:1 VEGA PUMP 13:1 EXT EXPLODED VIEW OF PUMPING - COMPLETE PUMPING UNIT CODE 91806 WARNING: always indicate code and quantity for each part required. www.larius.com REV. 01 - 06/2020 - Cod. 150143... - Page 37 VEGA 13:1 Pos. Code Description Q.ty Pos. Code Description Q.ty 96073 O-ring 96889 Seal 91810 Connection sleeve 96988 Piston rod 91808 Standard joining extension cable 96880 Ball clamp pin 3323 Split pin 96879 Ball guide 91809 Connection part for the motor 4060 Ball 91001/1 Lubricant container cup...
-
Page 38: Saccessories
VEGA 13:1 ACCESSORIES SPRAy gUN EXT 85 SPRAy gUN LA 95 Art. Description Art. Description 17500 Manual spray gun Ext 85 11702 Manual spray gun for pneumatic sealing 17519 Fixed fitting 3/8" 17520 Fixed fitting 1/4" 11700 Manual spray gun for automatic sealing 17521 Fixed fitting M16X1,5 SPRAy gUN NOZZLE FOR EXTRUSION SPRAy gUN LA 95 INOX... - Page 39 VEGA 13:1 REgULATOR REgULATOR Art. Description Art. Description 7000 High pressure regulator for recirculation 7130 Automatic regulator for mastics 10-130bar 7030 High pressure regulator 7050 Regulator for mastics EXTRUSION DISCS Art. Description Extrusion disc with single flat gasket for lt.200 510776 drums Extrusion disc with single flat gasket for lt.30...
- Page 40 VEGA 13:1 PNEUMATIC PUMPS FOR EXTRUSION OMEgA PNEUMATIC HOIST TwIN MAST VEgA 45:1 Art. Description Art. Description Art. Description 7458 OMEGA 28:1 91950 Long split version Pneumatic hoist twin mast + 7470 OMEGA 40:1 K500010 91951 Medium split version extruder disc - GHIBLI 24:1 NOVA PNEUMATIC HOIST TwIN MAST + EXTRUDER DISC Art.
-
Page 41: Declaration Of Conformity
VEGA 13:1 DECLARATION OF CONFORMITy Company LARIUS srl Via Antonio Stoppani 21 - 23801 Calolziocorte (LC) ITALY Tel: +39 0341 621152 Fax: +39 0341 621243 E-mail: larius@larius.com Declares under his owns resonsibility that the product: VEgA 13:1 Pneumatic pump for extrusion complies with the directives: - EC Directive 2006/42 Machinery Directive furthermore to the... - Page 42 LARIUS srl Via Antonio Stoppani 21 - 23801 Calolziocorte (LC) ITALY TEL. +39 0341 621152 - Fax +39 0341 621243 - larius@larius.com www.larius.com...
Need help?
Do you have a question about the Larius Vega 13:1 and is the answer not in the manual?
Questions and answers