Gold Note VALORE 425 PLUS User Manual
Hide thumbs
Also See for VALORE 425 PLUS:
- User manual (72 pages) ,
- Owner's manual (21 pages) ,
- Owner's manual (21 pages)
Table of Contents
Advertisement
Quick Links
Advertisement
Table of Contents

Related Manuals for Gold Note VALORE 425 PLUS


Summary of Contents for Gold Note VALORE 425 PLUS
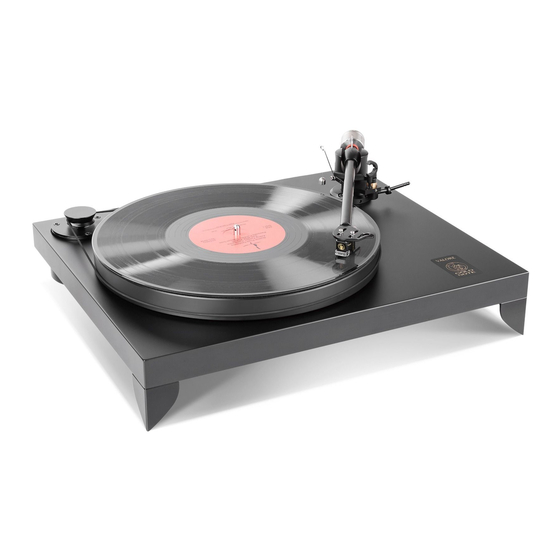
- Page 1 VALORE 425 PLUS THE ITALIAN TURNTABLE USERʼS MANUAL...
-
Page 3: Table Of Contents
INDEX INTRODUCTION............................P. 3 PACKAGE CONTENT ............................ P. 4 KEY FEATURES ............................P. 5 SPECIFICATION AND TECHNICAL FEATURES ....................P. 6 SET-UP INSTRUCTION........................... P. 7 INSTALLING THE PLATTER ........................... P. 8 INSTALLING THE BELT ..........................P. 10 ANTI-SKATING, AZIMUTH, COUNTERWEIGHT ADJUSTMENTS ................P. -
Page 4: Introduction
PACKAGE CONTENT •1 Turntable Valore 425 plus •1 Dust cover (detachable) •1 18v power supply with cable •1 Power adapter •1 B-5 tonearm (with the cable already installed) •1 Cylindrical counterweight 110 g •1 Additional counterweight 28.5 g •1 Platter spindle tip •1 Drive belt... - Page 5 - to achieve higher dampening and improve same time. the audio quality due to the qualities of the material. Every Gold Note product is 100% proudly designed, manufactured and assembled in Italy...
-
Page 6: Key Features
425 Plus , the construction details, the reasons for the technical choices and the originality of the design. • The Valore 425 Plus is a rigid turntable that uses a plinth made of high damped lacquered MDF. • The turntable platter is 23mm thick and made of acrylic, chosen for its dampening quality and stability. -
Page 7: Specification And Technical Features
Motor: 12 Volt High Torque synchronous Platter: 23mm in PTE Platter Spindle: Split-Spindle™ clamping design Platter Bearing: Chromed Steel 5mm ball bearing Tonearm: Gold Note B-5 Dust Cover: transparent acrylic with hinges POWER Power supply: 18V output Power consumption: max 20W... -
Page 8: Set-Up Instruction
When the red LED light shuts down, the unit is ready for the fine speed adjustment. POSITIONING THE VALORE 425 PLUS • PITCH – Your Valore 425 Plus turntable has been designed for press repeatedly the 33⅓rpm button until the correct Hi-Fi systems. speed is reached. -
Page 9: Installing The Platter
INSTALLING THE PLATTER CONTENT OF THE TURNTABLE BOX 1 Platter 2 Oil Vessel 3 Ball bearing 4 Platter Spindle Tip + Platter spindle PLATTER SPINDLE TIP PLATTER PLATTER SPINDLE BEARING HOUSING... - Page 10 INSTALLING THE PLATTER INSTRUCTIONS 1 Remove plug from the middle of the turntable 2 Insert the Ball Bearing into the Bearing Housing* of the turntable taking care to center it on the bottom seat 3 Oil the Platter Spindle as shown in figure 3 4 Insert the Platter Spindle into the Bearing Housing 5 Lay the Platter on the Platter Spindle 6 Secure the Platter Spindle Tip in the threaded hole of the...
-
Page 11: Installing The Belt
INSTALLING THE BELT Wrap the belt around the pulley and the platter as shown in the pictures:... -
Page 12: Anti-Skating, Azimuth, Counterweight Adjustments
ANTI-SKATING, AZIMUTH, COUNTERWEIGHT ADJUSTMENTS ANTI-SKATING nylon wire with bullet counterweight 2 ANTI-SKATING adjustment bar 3 TONEARM COUNTERWEIGHT: to set up the correct tracking force depending on the phono cartridge in use 4 SHELL AZIMUTH ADJUSTMENT: to adjust the alignment of the tonearm head-shell (0,9mm Allen Wrench) INSTALLING THE ANTI-SKATING SYSTEM Slip the loop of the ANTI-SKATING nylon wire over the groove of the ADJUSTMENT BAR Feed the wire through the loop of the SUPPORT HOOP... -
Page 13: Vta Setup
VTA SETUP VTA SETUP Loose the Hex -bolt indicated by the arrow on the collar using the 1,5mm Allen Wrench supplied to lift up or down the arm correctly adjusting the VTA as necessary. Allen-key 1,5 mm Arm board AZIMUTH After the cartridge has been properly installed on the tone arm, adjust the Azimuth of the shell with the supplied 0,9mm Allen... -
Page 14: Power Supply
POWER SUPPLY POWER SUPPLY ADAPTER Is necessary to use the correct AC plug based on your local area. Size: 67.3 x 43.5 x 37.5 mm 43.5 mm PLEASE NOTE: Before plugging the AC adapter plug the round connector indicated here. -
Page 15: Power Adapter And Speed Control
POWER ADAPTER AND SPEED CONTROL CONNECTING THE POWER SUPPLY ADAPTER DC in DC out Use only the original GOLD NOTE AC adapter to power the turntable to ensure the correct functioning. TSC REAR PANEL PLEASE NOTE: before plugging the adapter in to the AC make sure the connector is plugged into the turntable. -
Page 16: Calibration: Cartridge Overhang, Alignment And Speed
CALIBRATION: CARTRIDGE OVERHANG, ALIGNMENT AND SPEED Our turntables and tone arms are always supplied with the Gold Note Calibration Tool to calibrate correctly the setup. With this tool you will be able to adjust: A) Phono Cartridge alignment B) Overhang allignment 66 mm. -
Page 17: Cartridge Alignment
CARTRIDGE ALIGNMENT PHONO CARTRIDGE ALIGNMENT To correctly align the phono cartridge and achieve the best tracking position, point the tip of the phono cartridge into the white circles as in the picture below. The body of the phono cartridge must be aligned to the vertical stripes in order to achieve the best position for musical reproduction. -
Page 18: Detachable Dust Cover
DETACHABLE DUST COVER PICTURE 1 The new Gold Note dust cover features detachable hinges, a new proprietary design developed to let you enjoy your turntable at the best in any situation. The new dust cover is incredibly versatile and allows the usage of the turntable with or without it. -
Page 19: Warranty And Service
WARRANTY AND SERVICE WARRANTY To validate the warranty is necessary to register the unit on the Gold Note internet web site within 15 days from the purchase on the appropriate area of the web site: www.goldnote.it/warranty If the unit is not registered correctly or has been purchased from a different country of the purchaser home address the unit will not be covered by any warranty and the registration will be refused. -
Page 20: Troubleshooting
Gold Note may warm up to 50° Celsius without creating any problem. Noise on startup The turntable produces a slight It is normal for the belt to produce a slight noise rubbing noise upon startup when starting. For spare parts visit the official Gold Note store at: www.akamaiaudio.it... -
Page 21: Important Safety Information
Protect the product from rain and humidity and keep away from heat sources, electric and electronic motors etc. The power Chord supplied must be used only on this unit. Gold Note does not have responsibility for any improper use of this unit. This appliance has a serial number located on the rear panel. - Page 22 IMPORTANT SAFETY INFORMATION 1. Follow the instructions and store them 10. Unplug this apparatus during lightning storms or when unused for long periods of time. 2. Heed all warnings 11. Refer all servicing to qualified service personnel only. 3. Do not use this apparatus near water Servicing is required when the apparatus has been dam- 4.
- Page 23 NOTES...
- Page 24 Gold Note Audio Gold Note Akamai S.r.l. service@goldnote.it www.goldnote.it...
Need help?
Do you have a question about the VALORE 425 PLUS and is the answer not in the manual?
Questions and answers