Table of Contents
Advertisement
Available languages
Available languages
Quick Links
Advertisement
Chapters
Table of Contents

Related Manuals for Gold Note MEDITERRANEO X


Summary of Contents for Gold Note MEDITERRANEO X
- Page 1 USER MANUAL MEDITERRANEO X...
- Page 5 Thank you for purchasing one of our units and welcome into the Gold Note world, where we turn High-End audio and music into a new experience. Maurizio Aterini, founder of Gold Note...
- Page 6 When a cart is used, use caution when moving the cart/apparatus combination to Gold Note does not have responsibility avoid injury from tip-over. for any improper use of this unit. Unplug this apparatus during lightning...
- Page 7 Refer only to qualified Gold Note service personnel for service. GOLD NOTE - Information on the correct management of waste from household Equipment pursuant to the European Directive 2012/19/EU The crossed-out wheelie bin symbol shown on the equipment or its packaging indicates that the product, at the end of its useful life, must be collected separately from other waste to allow its proper treatment and recycling.
-
Page 8: Table Of Contents
| INDEX UNBOXING TECHNICAL SPECIFICATIONS SETTING UP THE TURNTABLE INSTALLING THE TURNTABLE POWER ADAPTER SPEED SELECTION & FEATURES CARTRIDGE CALIBRATION DETACHABLE DUST COVER PRODUCT REGISTRATION TROUBLESHOOTING... - Page 9 | PACKAGE CONTENT MEDITERRANEO X DUST TURNTABLE ANTI- CLAMP COVER SKATING (with spacers) COUNTERWEIGHTS TONEARM DRIVE (pre-installed and calibrated) BELT 28.5g 110g 18V POWER PHONO SPIKE ALLEN KEYS SUPPLY CABLE WASHERS 2.5mm 2.0mm 1.5mm (with cable) PLATTER OIL JAR PROTRACTOR/OVERHANG and...
-
Page 10: Unboxing
| UNBOXING Dust cover spacers User manual Allen keys (3) Belt Anti-skating Stroboscope, GN stylus gauge overhang and Spike washers protractor Ball bearing Platter spindle Platter spindle tip Lifting eye bolt Counterweights Clamp Dust cover Platter Felt mat Power cable Phono cable... -
Page 11: Technical Specifications
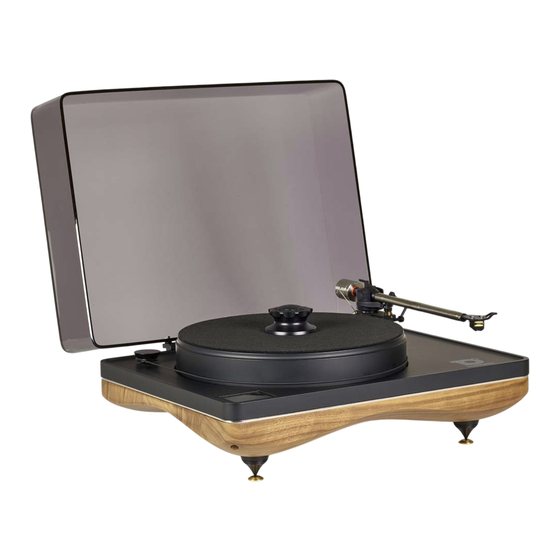
Platter: Aluminium and high-density POM (45mm, 7Kg) Platter spindle: Split-spindle™ clamping design Platter bearing: 4,3mm ceramic ball Tonearm: Gold Note B-7 Ceramic Dust cover: Smoked acrylic with hinges POWER Power supply: 18V output, 100-240V / 50-60Hz Power consumption: max 27W... -
Page 12: Setting Up The Turntable
| SETTING UP THE TURNTABLE FIRST OPERATION POSITIONING THE TURNTABLE Please remove carefully the protecting Your turntable has been designed for Hi-Fi foam and check if all the listed items are systems. It must be protected from direct supplied. sun and humidity. Do not place it near heating sources, electrical and electronic Place the turntable on a flat surface, then motors, mobile phones etc. -
Page 13: Installing The Turntable
| INSTALLING THE TURNTABLE PLATTER Insert the spindle into the bearing Remove the cap from the center of the turntable. housing.* Screw the lifting eye bolt in the platter to Insert the ball bearing into the bearing lift it. housing of the turntable taking care to centre it on the bottom seat. - Page 14 Remove the eye bolt from the platter. Tighten the spindle tip onto the spindle to lock the platter in place. Wrap the belt around the pulley and the platter as shown in the picture. Platter spindle tip...
- Page 15 ANTI-SKATING AND COUNTERWEIGHT Anti-skating: Nylon wire with bullet Tonearm counterweight: to set up the counterweight. correct tracking force depending on the phono cartridge in use. Anti-skating: Adjustment bar. INSTALLING THE ANTI-SKATING SYSTEM Slip the loop of the ANTI-SKATING nylon wire over the groove of the ADJUSTMENT BAR.
-
Page 16: Power Adapter
VTA SETUP Use the 1.5mm Allen key supplied to adjust the VTA. Before moving the tonearm, loosen the hex bolts found in the tonearm collar. We recommend to loosen one hex bolt at a time (usually loosening one is enough to adjust the VTA). -
Page 17: Speed Selection & Features
TURNING ON AND OFF THE TURNTABLE Connect the Mediterraneo X to the power To turn OFF the Mediterraneo X, tap and supply, then tap the display once (Fig. 1). hold the Home button for 3 seconds (Fig. 2). Fig. 1 Fig. - Page 18 33 / 45 Tap the desired speed to start the turntable. To stop it, tap the speed again. When the platter’s rotation is stable, the other functions become available. Opens the Pitch adjustment. Opens the Torque adjustment. Shows the timer viewer to start and stop the time count for the active cartridge.
- Page 19 TORQUE ADJUSTMENT Adjusting the torque allows you to change the amount of force applied by the motor to the pulley and the platter. Torque is not related to rotational speed - which can be changed with Pitch adjustment - and only affects the rotational force. Changing the torque will result in subtle audio differences depending on the combination of cartridge and vinyl.
-
Page 20: Cartridge Calibration
| CARTRIDGE CALIBRATION Our turntables and tone arms are always pre- calibrated at our factory but you can use the GN Calibration tool to adjust the: Phono Cartridge alignment. Overhang. 45rpm and 33 rpm speed (requires a strobe light). SPEED ADJUSTMENTS OVERHANG Check the speed with the help of a strobe To set the correct overhang the Calibration... - Page 21 ALIGNMENT To correctly align the phono cartridge and achieve the best tracking position, point the tip of the phono cartridge into the circles as in the picture below. The body of the phono cartridge must be aligned to the vertical lines.
-
Page 22: Detachable Dust Cover
| DETACHABLE DUST COVER The dust cover features detachable hinges, a new proprietary design developed to let you enjoy your turntable at the best. The hinges provide a stop point at about 90°: in this position the dust cover is stable and held in place by the hinges. -
Page 23: Product Registration
Any service and inspection must be carried out by a Gold Note dealer or distributor so If the unit is not registered correctly or has in case you need any assistance with this been purchased from a different country of product, please contact the seller. -
Page 24: Troubleshooting
| TROUBLESHOOTING PROBLEM CAUSE SOLUTION Levelling the turntable. The turntable is not Use a spirit level to help levelled. yourself and adjust the levelling by screwing or unscrewing the feet. Unscrewing a foot increase the height of that corner. Cleaning the turntable. The turntable is dusty or With EXTREME care use requires cleaning. - Page 25 Vielen Dank, dass Sie sich für eines unserer Geräte entschieden haben und herzlich Willkommen in der Welt von Gold Note, wo wir High-End Audio und Musik in eine neue Erfahrung verwandeln. Maurizio Aterini, Gründer von Gold Note...
- Page 26 Steckern, Steckdosen und mitgelieferte Netzkabel darf nur an an der Stelle, an der sie aus dem Gerät diesem Gerät verwendet werden. austreten. Gold Note übernimmt keine Verwenden Sie nur die vom Hersteller Verantwortung für Schäden durch angegebenen Anbaugeräte/Zubehörteile. unsachgemäße Handhabung.
- Page 27 Für die Wartung wenden Sie sich ausschließlich an qualifiziertes Gold Note Servicepersonal. GOLD NOTE - Information zum korrekten Umgang mit Elektro- und Elektrogeräte-Abfall gemäß der WEEE-Richtlinie 2012/19/EU des Europäischen Parlaments Das Symbol der durchkreuzten Abfalltonne auf Rädern auf Geräten oder...
- Page 28 | INHALT ZUBEHÖR AUSPACKEN TECHNISCHE ANGABEN AUFBAUHINWEISE MONTAGE NETZANSCHLUSS FUNKTIONSÜBERSICHT AUSRICHTUNG TONABNEHMER ABNEHMBARE SCHUTZHAUBE PRODUKTREGISTRIERUNG FEHLERBEHEBUNG...
- Page 29 | PACKUNGSINHALT MEDITERRANEO X SCHUTZHAUBE NETZTEIL (mit Abstandhalter) (mit Kabel) GEGENGEWICHT ÖL VERSCHRAUBUNG FÜR PLATTENTELLER 28.5g 110g TONARMWAAGE TONARM INBUSSCHLÜSSEL (vorinstalliert 2.5mm 2.0mm 1.5mm und kalibriert) ÜBERHANG MIT STROBOSKOPSCHEIBE FILZMATTE ANTI- Für die Feineinstellung der Geschwindigkeit und des SKATING Tonabnehmers...
-
Page 30: Zubehör Auspacken
| ZUBEHÖR AUSPACKEN Abstandhalter Schutzhaube Inbusschlüssel (3) Spindelspitze Anti-skating Lagerachse GN Tonarmwaage Ringschraube Unterlegscheiben Lagerkugel Überhangschablone mit Stroboskopscheibe Antriebsriemen Bedienungsanleitung Öl Gegengewicht Plattenklemme Schutzhaube Plattenteller Filzmatte Netzkabel Phonokabel... -
Page 31: Technische Angaben
Extra dichtes POM und Aluminium (45 mm, 7 kg) Tellerachse: In “Split-SpindleTM” Bauart zur Einspannung des Plattentellers Vertikallagerung: Mit 4,3 mm Keramik-Lagerkugel Tonarm: Gold Note B-7 Ceramic Abdeckhaube: Transparentes dunkelgraues Acryl und abnehmbar NETZVERSORGUNG Netzspannungen: 18V Ausgangsleistung, 100-240V / 50-60Hz Leistungsaufnahme:... -
Page 32: Aufbauhinweise
| AUFBAUHINWEISE INBETRIEBNAHME AUFSTELLUNG DES PLATTENSPIELERS Bitte entfernen Sie vorsichtig alles Ihr Plattenspieler ist für den Gebrauch Verpackungsmaterial und prüfen Sie den in heimische HiFi-Anlagen ausgelegt Inhalt auf Vollständigkeit. und muss vor Feuchtigkeit und direkter Sonneneinstrahlung geschützt werden. Stellen Sie den Plattenspieler auf eine Stellen Sie den Plattenspieler nicht in ebene Unterlage und richten Sie ihn der Nähe von Wärmequellen, Motoren,... -
Page 33: Montage
| MONTAGE PLATTENTELLER Entfernen Sie die Kappe in der Mitte des Setzen Sie die Lagerachse in das Plattenspielers. Lagergehäuse.* Führen Sie die Lagerkugel in das Drehen Sie die Ringschraube in der Lagergehäuse ein und achten Sie dabei Mitte des Plattentellers ein, um diesen darauf, dass sie mittig auf dem Boden anzuheben. - Page 34 Entfernen Sie die Ringschraube von dem Plattenteller. Drehen Sie die Spindelspitze auf der Oberseite ein, um den Plattenteller am Plattenspieler zu befestigen. Installieren Sie den Antriebsriemen wie in der Abbildung, indem Sie ihn zuerst über die Riemenscheibe und dann außen über den Plattenteller legen.
- Page 35 ANTISKATING UND GEGENGEWICHT Gegengewicht für Tonarm: Anti-skating: Faden mit Gewicht Zur Einstellung der korrekten Auflagekraft je nach Tonabnehmer in Gebrauch. Anti-skating: Hebelarm ANTISKATING FADEN ANBRINGEN Die Schlaufe des FADENS am HEBELARM einhängen. Den Faden in die Öse der AUFHÄNGUNG führen. Antiskatingwirkung durch die Position der Schlaufe am HEBELARM justieren.
-
Page 36: Netzanschluss
EINSTELLUNG DER TONARMHÖHE Zur Anpassung des VTA den mitgelieferten 1,5mm-Inbusschlüssel. Bevor Sie den Tonarm bewegen, die Inbusschrauben in der Armplatte lockern. Wir empfehlen, die Schrauben nacheinander zu lösen (normalerweise reicht eine zum Anpassen des VTA). | NETZANSCHLUSS ANSCHLUSS DES NETZTEILS Bevor Sie das Versorgungsgerät an das Netz anschließen bitte zunächst den Stecker mit dem Anschluss des Plattenspielers... -
Page 37: Funktionsübersicht
| FUNKTIONSÜBERSICHT MEDITERRANEO X EIN- UND AUSSCHALTEN Um den Mediterraneo X einzuschalten, Um den Mediterraneo X auszuschalten, schließen Sie die Stromversorgung an und berühren und halten Sie die Home-Taste 3 berühren Sie dann einmal das Display Sekunden lang (Abb. 2). - Page 38 33 / 45 Tippen Sie auf die gewünschte Der Nutzungs-Timer des ausgewählten Geschwindigkeit, um den Plattenspieler zu Tonabnehmers wird angezeigt. Es ist starten. möglich, den Zähler zu starten oder zu Tippen Sie erneut auf Geschwindigkeit, um stoppen. den Plattenspieler zu stoppen. Wenn die Drehung des Plattentellers stabil ist, können andere Funktionen ausgewählt werden.
- Page 39 DREHMOMENTREGELUNG Fünf Einstellungen stehen zur Verfügung: 5 weiße Balken = maximales Drehmoment Die Drehmomentregelung ermöglicht es, die 1 weißer Balken = minimales Drehmoment Krafthöhe zu ändern, die der Motor auf die Tippen Sie immer auf „SAVE“, um die Riemenscheibe und den Plattenteller ausübt. gewählte Einstellung zu übernehmen.
-
Page 40: Ausrichtung Tonabnehmer
| AUSRICHTUNG TONABNEHMER Unsere Plattenspieler und Tonarme werden vor der Auslieferung voreingestellt, aber Sie können anhand der Gold Note Einstellschablone folgendes anpassen: OrientierungTonabnehmer. Überhang. 45rpm und 33 rpm Drehzahl (Stroboskoplampe nötig). DREHZAHLKONTROLLE ÜBERHANG Kontrollieren Sie die Drehzahl mithilfe Für die korrekte Ausrichtung des Überhangs einer Stroboskoplampe während sich der... - Page 41 ORIENTIERUNG TONABNEHMER Für eine korrekte Einstellung des Abtastwinkels und den bestmöglichen Nadelkontakt mit der Plattenrille wird die Spitze des Tonabnehmers über den Kreisen ausgerichtet, wie in der unten stehenden Abbildung gezeigt wird. Der Korpus des Tonabnehmers soll an den vertikalen Hilfslinien ausgerichtet werden.
-
Page 42: Abnehmbare Schutzhaube
| ABNEHMBARE SCHUTZHAUBE Die firmeneigene Staubschutzhaube hat als Besonderheit lösbare Scharniere, sodass Sie den Plattenspieler nach Ihren Vorlieben nutzen können. Die aufgeklappte Haube hält in den Scharnieren bei etwa 90° Öffnung und kann dabei nicht nach hinten kippen. Die Schutzhaube kann schnell und einfach abgenommen werden: die aufgeklappte Haube vorsichtig seitlich nach LINKS schieben, um sie vom Chassis zu lösen. -
Page 43: Produktregistrierung
| PRODUKTREGISTRIERUNG PRODUKTREGISTRIERUNG GEWÄHRLEISTUNG Alle Gold Note Geräte verfügen über eine Bitte registrieren Sie das Produkt innerhalb Gewährleistung bezüglich fehlerhafter von 15 Tagen nach dem Kauf über das Materialien und Verarbeitung. Für zugehörige Formular auf unserer Webseite: Reparaturen und Probleme jeglicher Art www.goldnote.it/produktregistrierung... -
Page 44: Fehlerbehebung
Plattenspielers irreversibel. Verwenden Sie NUR trockene Tücher. Überhitzung des Motors. Der Motor läuft heiß. AC-Synchronmotoren, die von Gold Note verwendet werden, können sich problemlos auf bis zu 50° Celsius erwärmen. Geräusch bei Der Plattenspieler Es ist normal, dass der Inbetriebsetzung. - Page 45 Grazie per aver acquistato una delle nostre unità e benvenuto nel mondo di Gold Note, dove trasformiamo l’audio e la musica High- End in un’esperienza completamente nuova. Maurizio Aterini, fondatore di Gold Note...
- Page 46 Scollega il prodotto dalla corrente durante i Gold Note non ha la responsabilità per temporali o quando non viene utilizzato per ogni uso improprio di questa unità. lunghi periodi di tempo.
- Page 47 GOLD NOTE - Informazioni sulla corretta gestione dei Rifiuti da Apparecchiature Elettriche ed Elettroniche (RAEE) domestiche ai sensi della Direttiva Europea 2012/19/EU Il simbolo del cassonetto barrato riportato sull’apparecchiatura o sulla sua confezione indica che il prodotto alla fine della propria vita utile deve essere raccolto separatamente dagli altri rifiuti per permetterne un adeguato trattamento e riciclo.
- Page 48 | INDICE DISIMBALLO SPECIFICHE TECNICHE PRIMA CONFIGURAZIONE ASSEMBLAGGIO ALIMENTAZIONE PANORAMICA DELLE FUNZIONI CALIBRAZIONE DELLA TESTINA CAPPA PARA-POLVERE REGISTRAZIONE PRODOTTO RISOLUZIONE PROBLEMI...
- Page 49 CONTENUTO DELLA | CONFEZIONE MEDITERRANEO X CAPPA PARA-POLVERE ANTI- (con distanziali) SKATING CONTRAPPESI CLAMP ALIMENTATORE 18V (con cavo) 28.5g 110g CINGHIA DI TRASMISSIONE OLIO PER BRACCIO (già installato e calibrato) GIRADISCHI TAPPETINO CHIAVI A BRUGOLA PERNO DEL CAVO PER VINILI...
-
Page 50: Disimballo
| DISIMBALLO Distanziali cappa para-polvere Manuale utente Brugole (3) Cinghia Anti-skating Protractor / Bilancia per testina Hoverhang e Sottopunta Stroboscopio Cuscinetto a sfera Perno del piatto Centradisco Bullone ad anello Olio Contrappesi Clamp Cappa para-polvere Piatto Tappetino per vinili Cavo di alimentazione Cavo phono... -
Page 51: Specifiche Tecniche
Alluminio e POM ad alta densità (45mm, 7Kg) Perno del piatto: Split-spindle™ Pozzetto del piatto: Sfera di 4,3 mm in ceramica Braccio: Gold Note B-7 Ceramic Cappa para-polvere: Acrilico fumé trasparente e rimovibile ALIMENTAZIONE Alimentazione: 18V in uscita, 100-240V / 50-60Hz Assorbimento nominale:... -
Page 52: Prima Configurazione
| PRIMA CONFIGURAZIONE OPERAZIONI INIZIALI POSIZIONARE IL GIRADISCHI Rimuovere con attenzione gli imballi Il vostro giradischi è stato progettato per avendo cura di controllare che sia l’impianto Hi-Fi domestico e deve essere presente quanto elencato nel contenuto protetto da fonti dirette di luce e umidità. della confezione. -
Page 53: Assemblaggio
| ASSEMBLAGGIO PIATTO Inserire il centradisco nel pozzetto.* Rimuovere il tappo dal centro del giradischi. Avvitare il bullone ad anello al centro del Inserire la sfera nel pozzetto del piatto per sollevarlo. giradischi assicurandosi di posizionarla Posizionare il piatto sul centradisco. perfettamente al centro. - Page 54 Rimuovere il bullone ad anello dal piatto. Avvitare il perno del piatto sulla parte superiore per assicurare il piatto al giradischi. Installare la cinghia di trasmissione facendola scorrere intorno al perimetro esterno della puleggia e successivamente al piatto, come mostrato in figura. Perno del piatto...
- Page 55 ANTI-SKATING E CONTRAPPESI Anti-skating: Filo in nylon con Contrappeso del braccio: Regolabile contrappeso. per aggiustare il peso di tracciamento della testina. Anti-skating: Barra di regolazione. REGOLAZIONE DELL ’ANTI-SKATING Passare l’occhiello del filo dell’Anti- skating sulla barra di regolazione adagiandolo in uno dei 5 solchi. Inserire il filo dell’Anti-skating nell’anello di supporto così...
-
Page 56: Alimentazione
CONFIGURAZIONE VTA Per regolare il VTA utilizzare la chiave a brugola da 1,5mm. Prima di muovere il braccio è necessario allentare i bulloni sulla base del braccio. Consigliamo di allentarli uno alla volta (spesso è sufficiente allentarne uno solo per regolare il VTA). | ALIMENTAZIONE CONNETTERE L ’ALIMENTAZIONE Assicurarsi di aver connesso l’alimentatore al... -
Page 57: Panoramica Delle Funzioni
| PANORAMICA DELLE FUNZIONI ACCENDERE E SPEGNERE MEDITERRANEO X Per accendere Mediterraneo X collegare Per spegnere Mediterraneo X, toccare e l’alimentazione, quindi toccare una volta il tenere premuto il pulsante Home per 3 display (Fig. 1). secondi (Fig. 2). Fig. 1 Fig. - Page 58 33 / 45 Toccare la velocità desiderata per avviare il giradischi. Per fermarlo, toccare di nuovo la velocità. Quando la rotazione del piatto è stabile, è possibile selezionare altre funzioni. Apre il menù di regolazione del Pitch. Apre il menù di regolazione della coppia. Mostra il timer di utilizzo della testina selezionata e permette di avviare o fermare il contatore.
- Page 59 REGOLAZIONE DELLA COPPIA La regolazione della coppia consente di modificare la quantità di forza applicata dal motore alla puleggia e al piatto. La coppia non è correlata alla velocità di rotazione, che può essere modificata con la regolazione del Pitch, e influisce solo sulla forza di rotazione.
-
Page 60: Calibrazione Della Testina
| CALIBRAZIONE DELLA TESTINA I nostri giradischi e bracci vengono sempre pre-calibrati in fabbrica, ma è possibile usare l’apposito strumento per regolare: Allineamento della testina phono. Overhang. Pitch (è richiesta una luce strobo) REGOLAZIONE DELLA VELOCITÀ OVERHANG È possibile controllare il PITCH con l’aiuto di Per impostare correttamente l’Overhang è... - Page 61 ALLINEAMENTO DELLA TESTINA Per allineare correttamente la testina ed ottenere il miglior tracciamento possibile è necessario posizionare la punta della testina al centro delle aree delimitate dai due cerchi in figura qui sotto. Il corpo della testina deve essere allineato con le linee verticali della griglia.
-
Page 62: Cappa Para-Polvere
| CAPPA PARA-POLVERE La cappa para-polvere è dotata di cerniere scomponibili, un design proprietario sviluppato per offrire la miglior esperienza. Le cerniere hanno un punto di stop a 90° e può quindi essere lasciata aperta. Per rimuovere la cappa para-polvere è... -
Page 63: Registrazione Prodotto
| REGISTRAZIONE PRODOTTO REGISTRAZIONE PRODOTTO GARANZIA Si prega di registrare il prodotto tramite Tutti i prodotti Gold Note sono coperti da l’apposito form sul nostro sito entro e non garanzia in caso di malfunzionamento o oltre 15 giorni dall’acquisto: difetti di produzione. -
Page 64: Risoluzione Problemi
| RISOLUZIONE PROBLEMI PROBLEMA CAUSA SOLUZIONE Livellamento del giradischi. Il giradischi non è Con una livella a bolla, livellato. livellare il piatto del giradischi avvitando o svitando i piedi. Svitando un piede si va ad aumentare l’altezza. Pulire il giradischi. Il giradischi è... - Page 65 MANUEL D’UTILISATION EN FRANÇAIS Scannez le QR-Code ou rendez-vous sur https://www.goldnote.it/ download/manual/FR_ MEDITERRANEO-X.pdf...
- Page 68 Designed and handmade in Firenze, Italy www.goldnote.it copyright ©2023 Akamai S.r.l. All rights reserved...
Need help?
Do you have a question about the MEDITERRANEO X and is the answer not in the manual?
Questions and answers