Table of Contents
Advertisement
Advertisement
Table of Contents

Subscribe to Our Youtube Channel
Related Manuals for Bissell POWERGROOM 1988 Series


Summary of Contents for Bissell POWERGROOM 1988 Series
- Page 1 POWERGROOM Canister Vacuum ___________ USER GUIDE 1988 SERIES...
-
Page 2: Important Safety Instructions
This plug will fit in a polarized outlet only one way. If the plug does not fit fully in the outlet, reverse the plug. If it still does not fit, contact a qualified electrician to install a proper outlet. Do not change the plug in any way. www.BISSELL.ca... -
Page 3: What's In The Box
Thanks for buying a BISSELL vacuum! We love to clean and we’re excited to share one of our innovative products with you. We want to make sure your vacuum works as well in two years as it does today, so this guide has tips on using (pages 6-7), maintaining (pages 8-9), and if there is a problem, troubleshooting (page 10). -
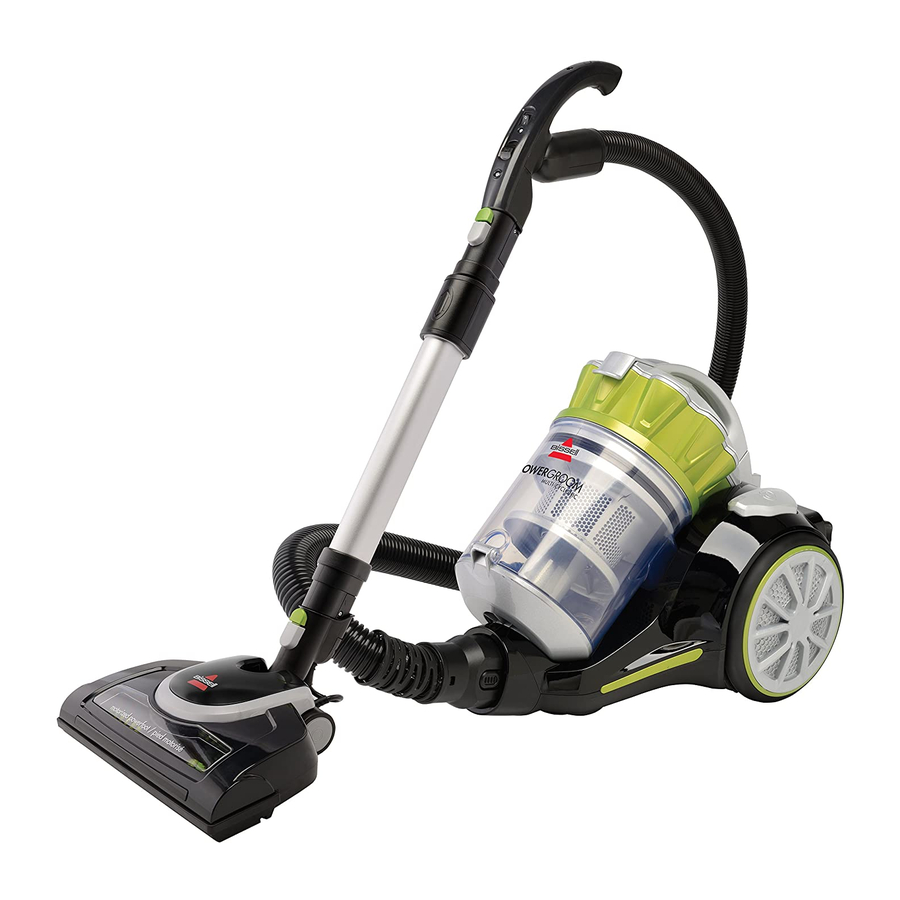
Page 4: Product View
Product View Handle Hose Extension Wand Pre-Motor Filter Dirt Container Powerfoot Dirt Container Release Button ON/OFF Cord Rewind Power Button Button Post Motor Filter www.BISSELL.ca www.BISSELL.ca... - Page 5 CAUTION: The Powerfoot will stand on Accessory clip can be attached to its own best in a taller height setting, the handle for storage. but may still tip over. www.BISSELL.ca www.BISSELL.ca...
-
Page 6: Operating The Product
fl oor or the brush roll to stall. Powerfoot can be used on carpeted and hardfloor surfaces. Height levels range from the low (1) to high (4). For bare floor use a lower height level. For carpet use a higher height level www.BISSELL.ca... -
Page 7: Above Floor Cleaning
Unplug from wall socket and retract Press on-off button to turn vacuum off. cable by pressing cord rewind button. Parts & Supplies For Parts and Supplies, go to www.BISSELL.ca or www.BISSELL.com and enter your model number in the search fi eld. www.BISSELL.ca... - Page 8 Press dirt container release button. Pull dirt container away from vacuum body by the handle. Hold the dirt container over a trash Once the dirt container is emptied, can and press the release button on snap everything back in place. back. www.BISSELL.ca...
-
Page 9: Cleaning The Filters
Rinse under tap to clean and allow to dry for 24 hours before To access the post motor filter, press reassembling. the release button on the back of the vacuum and pull the filter door away. www.BISSELL.ca... -
Page 10: Troubleshooting
There is a crack or hole in the If there is a crack or hole, order a new up dirt Main Hose Main Hose from the BISSELL website There is a clog in the vacuum Remove debris and any other entanglements that may be... -
Page 11: Warranty
Service If your BISSELL product should require service: Contact BISSELL Consumer Care to locate a BISSELL Authorized Service Center in your area. If you need information about repairs or replacement parts, or if you have questions about your warranty, contact BISSELL Consumer Care. - Page 12 See Warranty on page 11 for details. Parts & Supplies For Parts and Supplies, go to www.BISSELL.ca or www.BISSELL.com and enter your model number in the search fi eld. We c ’t wait to ar from y !
Need help?
Do you have a question about the POWERGROOM 1988 Series and is the answer not in the manual?
Questions and answers