Advertisement
Quick Links
Regular cleaning with mild soap on a soft cloth, followed by a clean damp
cloth, then a dry cloth, will preserve the original luster and beauty of this
fine finish of your Romina Furniture product.
THIS CRIB CONFORMS TO APPLICABLE
REGULATIONS PROMULGATED BY THE
CONSUMER PRODUCT SAFETY COMMISION
AND BY THE AMERICAN SOCIETY
FOR TESTING AND MATERIALS
DO NOT THROW OUT THIS
I N S T R U C T I O N B O O K L E T!
NOTE: THE STYLE OF YOUR CRIB OR OF YOUR
MATTRESS SUPPORT MAY VARY FROM WHAT IS
PICTURED IN THE INSTRUCTION SHEET
Thank you for beeing one of our distinguished clients.
Furniture
ASSEMBLY INSTRUCTIONS
FOR YOUR
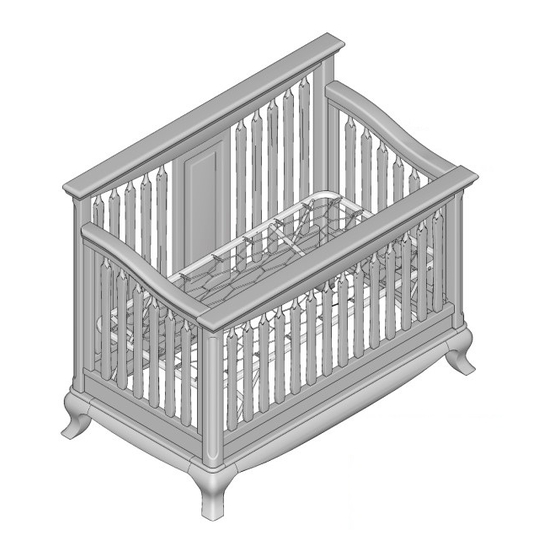
6501 & 7501 SP & TH
CONVERTIBLE CRIBS
IMPORTANT:
PLEASE, READ ALL
INSTRUCTIONS BEFORE
ASSEMBLING! PLEASE,
SAVE INSTRUCTIONS
FOR FUTURE
USE
* READ ALL INSTRUCTIONS BEFORE
ASSEMBLING CRIB. KEEP INSTRUCTIONS
FOR FUTURE USE.
* NEVER USE PLASTIC SHIPPING BAGS OR OTHER
PLASTIC FILM AS MATTRESS COVERS BECAUSE
THEY CAN CAUSE SUFFOCATION.
* INFANTS CAN SUFFOCATE IN GAPS BETWEEN
CRIB SIDES AND A MATTRESS THAT IS TOO SMALL.
Team
www.rominafurniture.com
for updates, special offers and more new designs.
4300 Northlake Ct, Ste E, Charlotte, NC 28216
Phone: 980-585-1460 / contact@rominafurniture.com
Visit
Europe's Kids Furniture
Furniture
www.rominafurniture.com
Advertisement

Subscribe to Our Youtube Channel
Related Manuals for Romina 6501 SP


Summary of Contents for Romina 6501 SP
- Page 1 Regular cleaning with mild soap on a soft cloth, followed by a clean damp cloth, then a dry cloth, will preserve the original luster and beauty of this fine finish of your Romina Furniture product. Thank you for beeing one of our distinguished clients.
- Page 4 Note: During the assembly process whenever using screws or bolts, check each by placing the screw / bolt on the event that you need to call ROMINA the upper diagram which is drawn in actual size. Be sure to use the proper size and shape specified in the instructions.
- Page 5 YOUR 6501 & 7501 SP & TH CONVERTIBLE CRIBS (THE CONVERSION KIT IS SOLD SEPARATELY) NOTE: YOUR CONVERTIBLE CRIB CAN CONVERT INTO A FULL SIZE BED WITH THE PURCHASE OF ROMINA FURNITURE ITEM CODE CKC 7501 (CONVERSION KIT FOR CRIBS, code 7501, SAME FOR BOTH CRIBS).
- Page 6 YOUR 6501 & 7501 SP & TH CONVERTIBLE CRIBS (THE TODDLER RAIL IS SOLD SEPARATELY) NOTE: YOU CAN ATTACH A TODDLER RAIL TO YOUR CRIB WITH THE PURCHASE OF ROMINA FURNITURE ITEM TR 7501 (TODDLER RAIL 7501, SAME FOR BOTH CRIBS).
- Page 7 STEP D (FOR BOTH 6501 & 7501) (Two adults are required to complete this step) WARNING! Take the footboard of your crib (FB) as resulted after completing STEP C COMPLETELY TIGHTEN! and carefully place it back over the rest of the crib. Using 4 smaller Allen bolts (4), 4 washers (10) and the Allen wrench supplied (1), fix...
- Page 8 STEP 3 (FOR BOTH 6501 & 7501) WARNING! Mount the mattress support (MS) on the stabilizing bars as COMPLETELY these resulted after STEP 1, using 4 smaller rounded head 11+10 TIGHTEN! bolts (6), 4 smaller washers (13) and a Phillips screwdriver (not supplied).
- Page 9 STEP B (FOR BOTH 6501 & 7501) top rail Using the supplied Allen wrench (1) completely remove both Allen bolts (x) (previously mounted in factory) then remove the top rail. You will find another factory mounted Allen bolts (y), one for each leg of your footboard.
- Page 10 ASSEMBLY INSTRUCTIONS FOR DAYBED OPTION OF YOUR 6501 & 7501 SP & TH CONVERTIBLE CRIBS WARNING (FOR DAY BED OPTION ONLY): ANY MATTRESS USED IN THIS CRIB MUST BE AT LEAST 27 1/4 INCHES BY 51 5/8 INCHES WITH A THICKNESS NOT EXCEEDING 6 INCHES.
Need help?
Do you have a question about the 6501 SP and is the answer not in the manual?
Questions and answers