Advertisement
Quick Links
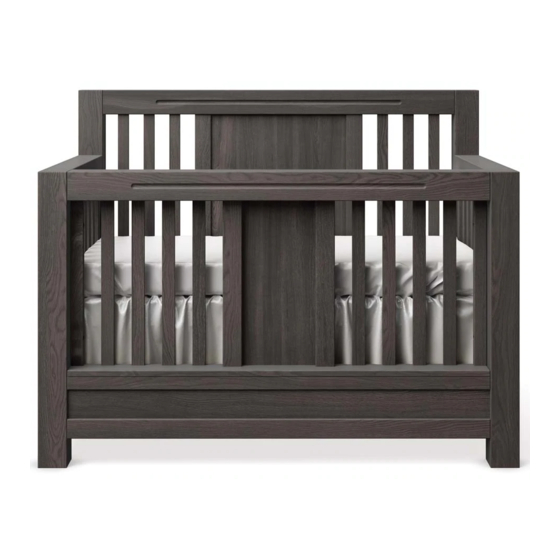
THIS CRIB CONFORMS TO APPLICABLE
REGULATIONS PROMULGATED BY THE
CONSUMER PRODUCT SAFETY COMMISION
NOTE: THE STYLE OF YOUR CRIB OR OF YOUR
MATTRESS SUPPORT MAY VARY FROM WHAT IS
PICTURED IN THE INSTRUCTION SHEET
ASSEMBLY INSTRUCTIONS
FOR
4501
CONVERTIBLE CRIB
* READ ALL INSTRUCTIONS BEFORE ASSEMBLING
CRIB. KEEP INSTRUCTIONS FOR FUTURE USE.
* NEVER USE PLASTIC SHIPPING BAGS OR OTHER
PLASTIC FILM AS MATTRESS COVERS BECAUSE
T H E Y
C A N
* INFANTS CAN SUFFOCATE IN GAPS BETWEEN CRIB
SIDES AND A MATTRESS THAT IS TOO SMALL.
DO NOT THROW THIS INSTRUCTION BOOKLET
IMPORTANT:
PLEASE, READ ALL INSTRUCTIONS
BEFORE ASSEMBLING!
PLEASE, SAVE INSTRUCTIONS FOR
FUTURE USE
Europe's Kids Furniture
20 Corporation Row, Edison, NJ 088 7
Phone
(718) 478 5100, Fax (718) 478 5117
www.rominakidsfurniture.com
YOUR
C A U S E
S U F F O C A T I O N .
Furniture
1
Advertisement

Subscribe to Our Youtube Channel
Related Manuals for Romina 4501


Summary of Contents for Romina 4501
- Page 1 ASSEMBLY INSTRUCTIONS THIS CRIB CONFORMS TO APPLICABLE REGULATIONS PROMULGATED BY THE CONSUMER PRODUCT SAFETY COMMISION YOUR 4501 CONVERTIBLE CRIB * READ ALL INSTRUCTIONS BEFORE ASSEMBLING CRIB. KEEP INSTRUCTIONS FOR FUTURE USE. * NEVER USE PLASTIC SHIPPING BAGS OR OTHER PLASTIC FILM AS MATTRESS COVERS BECAUSE...
- Page 4 Please, refer to this number in each by placing the screw / bolt on the upper diagram which is drawn in actual the event that you need to call ROMINA size. Be sure to use the proper size and shape specified in the instructions.
- Page 5 STEP 1 Attach the stabilizing bars (SB) to the left and right panels & RP) of the crib using 4 medium Allen bolts and 4 washers . Align the tenons attached at the end of the stabilizing bars with the lower holes existing on the inner faces of the left &...
- Page 6 STEP 2 Assemble the mattress support using 4 bigger round head bolts "butterfly" type nuts smaller lock washers (10) and a Phillips screwdriver (not supplied). The lock washer must be attached to the bolt after the bolt passed through the frame and the metallic bracket of the mattress support and before attaching the nut.
- Page 7 STEP 3 Mount the mattress support (MS) on the stabilizing bars as these resulted after STEP , using the four smaller round head bolts , 4 washers (10) and a Phillips screwdriver (not supplied). The lock washer must be attached to the bolt before inserting the bolt through the metallic bracket of the mattress support.
- Page 8 STEP 4 Two adults are required to complete this step) Take the footboard of our crib and carefully lace it on the floor with the drilled side on top, taking care not to scratch its finish. Then, using four medium Allen bolts , 4 washers and the Allen wrench supplied...
- Page 9 STEP 5 Two adults are required to complete this step) Take the head board of our crib (H ) carefully lace it on the part of your crib esulted after completing STEP 4 Fix it using all the 4 bigger Allen bolts washers and the Allen wrench supplied Do not tighten these bolts completely at this...
- Page 10 STEP 7 (Two adults are required to complete this step) Turn your crib with its feet back on the floor. WARNING! sing the Allen wrench supplied, you must tighten completely all the Allen bolts (4+9) & (5+9) remained TIGHTEN COMPLETELY! untighten from all previous steps (see FIGURE 6 REMINDER...
- Page 11 ASSEMBLY INSTRUCTIONS FOR DAY BED OPTION OF YOUR 4501 CONVERTIBLE CRIB WARNING (FOR DAY BED OPTION ONLY): § ANY MATTRESS USED IN THIS CRIB MUST BE AT LEAST 27 1/4 INCHES BY 51 5/8 INCHES WITH A THICKNESS NOT EXCEEDING 6 INCHES.
- Page 12 STEP A STARTING FROM CRIB Using the supplied Allen wrench unscrew completely all the four Allen bolts and washers (previously mounted in factory) located 2 by 2 on the lateral sides of the legs. Then, remove the middle panel (MP) resulted by pulling it upwards and then towards you (see FIGURE A...
- Page 13 STEP B (Two adults are required to complete this step) Carefully, t ake the crib and place it with the footboard FB facing the floor, taking care not to scratch its finish (see FIGURE B Using the supplied Allen wrench and a Phillips screwdriver (not supplied) unscrew completely both Allen bolts (4+9)
- Page 14 STEP C (Two adults are required to complete this step) Attach the wooden rail (WR) and fix it using both smaller Allen bolts supplied Allen wrench Rotate the front stabilizing bar (SB) back to its original position and fix it using both medium Allen bolts and washers (4+9) removed earlier.
- Page 15 YOUR CRIB WITH THE PURCHASE OF ROMINA FURNITURE ITEM TR 4501 T ( ODDLER AIL 4501 ASSEMBLY INSTRUCTIONS FOR TODDLER RAIL CAN BE FOUND INSIDE OF TR 4501 PACKAGE. PLEASE, CONTACT ROMINA FURNITURE OR YOUR LOCAL DISTRIBUTOR FOR MORE INFORMATION.
- Page 16 YOUR 4501 CONVERTIBLE CRIB (THE CONVERSION KIT IS SOLD SEPARATELY) NOTE: YOUR 5501 CONVERTIBLE CRIB CAN CONVERT INTO A FULL SIZE BED WITH THE PURCHASE OF ROMINA FURNITURE ITEM CODE 4501 C ( ONVERSION IT FOR RIBS, code 4501 .
- Page 18 Regular cleaning with mild soap on a soft cloth, followed by a clean damp cloth, then a dry cloth, will preserve the original luster and beauty of this fine finish of your Romina Furniture product. Thank you for beeing one of our distinguished clients.
Need help?
Do you have a question about the 4501 and is the answer not in the manual?
Questions and answers