Table of Contents
Advertisement
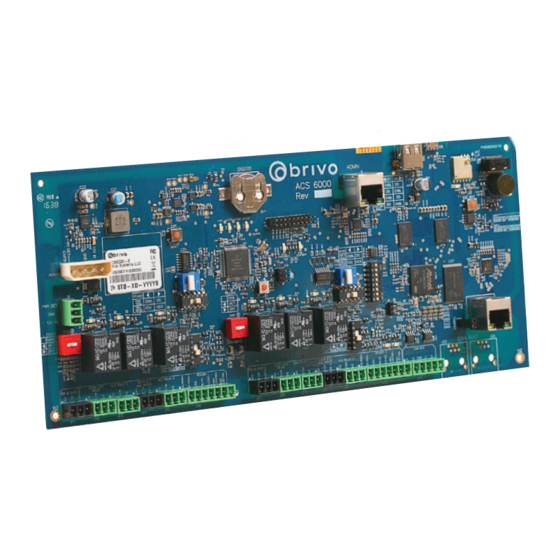
Panel Networking Guide
I
Introduction
ACS6000, ACS300,
II
ACS5000, and IPDC
III
ACS100
Legal Disclaimers ............................................................................ 2
Document Objectives ..................................................................... 4
Terminology ..................................................................................... 4
Registration...................................................................................... 5
Additional Resources ...................................................................... 5
Understanding the Network Environment .................................. 6
Network Requirements .................................................................. 6
Bandwidth Usage ............................................................................ 6
Firewall Considerations .................................................................. 7
-E Control Panels and Proxy Servers ............................................ 7
Accessing the Administrative Interface ........................................ 8
Main Tab ........................................................................................ 12
Networking Tab ............................................................................. 13
System Tab .................................................................................... 22
Hardware Tab ................................................................................ 27
Application Tab ............................................................................. 33
Cellular Module Tab...................................................................... 35
Troubleshooting (ACS6000, ACS300, ACS5000, & IPDC) ........... 36
Accessing the Administrative Interface ...................................... 38
Main Tab ........................................................................................ 40
Networking Tab ............................................................................. 41
System Tab .................................................................................... 48
Hardware Tab ................................................................................ 52
Application Tab ............................................................................. 57
Troubleshooting (ACS100) ........................................................... 59
Advertisement
Table of Contents

Subscribe to Our Youtube Channel
Related Manuals for Brivo ACS6000


Summary of Contents for Brivo ACS6000
-
Page 1: Table Of Contents
System Tab ..................22 Hardware Tab ................27 ACS5000, and IPDC Application Tab ................33 Cellular Module Tab..............35 Troubleshooting (ACS6000, ACS300, ACS5000, & IPDC) ... 36 Accessing the Administrative Interface ........38 Main Tab ..................40 Networking Tab ................41 ACS100 System Tab .................. -
Page 2: Legal Disclaimers
For C-UL Listed applications, the unit shall be installed in accordance with Part 1 of the Canadian Electrical Code. Parts and Service All Brivo controllers contain no user serviceable parts. The lithium battery is not serviceable and is to be replaced by qualified service technicians only. - Page 3 Brivo Systems LLC. The information contained within this document or within the product itself is considered the exclusive property of Brivo Systems LLC. All information in this document or within the hardware and software product themselves is protected by the copyright and/or other intellectual property laws of the United States.
-
Page 4: Document Objectives
By default, the Brivo control panels automatically configure themselves upon power-up and contacts the Brivo Onair Cloud Server (-E) or the Brivo Onsite Server (-A) with no intervention from the installer or IT personnel. This ease of installation is possible because the control panel: •... -
Page 5: Registration
The control panel is considered “registered” when it is properly installed and configured through the Brivo Onair Cloud Server (for the -E) or the Brivo Onsite Server (for the -A). Please refer to the Brivo Installation Worksheets and Brivo Onair Quick Start Guide/Brivo Onsite Server Quick Start Guide available at www.brivo.com. -
Page 6: Understanding The Network Environment
Brivo Onair Cloud Server. For the -E, it periodically polls the Brivo Onair Cloud Server using HTTPS to query for new data that may be available. NOTE: The polling period is set by default to a five-minute interval for the –E panel version. -
Page 7: Firewall Considerations
HTTP(S) protocol operates with firewalls. Data from the Brivo Onair Cloud Server is downloaded to the control panel by virtue of the fact that firewalls allow the response to an HTTP(S) “POST” message to return through the firewall, provided the original POST message originated from within the firewall, as it does in the case of an installed –E panel. -
Page 8: Accessing The Administrative Interface
Panel Networking Guide ACS6000, ACS300, ACS5000, & IPDC This chapter is devoted to the ACS6000, ACS300, ACS5000, and IPDC control panels. For information on the ACS100 control panel, refer to the following chapter. Accessing the Local Administrative Interface This section describes how to connect to the Brivo control panel local Administrative Interface (often described throughout this document as the WebCLI). - Page 9 NOTE: Only the Main Board requires an Ethernet connection; any other boards that are slaved off the Main Board communicate via the CAN bus. Figure 4: ACS5000 - Connect Main Board to LAN © 2020 Brivo Systems LLC. All rights reserved. P-MAN-PUB-Panel Networking Guide...
- Page 10 Panel Networking Guide Figure 5: ACS6000 - Connect Main Board to LAN Figure 6: ACS300 - Connect Main Board to LAN When the Ethernet connection is working properly, you will see a green LED illuminated on the right side of the socket.
- Page 11 Figure 7: Login Screen Enter cli as the default user name and new5cli as the default password. You are now ready to begin configuring your Brivo control panel. © 2020 Brivo Systems LLC. All rights reserved. P-MAN-PUB-Panel Networking Guide...
-
Page 12: Main Tab
NOTE: If you were NOT able to reach this page for any reason, see the Troubleshooting section at the end of this document. NOTE: For ease of presentation, the screenshots below display ACS6000 or ACS300 as the model type. When you log in, the model that displays will match your device type. -
Page 13: Networking Tab
Click Status to access the Network Status page. Explanations of the various status fields are provided in the text on the right side of the page. Figure 10: Network Status © 2020 Brivo Systems LLC. All rights reserved. P-MAN-PUB-Panel Networking Guide... - Page 14 Panel Networking Guide IP Configuration The Brivo control panel is shipped with DHCP enabled. This means that on most networks, the control panel will automatically acquire all the information it needs to communicate with Brivo. However, some networks may require custom settings, either by design or by policy.
- Page 15 After entering the data, click Set Static Params. Figure 12: IP Address Configuration NOTE: Incorrect parameters may prevent the control panel from communicating with the Brivo Onair Cloud Server. Please confirm all settings with the LAN network administrator first. WARNING: LAN Port IP Address The Admin port uses the IP address range 192.168.207.NNN;...
- Page 16 Panel Networking Guide Advanced Settings When configuring a network Link Speed, the Brivo control panel defaults to Auto when establishing a link speed between the panel and the network. Click Networking to access the Networking menu bar. Click Advanced Settings to access the Advanced Settings page.
- Page 17 Before changing these settings, first work with the network administrator to determine valid values. Click Networking to access the Networking menu bar. Click Proxy Server to access the SOCKS5 Proxy Server page. Figure 15: Proxy Server Configuration © 2020 Brivo Systems LLC. All rights reserved. P-MAN-PUB-Panel Networking Guide...
- Page 18 Panel Networking Guide Tools (Networking) Diagnosing connectivity problems through use of the Network Tools page allows you to reinitialize the Brivo control panel networking setup or enter commands for diagnosing network connectivity problems. To access this page: Click Networking to access the Networking menu bar.
- Page 19 Troubleshooting network problems (for both -E or -A panel types) through the Administrative Interface uses a Network Troubleshooting assistant to determine if the Brivo control panel is connected to the local network and ultimately to the Brivo Onair Cloud Server or Brivo Onsite Server. To access this tool: Click Networking to access the Networking menu bar.
- Page 20 WiFi (ACS6000 and ACS300 only) NOTE: For the ACS6000, to allow Wi-Fi functionality, Switch 7-8 MUST be in the Enabled position on the ACS6000 control panel. Please refer to the ACS6000 (A/E) Installation Manual (available at www.brivo.com) for instructions on configuration of the Wi-Fi hardware.
- Page 21 Panel Networking Guide Connection Priority (ACS6000 and ACS300 only) The ACS6000 and ACS300 allow for multiple connection methods to the Brivo Onair Cloud Server or Brivo Onsite Server. The panel can connect via Ethernet, WiFi, or Cellular. The Administrative Interface includes a tab for configuring the connection priority of the panel. To access this tool: Click Networking to access the Networking menu bar.
-
Page 22: System Tab
To view a status report of the performance and state of the control panel at the level of the operating system: Click System to access the System menu bar. Click Status to access the System Status page. Figure 21: System Status © 2020 Brivo Systems LLC. All rights reserved. P-MAN-PUB-Panel Networking Guide... - Page 23 Click Time/Date to access the System Date/Time page. Figure 22: System Date/Time NOTE: A properly functioning control panel obtains its date and time information from the Brivo Onair Cloud Server or Brivo Onsite Server. Setting the date and time manually should seldom be required, if ever.
- Page 24 The Administrative Interface provides access to low-level operations that are to be used only when troubleshooting a control panel with the assistance of Brivo Technical Support. If instructed to do so by Technical Support: Click System to access the System menu bar.
- Page 25 The minimum character length is six characters and the maximum character length is 1024 characters. • All CAPS and the following non-alphanumeric characters are permitted: • ~`!@$%^&*()_+{}[]|\:;”’<,>.?/ (except # and space) © 2020 Brivo Systems LLC. All rights reserved. P-MAN-PUB-Panel Networking Guide...
- Page 26 The Diagnostic Dump functionality has no particular screen, but simply downloads a log file to the local storage device. NOTE: It is generally recommended that the Diagnostic Dump functionality be used only at the request of Brivo Technical Support. Click System to access the System menu bar.
-
Page 27: Hardware Tab
To access this page: Click Hardware to access the Hardware menu bar. Click Status to access the Brivo Hardware Status page. Status values are defined in the text on the right side of the page. Figure 27: Brivo Hardware Status ©... - Page 28 Click LED Settings to access the LED Settings page. Click the checkbox to disable the Reader LED indicator for waiting state. Click Apply to complete the process. Figure 28: LED Settings © 2020 Brivo Systems LLC. All rights reserved. P-MAN-PUB-Panel Networking Guide...
- Page 29 Enter the maximum number of event(s) and the number of hours (the default for each is one). Click Apply to complete the process. Figure 29: Event Rate Control © 2020 Brivo Systems LLC. All rights reserved. P-MAN-PUB-Panel Networking Guide...
- Page 30 To access this page: Click Hardware to access the Hardware menu bar. Click Troubleshooting to access the Hardware Troubleshooting page. Figure 30: Expansion Board Troubleshooting © 2020 Brivo Systems LLC. All rights reserved. P-MAN-PUB-Panel Networking Guide...
- Page 31 Click Hardware to access the Hardware menu bar. Click OSDP Tool to access the OSDP Tool page. Select the RS485 Bus (BUS 1 or BUS 2) from the dropdown list. BUS 2 is only available on ACS6000 control panels. Click Scan to discover peripheral devices attached to the RS485 bus. When successful, the scan results will appear on the OSDP Tool page.
- Page 32 The Upgrade Reader Firmware page allows the administrator to upgrade the firmware for OSDP peripheral devices attached to the control panel. To access this page: NOTE: The firmware upgrade file will ONLY be sent by Brivo to the administrator. Do not use any other firmware upgrades files provided from other sources.
-
Page 33: Application Tab
Did the control panel detect the door closure switch change of state? To access this page: Click Application to access the Application menu bar. Click Log to view the Brivo Application Log. Figure 33: Brivo Application Log © 2020 Brivo Systems LLC. All rights reserved. - Page 34 Figure 34: Office Mode Tools (Application) The Brivo Application Tools page provides access to two commands that are used only as part of diagnostic procedures where you might suspect that the panel is not operating correctly or data may have been corrupted. To access this page: Click Application to access the Application menu bar.
-
Page 35: Cellular Module Tab
NOTE: Firmware Requirement In order to use a cellular network module, a minimum firmware version of 6.0.0 for Brivo Onair and 3.4.6 for Brivo Onsite Server is required. -
Page 36: Troubleshooting (Acs6000, Acs300, Acs5000, & Ipdc)
Network Connectivity If your Brivo control panel is properly configured for the network, your network administrator should be able to see that it has received an IP address from the local DHCP server. Ask your network administrator to check the “DHCP Clients Table”... - Page 37 Connectivity to Brivo Onair Cloud Server (-E panels only) Follow the steps in the Brivo Onair Quick Start Guide to make sure that you have performed all the tasks necessary to set up your account. In particular, you should at least have registered the control panel you are testing.
-
Page 38: Accessing The Administrative Interface
Figure 38: ACS100 - Connect laptop to control panel through switch When the Ethernet connection is working properly, you will see a blue Brivo logo illuminated on the front of the ACS100. If the logo is not illuminated, check the connection on the ACS100 as well as the connection to the switch to which the panel is connected. - Page 39 Panel Networking Guide Log in to the Administrative Interface NOTE: The process for logging into the local Administrative Interface on an ACS100 is different than other Brivo control panels. After your computer finishes booting up: Go to your laptop’s/PC’s networking settings page and manually set your IP address on your laptop/PC to 169.254.242.122 and net mask 255.255.255.0.
-
Page 40: Main Tab
NOTE: For ease of presentation, the screenshots below display ACS100 as the model type. When you log in, the model that displays will match your device type. Figure 40: Administrative Interface © 2020 Brivo Systems LLC. All rights reserved. P-MAN-PUB-Panel Networking Guide... -
Page 41: Networking Tab
Click Status to access the Network Status page. Explanations of the various status fields are provided in the text on the right side of the page. Figure 41: Network Status © 2020 Brivo Systems LLC. All rights reserved. P-MAN-PUB-Panel Networking Guide... - Page 42 Panel Networking Guide IP Configuration The Brivo control panel is shipped with DHCP enabled. This means that on most networks, the control panel will automatically acquire all the information it needs to communicate with Brivo. However, some networks may require custom settings, either by design or by policy.
- Page 43 After entering the data, click Set Static Params. Figure 43: IP Address Configuration NOTE: Incorrect parameters may prevent the control panel from communicating with the Brivo Onair Cloud Server. Please confirm all settings with the LAN network administrator first. © 2020 Brivo Systems LLC. All rights reserved.
- Page 44 Panel Networking Guide Advanced Settings When configuring a network Link Speed, the Brivo control panel defaults to Auto when establishing a link speed between the panel and the network. Click Networking to access the Networking menu bar. Click Advanced Settings to access the Advanced Settings page.
- Page 45 Before changing these settings, first work with the network administrator to determine valid values. Click Networking to access the Networking menu bar. Click Proxy Server to access the SOCKS5 Proxy Server page. Figure 46: Proxy Server Configuration © 2020 Brivo Systems LLC. All rights reserved. P-MAN-PUB-Panel Networking Guide...
- Page 46 Panel Networking Guide Tools (Networking) Diagnosing connectivity problems through use of the Network Tools page allows you to reinitialize the Brivo control panel networking setup or enter commands for diagnosing network connectivity problems. To access this page: Click Networking to access the Networking menu bar.
- Page 47 Troubleshooting network problems (for the ACS100) through the Administrative Interface uses a Network Troubleshooting assistant to determine if the Brivo control panel is connected to the local network and ultimately to the Brivo Onair Cloud Server. To access this tool: Click Networking to access the Networking menu bar.
-
Page 48: System Tab
To view a status report of the performance and state of the control panel at the level of the operating system: Click System to access the System menu bar. Click Status to access the System Status page. Figure 49: System Status © 2020 Brivo Systems LLC. All rights reserved. P-MAN-PUB-Panel Networking Guide... - Page 49 Click Time/Date to access the System Date/Time page. Figure 50: System Date/Time NOTE: A properly functioning control panel obtains its date and time information from the Brivo Onair Cloud Server. Setting the date and time manually should seldom be required, if ever.
- Page 50 The Administrative Interface provides access to low-level operations that are to be used only when troubleshooting a control panel with the assistance of Brivo Technical Support. If instructed to do so by Technical Support: Click System to access the System menu bar.
- Page 51 The Diagnostic Dump functionality has no particular screen, but simply downloads a log file to the local storage device. NOTE: It is generally recommended that the Diagnostic Dump functionality be used only at the request of Brivo Technical Support. Click System to access the System menu bar.
-
Page 52: Hardware Tab
To access this page: Click Hardware to access the Hardware menu bar. Click Status to access the Brivo Hardware Status page. Status values are defined in the text on the right side of the page. Figure 54: Brivo Hardware Status ©... - Page 53 Click LED Settings to access the LED Settings page. Click the checkbox to disable the Reader LED indicator for waiting state. Click Apply to complete the process. Figure 55: LED Settings © 2020 Brivo Systems LLC. All rights reserved. P-MAN-PUB-Panel Networking Guide...
- Page 54 Enter the maximum number of event(s) and the number of hours (the default for each is one). Click Apply to complete the process. Figure 56: Event Rate Control © 2020 Brivo Systems LLC. All rights reserved. P-MAN-PUB-Panel Networking Guide...
- Page 55 OSDP peripheral device attached to the control panel. To access this page: NOTE: The firmware upgrade file will ONLY be sent by Brivo to the administrator. Do not use any other firmware upgrades files provided from other sources.
- Page 56 If mobile credential holders are experiencing interference from other Brivo Smart readers or ACS100 units, decrease the Transmit Power DB value. Click Apply when finished. NOTE: Other than the options listed above, other changes to this page should be made ONLY if requested by Brivo Technical Support. Figure 58: BLE Advertisement ©...
-
Page 57: Application Tab
Did the control panel detect the door closure switch change of state? To access this page: Click Application to access the Application menu bar. Click Log to view the Brivo Application Log. Figure 59: Brivo Application Log © 2020 Brivo Systems LLC. All rights reserved. - Page 58 Panel Networking Guide Tools (Application) The Brivo Application Tools page provides access to two commands that are used only as part of diagnostic procedures where you might suspect that the panel is not operating correctly or data may have been corrupted. To access this page: Click Application to access the Application menu bar.
-
Page 59: Troubleshooting (Acs100)
Network Connectivity If your Brivo control panel is properly configured for the network, your network administrator should be able to see that it has received an IP address from the local DHCP server. Ask your network administrator to check the “DHCP Clients Table”... - Page 60 Connectivity to Brivo Onair Cloud Server Follow the steps in the Brivo Onair Quick Start Guide to make sure that you have performed all the tasks necessary to set up your account. In particular, you should at least have registered the control panel you are testing.
- Page 61 Added username/password change functionality 2/13/19 Added cellular network module, connection priority functionality, and proxy server options for cellular connectivity 8/6/20 Added OSDP addressing clarification 1.10 8/19/20 Added ACS100 chapter P-MAN-PUB-Panel Networking Guide_v1.10 © 2020 Brivo Systems LLC. All rights reserved. P-MAN-PUB-Panel Networking Guide...
Need help?
Do you have a question about the ACS6000 and is the answer not in the manual?
Questions and answers