Advertisement
Advertisement

Related Manuals for Netvue Vigil Camera


Summary of Contents for Netvue Vigil Camera
- Page 1 Your property guardian at day and night Vigil Camera Quick Guide...
- Page 2 Warning This equipment has been tested and found to comply with the limits for a Class B digital device, pursuant to Part 15 of the FCC Rules. These limits are designed to provide reasonable protection against harmful interference when the equipment is operated in a commercial environ- ment.
- Page 3 What’s InThe Box Yourproperty guardianatdayand night Vigil Camera Quick Guide Drilling Template Power Adapter Quick Guide Hex Key Mounting Screws Anchors Drill Bit Weatherproof Tube Antenna Vigil Camera...
-
Page 4: Table Of Contents
Installation Guide Catalogue 1. More About Vigil Camera P. 1-2 P. 3 2. Read Before Installing P. 4-13 3. Set Up with Netvue App P. 14-21 4. Vigil Camera Installation P. 22 5. Status Light... -
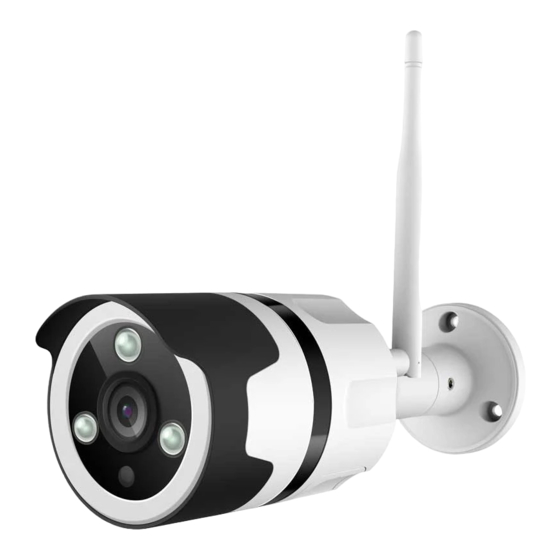
Page 5: Moreabout Vigilcamer A
Moreabout VigilCamer a Infrared LEDs Antenna Lens Light Sensor Speaker Micro SD Card Slot Microphone Wi-Fi Configuration Button Ethernet Cable Port Status Light Power Port... - Page 6 How to Inse rt Micro SD Card Vigil Camera comes with a built-in card slot which supports up to 128GB Micro SD card. Once you insert the storage card, the camera will automati- cally start to record and store videos on the storage card. Videos can be replayed by dragging the timeline below the live feed screen in Netvue App.
-
Page 7: Read Before Installing
Read Be fore Installing 1.KeeptheVigilCameraandallaccessoriesoutof reachofchildrenandpets. 2. Power supply voltage that is required to operate Vigil Camera should be 12VDC (≥1000mA). 3. The product can only be used in proper temperature and humidity: Operating temperature: -20°C - 50°C (-4°F-122°F) Operating humidity: 0-90%. -
Page 8: Setup With Netvue App
SetUp with Netvue App Please add the Vigil Camera onto your Netvue account through Netvue App before mountingit outside. Connecting Method There are two ways of adding Vigil Camera onto Netvue App: Wireless Connection and Wired Connection. Wirelessconnection Wireless connection uses Wi-Fi to connect the camera to the App. It is the easiest way if the installation spot is close to your router and have a strong Wi-Fi signal. - Page 9 Wired connection If the Wi-Fi signal strength is weak at your installation spot, the Ethernet cableconnection mightbe yoursolution. An Ethernet cableis required for this connection method. Plug one end of the Ethernet cable into Vigil Cam, and the other end into the LAN port on your router. Then follow thein-appinstruction tocompletethefollowing setupprocess.
- Page 10 AddCamer atoNetvue App 1. Power on Vigil Camera withthe providedpower adapter. Youshouldheara chimeonceithasfullystarted.
- Page 11 Download Netvue App 2.DownloadNetvueAppfromAppStore orGooglePlayontoyourphone.
- Page 12 3. Register an account if you are a new user to Netvue. If you already have an account, log into your account.
- Page 13 4. Tap “+” at the top right corner to add a new device.
- Page 14 5. A product list will show up, choose “Vigil Camera.”...
- Page 15 please select network connection Wireless connect Wired connect CANCEL 6. Choose a connecting method.
- Page 16 please select network connection Wireless connect Wired connect CANCEL 7. Follow the in-app instruction to complete the entire set up process.
- Page 17 OUTDOOR OWNER AUTO HISTORY 8. Test the video streaming. Now move to Vigil Camera installation.
-
Page 18: Vigil Camera Installation
Vigil Camer a Installation Check following things before you starting to drill holes on your wall: 1. Vigil Camera has been successfully added to your Netvue App and is able to stream video. 2. Have planned the cable route. Measured the length of the power cable and Ethernet cable (if you plan to use Ethernet connection) you will need. - Page 19 Step 1: Take off the anti-dust cap. Attach the provided antenna to Vigil Camera.
- Page 20 Step 2: Find a good installation spot. We recommend installing the Vigil camera just 7-10 feet (2-3 meter) above the ground for a better two-way audio experience. There is a power outlet nearby. Test whether Vigil camera can stream video smoothly at the spot.
- Page 21 Step 3: Before you starting to drill, make sure you know the locations of wall-in pipes and electrical wires. (If you are not comfortable with drilling holes, please consult with a licensed electrician.) Install Camera on Concrete or Brick: Use the provided drilling template to mark the position of holes on your wall.
- Page 22 , , ‘ { : ‘ · © 、 吨 叫 ‘吨 同 啕 ①...
- Page 23 Install Camera on Wood: Use the provided drilling template to mark the position of holes on your wall. Directly tighten the included screws to secure the camera.
- Page 24 Step 4 (Wired Connection): Readthis stepif youare usingwiredconnection, otherwiseskip to Step5. This steprequires the skillof making an Ethernet cable. Consult with the electricianifyouarenotsurehowtodoit. A weatherproof tube is needed for Ethernet cable to avoid leaking water into Ethernet cable port. Cut off the Ethernet cable at the length you want. Insert the cable into the weatherproof tube, and carefully attach RJ-45 connector to the cut ends.
- Page 25 Step 5: Use the hex key to loosen screws on the hinge. Point the camera to your designate direction, then tighten the screws. 105° 360° 360°...
-
Page 26: Status Light
Status Light Netvue Vigil Camera uses status light to communicate. StatusLight Description Green Online BlinkingGreen Wi-FiConfigurationMode Slowly Blinking Green Offline None Not Working Properly... - Page 27 Feelfreetocontactusforadditionalhelp: support@netvue.com 1(866)749-0567 Chat with us through App @NetvueTech www.netvue.com 240 W Whitter Blvd Ste A, La Habra, CA 90631 © 2010-2018 Netvue Technologies Co., Ltd. All Rights Reserved. Version 1.0...
- Page 28 设计文件须知 产品名称: Vigil Camera 印刷颜色: 单色黑 装帧: 骑马钉 (28 页) 日期: 2018-03-05 black magenta 1.此文件为 Netvue 市场部出品, 请勿修改相关设计文件, 如有修改请联系设计师 2.所有的文件需经相关部门负责人审核校对 105mm*130mm 说明书尺寸: 材质: 80g 书写纸 设计师: 加乔 2.设计师在交稿之前应对文件仔细校对以确保图纸准确性 cyan yellow 3.生产过程中涉及的纸张、 色彩等需与设计师沟通...
Need help?
Do you have a question about the Vigil Camera and is the answer not in the manual?
Questions and answers