Table of Contents
Advertisement
Quick Links
Important: Read these instructions for use carefully so as to familiarize yourself with the
appliance before putting it to your gas or charcoal grill. Keep these instructions for future reference
Manufactured in China· Distributed by Mega Group · PO Box 15, Woodlands, 0027, South Africa· Tel: +27(0)12 802 1515
f
WARNING
d
For outdoor use only
WARNING
This BakerBox is not intended to be installed in or on recreational vehicles and/or boats.
WARNING
To reduce the risk of fire, burn hazard or other injury, read the manual carefully and
completely before using your BakerBox.
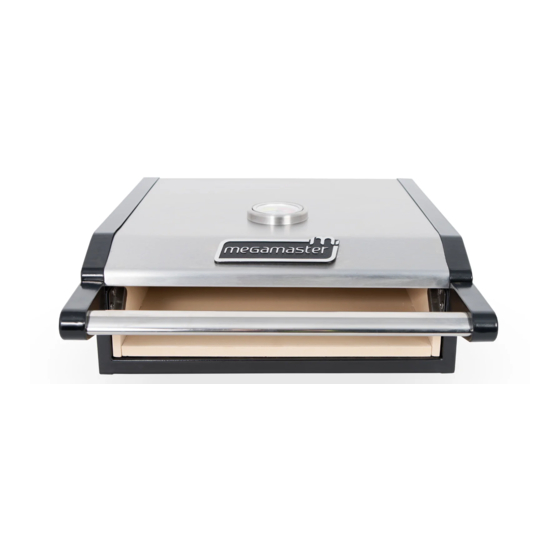
BakerBox
multi-purpose pizza oven
ASSEMBLY & OPERATING INSTRUCTIONS
www.megamaster.co.za
.
.
.
Advertisement
Table of Contents

Subscribe to Our Youtube Channel
Related Manuals for Megamaster BakerBox


Summary of Contents for Megamaster BakerBox
- Page 1 WARNING For outdoor use only WARNING This BakerBox is not intended to be installed in or on recreational vehicles and/or boats. WARNING To reduce the risk of fire, burn hazard or other injury, read the manual carefully and completely before using your BakerBox.
-
Page 2: Table Of Contents
Table of Contents Safety Instructions Installation Final Check List Package Content List Operating Instructions 10-11 Hardware Contents Care and Maintenance Explode View Trouble Shooting Part List Warranty Information Assembly Instructions Safety Instructions Please read the following instructions carefully before attempting to assemble, operate or install the product. -
Page 3: Safety Instructions
Children should not be left alone or unattended in an area where the BakerBox is being used. Do not allow them to sit, stand or play in or around the BakerBox while the grill is on or coals are hot. -
Page 4: Package Content List
Package Content List 1.Main lid and fire box assembly--- 2.Top stone ---1 piece 1piece 3.Side stone ---2 pieces 4.Rear stone ---1 piece 6.Top stone support 5.Bottom stone---1 piece bracket, front ---1piece 8. Stone support 7.Top stone support bracket, bracket, side ---2 pieces rear ---1piece Hardware Contents Description... -
Page 5: Explode View
Exploded View... -
Page 6: Part List
Part List Warranty Part(Descreption) coverage(year) Main lid Temperature gauge Temperature gauge seat Main lid screw Main lid left panel Top stone support bracket,rear Top stone Main lid right panel Top stone support bracket,front Main lid handle seat,left Logo Main lid hand seat,right Main lid handle Stone support bracket,side Side stone... -
Page 7: Assembly Instructions
Assembly Instructions Fig. 1 1. Loosen and remove the screws which were pre-assembled on the lid rear corner, so firebox and main lid are separate .As shown in Fig.1 2.Use 4 pieces screws(A), top stone front support bracket (6),top stone rear support Fig. - Page 8 Assembly Instructions Fig. 4 4. Put bottom stone(5),side stones(3),rear stone(4) inside firebox assembly. As shown in Fig.4 Fig. 5 5.Attach 2 pieces stone support brackets, side(8) to fire box side panel left and right corner, then tight the 4 screws(A).As shown in Fig.5 6.Assemble back the 2 screws which were Fig.
-
Page 9: Installation Final Check List
Note: The main lid block screw can hold the main lid open as show in Fig.7 Installation Final Check List 1.Stones are tight and steady. 2.The main lid can be open as above Fig.7 shows. . Your BakerBox is ready to use! -
Page 10: Operating Instructions
Note: Remove all packaging, including straps, before using the BakerBox. How to use your BakerBox 1.Open the main lid of gas grill or charcoal grill that will be used with the BakerBox. 2.Place BakerBox on the cooking grid, leave a 0.5’’(1.2cm) space between the front edge of the BakerBox and the front edge of the cooking grid, at least 1’’(2.5cm) of space... -
Page 11: Care And Maintenance
Turn off the gas supply, and make sure all the knobs are in the “OFF” position. Wait for the grill and BakerBox to cool. Clean the exterior of the BakerBox with a wire brush. Use a metal scraper for stubborn stains. -
Page 12: Trouble Shooting
Trouble Shooting Before calling for service If the BakerBox does not function properly, use the following check list before contacting your dealer for service. You may save the cost of a service call. Preheating: It is necessary to preheat the BakerBox before cooking pizza, depending on the type of food and the cooking temperature. -
Page 13: Warranty Information
This is subject to correct assembly, use, storage and regular maintenance of the product. It is the responsibility of the product owner to safely store and protect the BakerBox from the elements. This warranty does not cover the following:... - Page 14 WARNING Read and follow all Safety, Assembly, and Use & Care Instructions in this guide before assembling and cooking with this BakerBox. Failure to follow all instructions in this Use & Care Guide may lead to fire or explosion, which could result in property damage, personal injury or death.
Need help?
Do you have a question about the BakerBox and is the answer not in the manual?
Questions and answers