Table of Contents
Advertisement
Quick Links
Assembly Instructions & User's Manual
Questions, problems, missing parts?
se
rvice depa rtment at 1-866-814-0585, 8 a.m. - 8 p.m., EST, Monday - Friday.
Email :customerservice@shinerichgroup.com
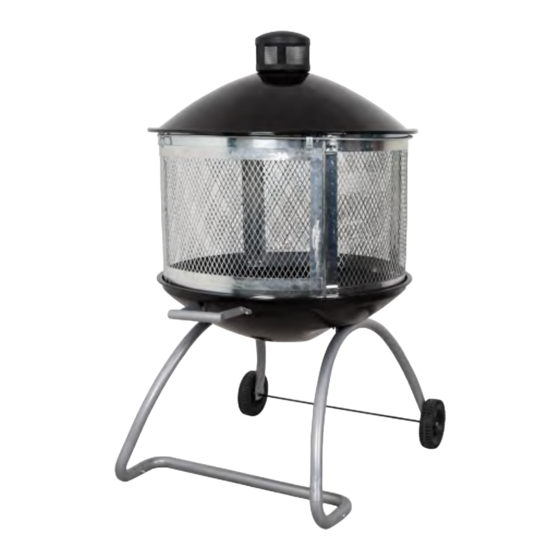
Steel Fire Pit
Be fore retu rning to your retaile r, call our customer
Item #: 227788
Model #: SRFP2822
1
Advertisement
Table of Contents

Related Manuals for Four Seasons Courtyard SRFP2822


Summary of Contents for Four Seasons Courtyard SRFP2822
- Page 1 Steel Fire Pit Item #: 227788 Model #: SRFP2822 Assembly Instructions & User's Manual Questions, problems, missing parts? Be fore retu rning to your retaile r, call our customer rvice depa rtment at 1-866-814-0585, 8 a.m. - 8 p.m., EST, Monday - Friday.
-
Page 2: Safety Information
Safety Information WARNING: FOR OUTDOOR USE ONLY. Do not use the firepit indoors. Carbon monoxide fumes, due to lack of ventilation, can cause death. Do not use gasoline or kerosene to start fires in the firepit. Keep all flammable liquids away from the firepit. -
Page 3: Package Contents
Package Contents... -
Page 4: Part List
Part List Part Description Quantity Part Description Quantity Chimney cap Right leg tube 1 pc 1 pc Top bowl 1 pc Axle 1 pc Screen Wheel 3 pcs 2 pcs Doorframe 1 pc Handle 1 pc Slide rail 1 pc U tube 1 pc 1 pc... - Page 5 Assembly Instructions Choose a level location for assembly. Remove all parts from the packaging, and check for missing parts. Connect U tube (N) to left leg tube (I) and right leg tube (J) with (2) M6 x 40 bolts (AA) and (2) M6 nuts (BB). Then take axle (K) through into two holes of leg tubes assembly.
- Page 6 Assembly Instructions Choose a level location for assembly. Remove all parts from the packaging, and check for missing parts. Attach the bottom bowl (H) to legs assembly with (4) M6 x 15 bolts (EE), (2) fixing plates (O) and (4) M6 nuts (BB).
- Page 7 Assembly Instructions Choose a level location for assembly. Remove all parts from the packaging, and check for missing parts. Place charcoal grid (G) into bottom bowl (H). Connect two screens (C) with (1) vertical bracket (Q), (4) M6 x 12 bolts (FF) and (4) M6 nuts (BB).
- Page 8 Assembly Instructions Choose a level location for assembly. Remove all parts from the packaging, and check for missing parts. Connect doorframe (D) and another screen (C) with (1) vertical bracket (Q), (3) M6 x 12 bolts (FF) and (3) M6 nuts (BB). Then attach slide rail (E) to upper-left hole on screen (C) and upper-right hole on vertical bracket (Q) with (1) M5 x 10 bolt (II)
- Page 9 Assembly Instructions Choose a level location for assembly. Remove all parts from the packaging, and check for missing parts. Settle screen assembly into bottom bowl (H). Hang the sliding door (F) onto slide rail (E) of screen assembly.
- Page 10 Assembly Instructions Choose a level location for assembly. Remove all parts from the packaging, and check for missing parts. Fix chimney cap (A) onto top bowl (B) with (2) pre-assembled bolts, (2) D16 washers (GG) and (2) M5 nuts (HH). Hardware Used D16 washer M5 nut...
-
Page 11: Care And Maintenance
Care and Maintenance Inspecting Inspect this firepit on a regular basis to ensure product safety and longer product life. DO NOT attempt to inspect this outdoor firepit until the fire is COMPLETELY out and cooled down. Check handles to make sure they are secure. Check components for any signs of damage or rust. -
Page 12: Warranty Information
Warranty Information 2019 2019 Need help? call our toll free number at: 1 (866)-814-0585 e-mail us at: Shinerichgroup...
Need help?
Do you have a question about the SRFP2822 and is the answer not in the manual?
Questions and answers