Table of Contents
Advertisement
Available languages
Available languages
Advertisement
Table of Contents

Related Manuals for Bestway POWER STEEL 56617


Summary of Contents for Bestway POWER STEEL 56617
- Page 1 Visit Bestway YouTube channel S-S-006080...
- Page 2 WARNING / ACHTUNG WAARSCHUWING / ATTENTION smooth out the bottom glätten den Boden glad uit de bodem lisser le fond Put 1” to 2” water in the pool to cover the floor. Once pool floor is slightly covered, gently smooth out all wrinkles. Start in the center of the pool and work your way clockwise to the outside.
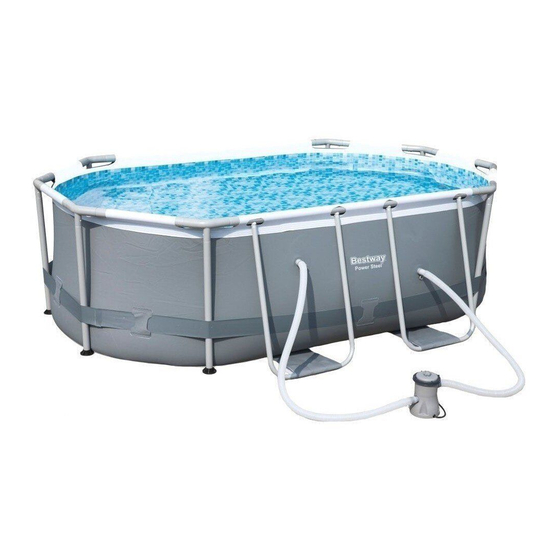
- Page 3 #56617 #56620 #56714 #56448 #56710 #56716 3.00m x 2.00m x 84cm 4.27m x 2.50m x 1.00m 4.27m x 2.50m x 1.00m 4.88m x 3.05m x 1.07m 5.49m x 2.74m x 1.22m 5.49m x 2.74m x 1.22m (9'10" x 6'7" x 33") (14' x 8'2"...
- Page 4 Top Rail B Thank you for buying a Bestway pool. In order to ensure that you gain maximum enjoyment and safe use of your pool please follow the installation instructions along with the important safety guidelines in your owner’s manual. Installation usually takes approximately 30 minutes with 2-3 people excluding earthworks and filling.
- Page 5 Installation Note: The installation drawing for the Top Rail and the T-Connector of 5.49m x 2.74m x 1.22m (18' x 9' x 48") Note: The installation drawing for the Top Rail and the T-Connector of 4.88m x 3.05m x 1.07m (16' x 10' x 42") Note: The installation drawing for the Top Rail and the T-Connector of 4.27m x 2.50m x 1.00m (14' x 8'2"...
- Page 6 1. Unscrew the drain valve cap on the outside of the pool counter clockwise and remove. IMPORTANT: Bestway Inflatables will not be responsible for damage caused to the pool due to mishandling or failure to 2. Connect the adaptor to the hose and put the other end of the hose in the area where you are going to drain your follow these instructions.
- Page 7 Obere Schiene B Besuchen Sie den YouTube-Kanal von Bestway Wir danken Ihnen für den Kauf eines Bestway-Pools. Für maximalen Spaß und eine sichere Verwendung Ihres Pools befolgen Sie bitte die Installationsanweisungen sowie die wichtigen Sicherheitsrichtlinien in Ihrem Benutzerhandbuch. Die Montage durch 2-3 Personen erfordert in der Regel etwa 30 Minuten, exklusive ggf. erforderlicher Bodenarbeiten und Befüllung.
- Page 8 Installation Hinweis: Die Installationszeichnung für die obere Schiene und den T-Verbinder von 5.49m x 2.74m x 1.22m (18' x 9' x 48") Hinweis: Die Installationszeichnung für die obere Schiene und den T-Verbinder von 4.88m x 3.05m x 1.07m (16' x 10' x 42") Hinweis: Die Installationszeichnung für die obere Schiene und den T-Verbinder von 4.27m x 2.50m x 1.00m (14' x 8'2"...
- Page 9 Der Zusammenbau des Pools mit Rahmen kann ohne Werkzeuge erfolgen. 1. Schrauben Sie die Kappe des Abflussventils an der Außenseite des Pools entgegen dem Uhrzeigersinn ab und WICHTIG: Die Firma Bestway Inflatables kann nicht für Schäden am Pool durch die falsche Behandlung oder entfernen Sie sie.
- Page 10 Bezoek het Bestway YouTube-kanaal Wij danken u voor de aankoop van een zwembad Bestway. Om ervoor te zorgen dat u maximaal plezier en veilig gebruik hebt van uw zwembad, volg de installatie- en de belangrijke veiligheidsvoorschriften in de gebruikershandleiding. De installatie vergt meestal ongeveer 30 minuten met 2-3 mensen exclusief grondwerken en vullen.
- Page 11 Installatie Opmerking: De installatietekening voor de bovenste rail en het T-stuk van 5.49m x 2.74m x 1.22m (18' x 9' x 48") Opmerking: De installatietekening voor de bovenste rail en het T-stuk van 4.88m x 3.05m x 1.07m (16' x 10' x 42") Opmerking: De installatietekening voor de bovenste rail en het T-stuk van 4.27m x 2.50m x 1.00m (14' x 8'2"...
- Page 12 1. Leg alle onderdelen neer en controleer of u de correcte hoeveelheden heeft, zoals opgesomd in de onderdelenlijst. het water zal automatisch afvloeien. Als u een onderdeel mist, monteer het zwembad dan niet, maar neem contact op met de klantenservice van Bestway. OPGELET: De waterstroom kan geregeld worden met de regelring.
- Page 13 Visitez la chaîne YouTube de Bestway Merci d’avoir acheté une piscine Bestway. Pour être certain de profiter au mieux de votre piscine et de l'utiliser en toute sécurité, veuillez suivre la notice d'installation ainsi que les consignes de sécurité importantes présentes dans le mode d’emploi.
- Page 14 Installation Remarque: le dessin d’installation pour le rail supérieur et le raccord en T de 5.49m x 2.74m x 1.22m (18pi x 9pi x 48po) Remarque: le dessin d’installation pour le rail supérieur et le raccord en T de 4.88m x 3.05m x 1.07m (16pi x 10pi x 42po) Remarque: le dessin d’installation pour le rail supérieur et le raccord en T de 4.27m x 2.50m x 1.00m (14pi x 8pi2po x 39.5po) Remarque: le dessin d’installation pour le rail supérieur et le raccord en T de...
- Page 15 Le montage de la piscine tubulaire peut être réalisé sans outils. montre. IMPORTANT: Bestway Inflatables n’est pas responsable pour les dommages causés à la piscine par une mauvaise 2. Branchez l’adaptateur au boyau et placez ce dernier là où vous souhaitez vider votre piscine. (Vérifiez les arrêtés manipulation ou par le non respect de ces instructions.
- Page 16 Distributed in Latin America by/Distribué en Amérique latine par/Distribuido en Latinoamérica por/Distribuído na América Latina por Bestway Central & South America Ltda, Salar Ascotan 1282, Parque Enea, Pudahuel, Santiago, Chile Distributed in Australia & New Zealand by Bestway Australia Pty Ltd, 98-104 Carnarvon Street, Silverwater, NSW 2128, Australia www.bestwaycorp.com Made in China / Fabriqué...
Need help?
Do you have a question about the POWER STEEL 56617 and is the answer not in the manual?
Questions and answers